WSUSの一覧に適用したいパッチ(KBxxxxxxxx.msuなど)が表示されず、指定した特定のパッチをWSUSに取り込みたい場合は、WSUS管理画面の「更新のインポート」からMicrosoft Update Catalogに接続しインポートしたいKB番号を検索 ->「直接インポート Windows Server Update Services」の操作を実行することでインポート可能です。 前提条件として.Net Framework Version 4.7 以降のインストールが必要です。
Windows Server 2016:WSUS 手動パッチのインポート
手順 1:
デスクトップ左下「 (Windowsマーク)」を選択します。

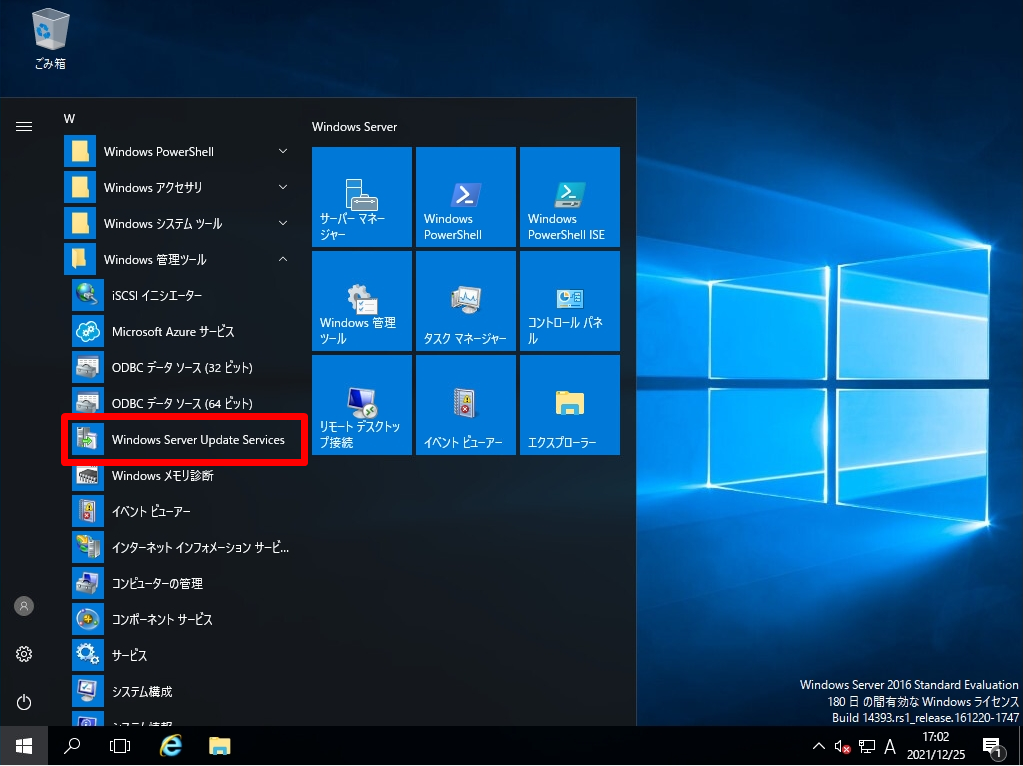
手順 2:
「Windows 管理ツール」->「Windows Server Update Services」を選択します。
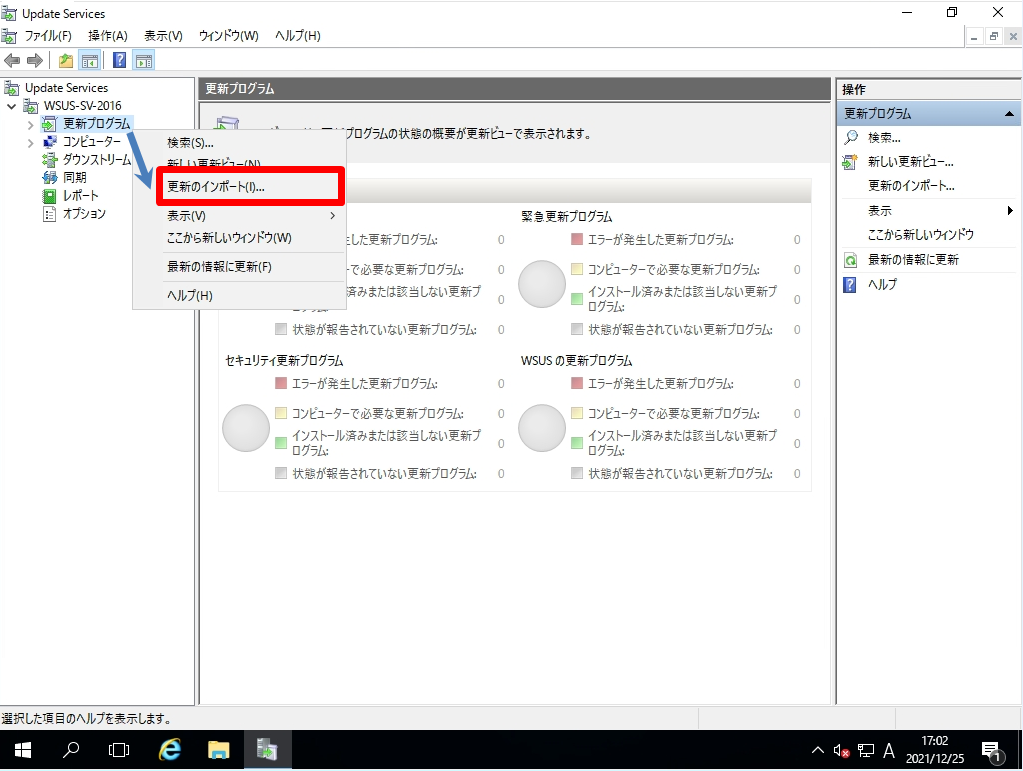
手順 3:
「更新プログラム」を右クリック->「更新のインポート」を選択します。
手順 4:
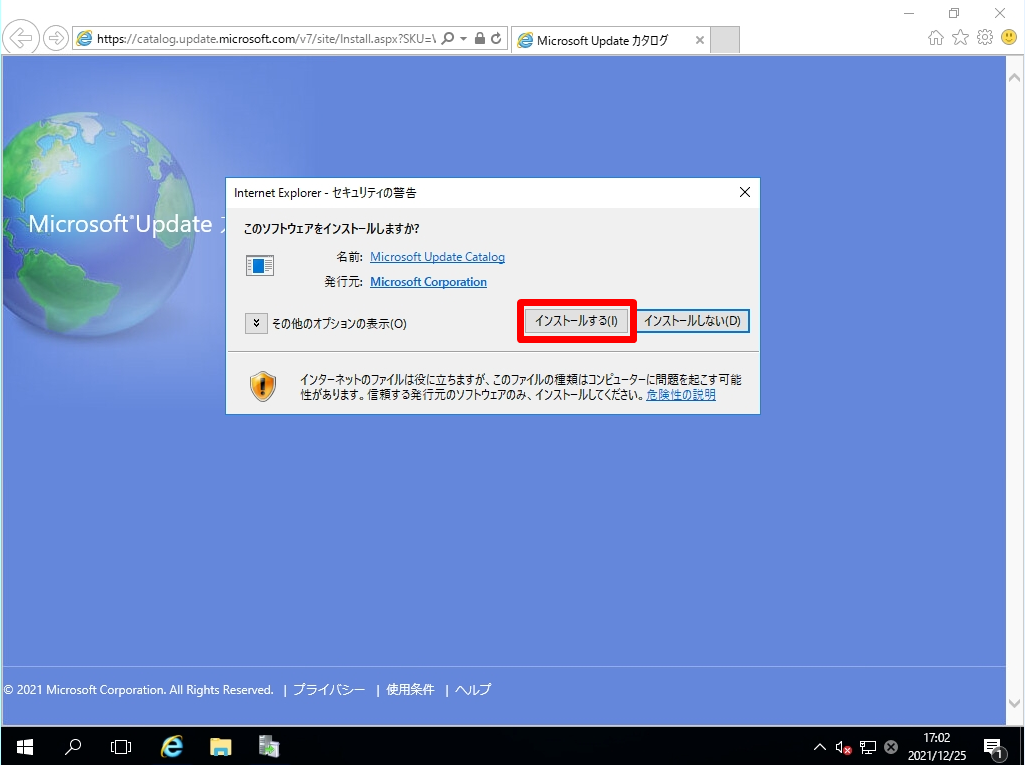
Microsoft Update カタログサイトに接続します。 Microsoft Update Catalogのアドオンをインストールしていない場合は以下画面が出力されます。「インストール」を実行します。
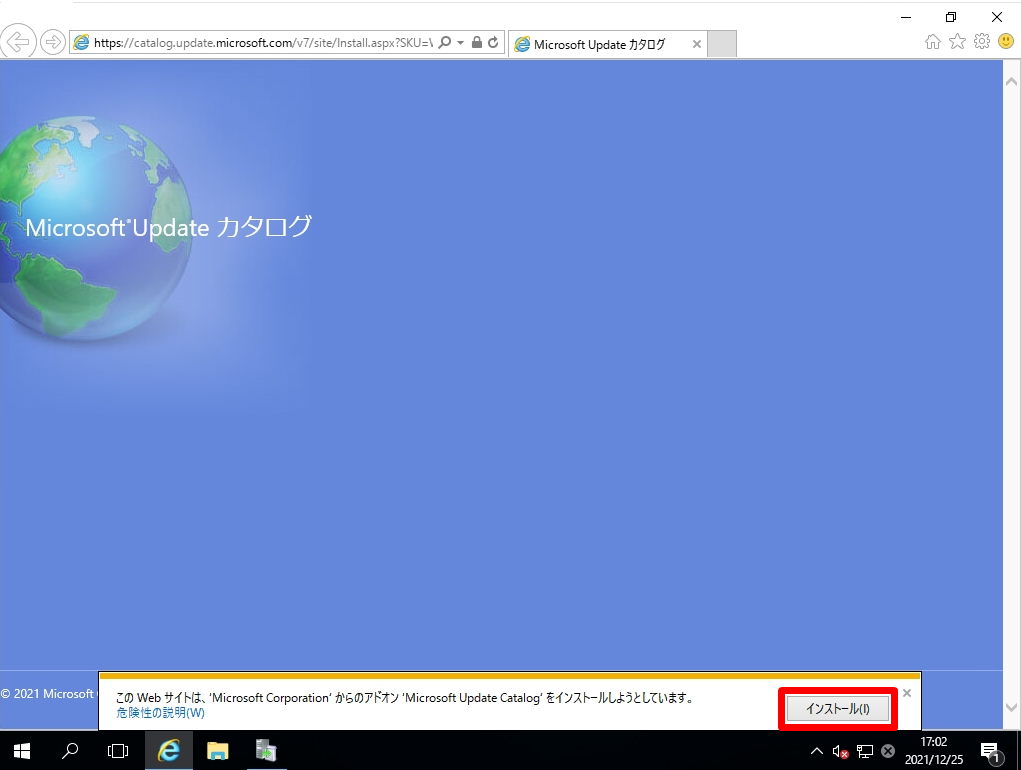
セキュリティの警告画面:「インストールする」を実行します。
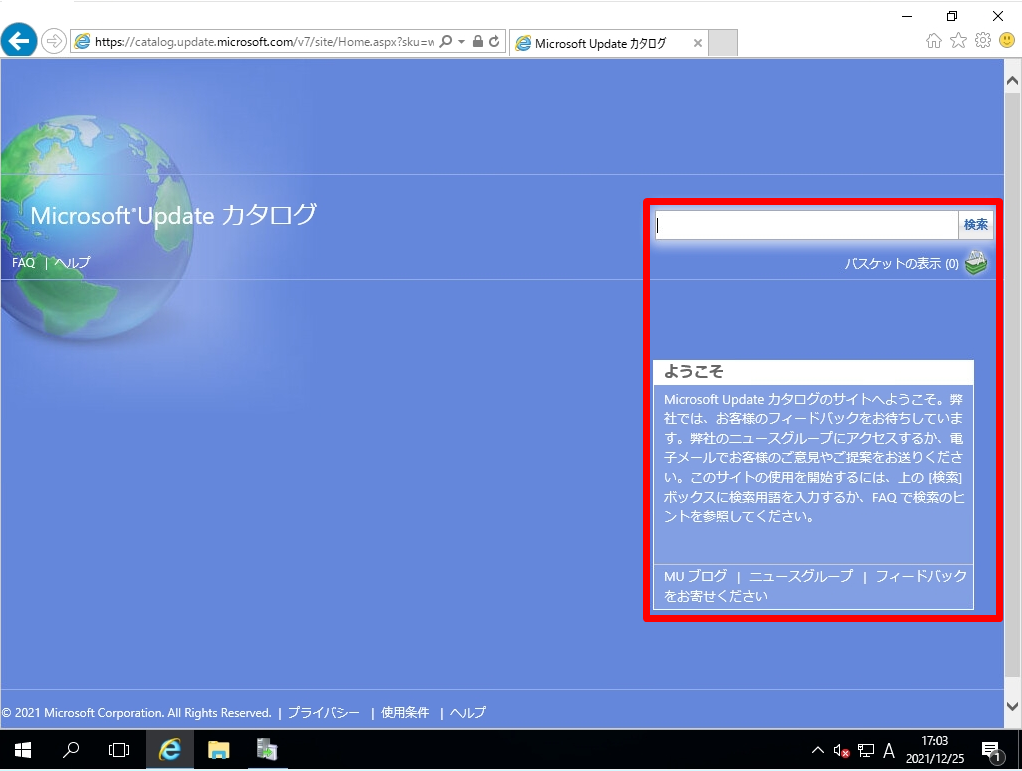
Microsoft Update Catalogのアドオンがインストールされました。ブラウザーに検索ボックス・バスケットの表示・ようこそ画面が表示されるようになります。
手順 5:
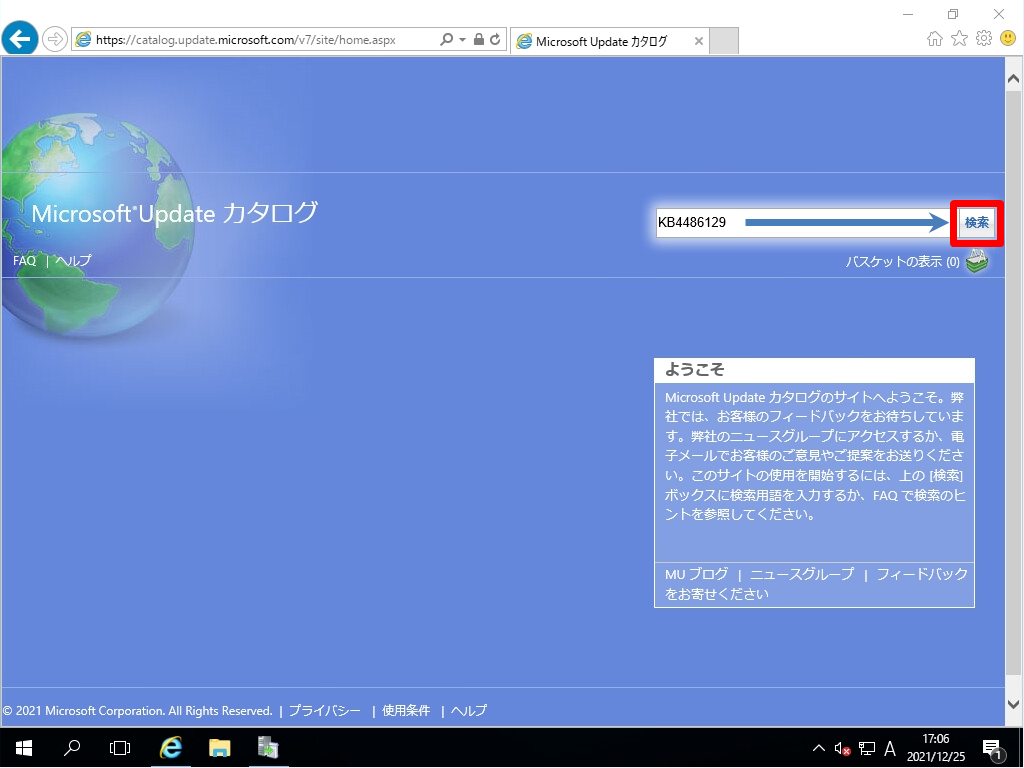
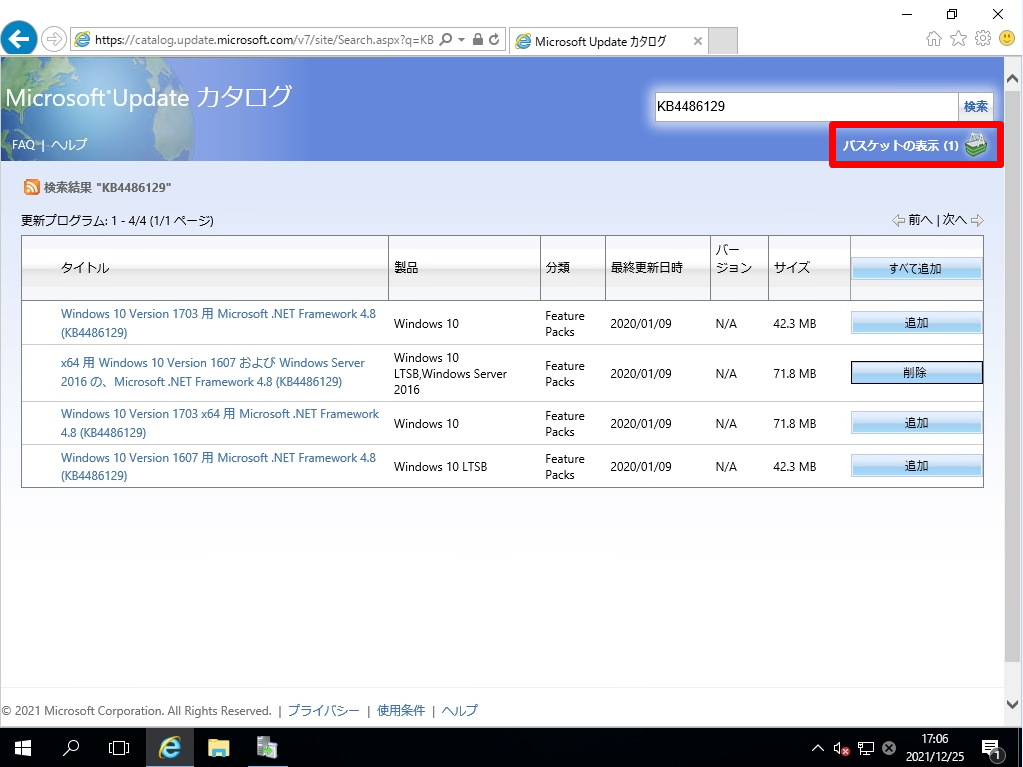
パッチ番号を入力 ->「検索」を選択します。
手順 6:
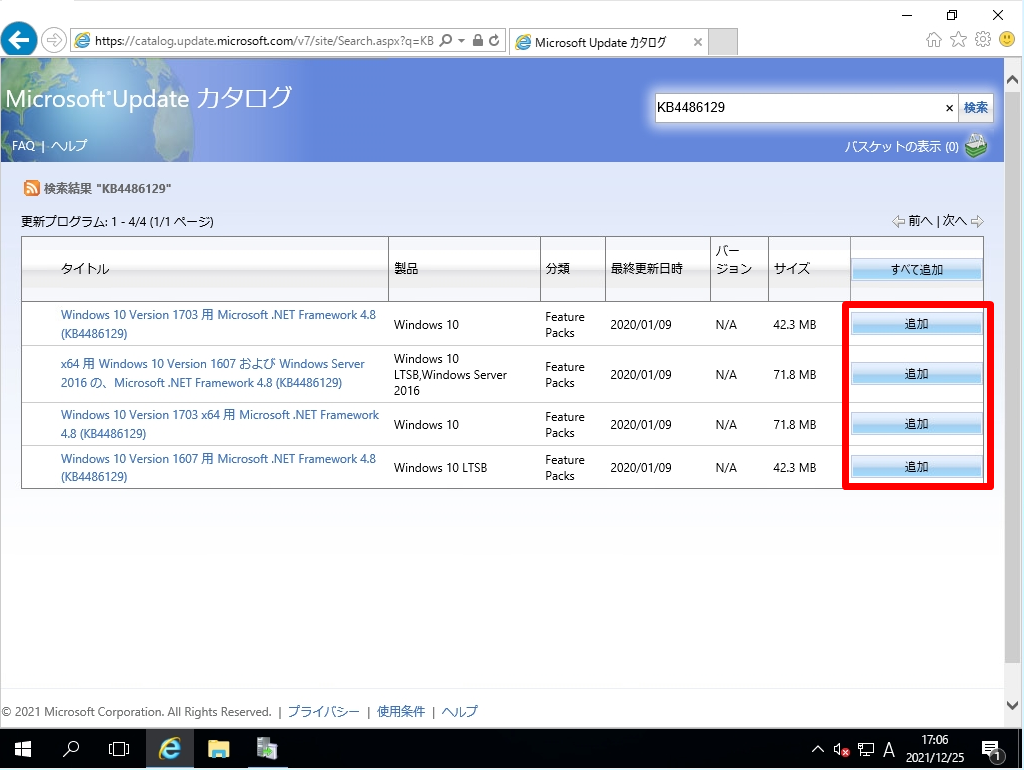
表示された製品一覧から「追加」を選択します。
手順 7:
バスケットにインストールモジュールが追加されました。「バスケットの表示」を選択します。
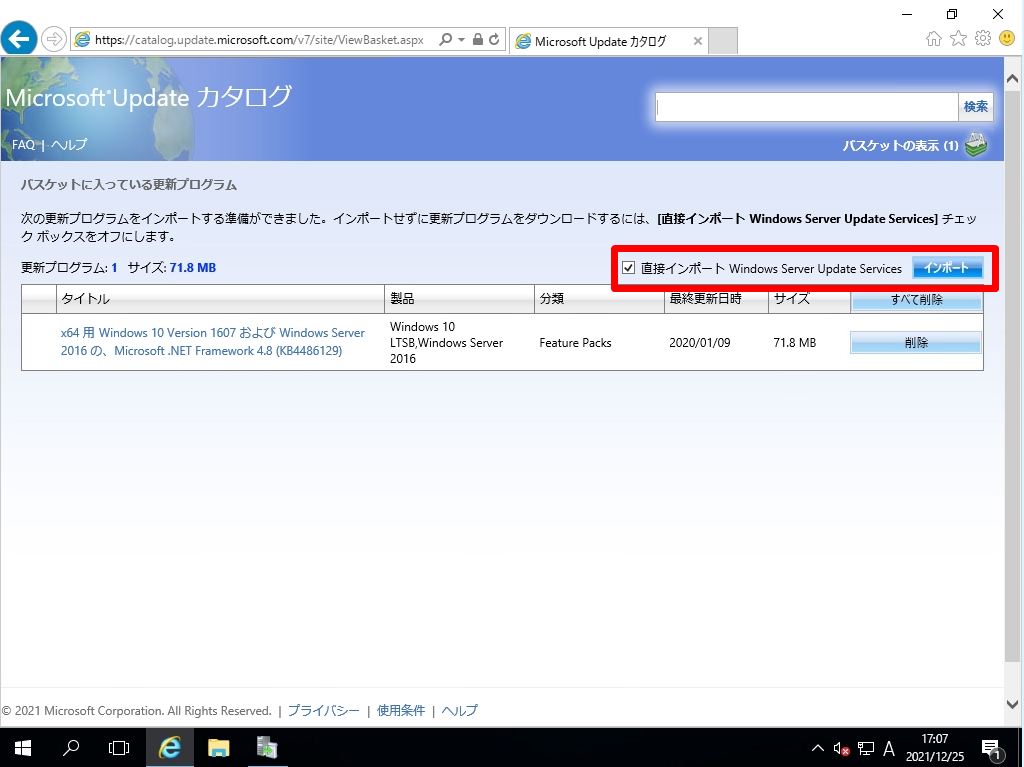
手順 8:
「直接インポート Windows Server Update Services」のチェックボックスを有効化 ->「インポート」を選択します。
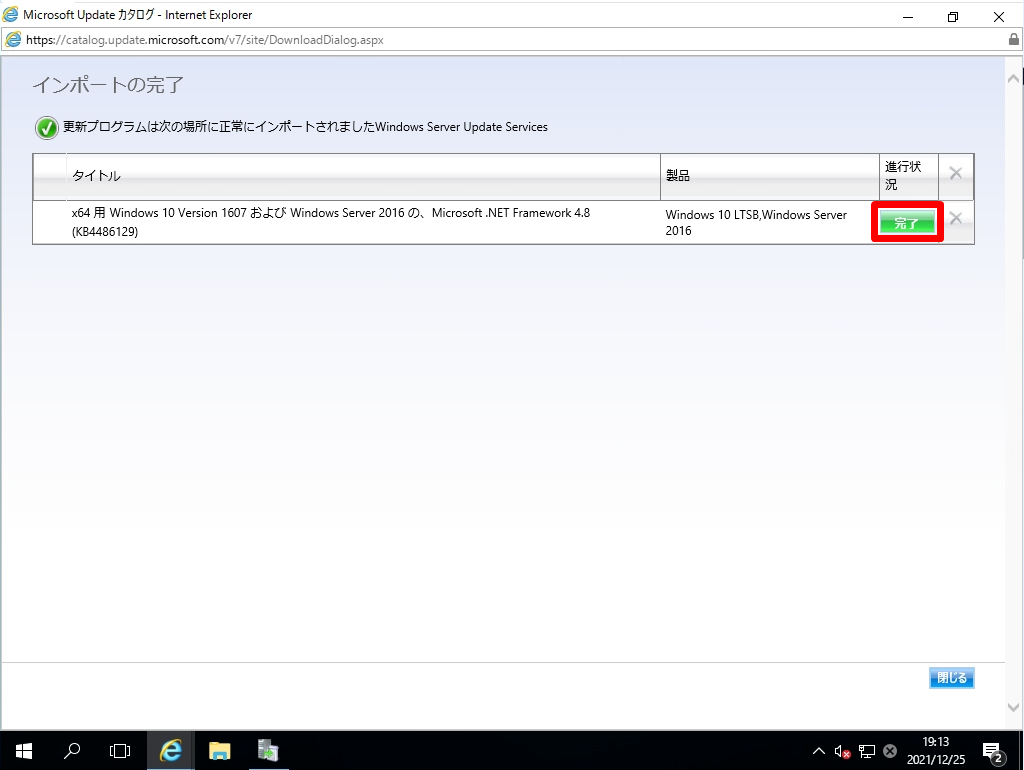
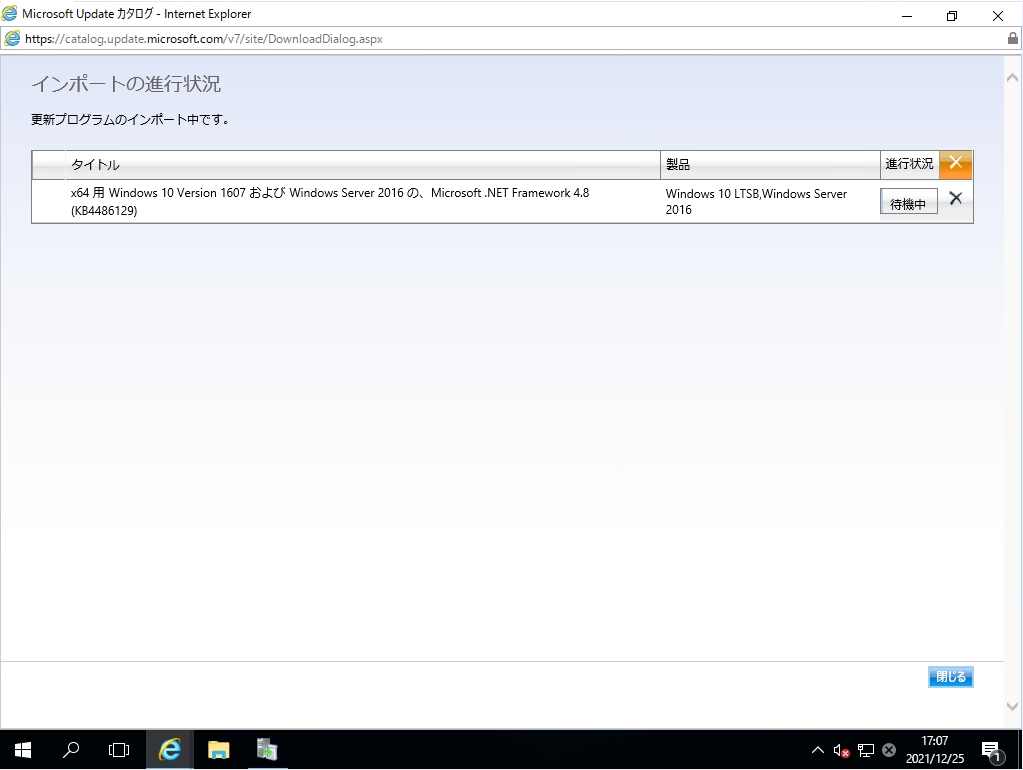
手順 9:
インポートの進行状況画面:進行状況が「待機中」から「完了」にステータスが変わることを確認します。
インポートの完了画面:「完了」にステータスが変わったことを確認します。

Windows Server 2016:WSUS 手動パッチのインポートが失敗する場合の対処方法
WSUSの「更新のインポート」で特定のパッチがインポートできず進行状況が「失敗」になる場合があります。
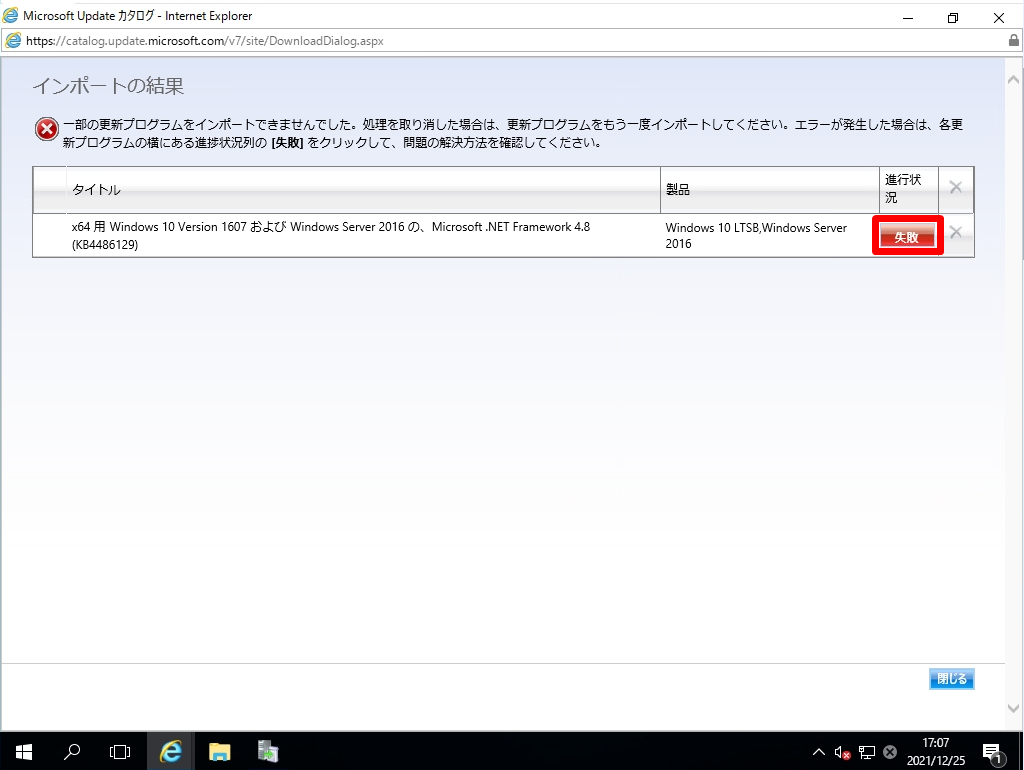
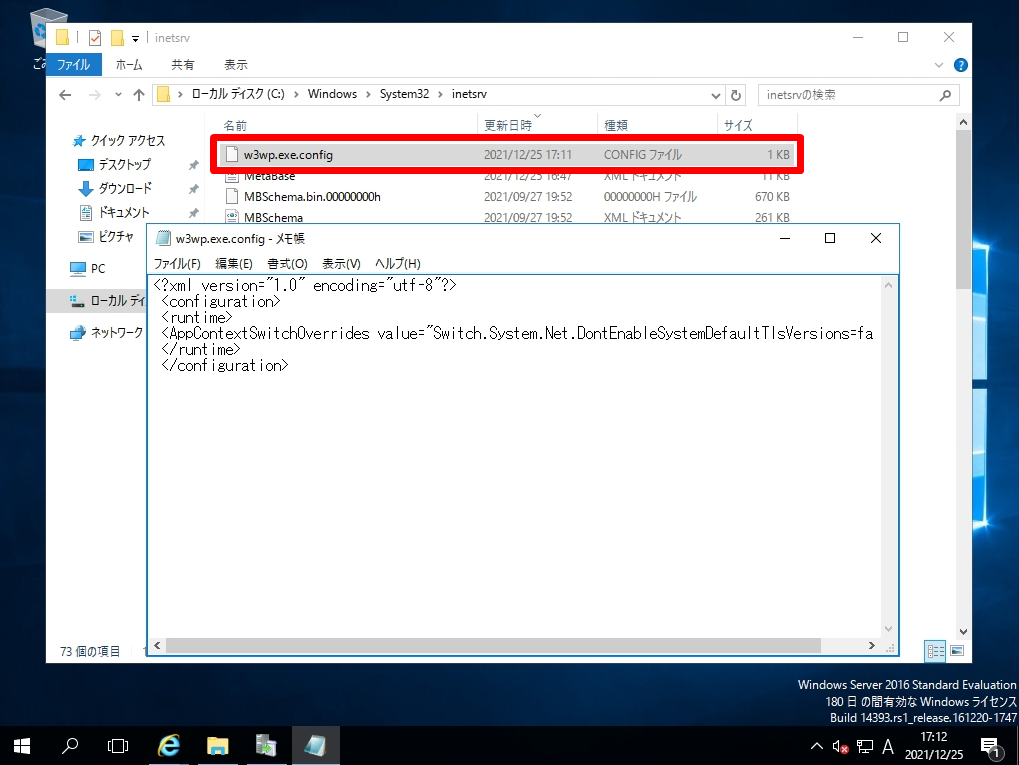
失敗する場合は「C:\Windows\System32\inetsrv」配下に「w3wp.exe.config」ファイルを作成し編集します。以下、参考サイトの解決法で本サイトの環境においても解消しています。
また、前提条件として.Net Framework Version 4.7 以降のインストールが必要です。
手順 1:
「w3wp.exe.config」ファイルを作成し以下、文字列を入力 ->「inetsrv」ディレクトリ配下に格納します。
<?xml version="1.0" encoding="utf-8"?>
<configuration>
<runtime>
<AppContextSwitchOverrides value="Switch.System.Net.DontEnableSystemDefaultTlsVersions=false"/>
</runtime>
</configuration>
手順 2:
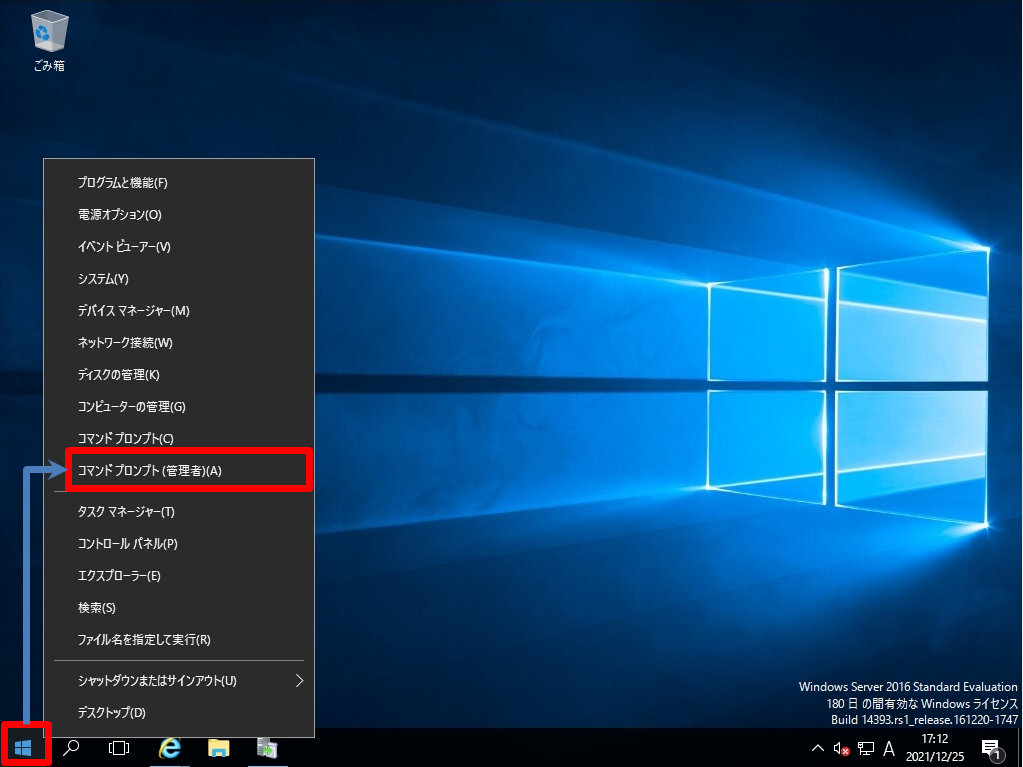
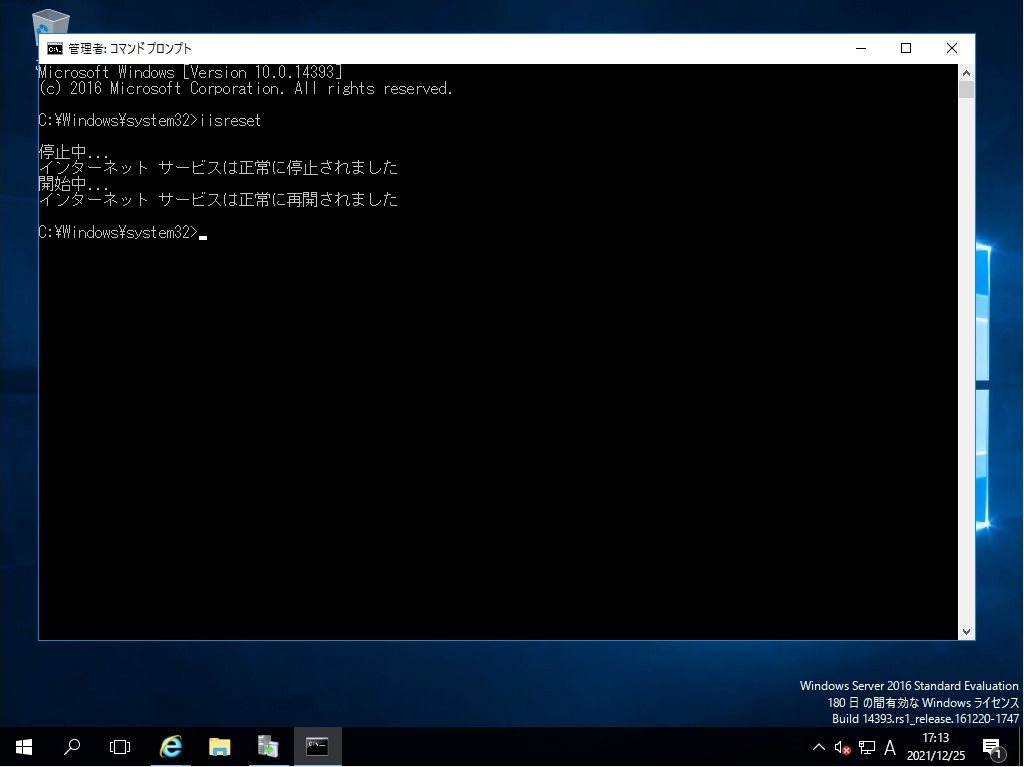
「iisreset」コマンドを実行しIISのサービスを停止、再度開始させます。
デスクトップ左下「 (Windowsマーク)」を右クリック->「コマンドプロンプト」を選択します。
手順 3:
「iisreset」コマンドでIISのサービスを停止、開始されたことを確認します。
手順 4:
再度、WSUSの「更新のインポート」で特定のパッチをインポートします。