Windows Server バックアップは、ディスク全体、フォルダー・ファイル単位でデータをバックアップおよび復元できるWindows 標準のバックアップ機能です。標準機能のため無料で利用できますが、Windows Server 2016 のクリーンインストール状態では機能が有効になっていないためサーバーマネージャーの役割と機能の追加ウィザード画面からインストールする必要があります。
Windows Server 2016:Windows Server バックアップインストール
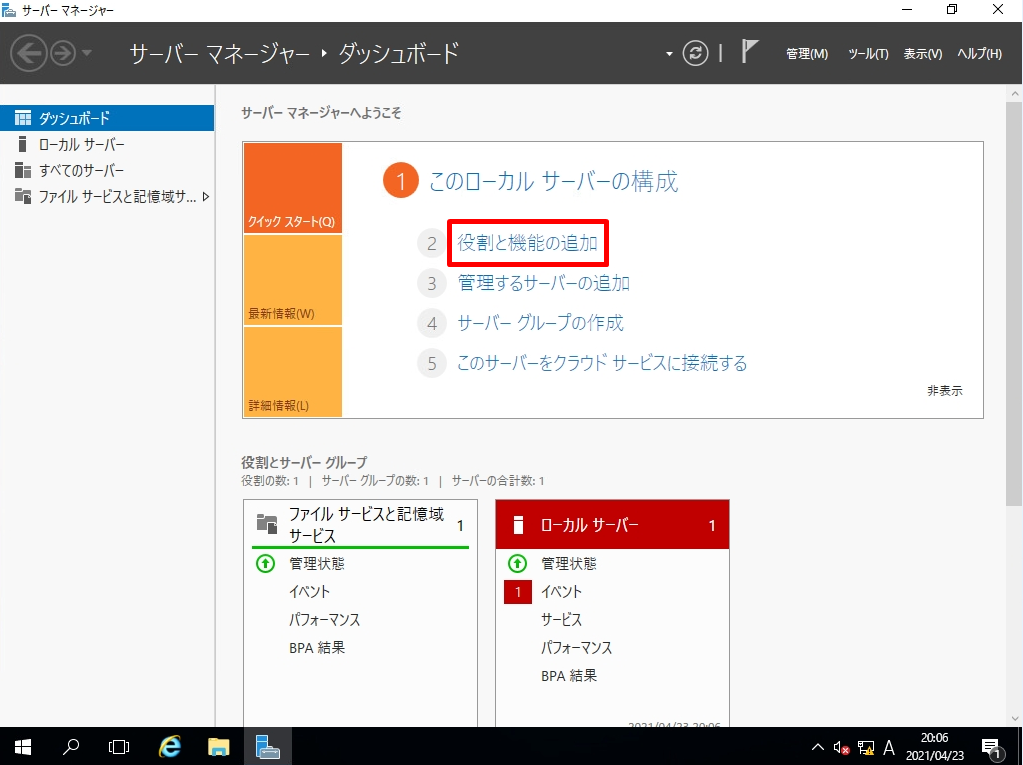
手順 1:
デスクトップ画面左下の「 Windowsアイコン」->「サーバーマネージャー」を選択します。

手順 2:
「役割と機能の追加」を選択します。
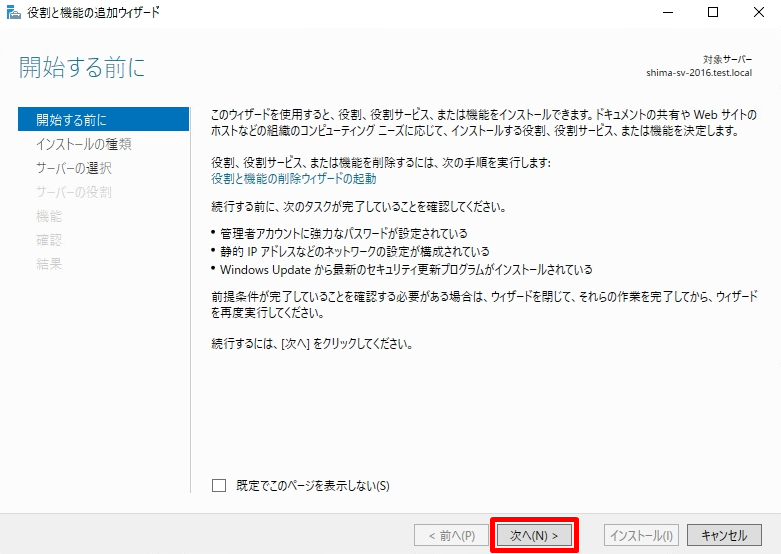
手順 3:
「開始する前に」画面 ->「次へ」を選択します。
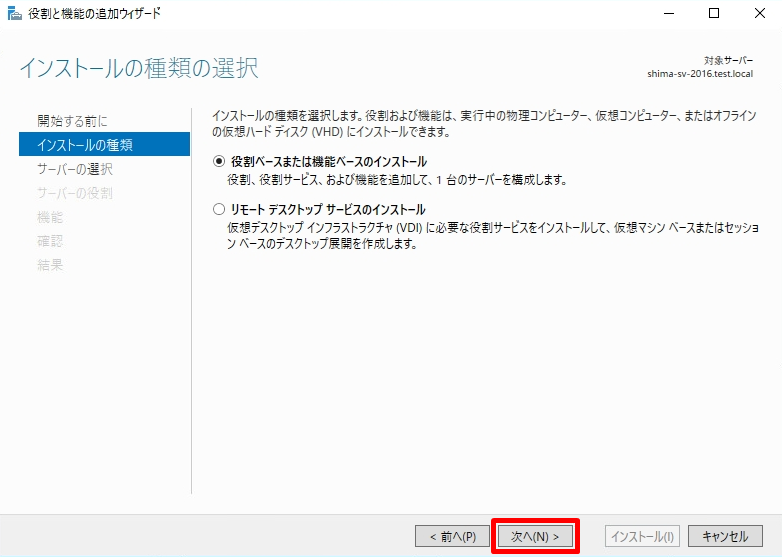
手順 4:
「インストールの種類の選択」画面 ->「次へ」を選択します。
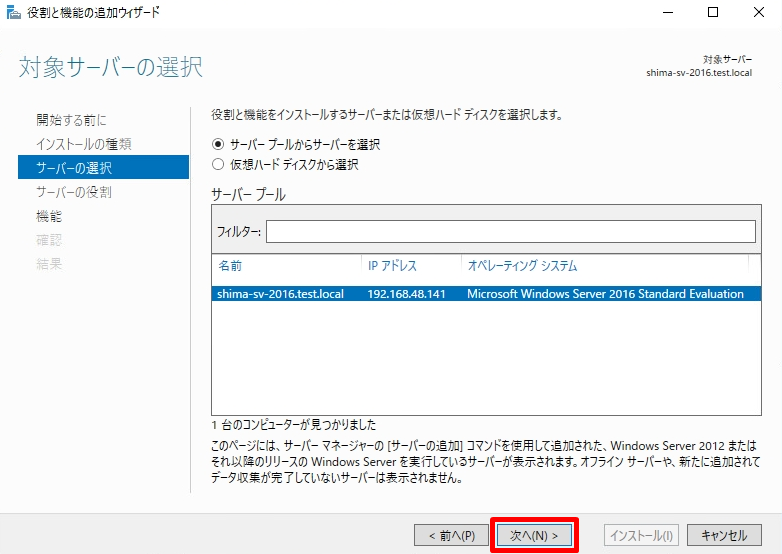
手順 5:
「対象サーバーの選択」画面 ->「次へ」を選択します。
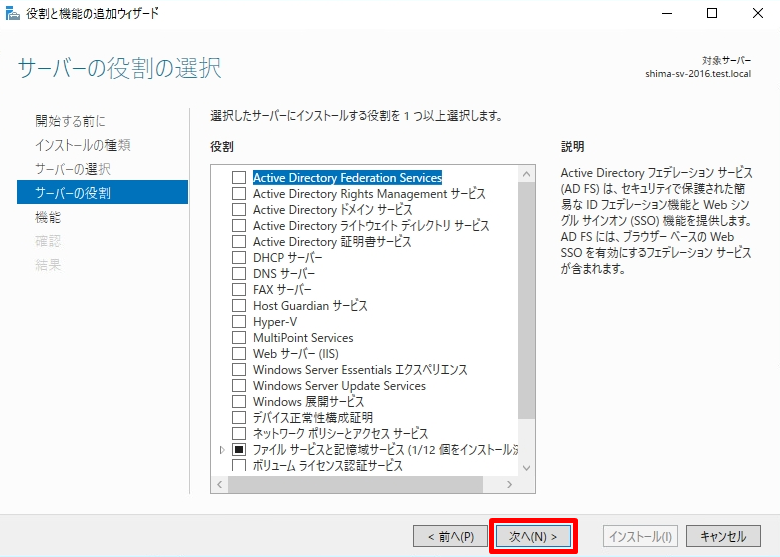
手順 6:
「サーバーの役割の選択」画面 -> 何も選択しないで「次へ」を選択します。
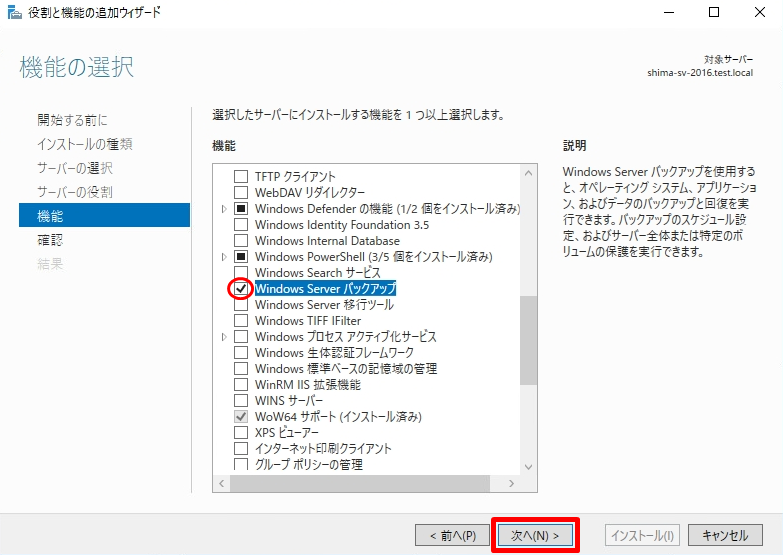
手順 7:
「機能の選択」画面 -> Windows Server バックアップのチェックボックスを 有効化します。
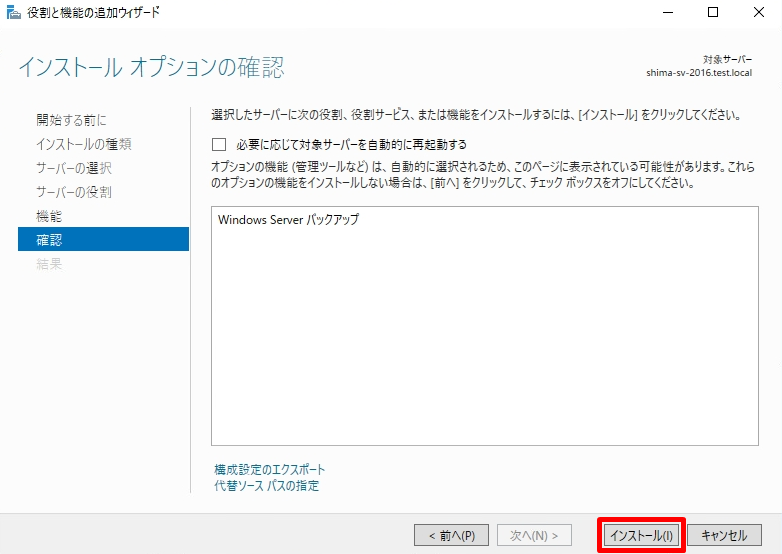
手順 8:
「インストールオプションの確認」画面 -> 「インストール」を選択します。
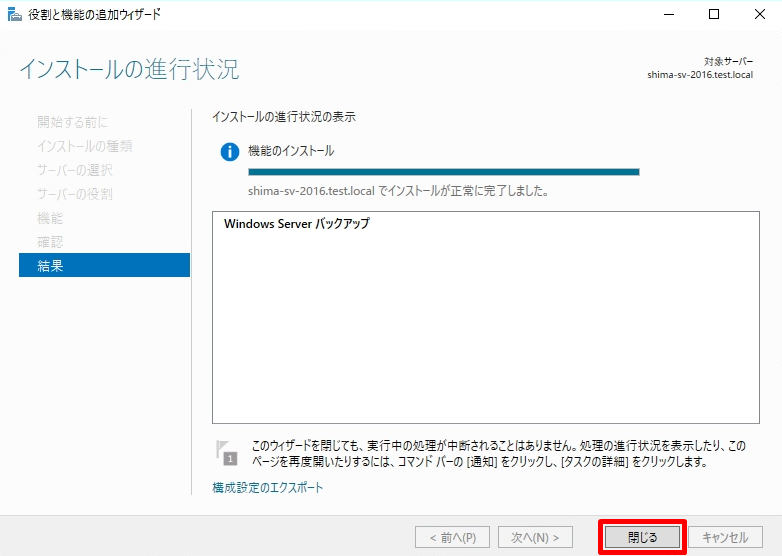
手順 9:
「インストールの進行状況」画面 -> 「閉じる」を選択します。
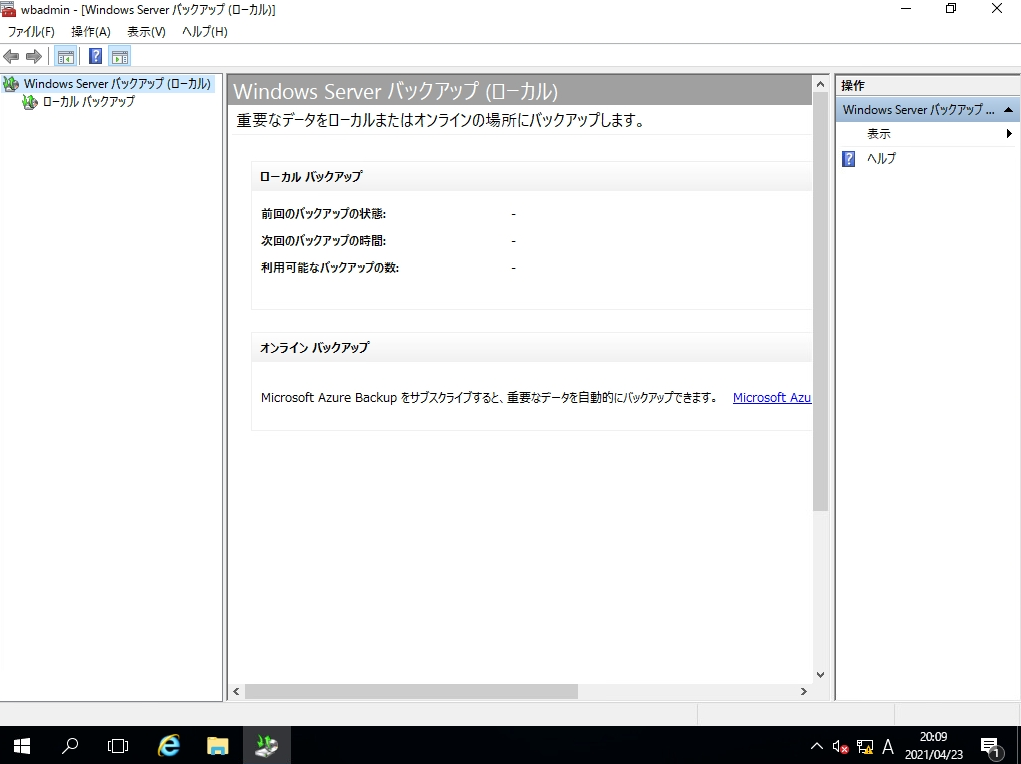
Windows Server バックアップ起動
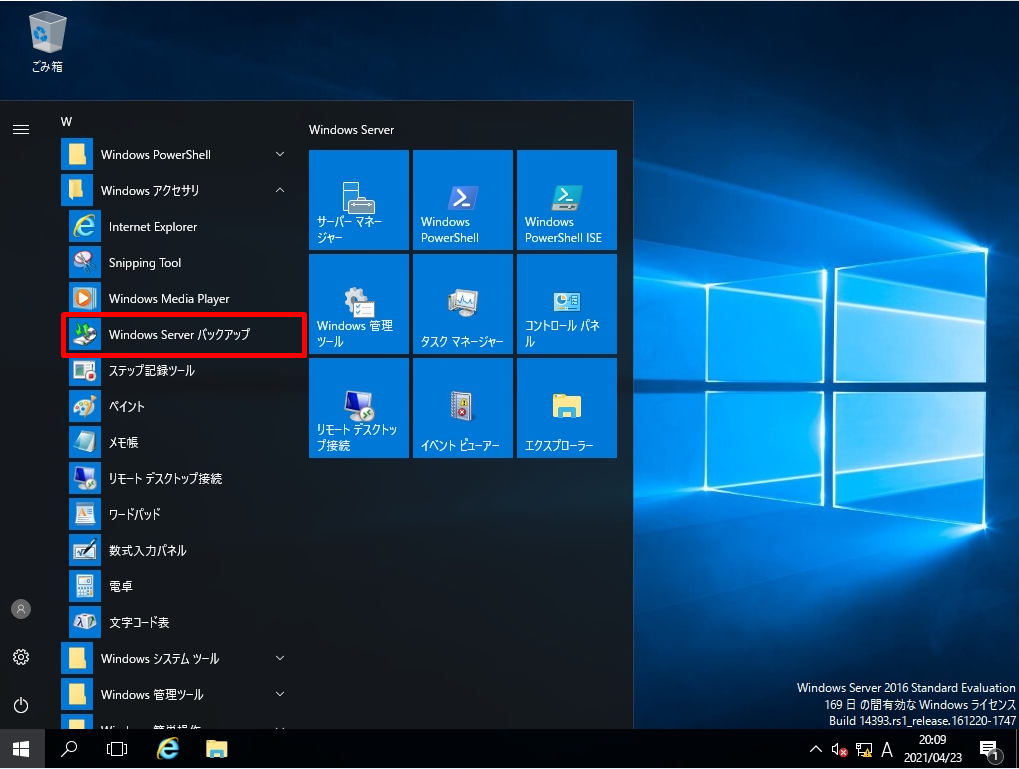
手順 1:
デスクトップ画面左下の「 Windowsアイコン」をクリック -> 「Windows アクセサリ」-> 「Windows Server バックアップ」を選択し起動します。
手順 2:
Windows Server バックアップが起動できたことを確認します。