Windows Defender is security software developed by Microsoft that is installed by default on Windows Vista and later Windows operating systems. It is also pre-installed in the OS of Windows Server version 2022. Windows Defender can be disabled with a local Group Policy.
In this article, we will use the GUI in the Local Group Policy Editor that comes standard with Windows Server 2022 to set up permanent Windows Defender disabling. When using it in a company, there are cases where antivirus software of other products is used, so this is an invalidation method when it does not conflict with other products.
Hereafter, we will explain how to check the service stop after disabling Windows Defender and changing the settings of Windows Server 2022 using GUI.
Local Group Policy:Disable Windows Defender
Step 1:
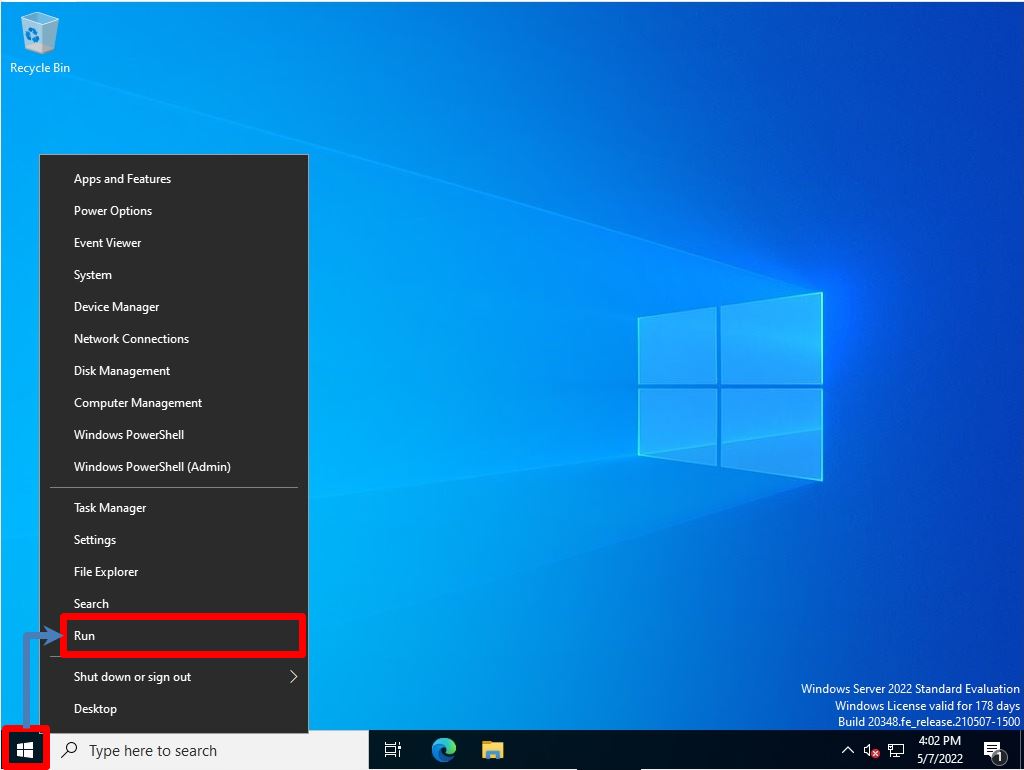
Right-click the Windows mark at the bottom left of the desktop -> select Run.
Step 2:
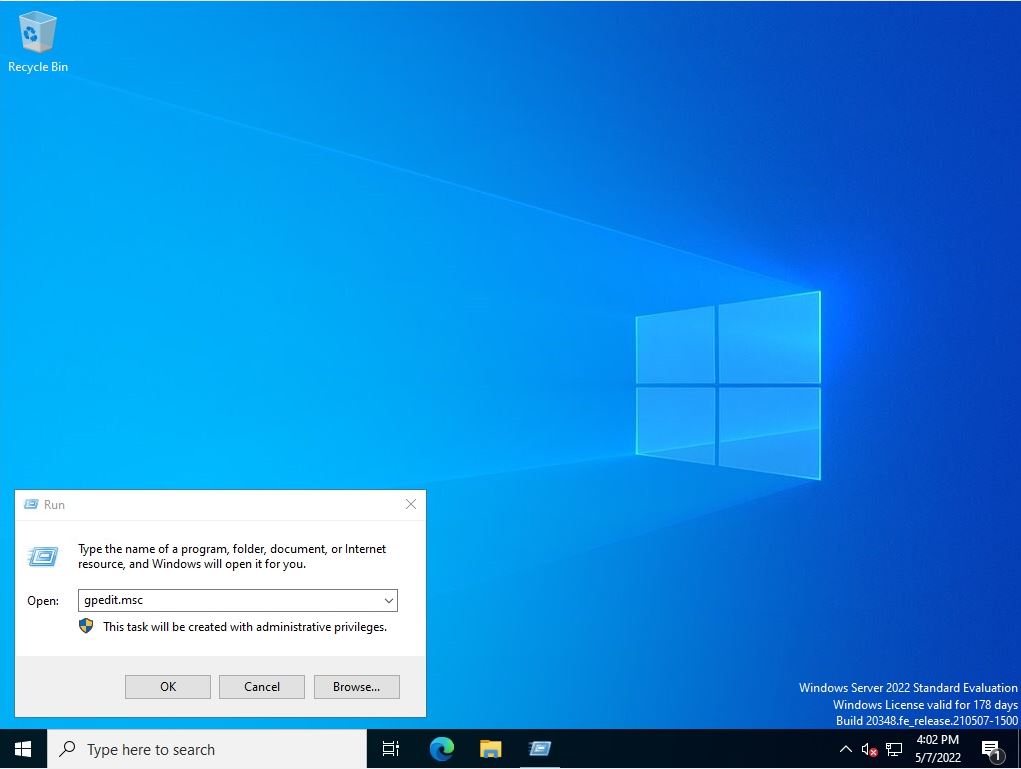
Enter gpedit.msc -> select OK.
Step 3:
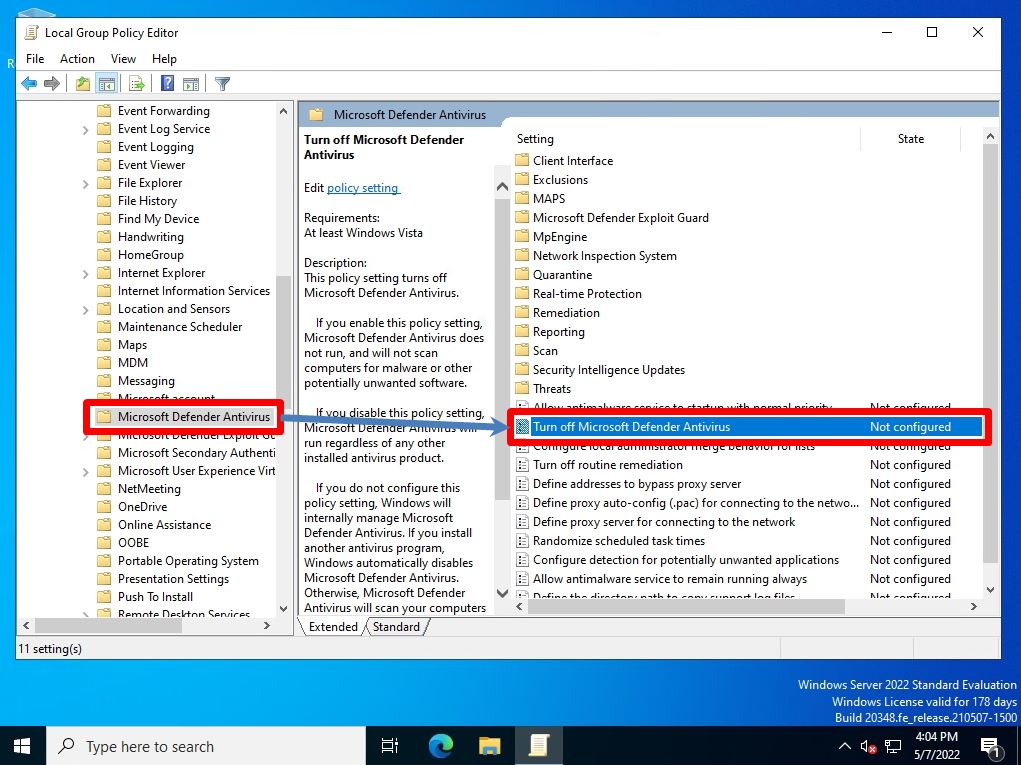
Select a policy below in the Local Group Policy Editor.
・ Computer configuration
-Administrative Templates
-Windows Components
-Microsoft Defender Antivirus
-Turn off Microsoft Defender Antivirus
Step 4:
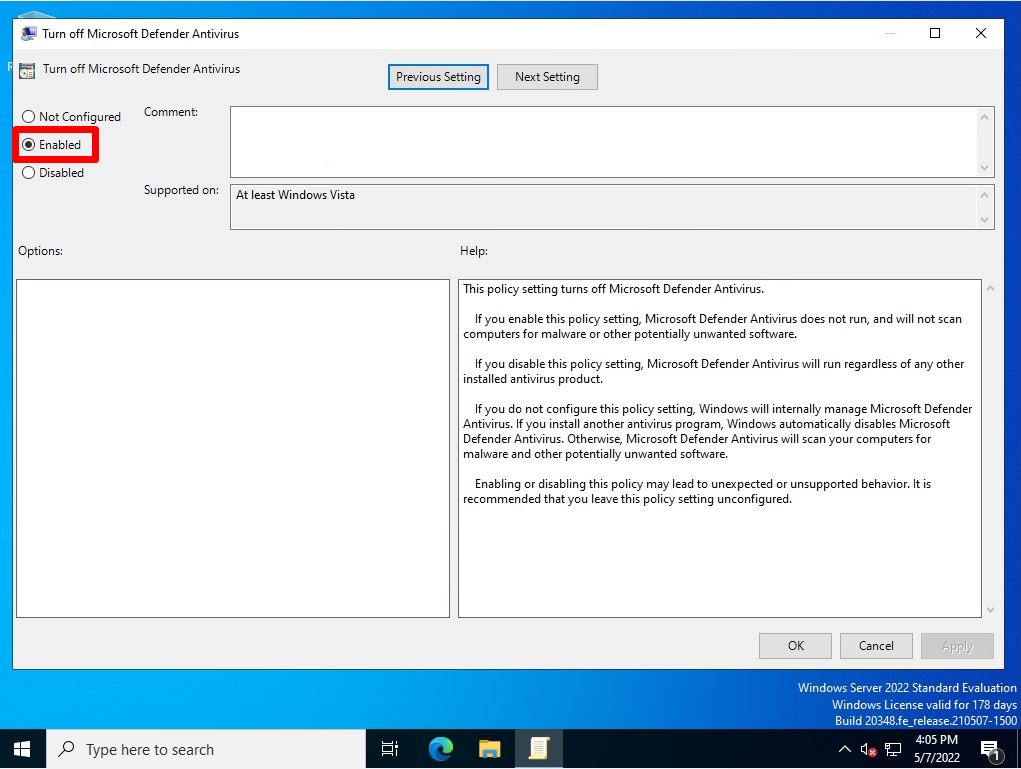
Change the default value from Not Configured to Enabled -> select OK.
Step 5:
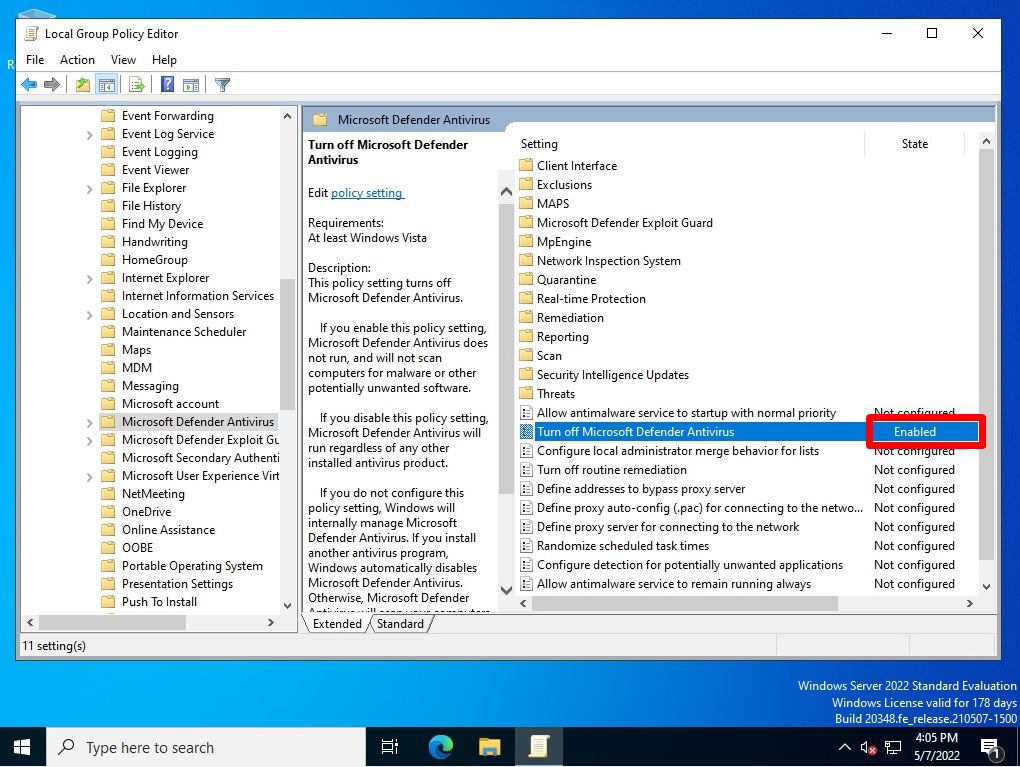
Confirm that the status is Enabled.
Local Group Policy Reflection / Windows Security Invalid Confirmation
Make sure that the changed policy is reflected. * The settings will be maintained even after restarting.
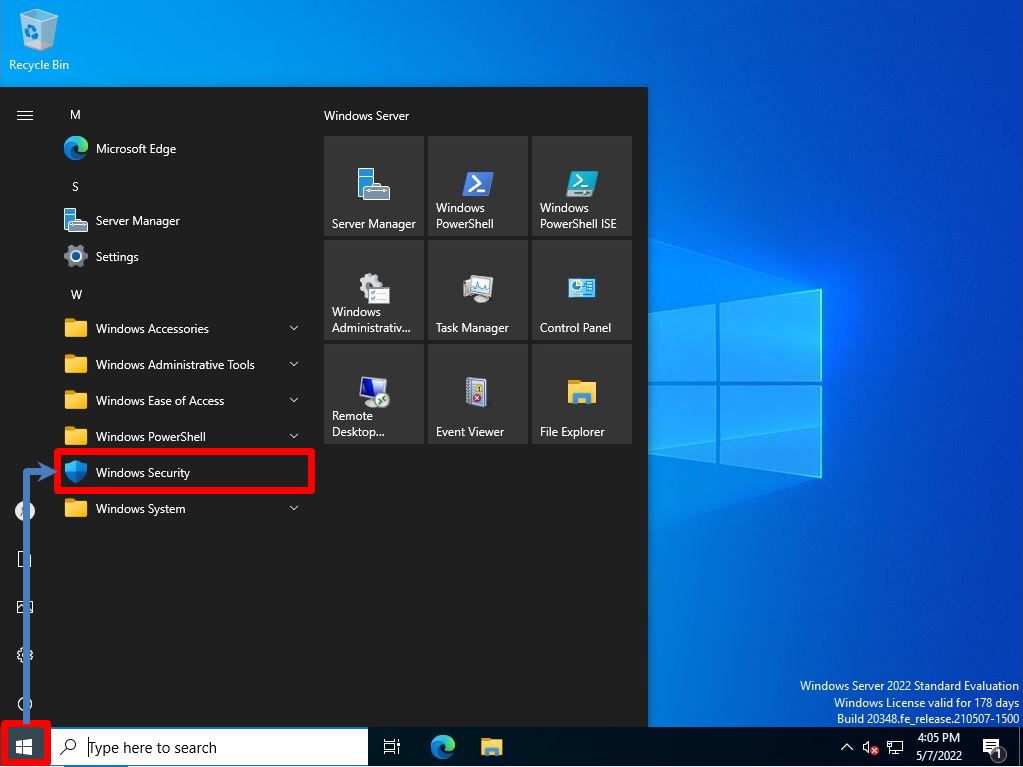
Click the Windows mark at the bottom left of your desktop -> select Windows Security.
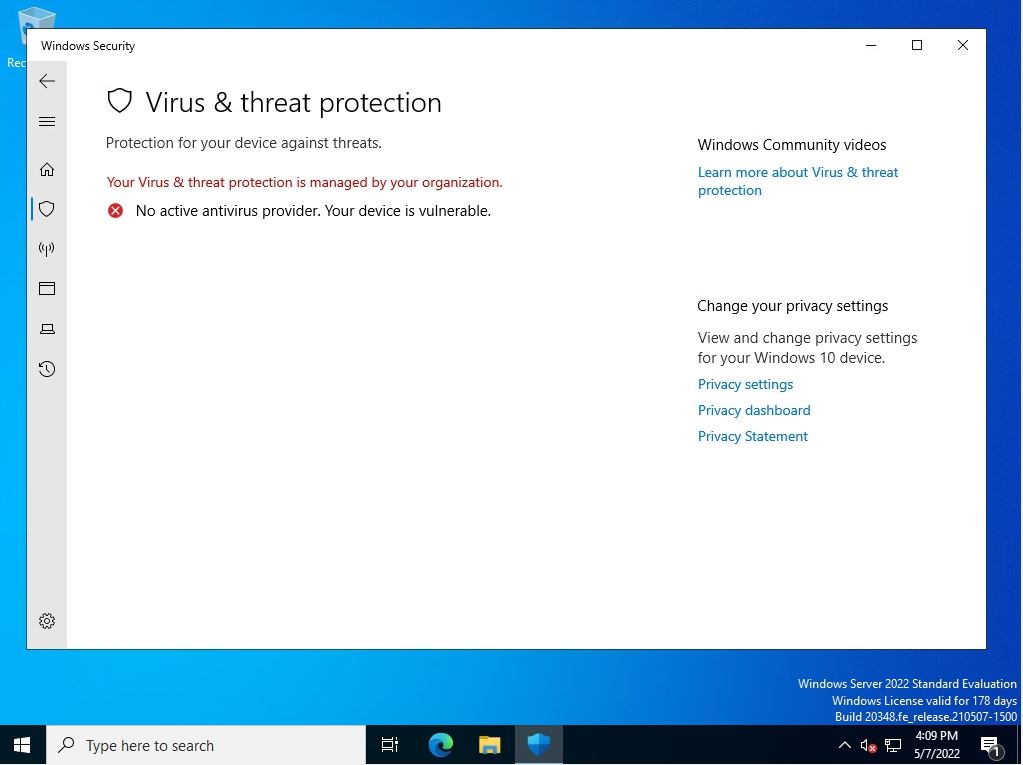
Make sure that the Virus and Threat Protection icon is not enabled because you have enabled the Disable Windows Defender Antivirus policy.
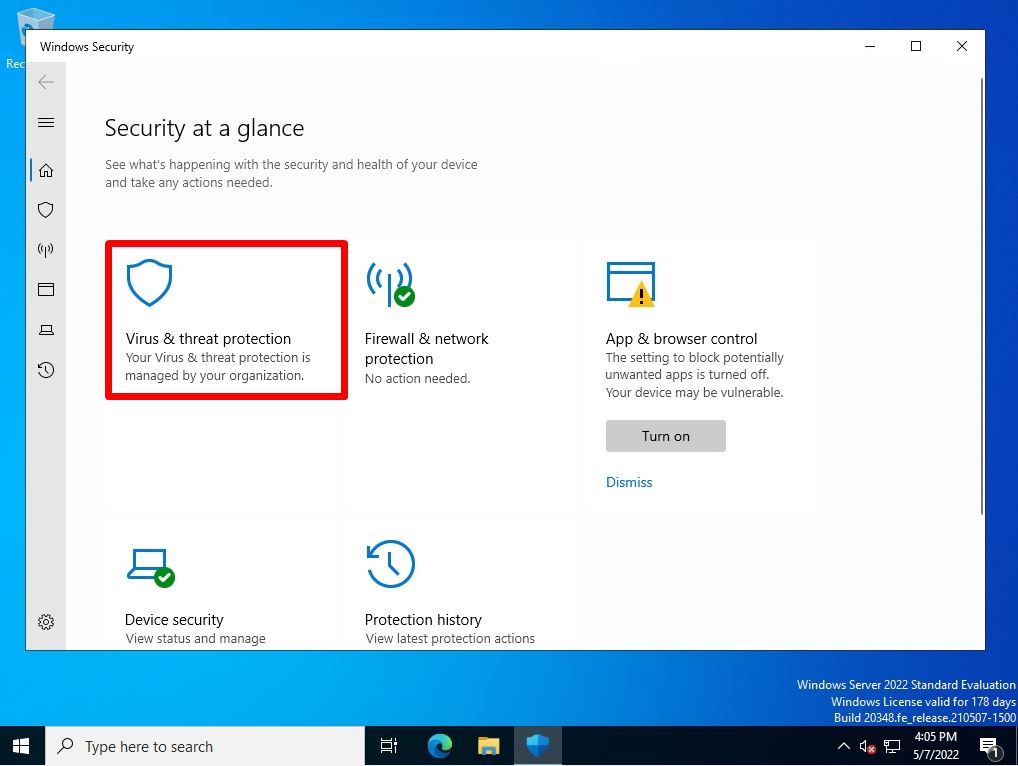
If you select Virus & threat protection on the previous screen, you will see “Your Virus & threat protection is managed by your organization” You can see that Windows Defender has been disabled.
