The PC name (host name) is an identifier used as the name of a computer or server. We recommend a maximum length of 63 bytes for the PC name and a maximum of 15 characters.
Immediately after OS installation, it is automatically composed of “WIN-” + “random alphanumericals”. The default value of the host name does not affect the operation, but in many companies, the host name is changed in order to manage the user’s personal computer in an easy-to-understand manner. This time, I will explain how to change the computer name of Windows Server 2019 and how to check it with the command prompt (cmd) as a supplement.
Windows Server 2019: PC Name (host name) change
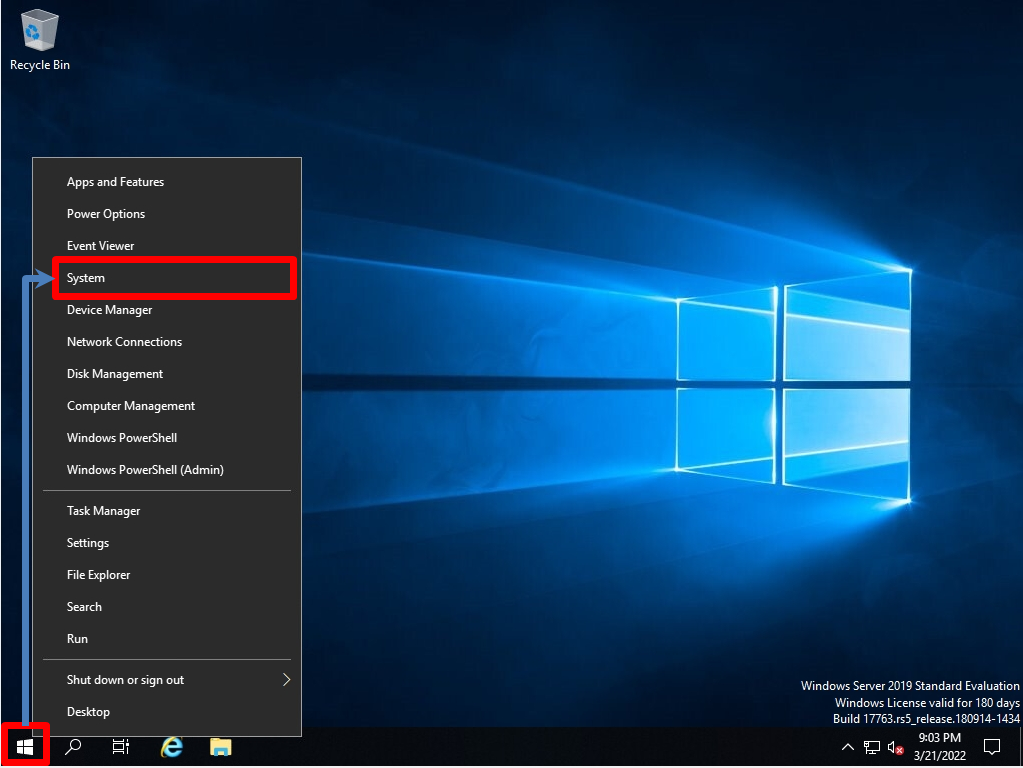
Step 1:
Right-click Windows Mark at the bottom left of the desktop -> select “System”.
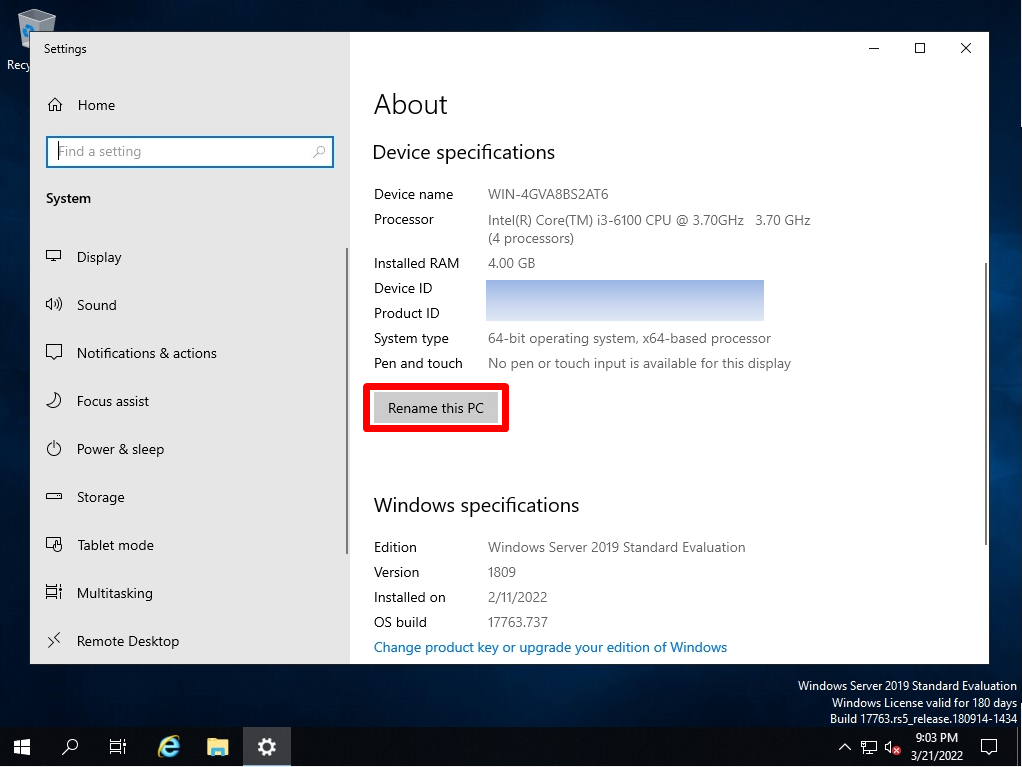
Step 2:
Select Rename this PC.
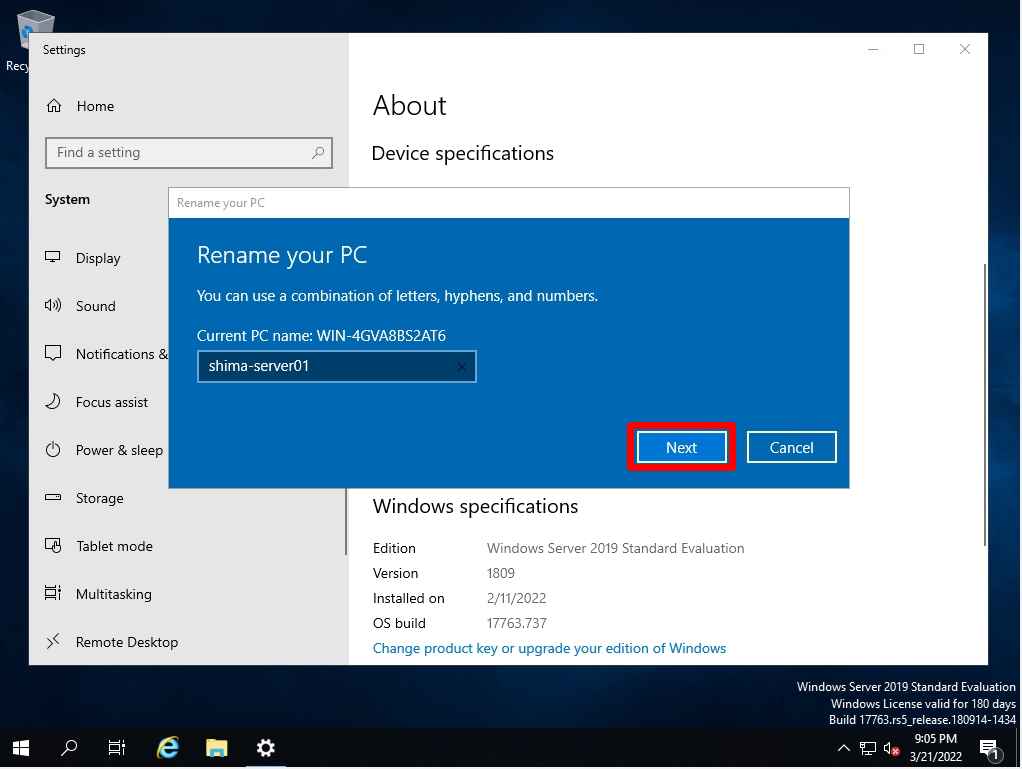
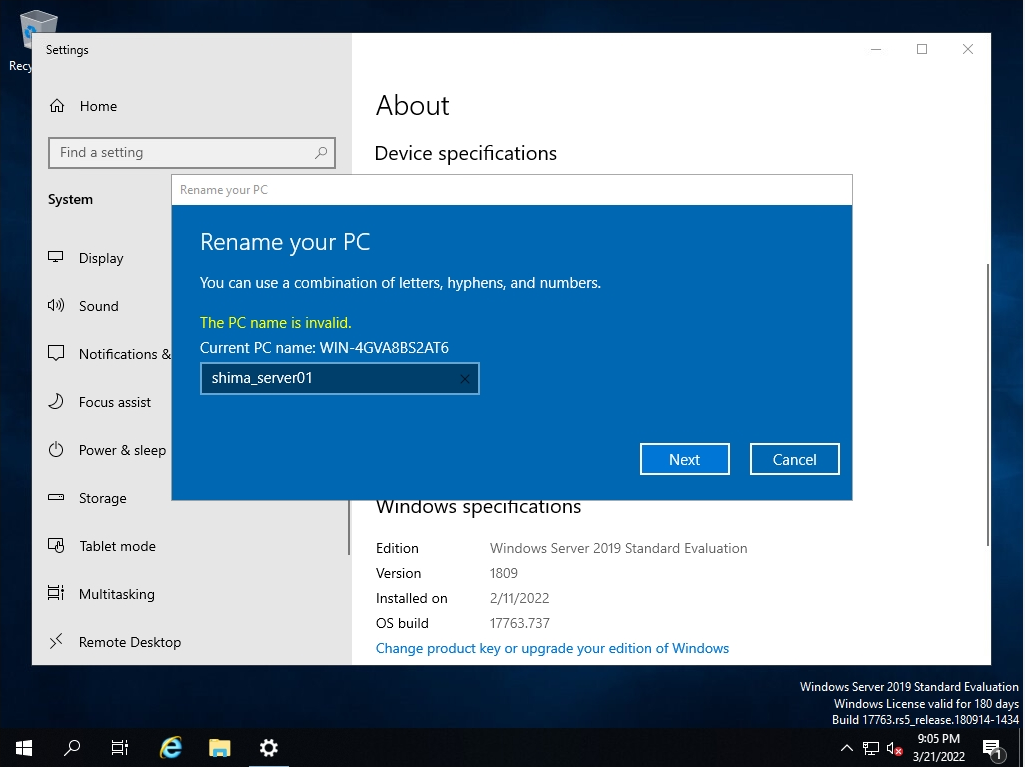
Step 3:
Enter the PC name you want to change -> select Next.
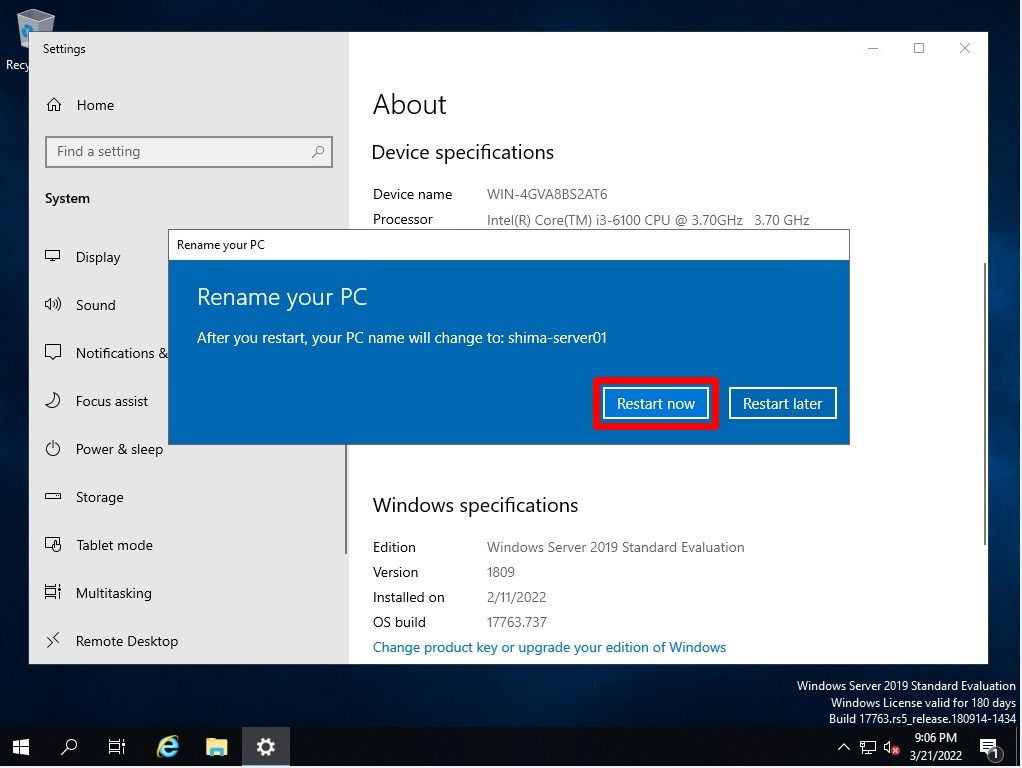
Step 4:
Select Restart Now.
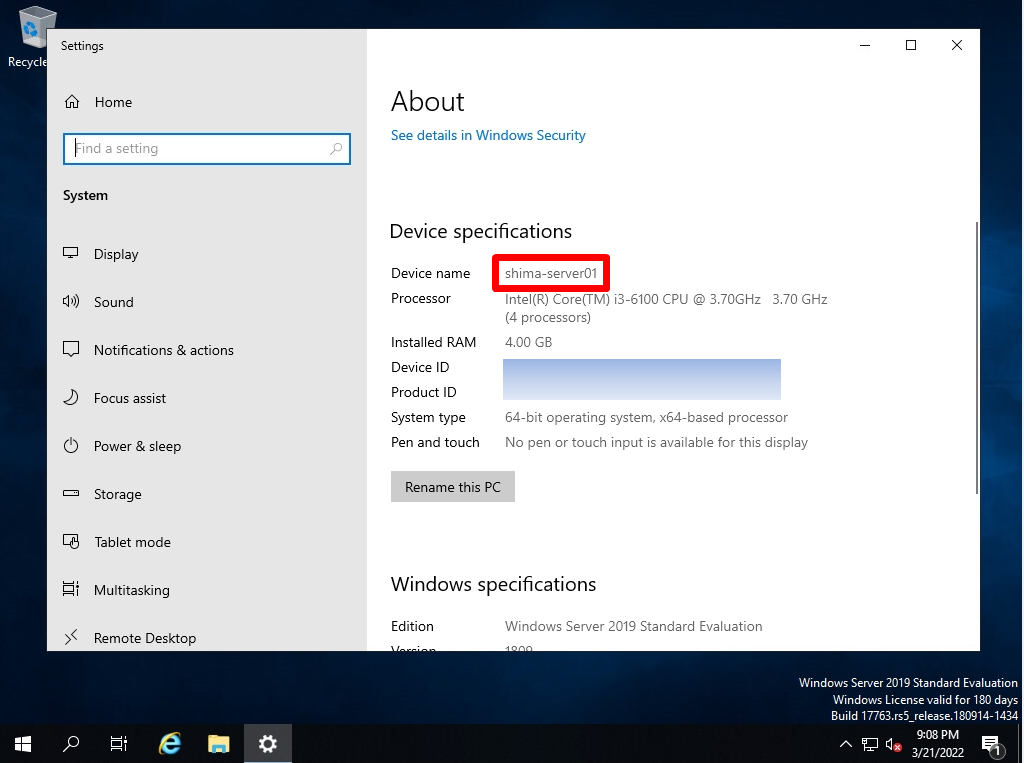
Step 5:
After rebooting, confirm that the device name has changed.
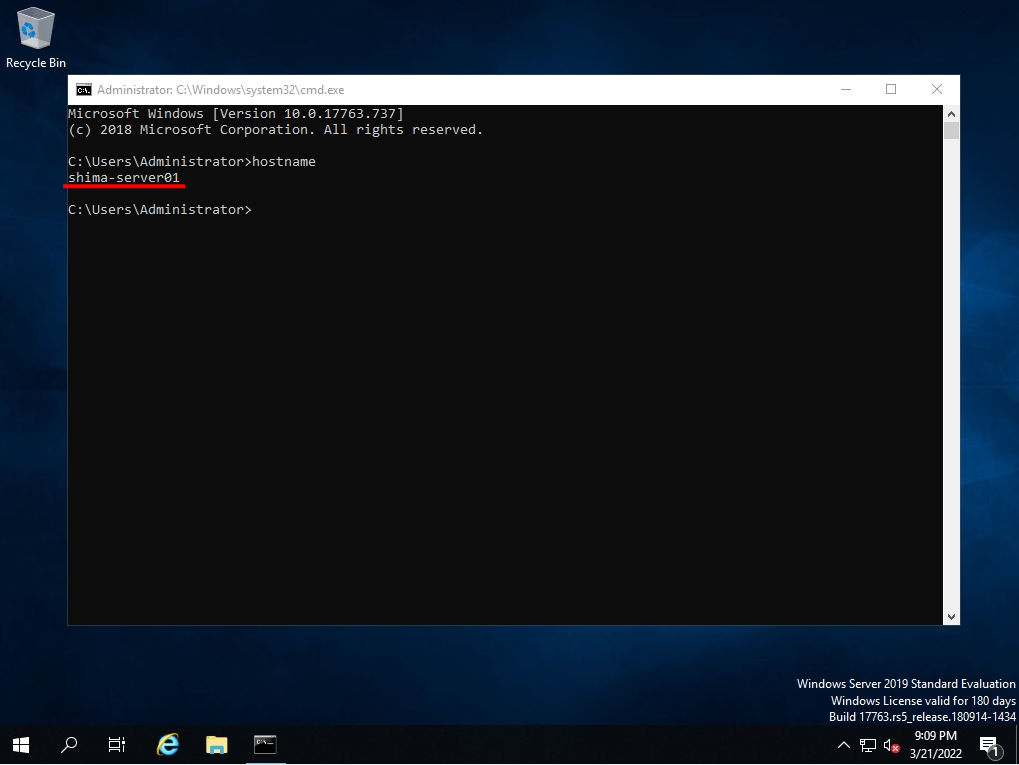
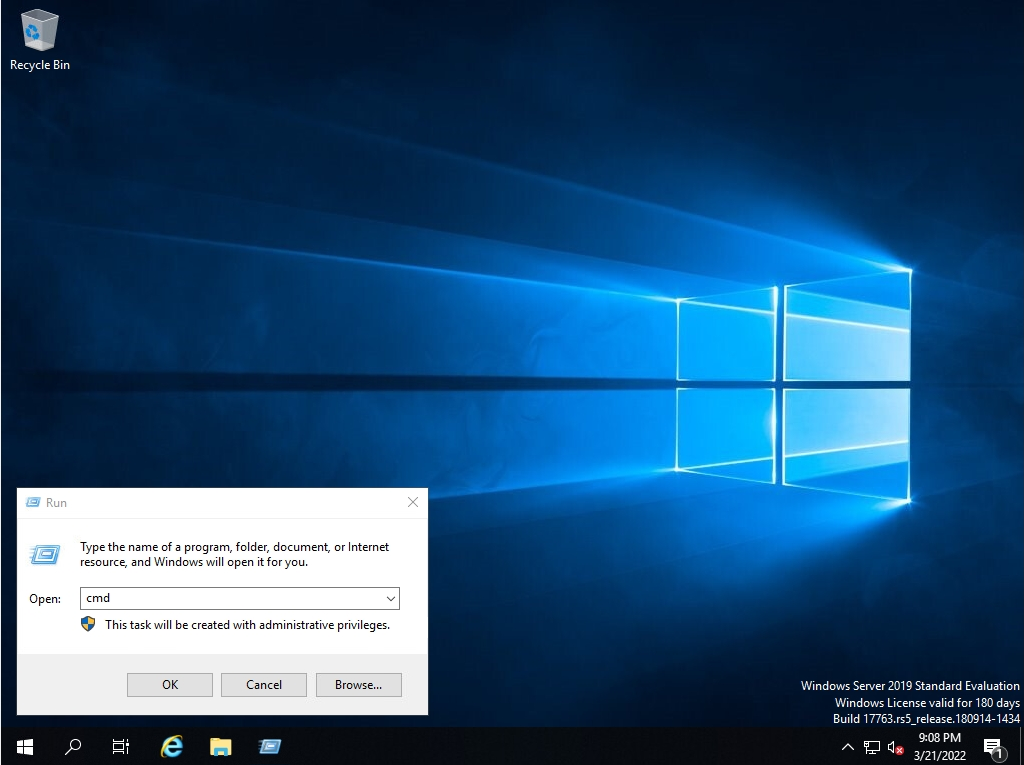
Windows Server 2019:How to find out the PC name using the command prompt (cmd)
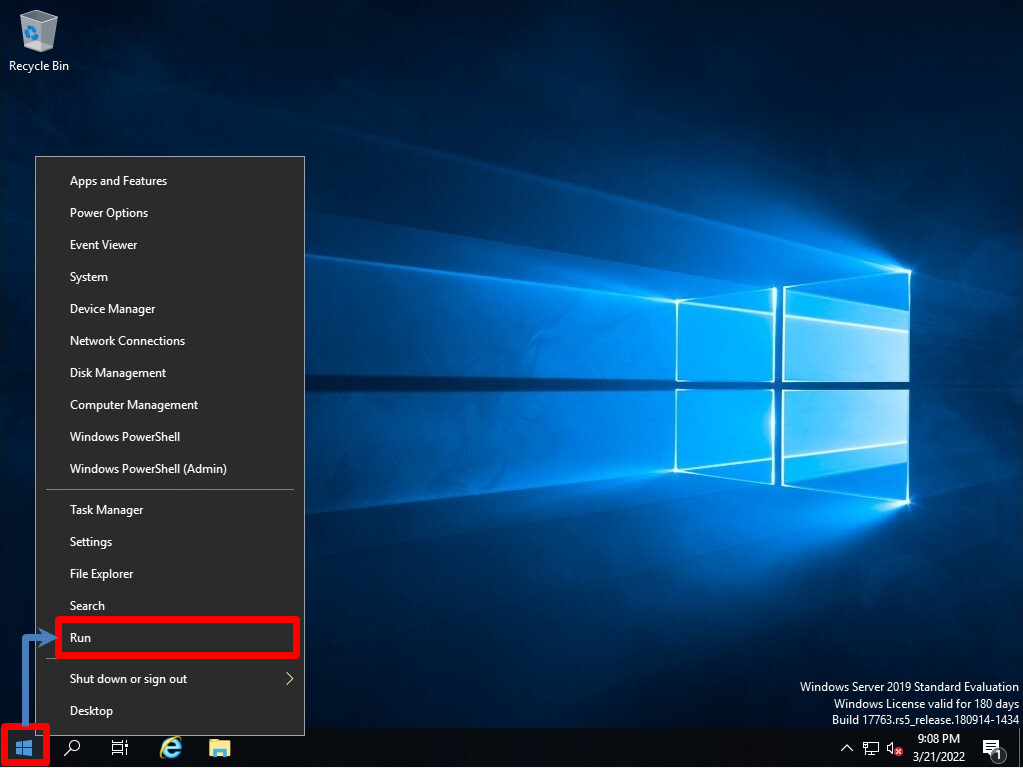
Step 1:
Right-click Windows Mark at the bottom left of the desktop -> select Run.
Step 2:
Enter cmd -> Select OK.
Step 3:
You can check the host / PC name with the “hostname” command from the command prompt.