Windows 10の標準ブラウザは「Microsoft Edge」です。Internet Explorer が必要がなくなった場合は、コントロールパネル、もしくはPowerShellコマンドを使用してInternet Explorer 11をアンインストール(無効化)することができます。※Internet Explorer削除後、再インストール(有効化)することも可能です。
コントロールパネル:Internet Explorer 11 アンインストール(無効化)
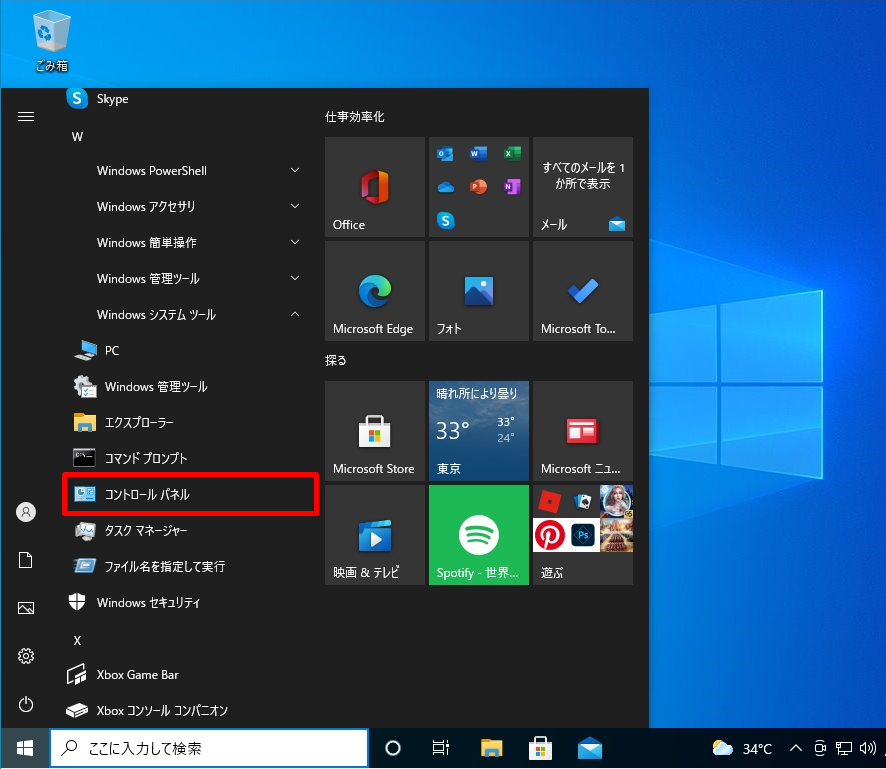
手順 1:
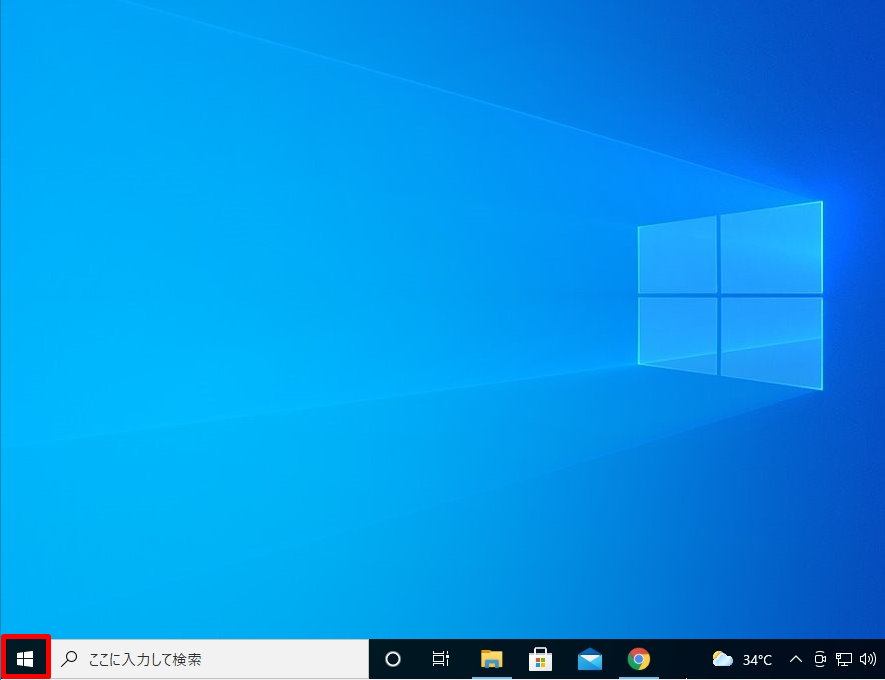
デスクトップ画面左下の「 Windowsマーク」を選択します。

手順 2:
「 コントロールパネル 」を選択します。
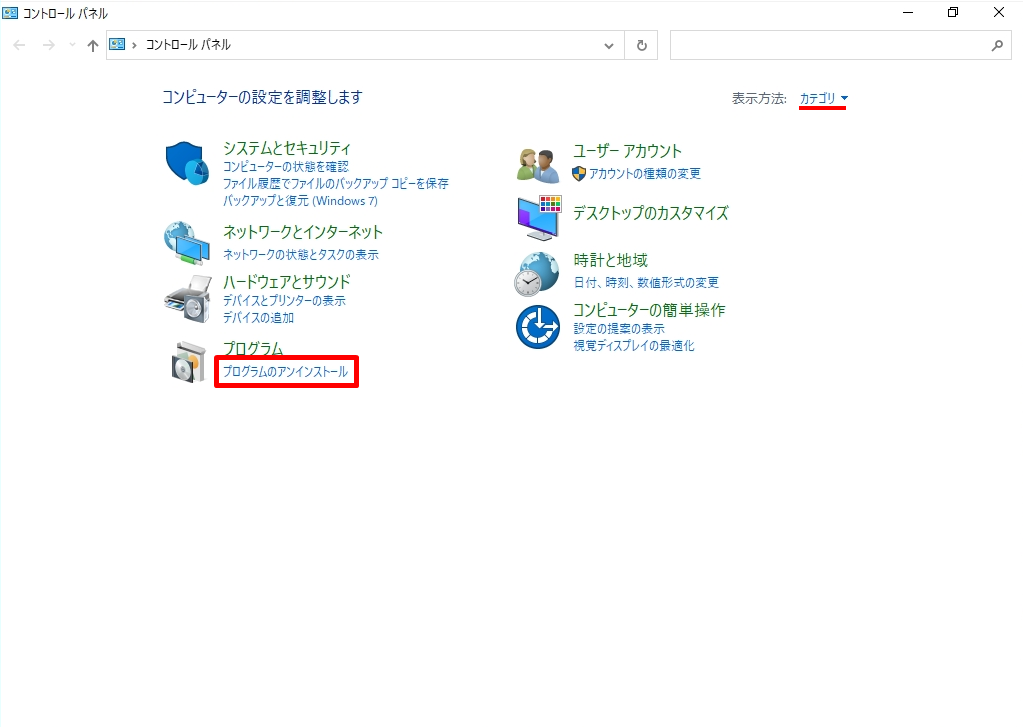
手順 3:
表示方法:カテゴリ ->「 プログラムのアンインストール 」を選択します。
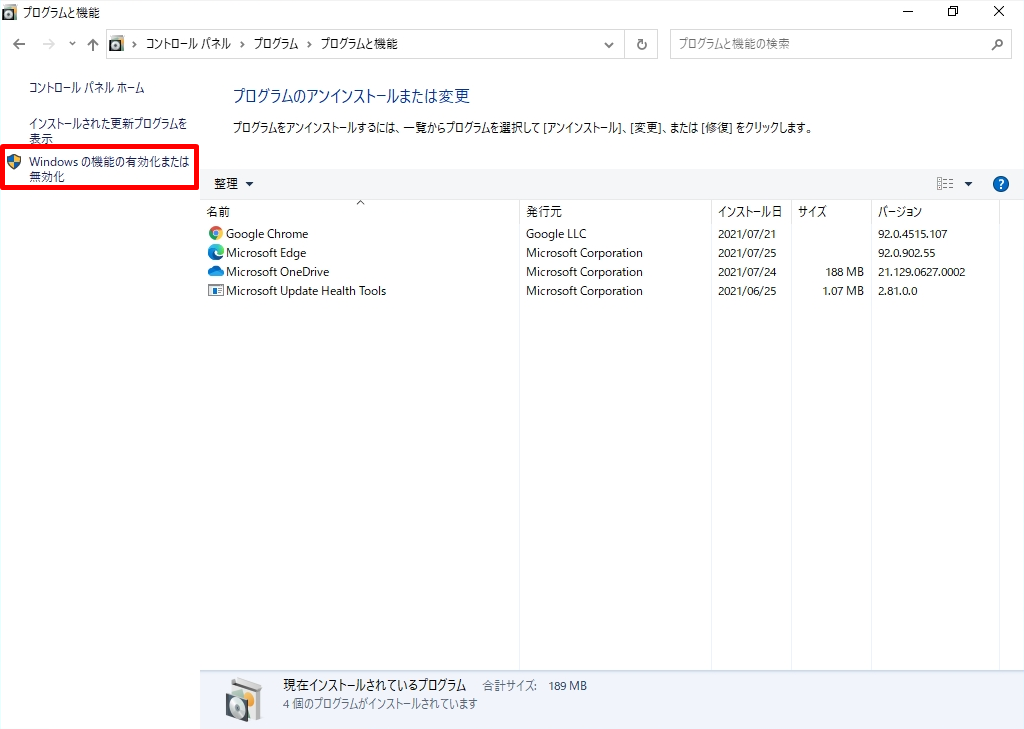
手順 4:
「 Windows の機能の有効化または無効化 」を選択します。
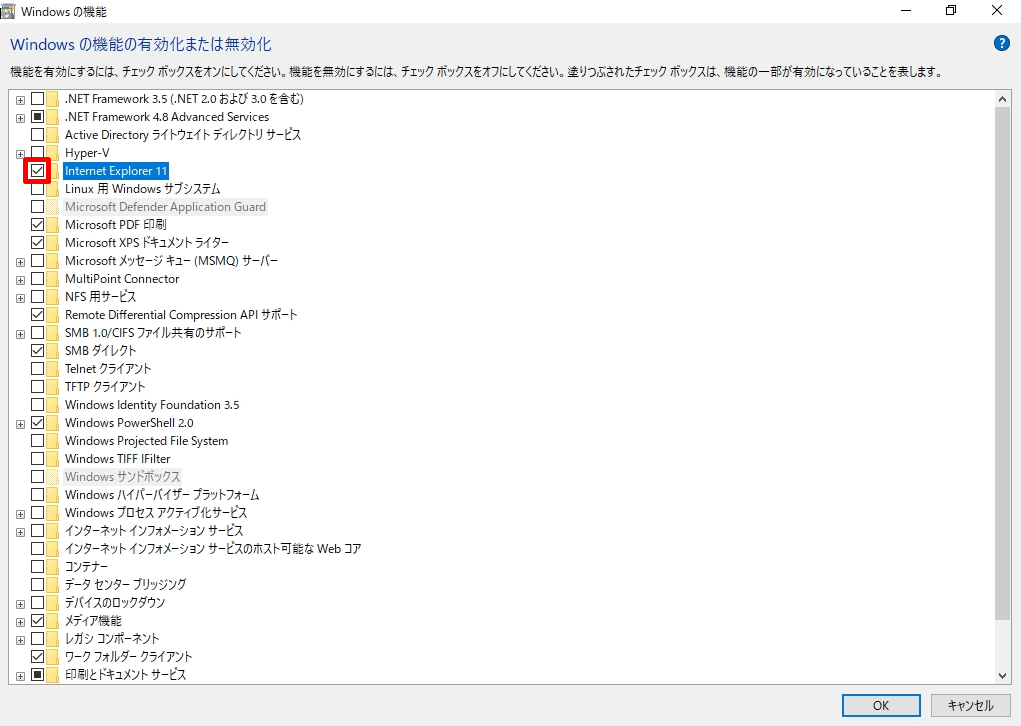
手順 5:
Internet Explorer 11のチェックボックスを選択します。
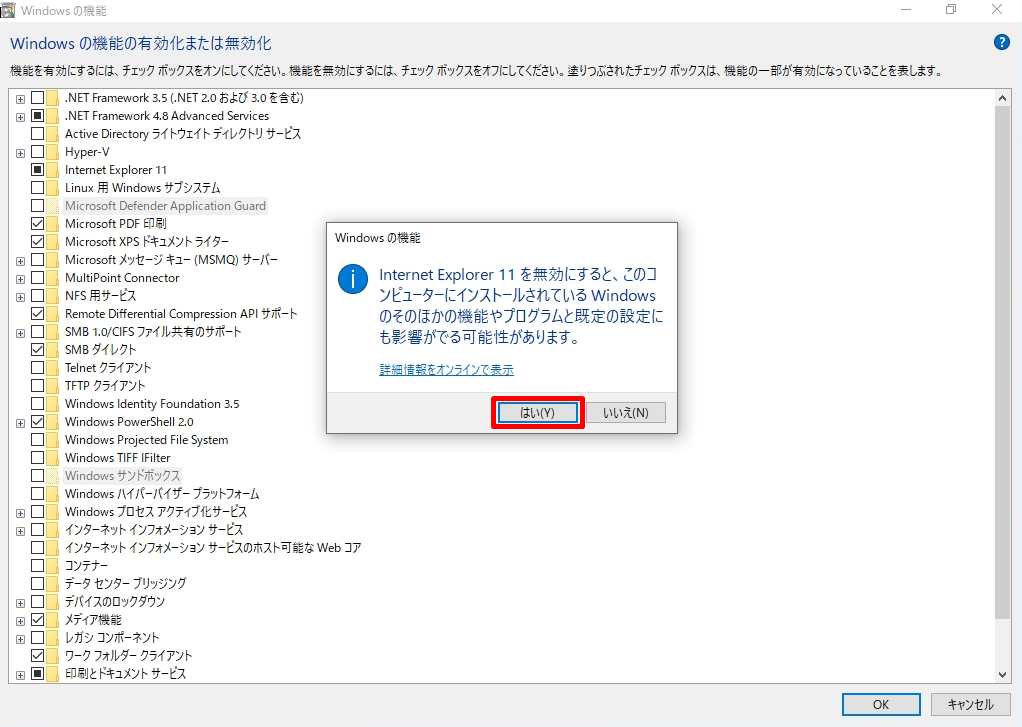
手順 6:
Internet Explorer 11を削除するため警告を促すダイアログボックスが表示されます。以下画面で「はい」を選択します。
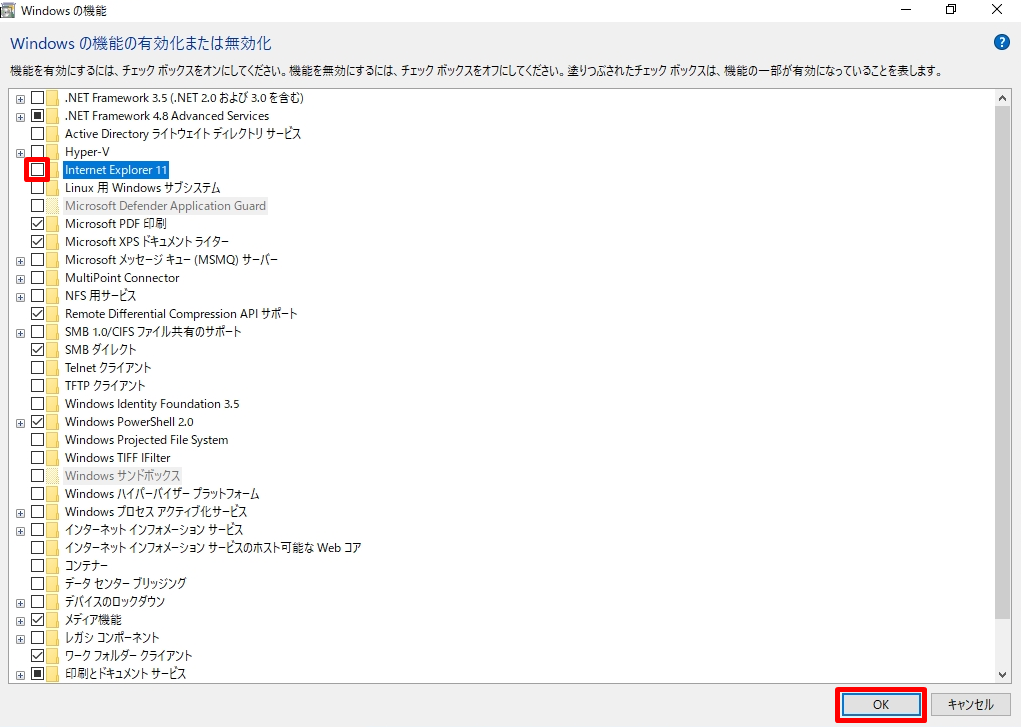
手順 7:
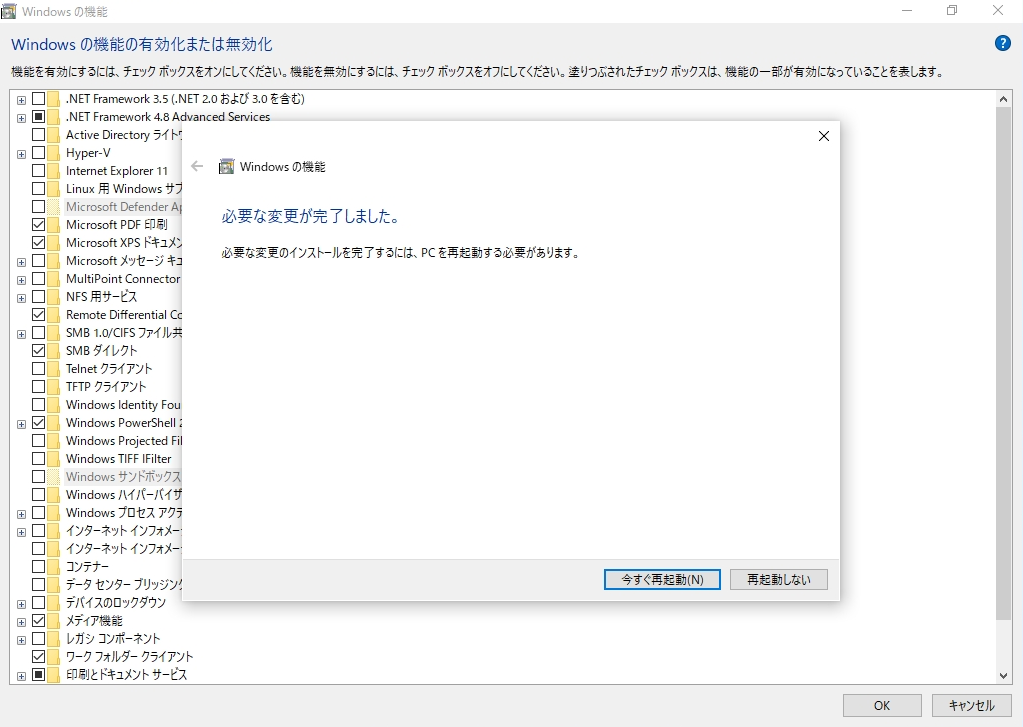
Internet Explorer 11のチェックボックスがオフになったことを確認 -> 「OK」を選択します。
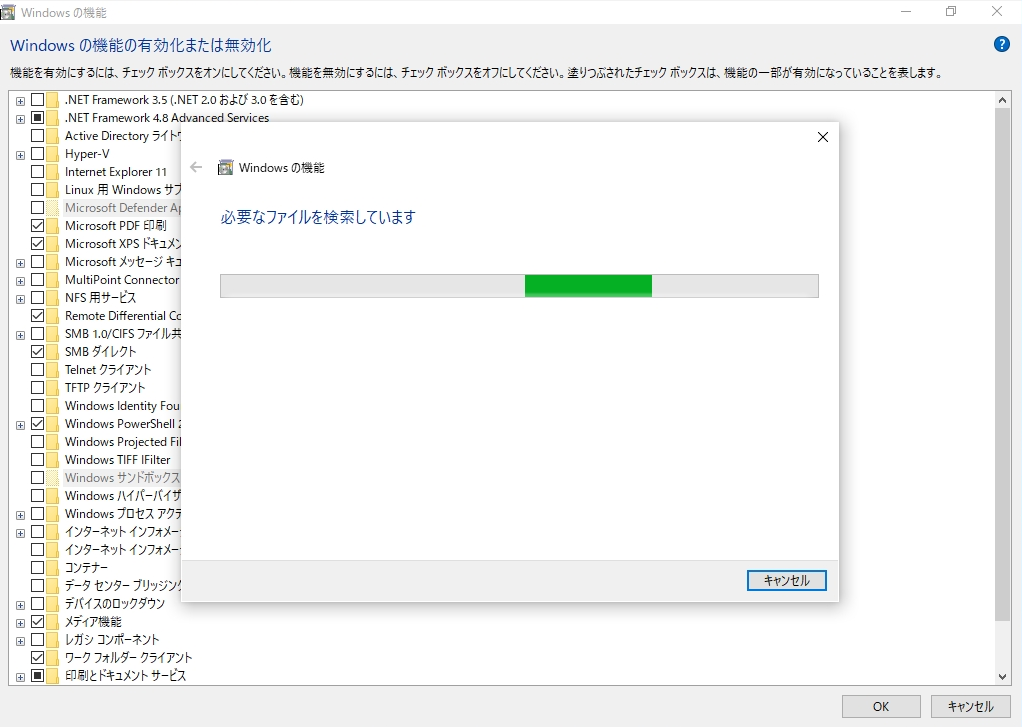
Internet Explorer 11のアンインストール(無効化)処理が開始されます。終了するまで少し待ちます。
手順 8:
PCを再起動後、Internet Explorer 11のアンインストール(無効化)処理は完了です。
PowerShellコマンド:Internet Explorer 11 アンインストール(無効化)
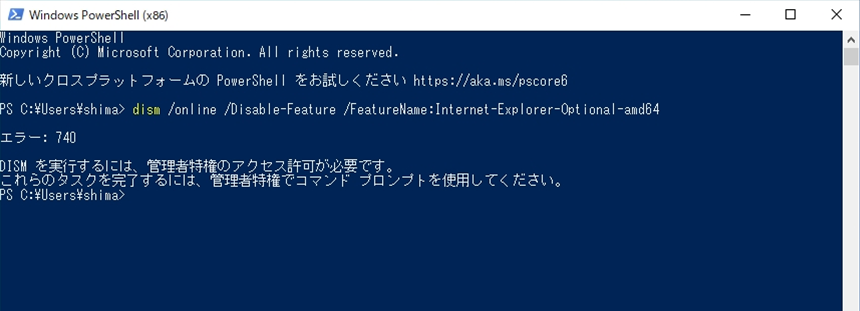
PowerShellコマンドを利用したInternet Explorer 11 アンインストール(無効化)は、管理者として実行する必要があります。管理者として実行しない場合、「管理者特権のアクセス許可が必要」と表示されアンインストール(無効化)できません。以降の手順で実行方法を説明します。
手順 1:
デスクトップ画面左下の「 Windowsマーク」を選択します。
手順 2:
「Windows PowerShell」を右クリック ->「その他」-> 「管理者として実行」を選択します。

手順 3:
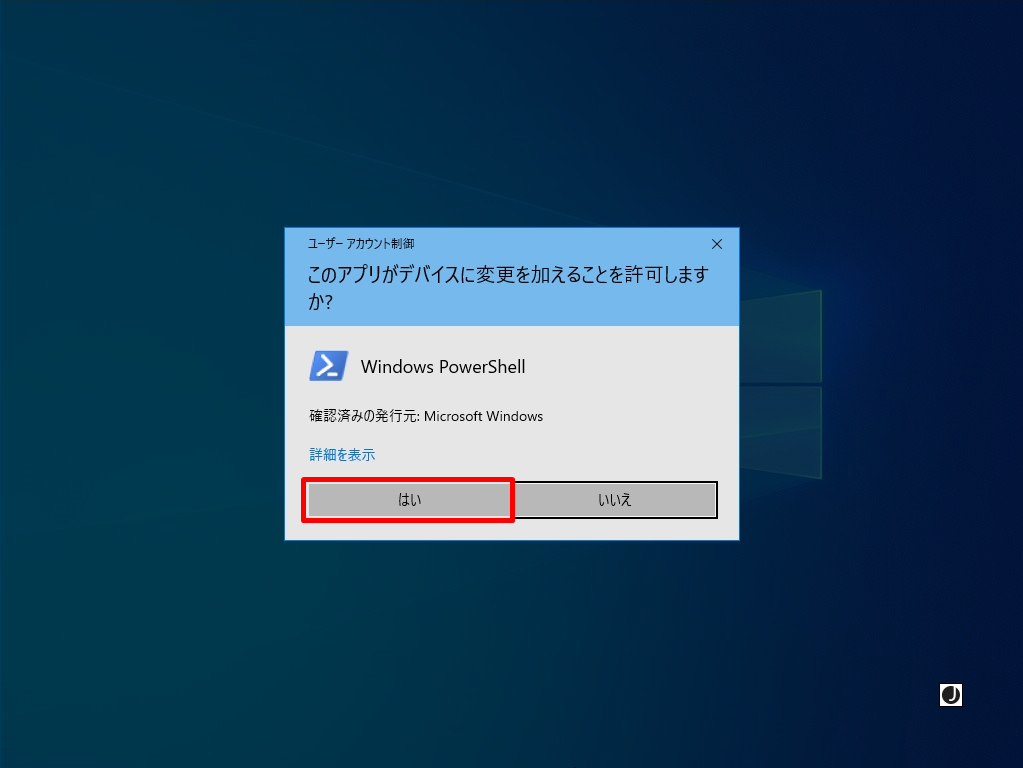
ユーザーアカウント制御画面:「はい」を選択します。
手順 4:
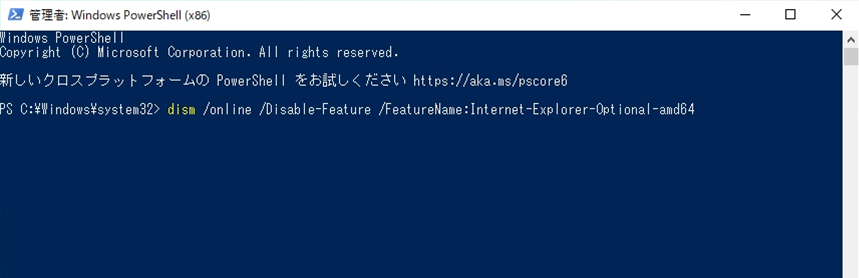
以下、コマンドを実行しInternet Explorer 11 をアンインストール(無効化)します。PowerShellコマンドを使用したIEの無効化手順はマイクロソフト公式サイトにも記載されています。
マイクロソフト公式サイトIE無効化手順:https://docs.microsoft.com/ja-jp/troubleshoot/browsers/disable-internet-explorer-windows
実行コマンド
dism /online /Disable-Feature /FeatureName:Internet-Explorer-Optional-amd64
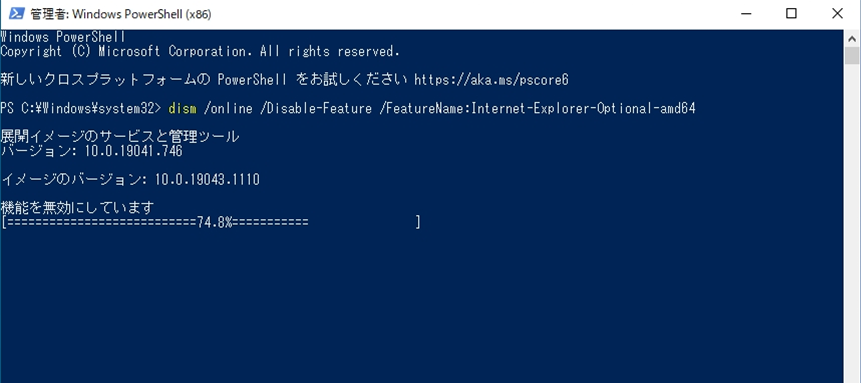
Internet Explorer 11のアンインストール(無効化)処理が開始されます。プロンプトが返ってくるまで少し待ちます。
手順 5:
プロンプト上に再起動するか表示されます。「Y」を入力します。
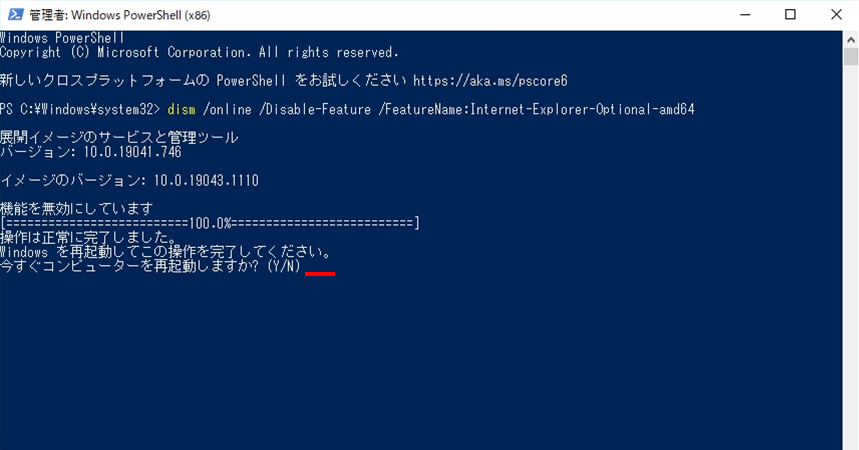
PCを再起動後、Internet Explorer 11のアンインストール(無効化)処理は完了です。