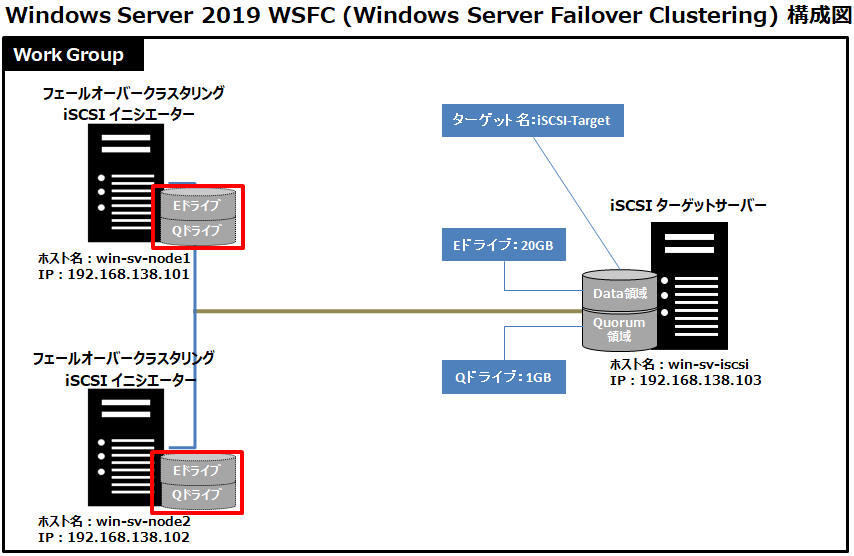
Windows Server 2019の高可用性 (High Availability)、WSFC(Windows Server Failover Clustering) を構築するための手順です。Windows Server 2012 R2以前のWindows Serverでは、フェイルオーバークラスターの作成にActive Directoryドメイン参加が必須でしたが、Windows Server 2012 R2 以降のOSであるWindows Server 2019 はドメイン参加は必須ではありません。WorkGroupで構築可能です。当例では以下の環境で設定します。
・WorkGroup(ワークグループ)環境を利用する
・クラスター構成ノードに2台のWindows Server 2019を用意する
・クラスター用の共有ストレージとしてData・Quorum(クォーラム)用の2つのネットワークストレージを作成するためにWindows Server 2019を1台用意する
・物理共有ストレージは用意しない
前回解説したiSCSIイニシエーター設定に続き、「ディスクの管理」からiSCSIネットワークストレージを初期化・オンラインにします。
iSCSIネットワークストレージマウント(Data領域)
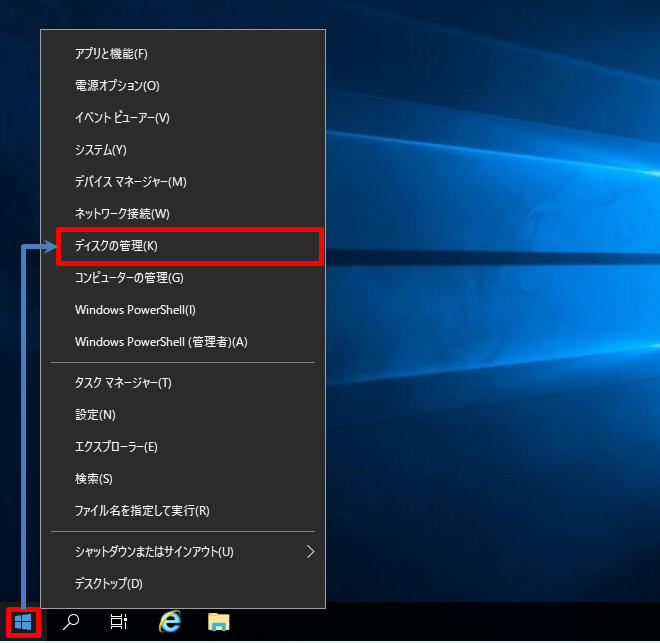
手順 1:
デスクトップ画面左下の「 Windowsアイコン」を右クリック -> 「ディスクの管理」を選択します。
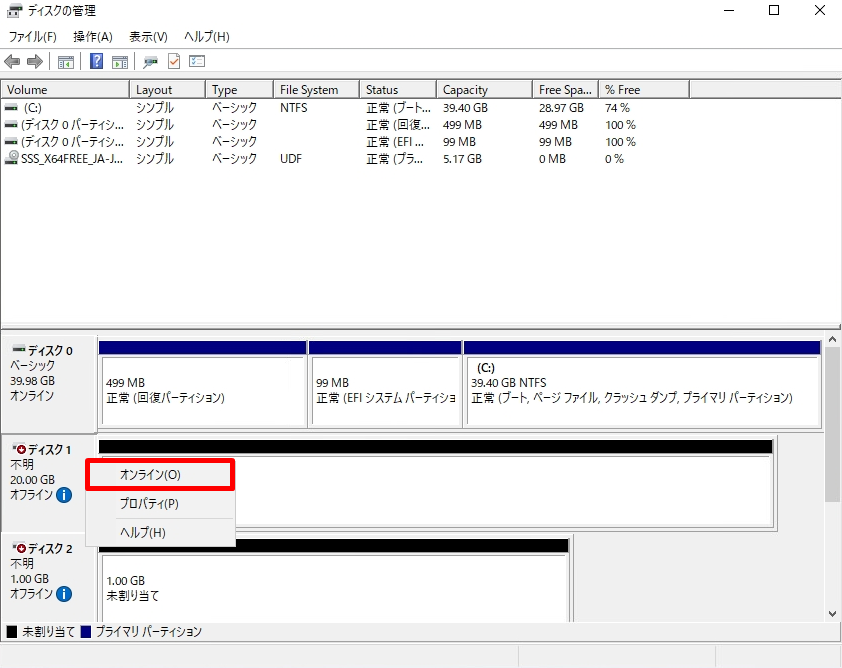
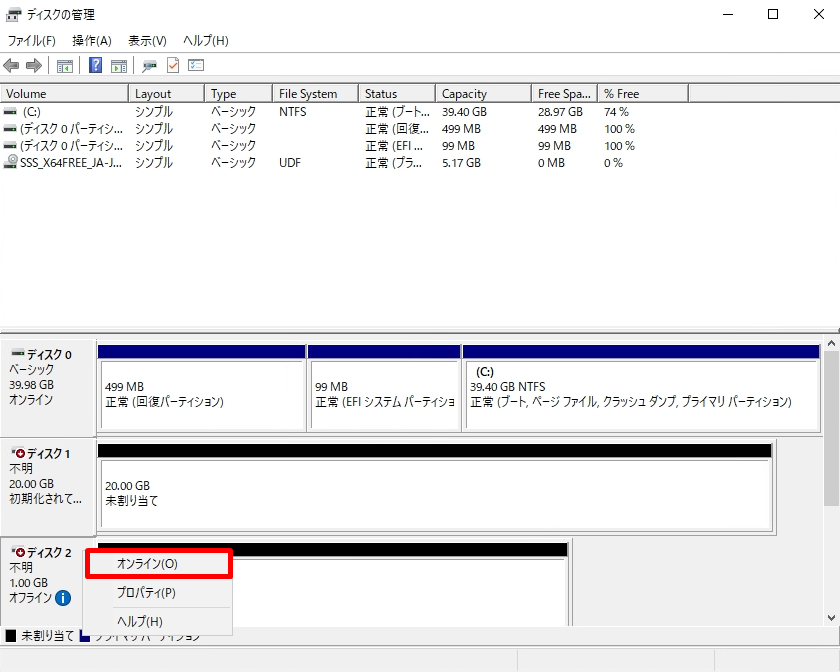
手順 2:
ディスク1 (Data領域)を選択 -> 「オンライン」を選択します。
手順 3:
ディスク2 (Quorum領域)を選択 -> 「オンライン」を選択します。
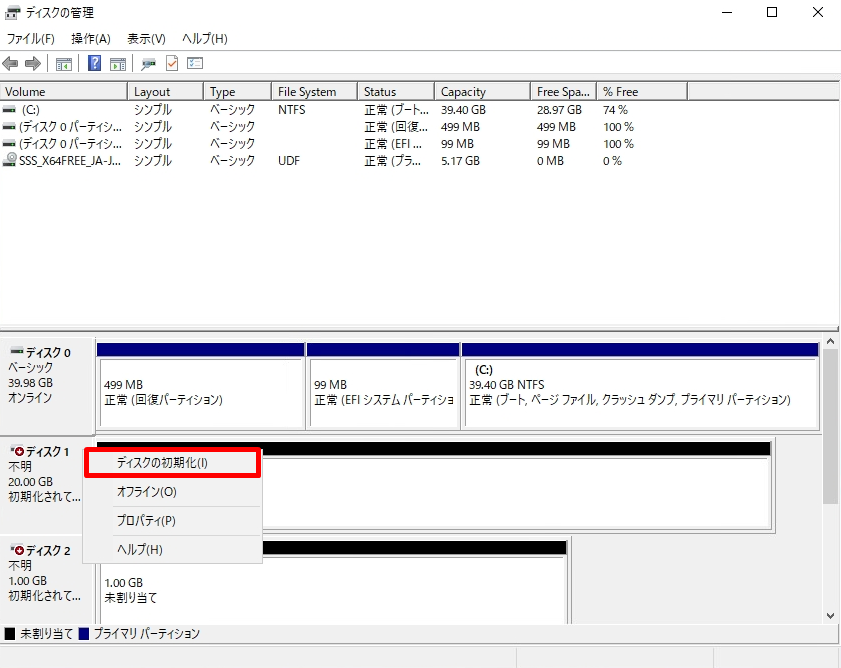
手順 4:
ディスク1 を選択 -> 「ディスクの初期化」を選択します。
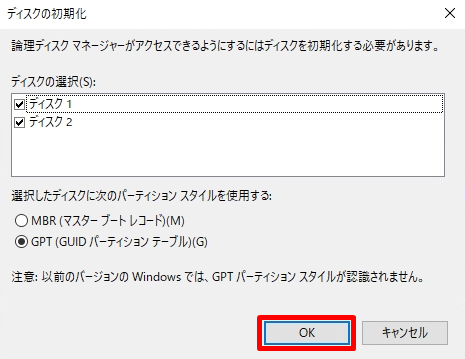
手順 5:
ディスクの初期化画面でディスク1(Data領域)、ディスク2(Quorum領域)のチェックが有効になっていることを確認 -> 「OK」を選択します。
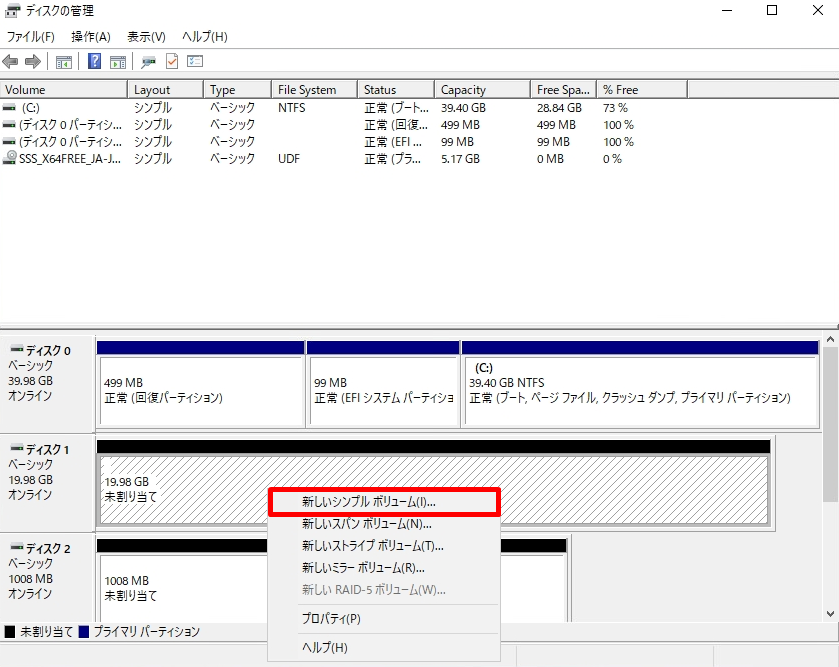
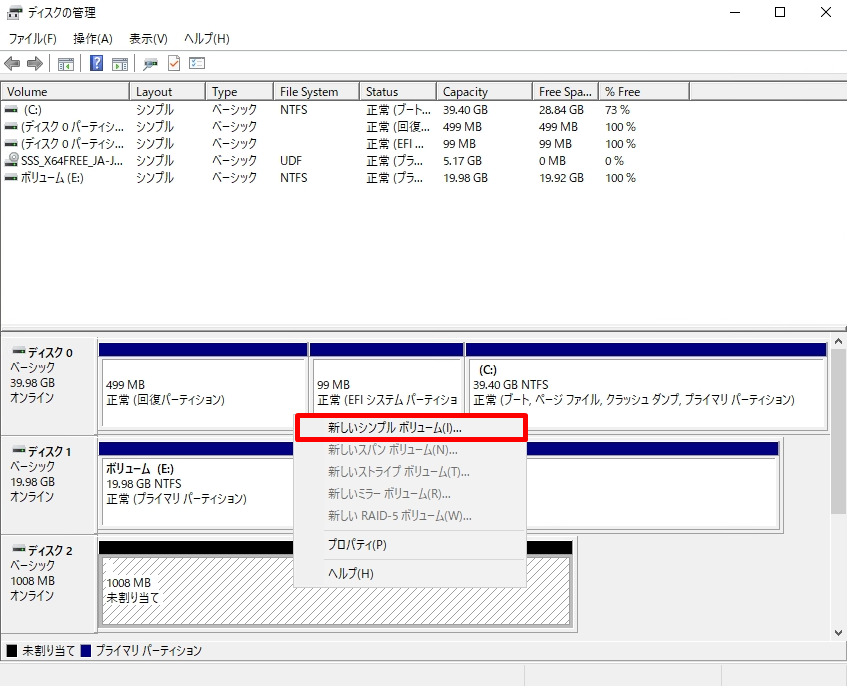
手順 6:
ディスクの未割り当てを選択 -> 「新しいシンプルボリューム」を選択します。
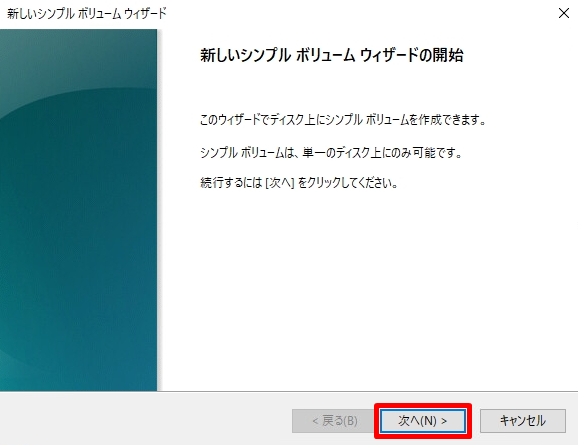
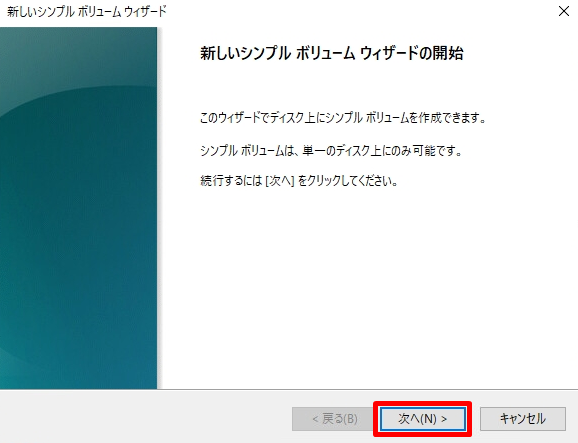
手順 7:
新しいシンプルボリュームウィザードの開始画面で「次へ」を選択します。
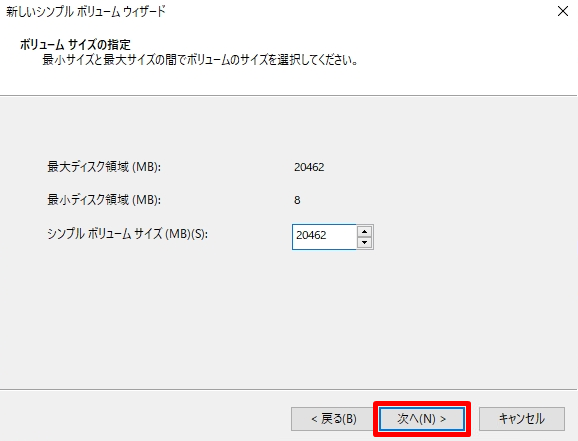
手順 8:
ボリュームサイズの指定画面で「次へ」を選択します。
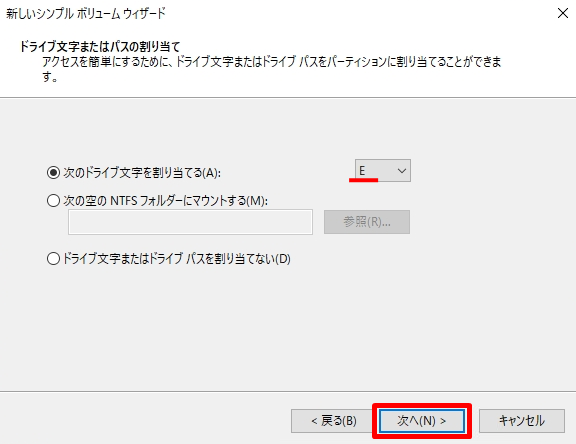
手順 9:
「 次のドライブ文字を割り当てる」 -> ドライブを選択します。
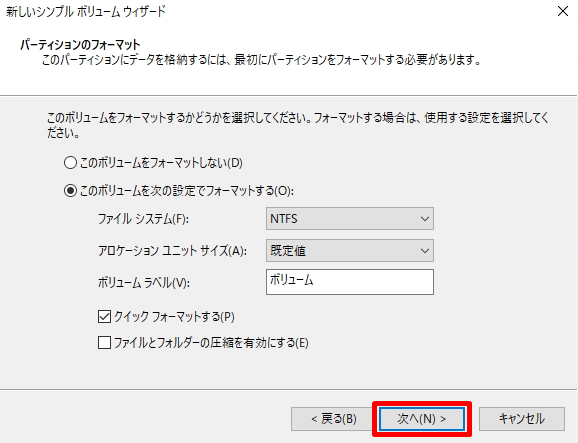
手順 10:
「 このボリュームを次の設定でフォーマットする」 ->パーティションのフォーマット画面で任意のボリュームラベルを入力 ->「次へ」を選択します。
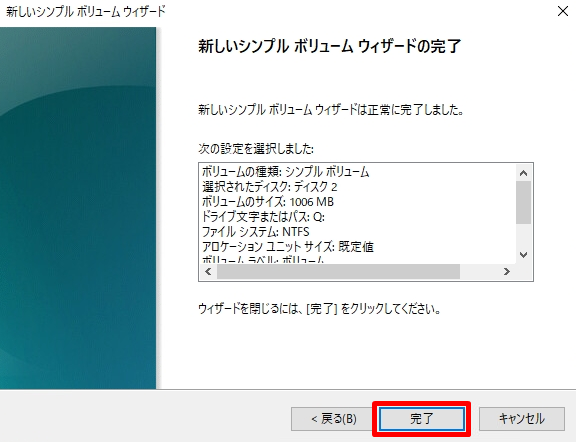
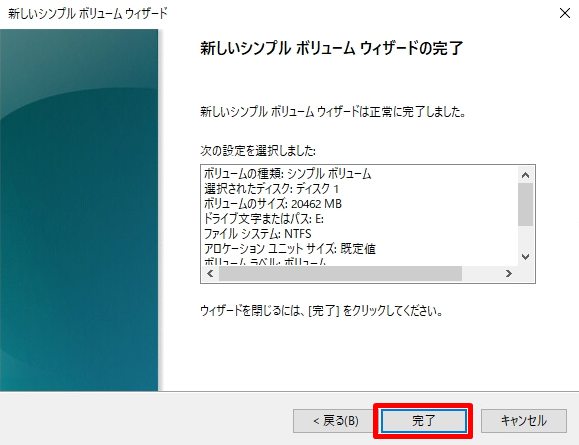
手順 11:
新しいシンプルボリュームウィザードの完了画面で「完了」を選択します。
iSCSIネットワークストレージマウント(Quorum領域)
手順 1:
ディスクの未割り当てを選択 -> 「新しいシンプルボリューム」を選択します。
手順 2:
新しいシンプルボリュームウィザードの開始画面で「次へ」を選択します。
手順 3:
ボリュームサイズの指定画面で「次へ」を選択します。

手順 4:
「 次のドライブ文字を割り当てる」 -> ドライブを選択します。

手順 5:
「 このボリュームを次の設定でフォーマットする」 ->パーティションのフォーマット画面で任意のボリュームラベルを入力 ->「次へ」を選択します。

手順 6:
新しいシンプルボリュームウィザードの完了画面で「完了」を選択します。