You can check the applied Windows Update updates (security patches) on a Windows 11 computer by displaying and outputting a list using the GUI and commands (PowerShell / command prompt). This article describes the procedure for checking 5 types of installed updates.
Update history display screen
Step 1:
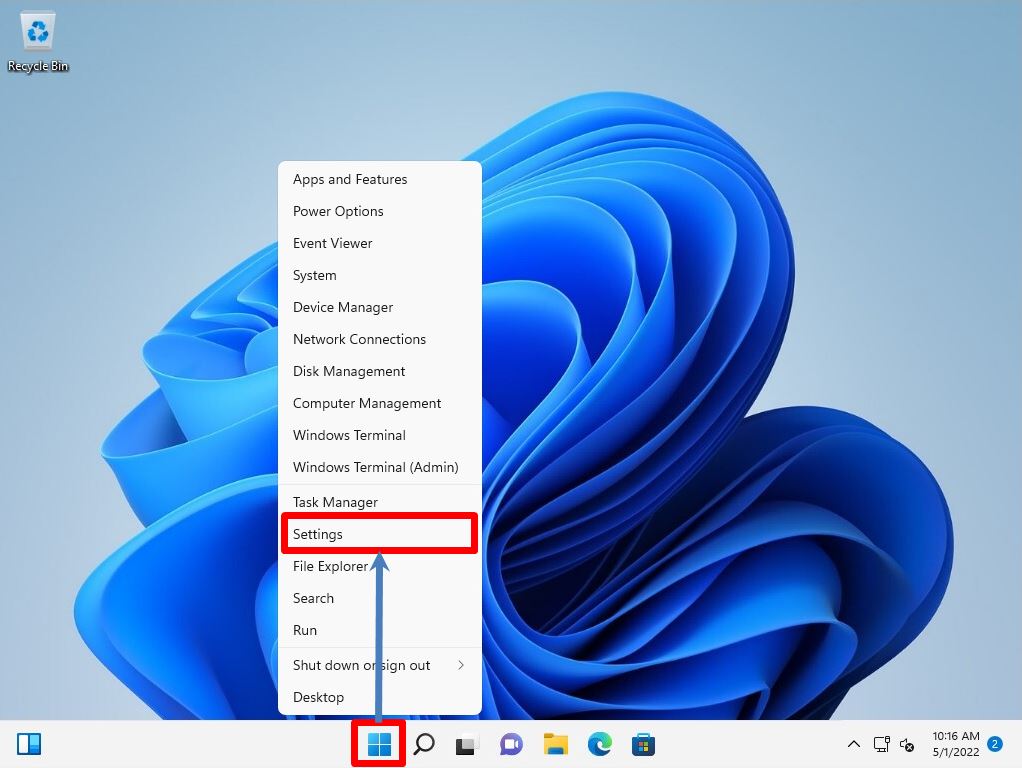
Right-click on the Windows mark –> select Settings.
Step 2:
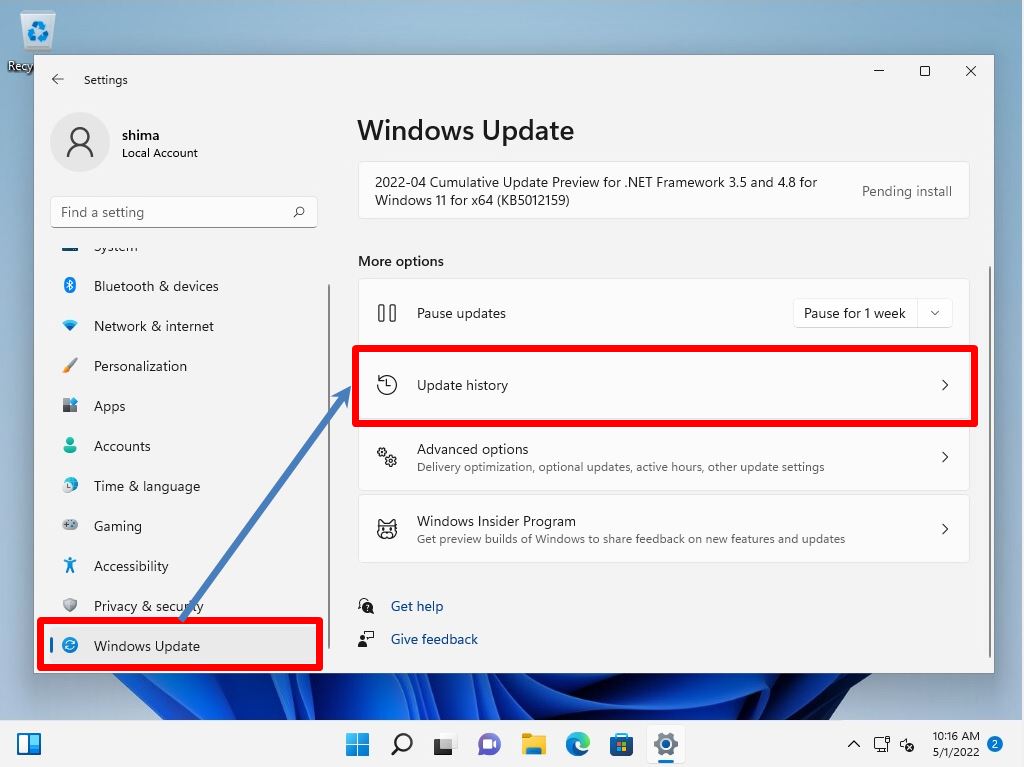
Select Windows Update -> Update history.
Step 3:
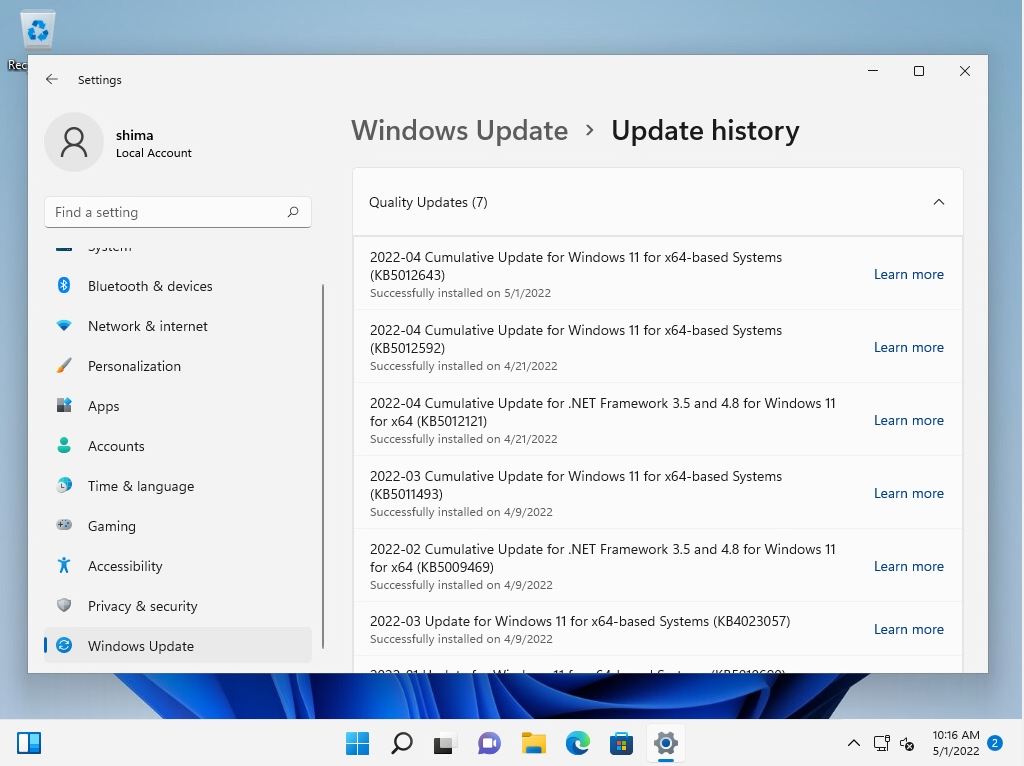
You can check the security patch with the installed KB number in “Update history” and the patch display list of the installation date and time.
Display screen for installed updates
Step 1:
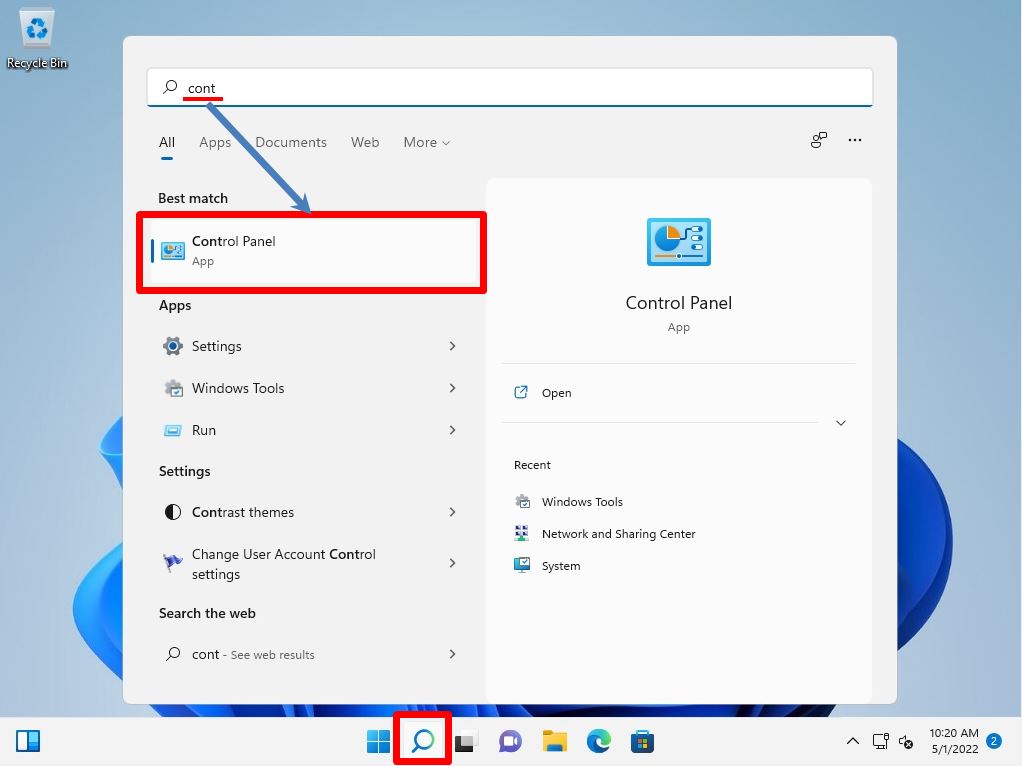
Type “cont” in the search box -> Select Control Panel.
Step 2:
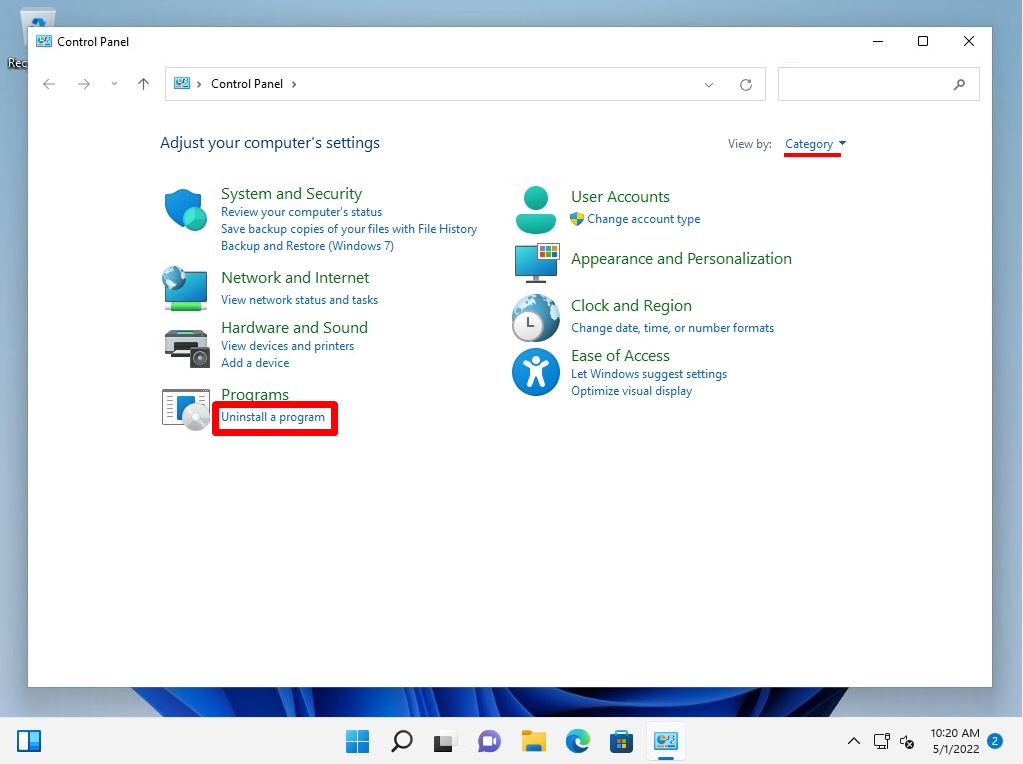
View by: Category -> Select Uninstall a program.
Step 3:
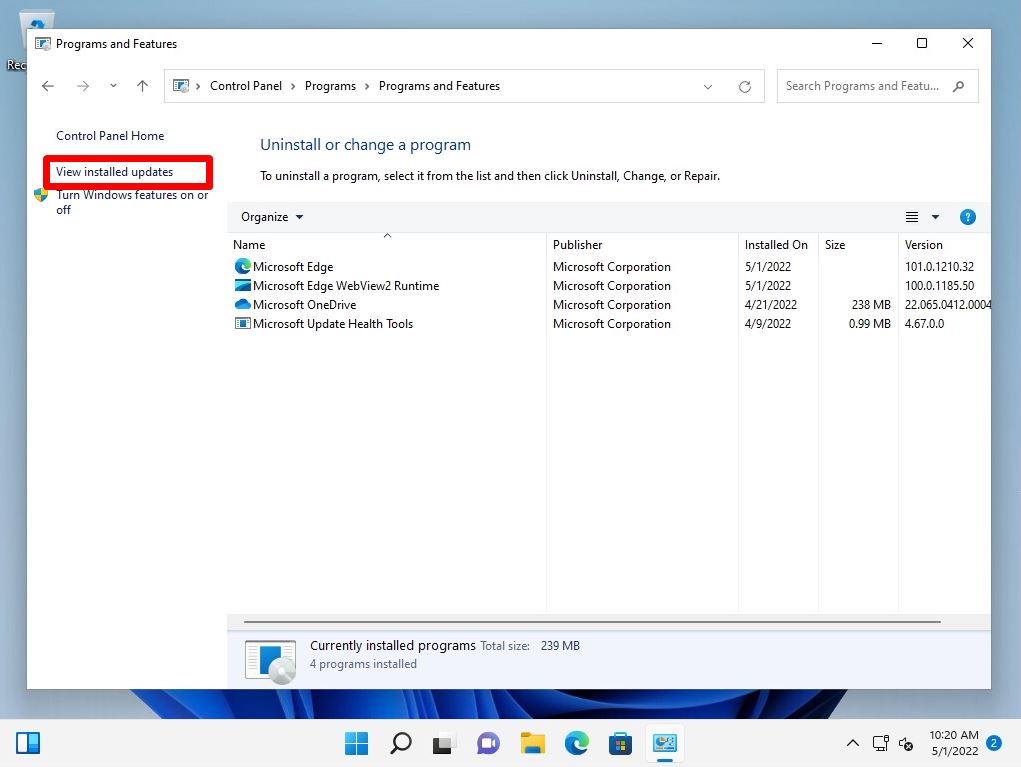
Select View installed updates.
Step 4:
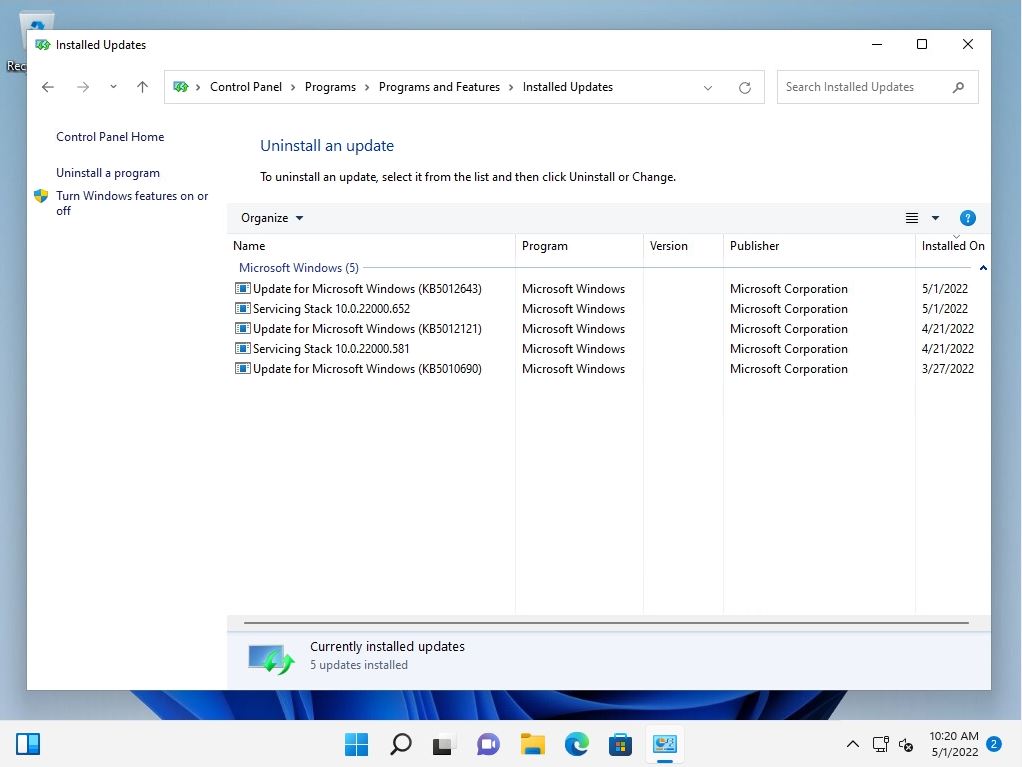
You can check the security patch with the installed KB number in “Installed Updates” and the patch display list of the installation date and time.
Event Viewer: Windows Log (System)
Step 1:
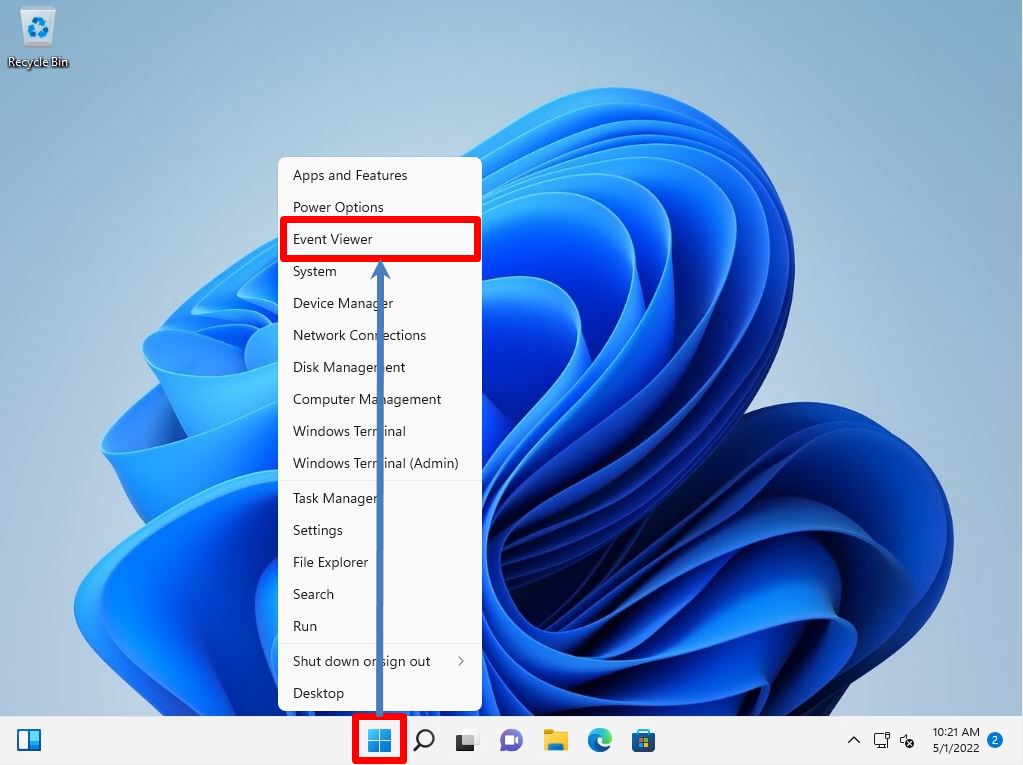
Right-click on the Windows mark –> select Event Viewer.
Step 2:
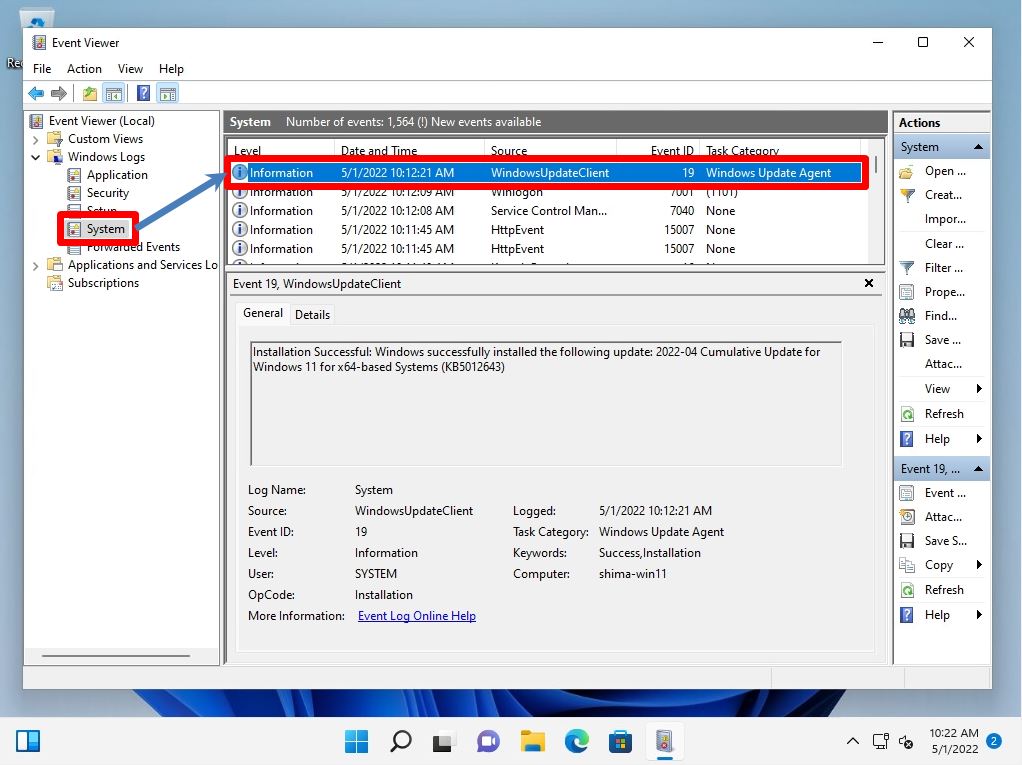
Select Event Viewer –> Windows Logs –> System.
Windows PowerShell: Get-Hotfix command
Step 1:
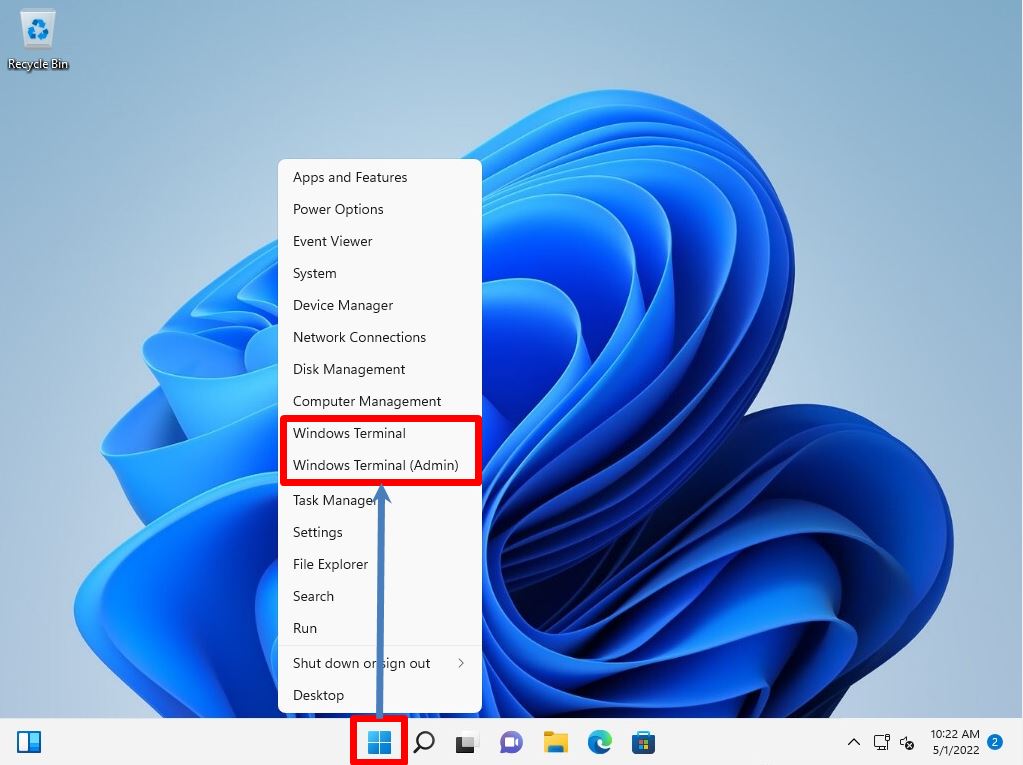
Right-click on the Windows mark –> select Windows Terminal.
Step 2:
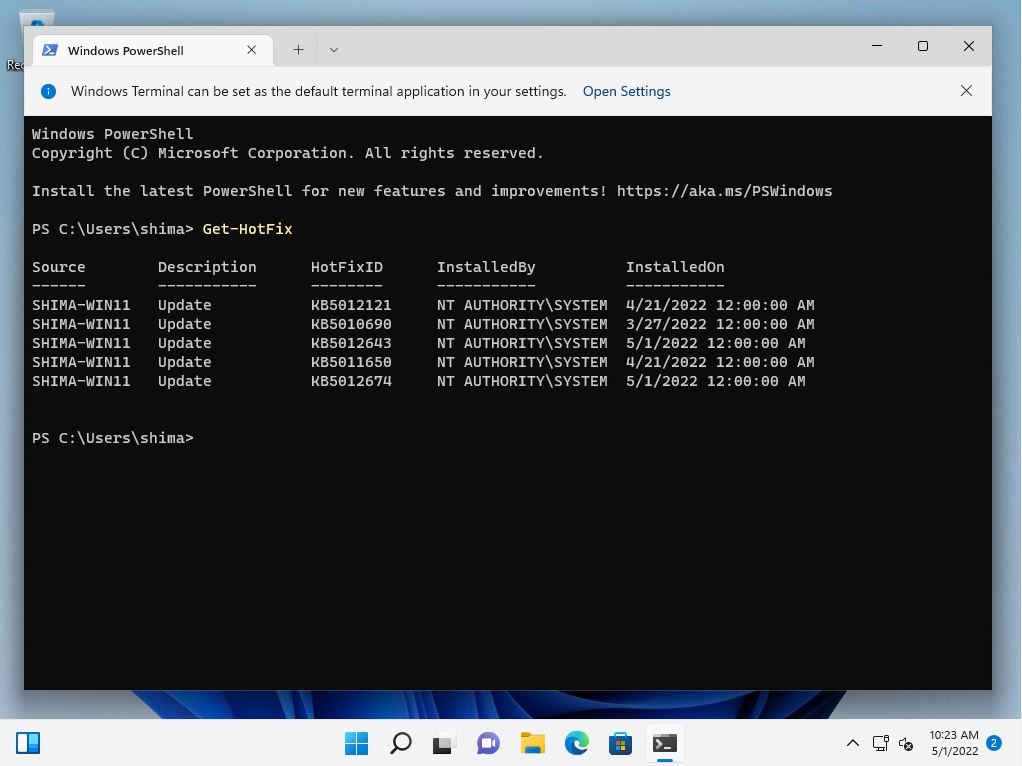
You can check the commands to be displayed and output by PowerShell with “Get-HotFix”. You can check the security patch with the installed KB number in “HotFix ID / Installed On” and the patch display list of the installation date and time.
Command prompt: wmic qfe command
Step 1:
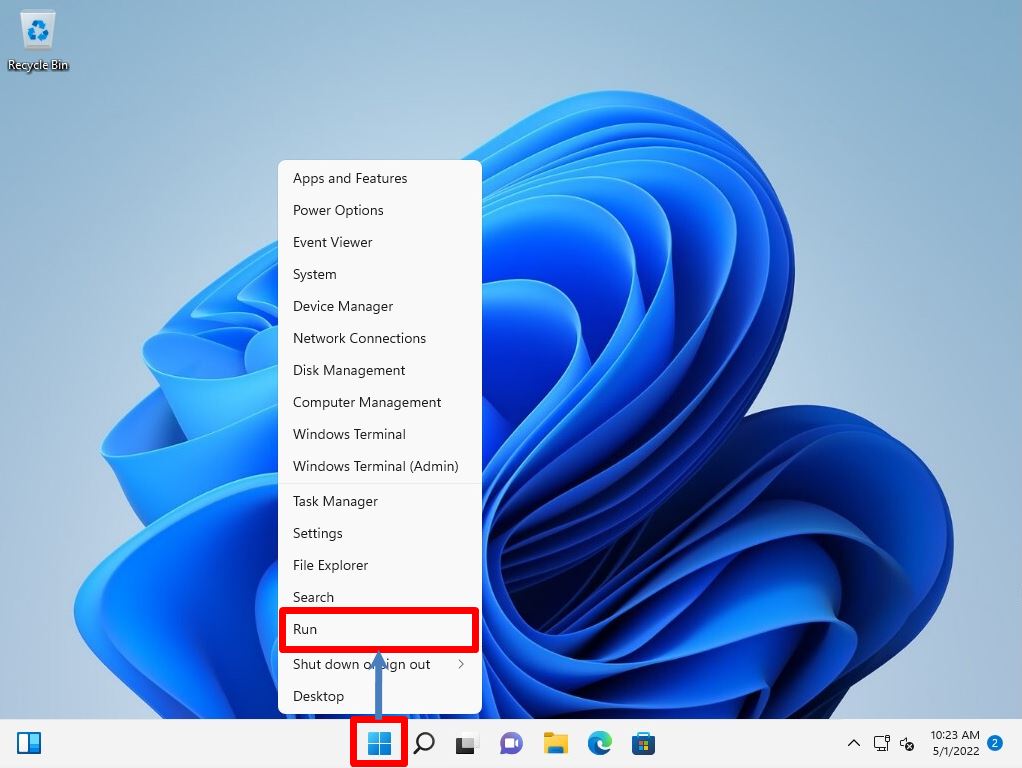
Right-click on the Windows mark –> select “Run”.
Step 2:
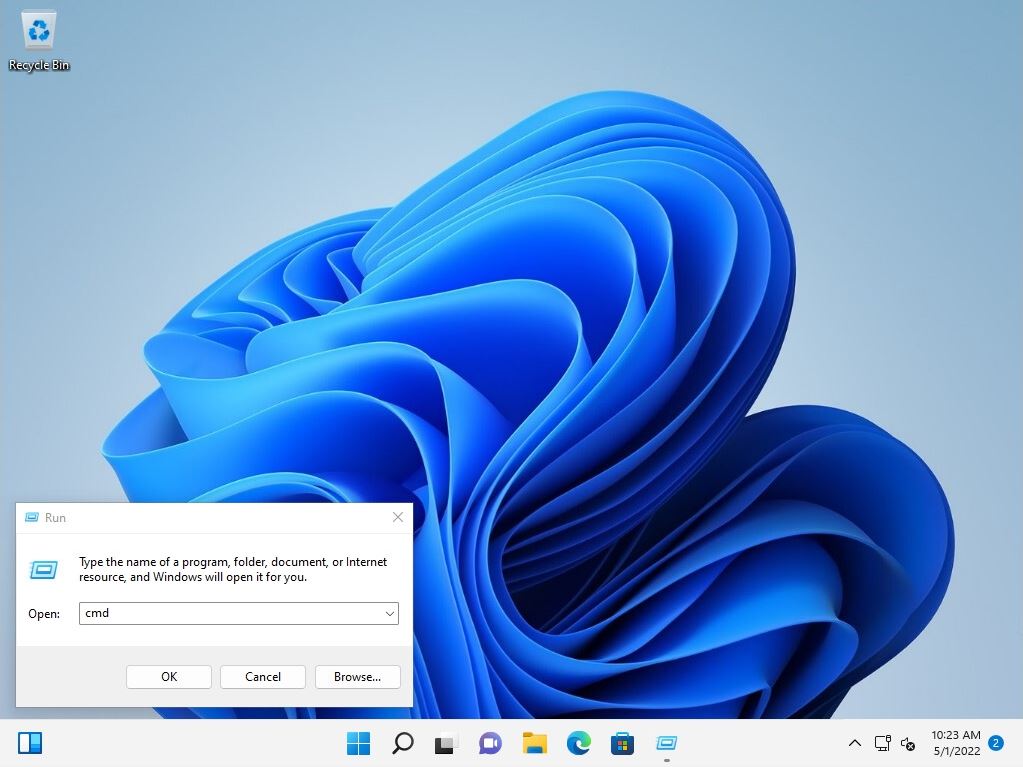
Enter cmd to start the command prompt.
Step 3:
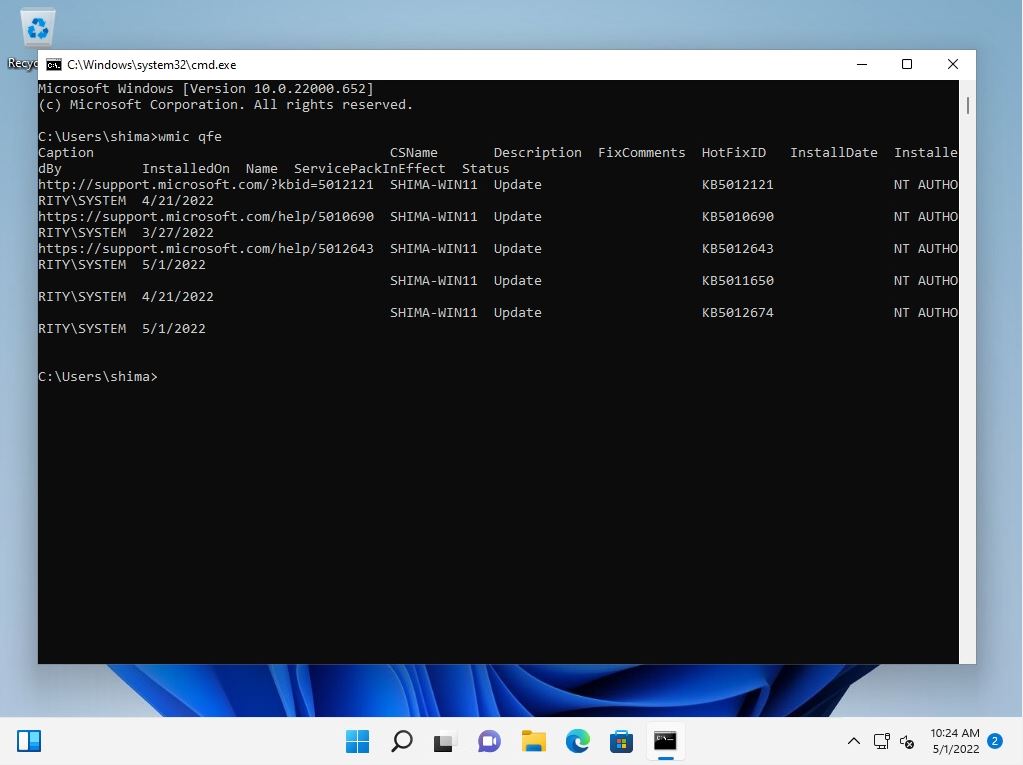
You can check the commands to be displayed and output at the command prompt with “wmic qfe”. You can check the security patch with the installed KB number in “HotFix ID / Installed On” and the patch display list of the installation date and time.
