Antivirus application software “Windows Defender” is installed in Windows 11 by default. It protects your computer by detecting and blocking malicious software such as virus & threat prevention, real-time protection, and ransomware prevention.
The Windows 11 “Windows Defender” described in this article can be run from four types: quick scan, full scan, custom scan, and offline scan. The differences between each scan are as follows.
- Quick scan: Check only folders where threats are often detected in your system
- Full scan: Check all files and programs on your hard disk
- Custom scan: Check folders in the specified drive (C drive, D drive, etc.), media such as USB memory, external hard disk, etc.
- Offline scan: Check for some malicious software that cannot be detected or deleted when the OS boots
The following describes how to execute Windows Defender Quick Scan, Full Scan, Custom Scan, and Offline Scan on a Windows 11 computer, and how to check the logs in Event Viewer after execution.
Windows 11 PC:Run Windows Defender Quick scan
Step 1:
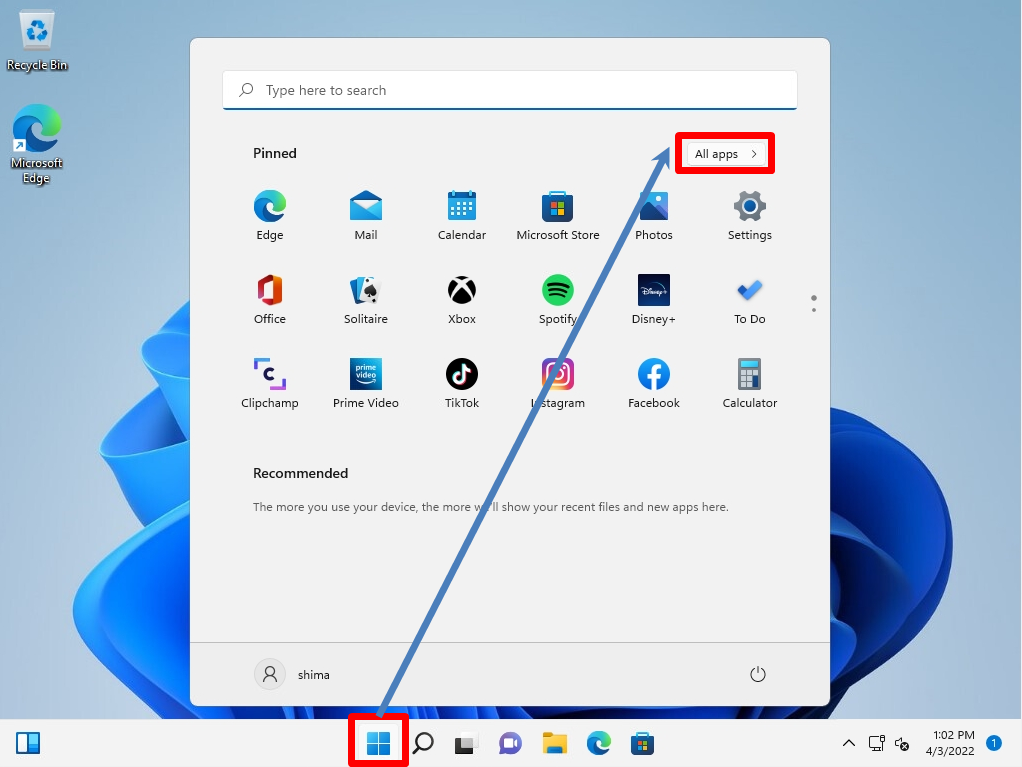
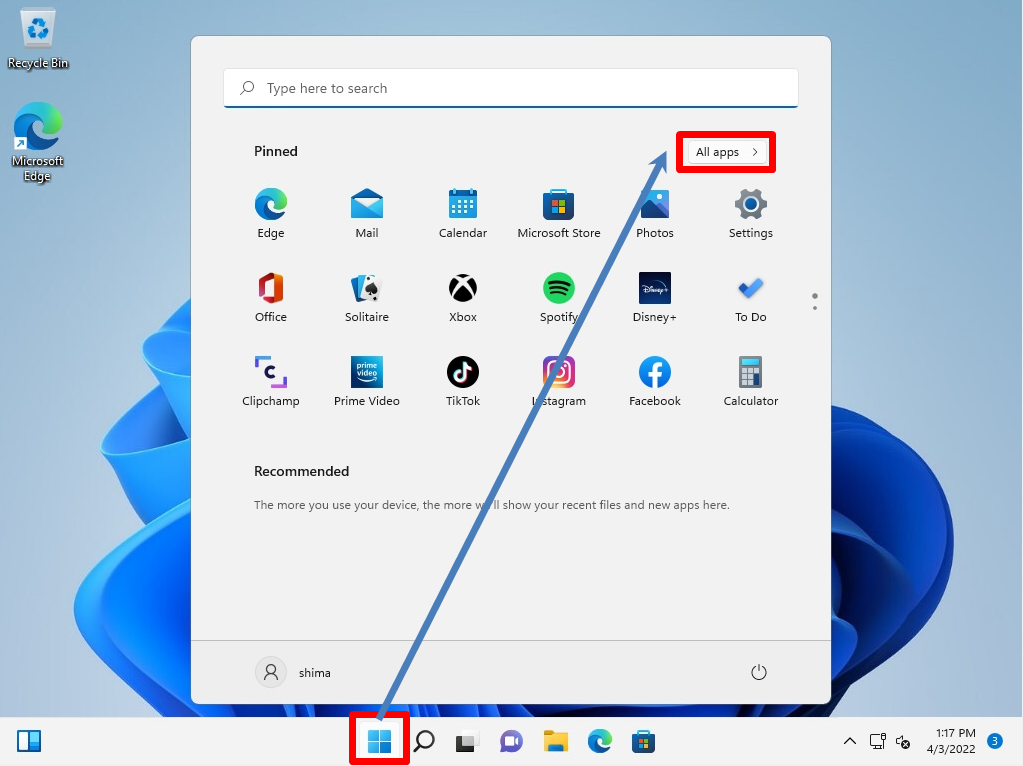
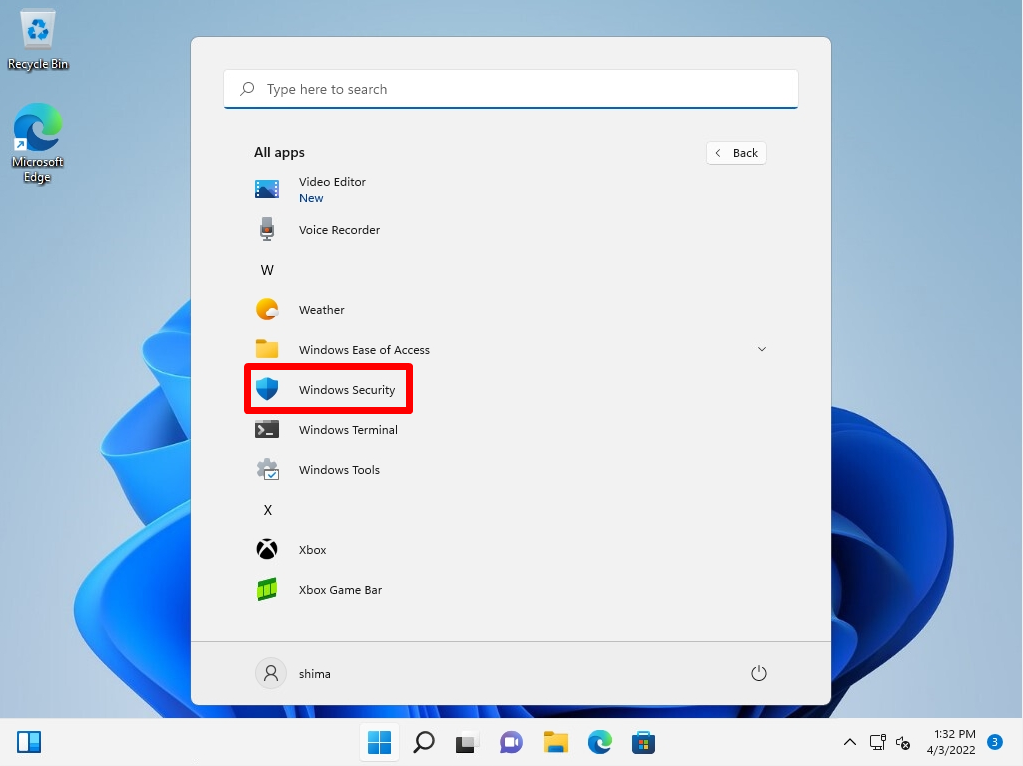
Click Taskbar Windows Mark –> Select All apps.

Step 2:
Select Windows Security.

Step 3:
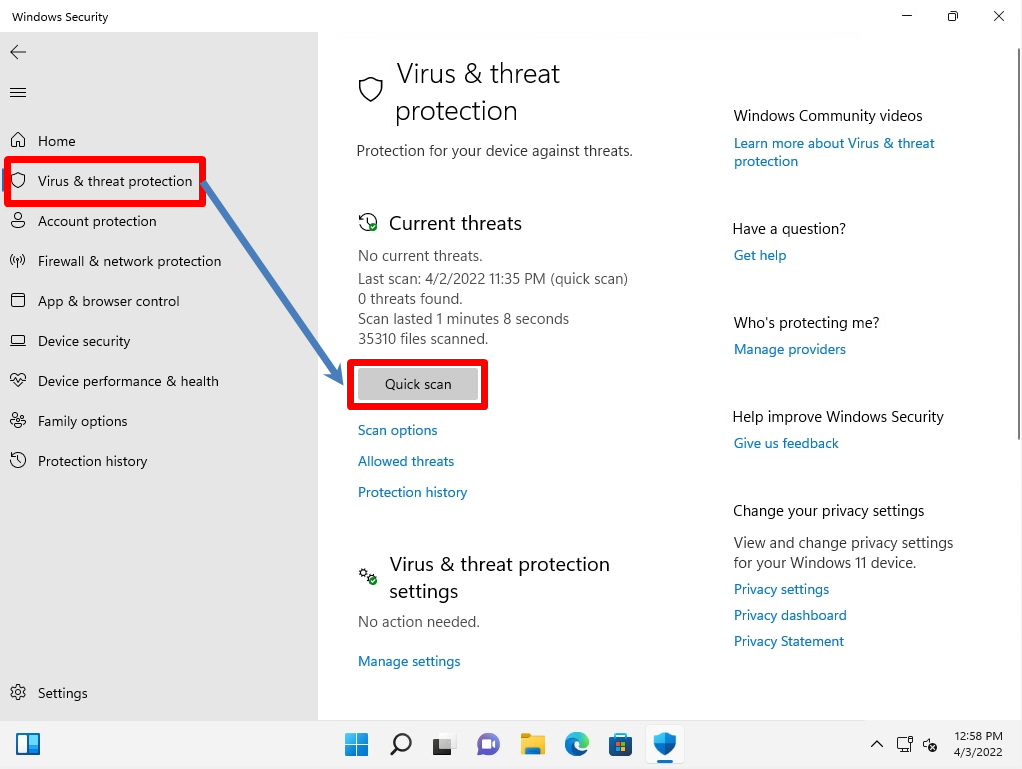
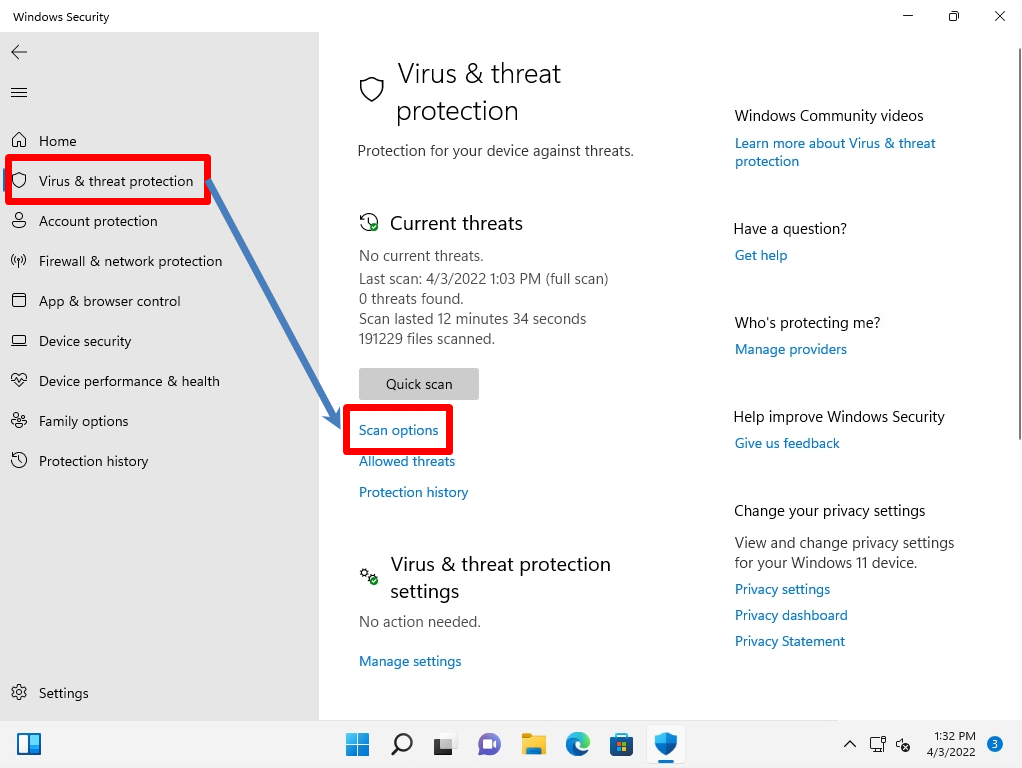
Click Virus & threat protection in the left pane –> select Quick scan.
*After executing the “Quick scan” button, the quick scan will start.
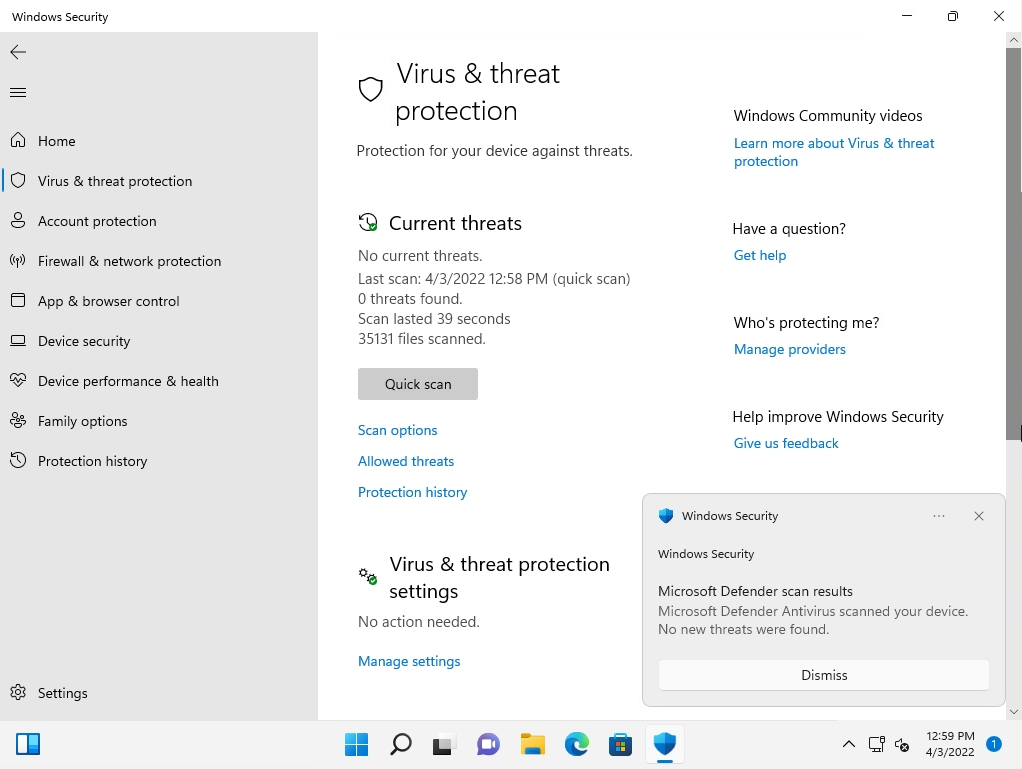
After the Windows Defender quick scan is complete, the results of the Windows Defender scan are printed.
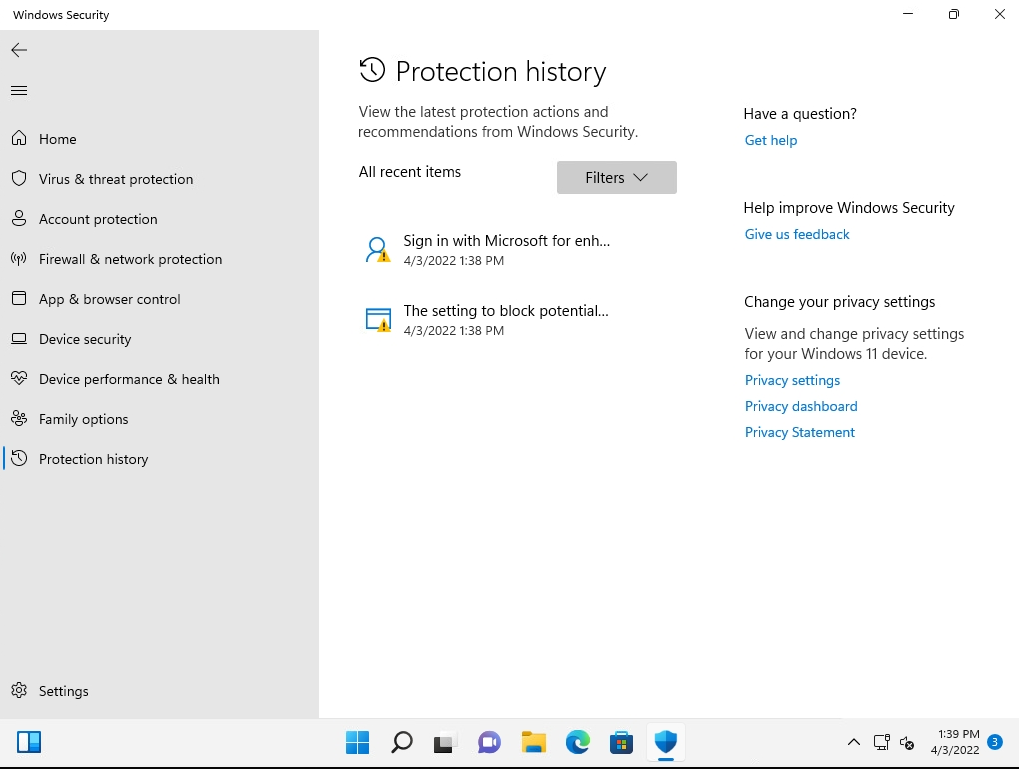
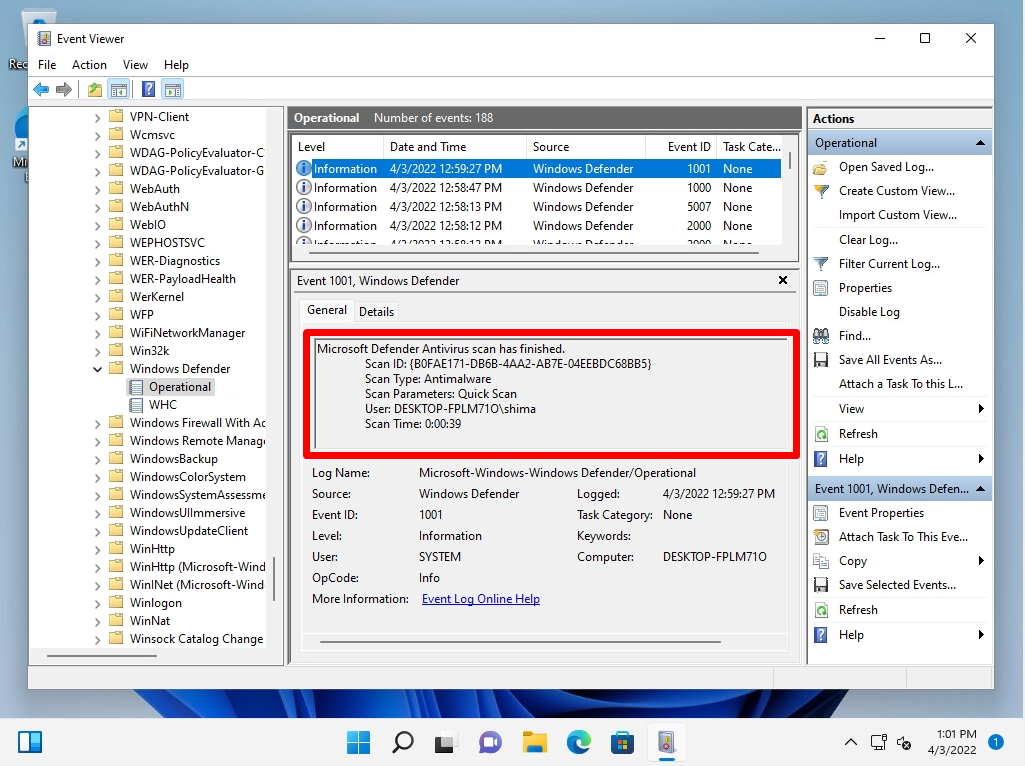
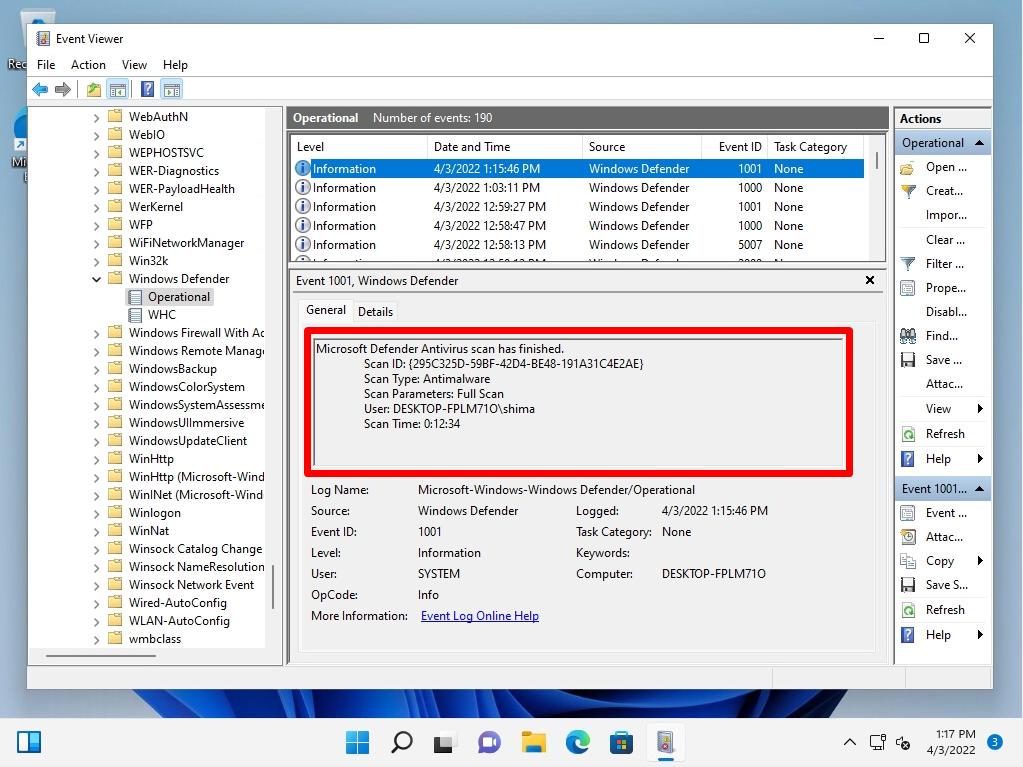
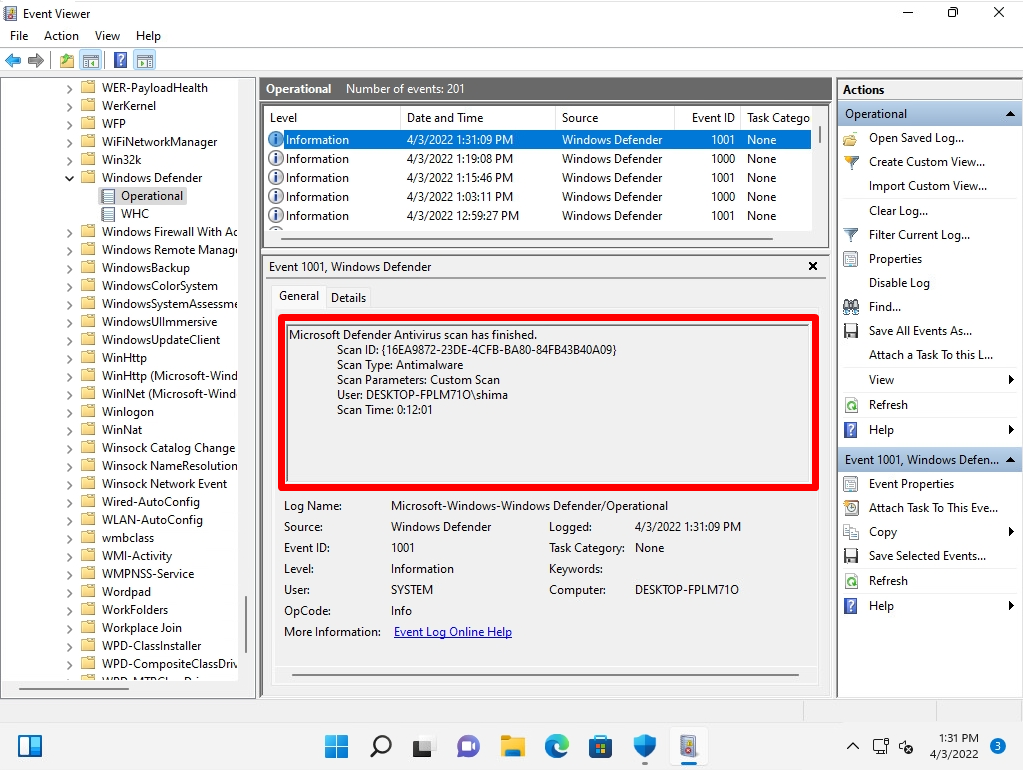
The Windows Defender quick scan results are output to Event Viewer. You can check the “scan type”, “scan time”, etc. in the log. If you want to see the log history from the event log, go to Windows Defender-> Operational. The location of the log history details is as follows. * It is output to the same location even when full scan or custom scan is executed.
Event Viewer
-Applications and service logs
-Microsoft
-Windows
-Windows Defender
-Operational
Windows 11 PC:Windows Defender full scan execution
Step 1:
Click Taskbar Windows Mark –> Select All apps.
Step 2:
Select Windows Security.

Step 3:
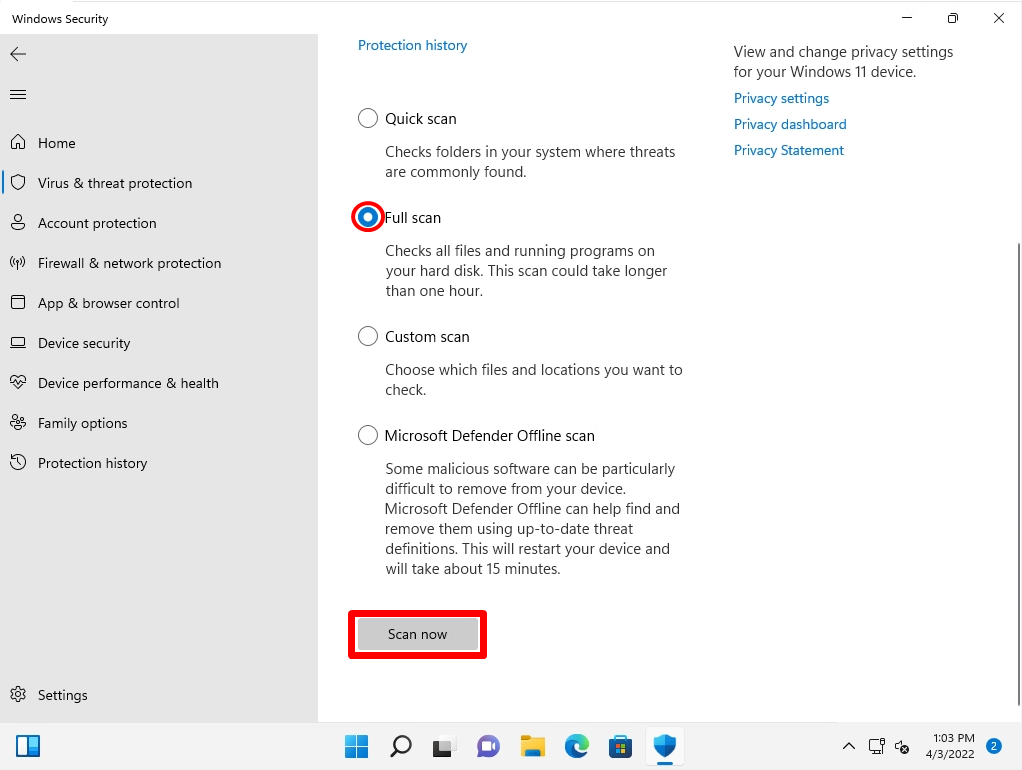
Click Virus & threat protection in the left pane –> select Scan options.

Step 4:
Select Full scan –> Scan now to run.
*After executing the “Scan now” button, the full scan will start.
After a full Windows Defender scan, the results of the Windows Defender scan will be printed on the scan options screen.
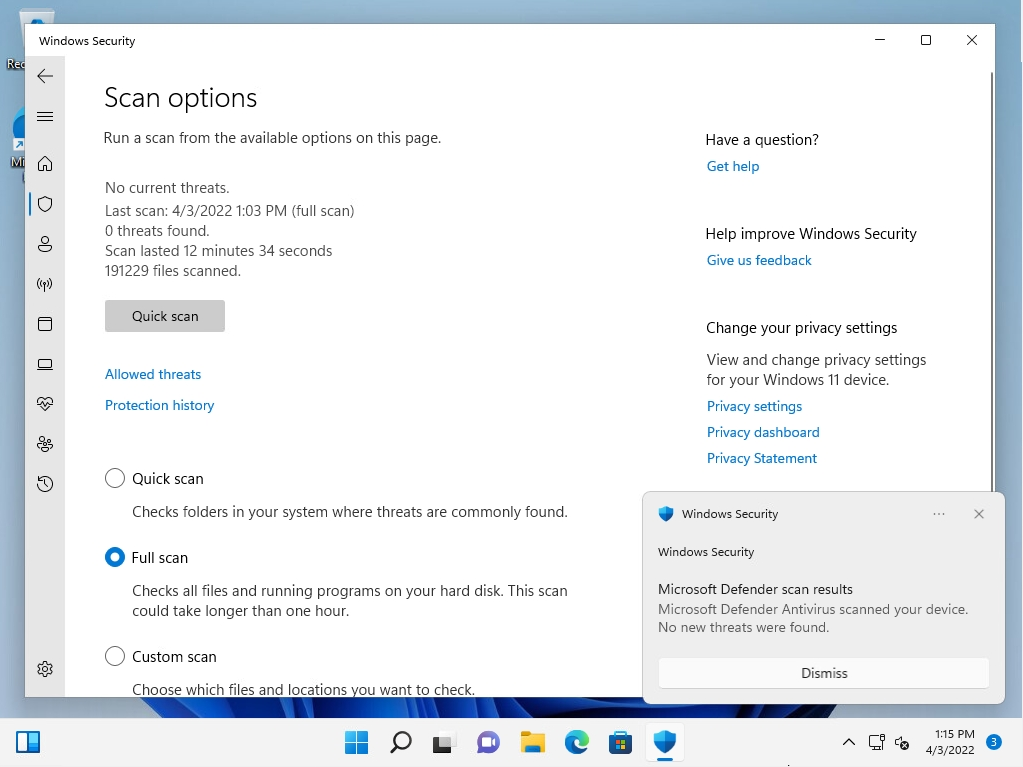
The full scan result of Windows Defender is output to the event viewer. You can check the “scan type”, “scan time”, etc. in the log. If you want to see the log history from the event log, go to Windows Defender-> Operational. The location of the log history details is as follows. * It is output to the same location when executing quick scan or custom scan.
Event Viewer
-Applications and service logs
-Microsoft
-Windows
-Windows Defender
-Operational
Windows 11 PC:Windows Defender Custom scan execution
Step 1:
Click Taskbar Windows Mark –> Select All Apps.
Step 2:
Select Windows Security.

Step 3:
Click Virus & threat protection in the left pane –> select Scan options.

Step 4:
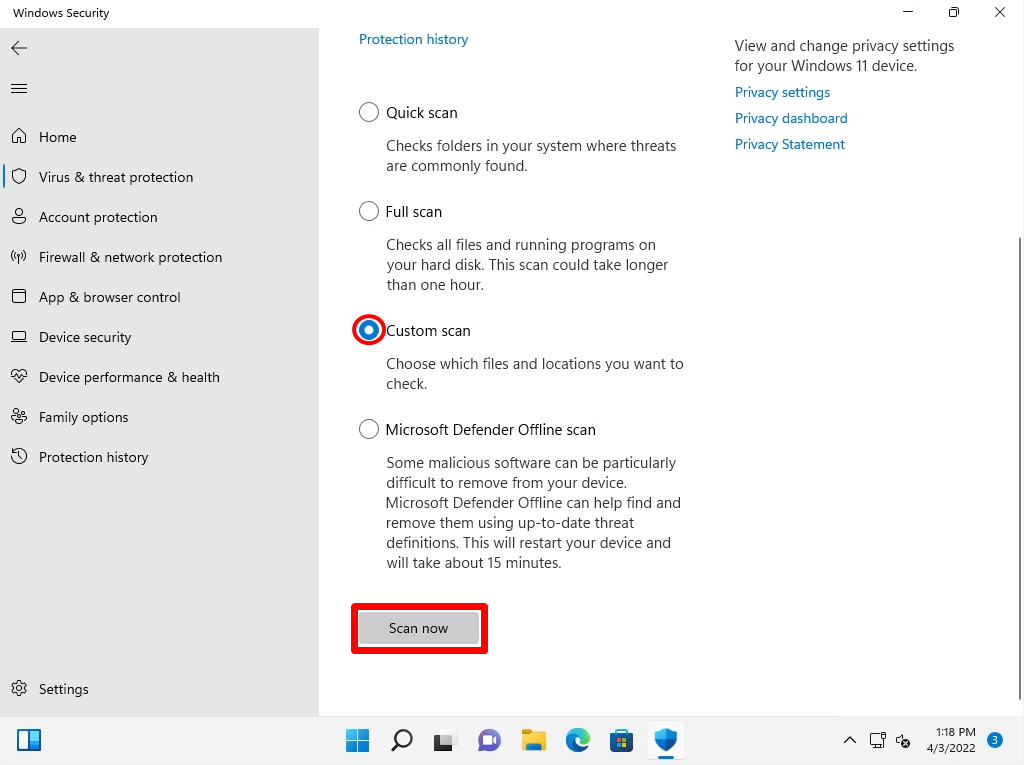
Select Custom scan –> Scan now.
Step 5:
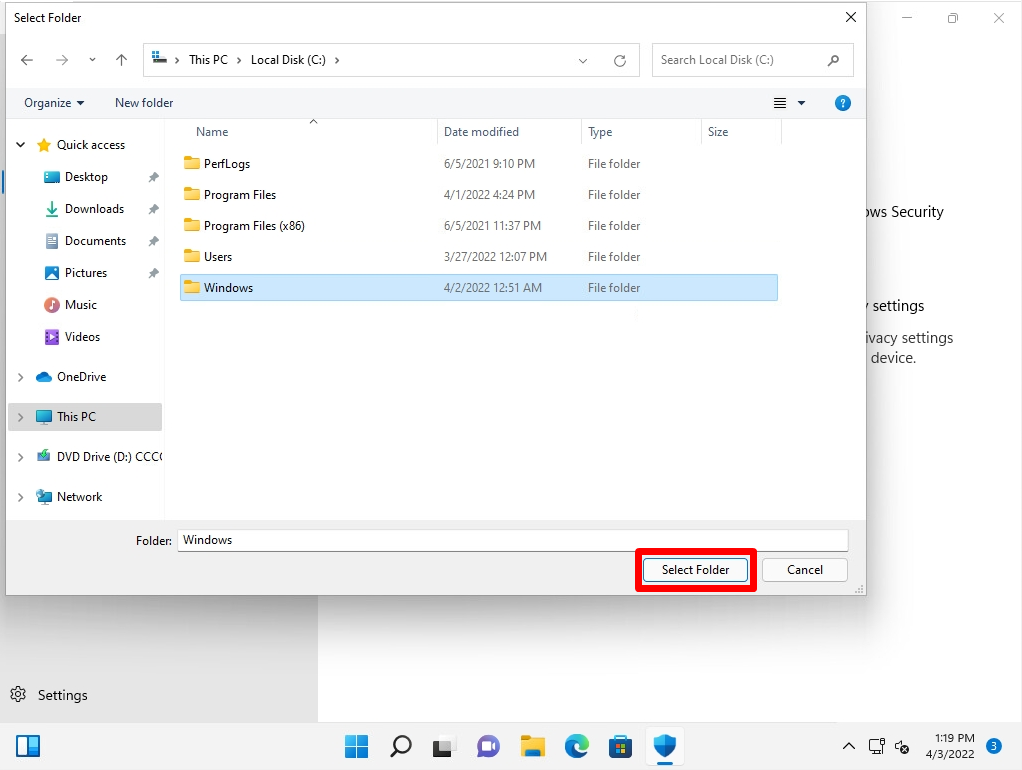
Select the folder in the specified drive (C drive, D drive, etc.), USB memory, external hard disk, or other media.
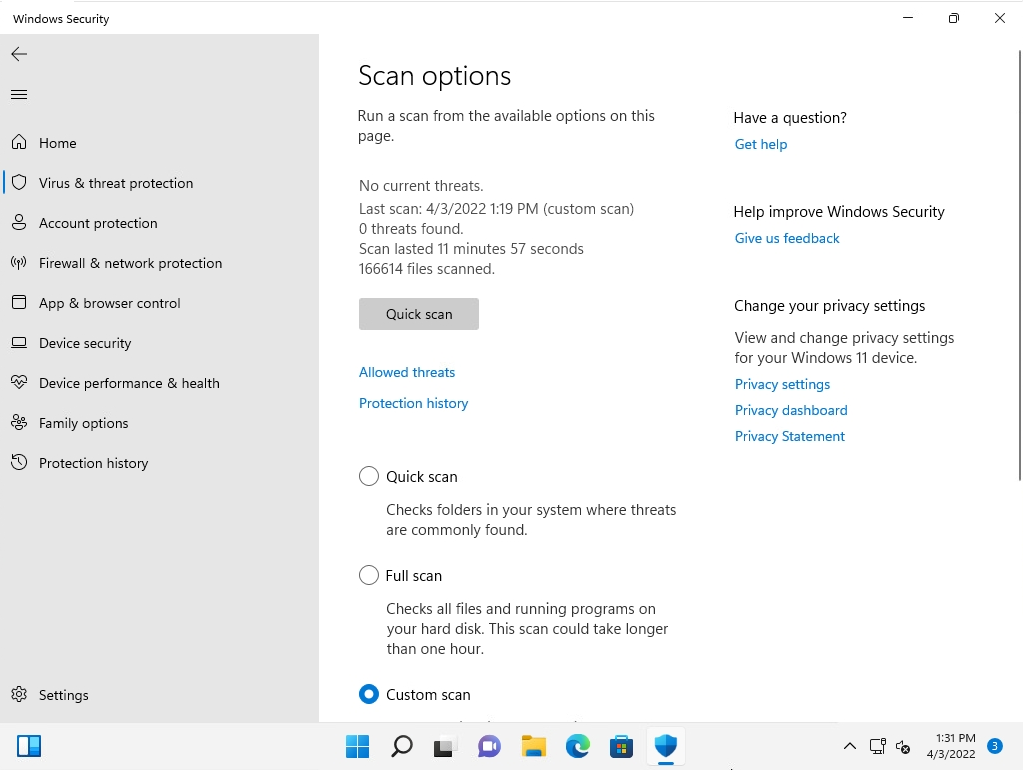
After completing a custom Windows Defender scan, the results of the Windows Defender scan will be printed on the scan options screen.
Windows Defender custom scan results are output to Event Viewer. You can check the “scan type”, “scan time”, etc. in the log. If you want to see the log history from the event log, go to Windows Defender-> Operational. The location of the log history details is as follows. * It is output to the same location even when quick scan / full scan is executed.
Event Viewer
-Applications and service logs
-Microsoft
-Windows
-Windows Defender
-Operational
Windows 11 PC:Windows Defender offline scan execution
step 1:
Click Taskbar Windows Mark –> Select All apps.

Step 2:
Select Windows Security.
Step 3:
Click Virus & threat protection in the left pane –> select Scan options.
Step 4:
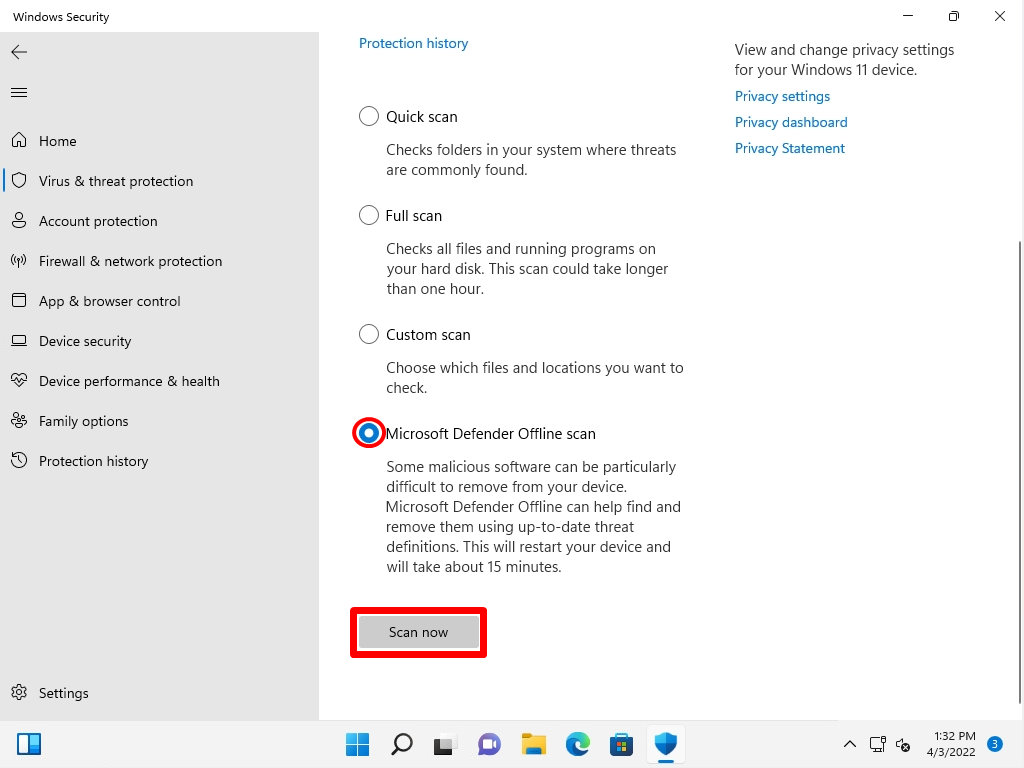
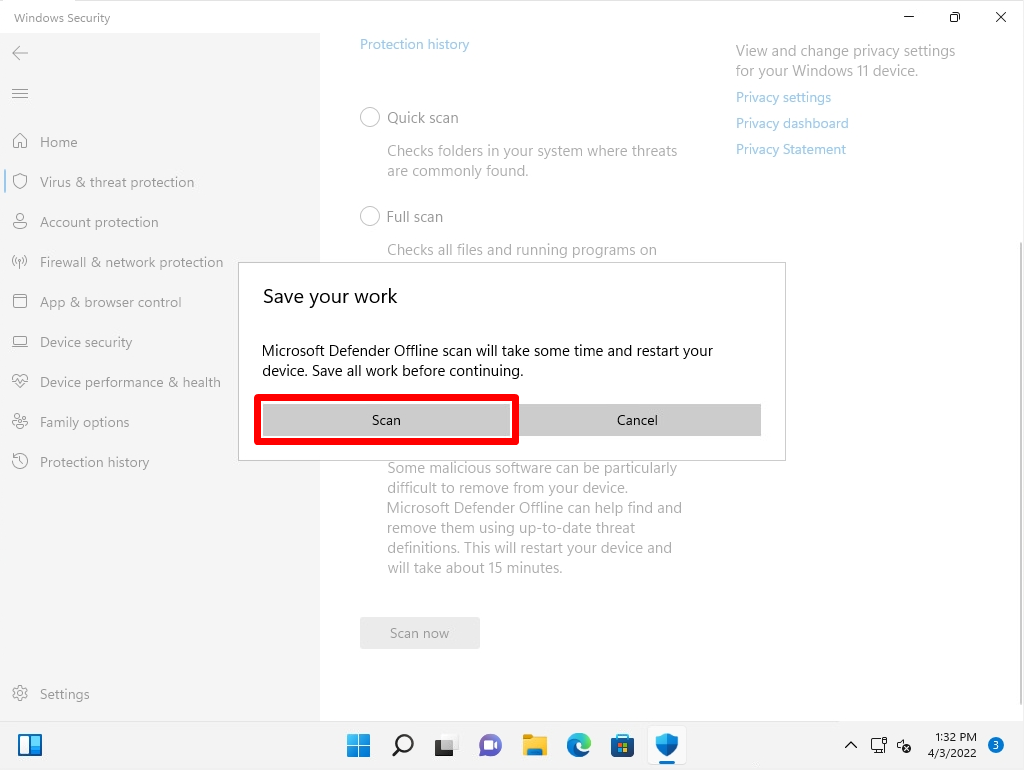
Select Microsoft Defender Offline Scan –> Scan now.
Step 5:
Save all your work and select Scan before restarting the device.
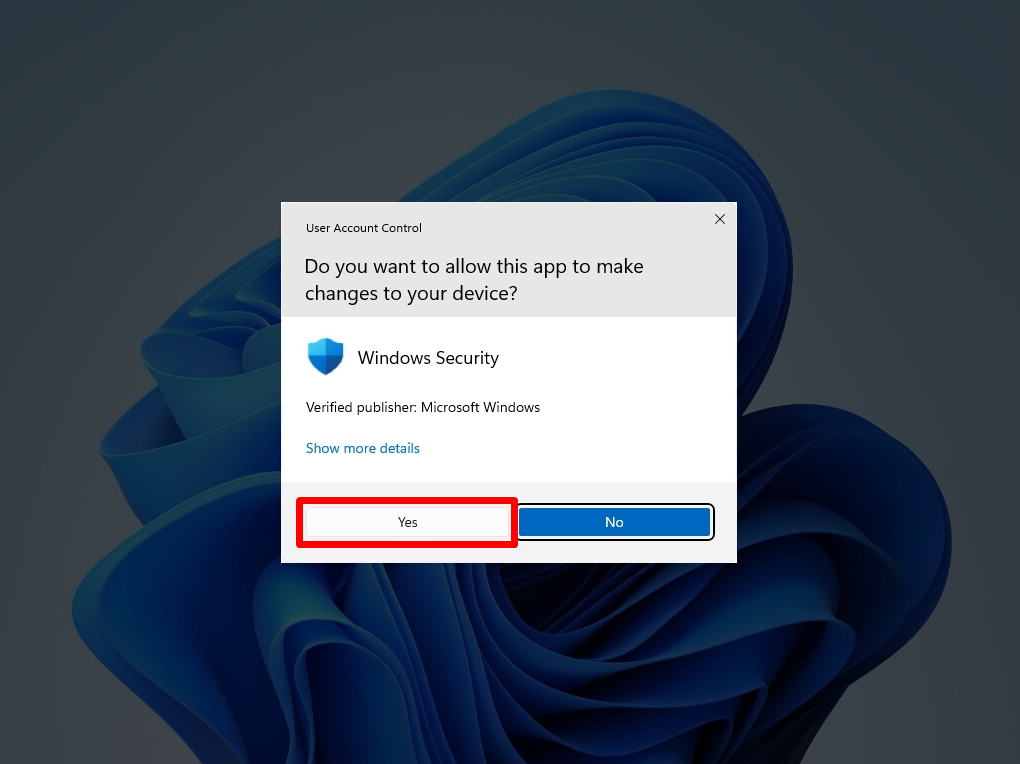
Step 6:
User Account Control screen -> Select Yes.
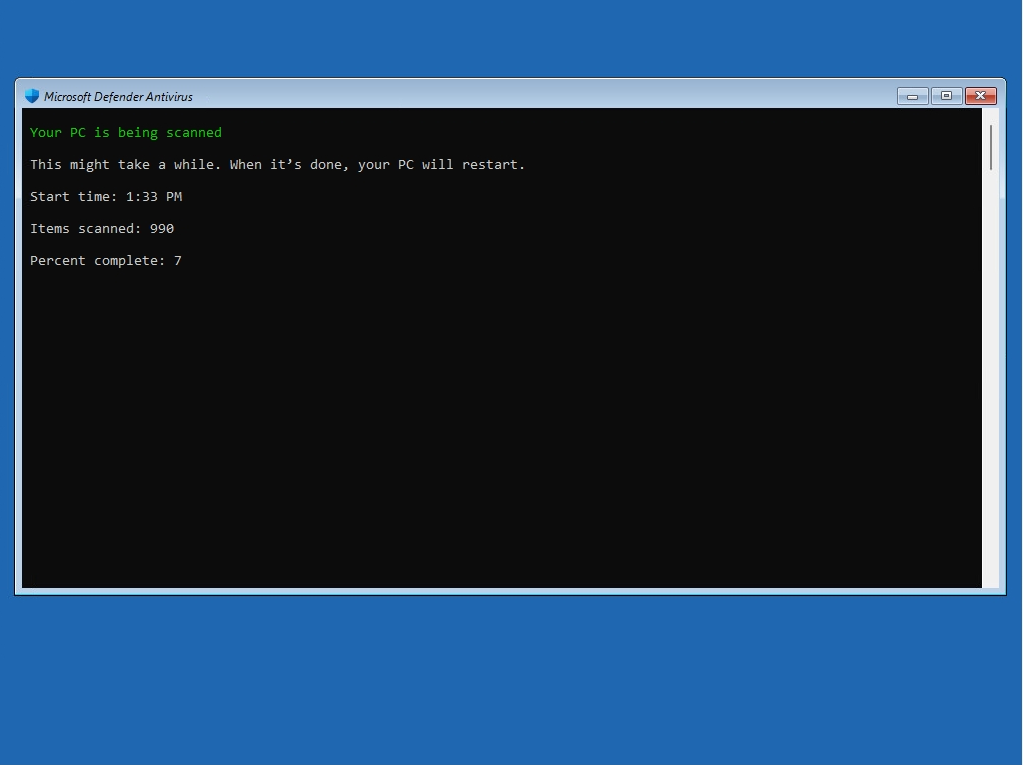
The processing time for Microsoft Defender offline scans depends on your PC. Wait a moment for the scanning process to finish.
The results of running a Windows Defender offline scan are displayed in the Protection History. If no virus is detected, nothing will be displayed.