This section describes how to check the private IP address of the terminal used by Windows Server 2019 and how to change the IP address manually. The private IP address corresponds to the address assigned to the terminal. This article explains how to check and set using GUI and command (ipconfig).
Windows Server 2019: IP address confirmation using GUI
Step 1:
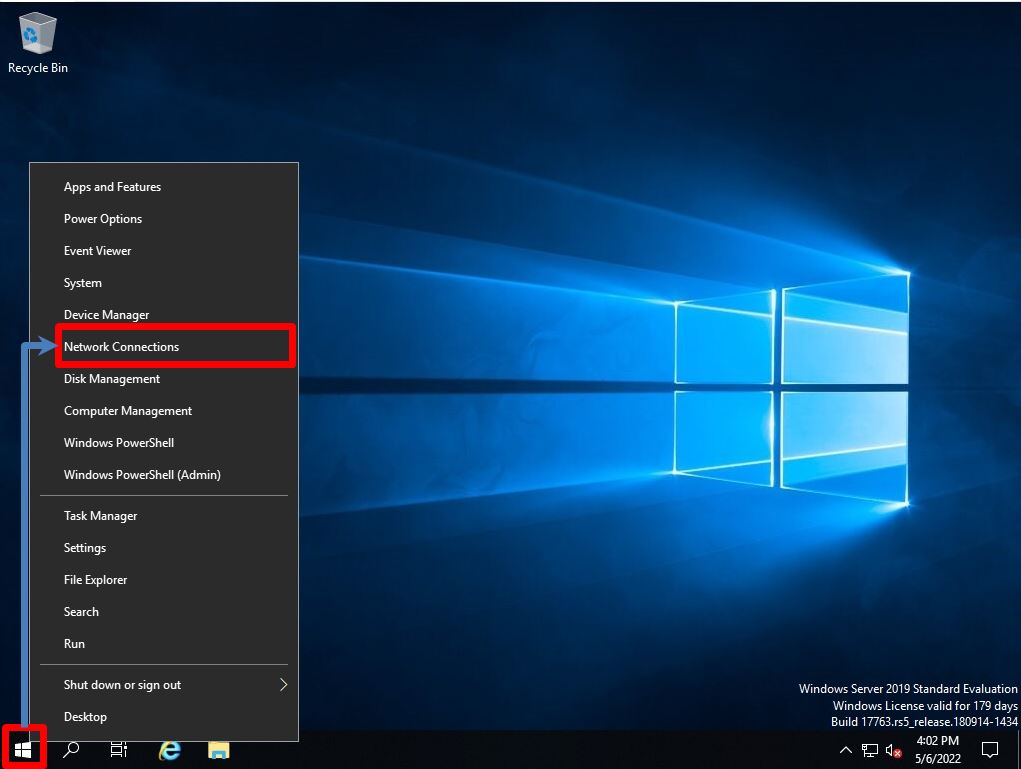
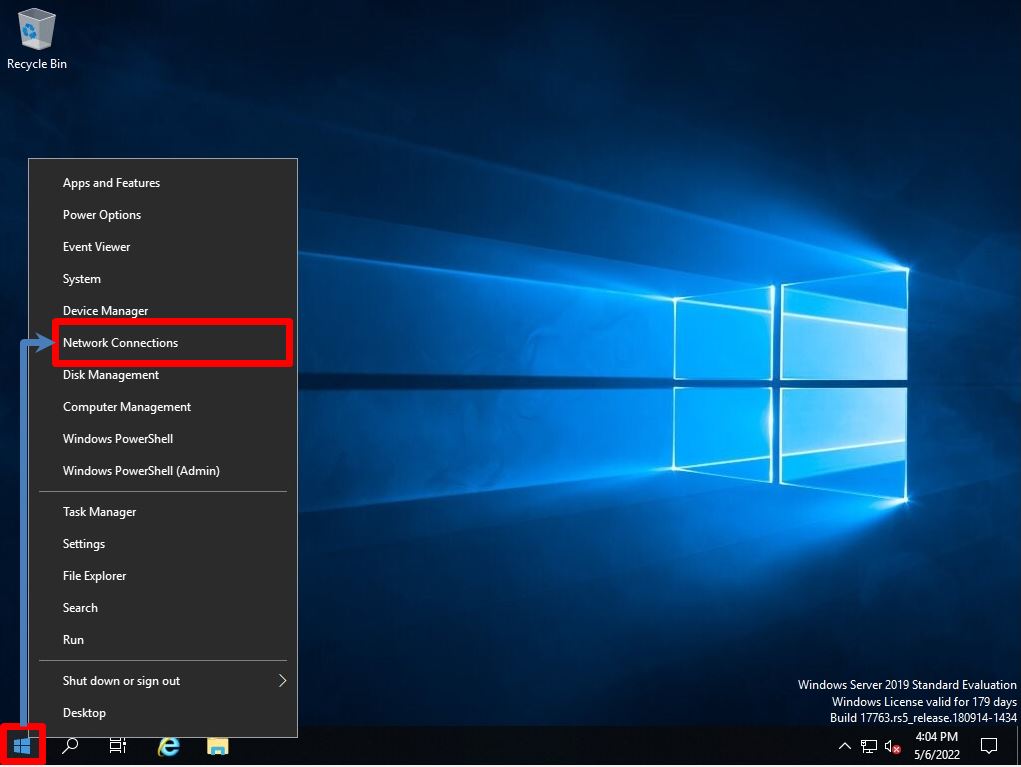
Right-click on the Windows mark at the bottom left of your desktop –> select Network Connections.
Step 2:
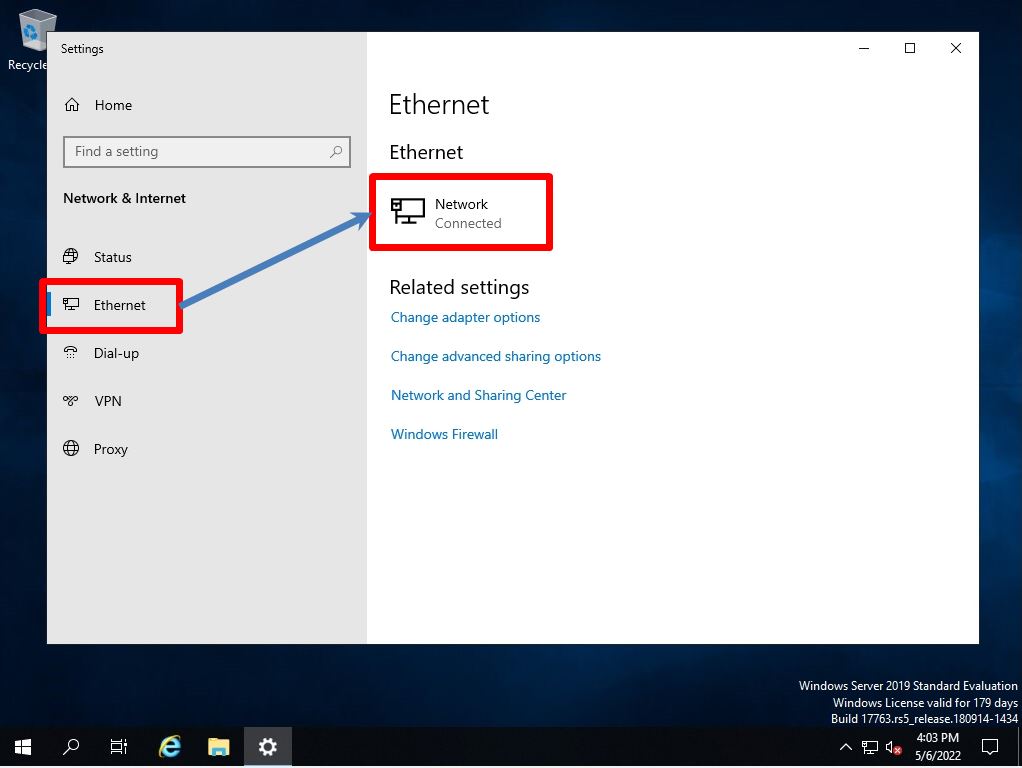
Ethernet -> Select “Network” of the displayed adapter.
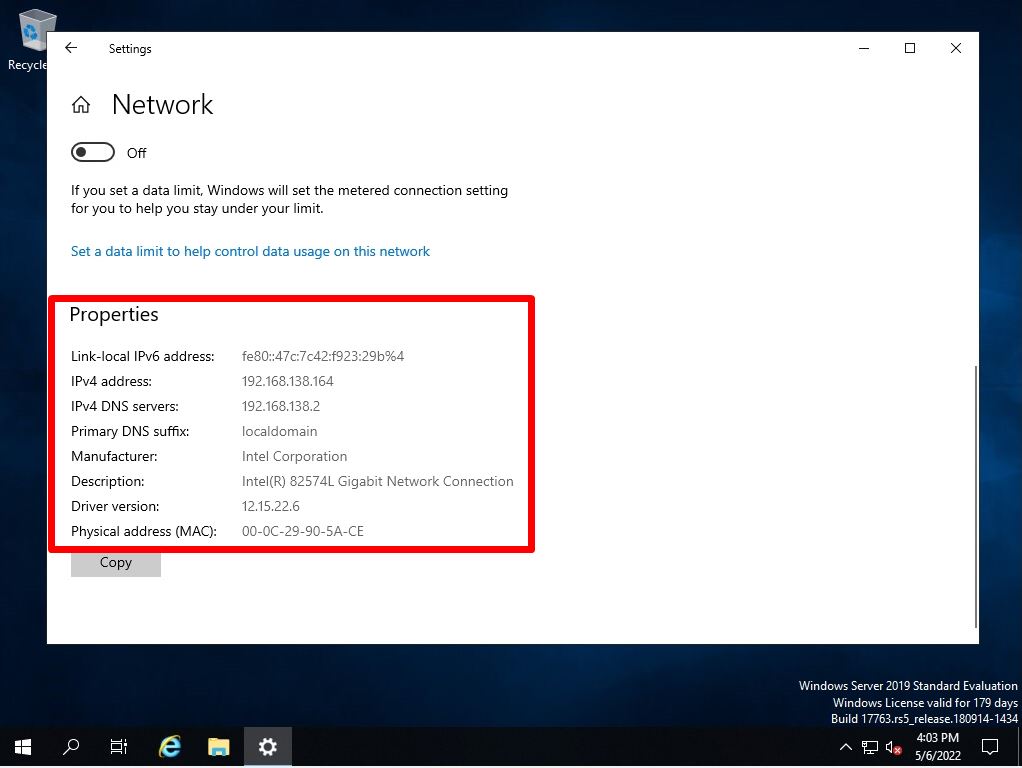
Step 3:
Properties screen: Confirm that the private IP address is displayed.
Windows Server 2019: IP address confirmation using command (Windows PowerShell)
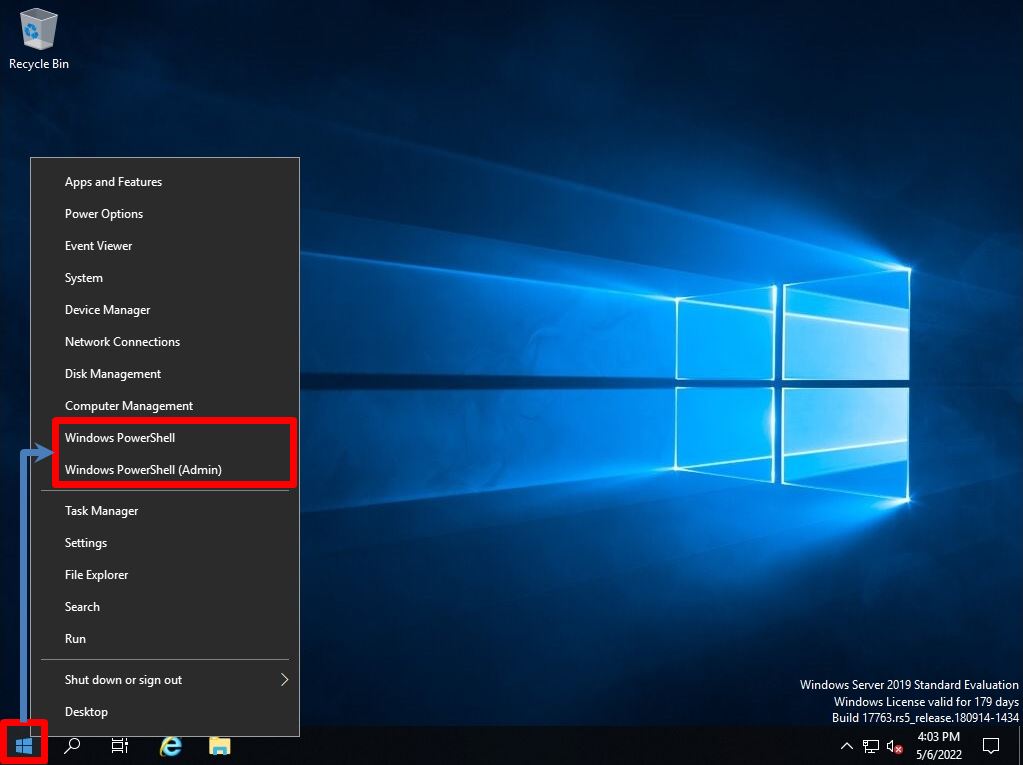
Step 1:
Right-click on the Windows mark at the bottom left of your desktop –> select Windows PowerShell.
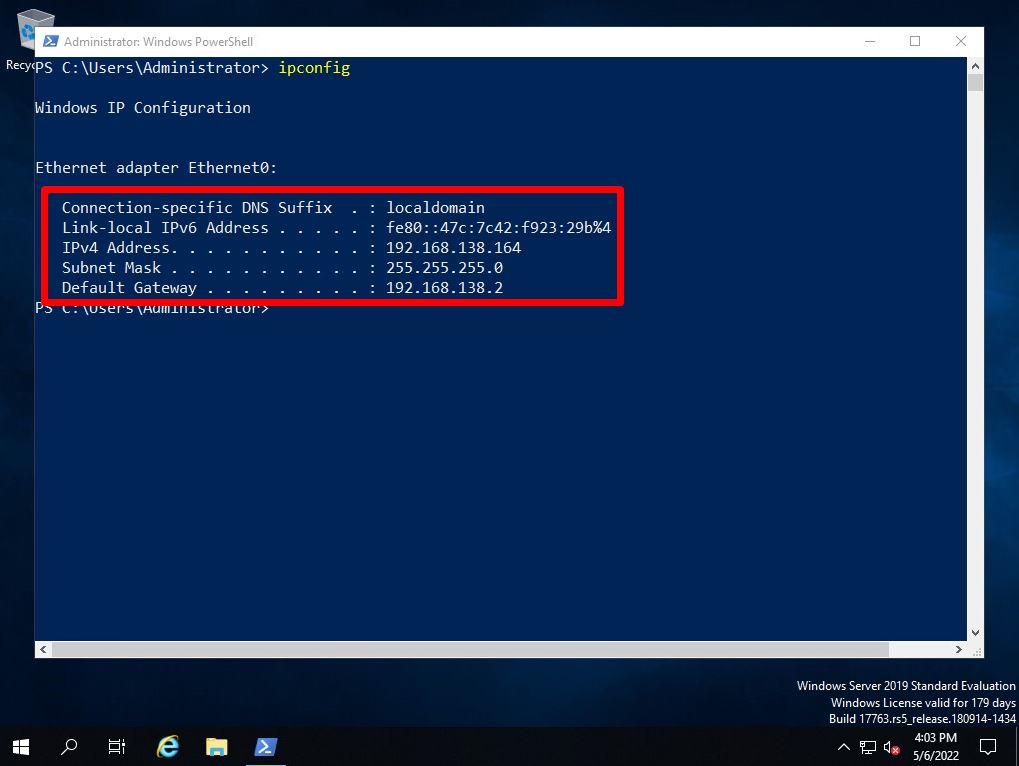
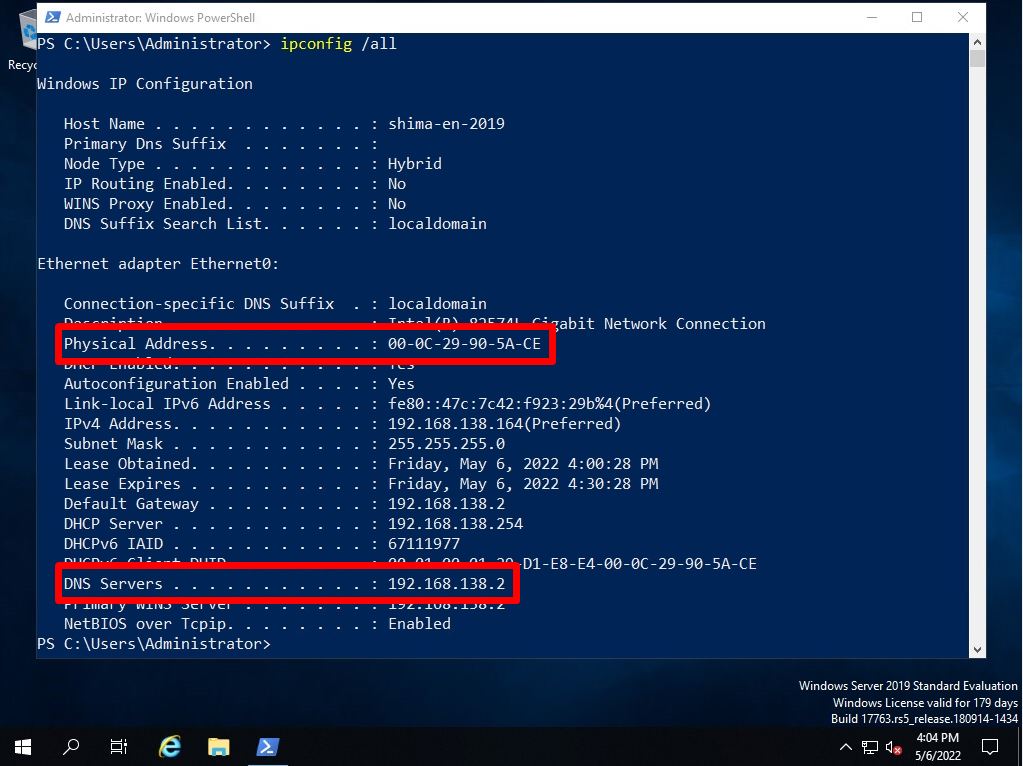
Step 2:
Execute the command “ipconfig” to display the private IP address. After executing ipconfig, you can display the IPv4 address, subnet mask, default gateway, etc.
Windows Server 2019: How to change the IP address using GUI
Step 1:
Right-click on the Windows mark at the bottom left of your desktop –> select Network Connections.
Step 2:
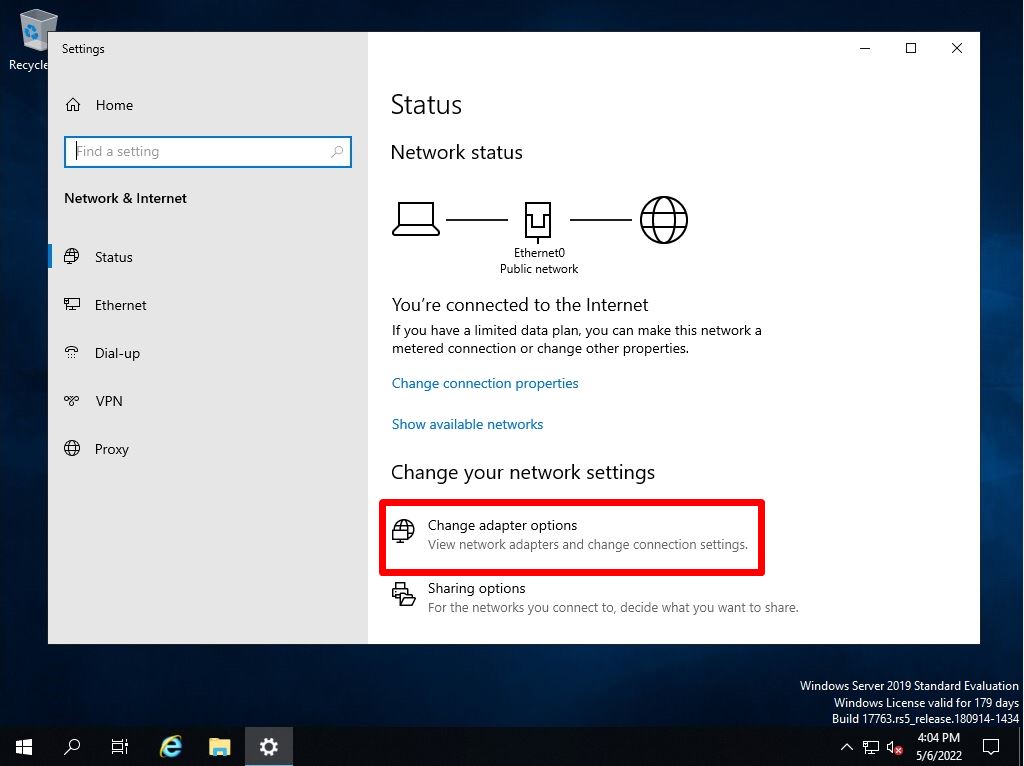
Select “Change adapter options”.
Step 3:
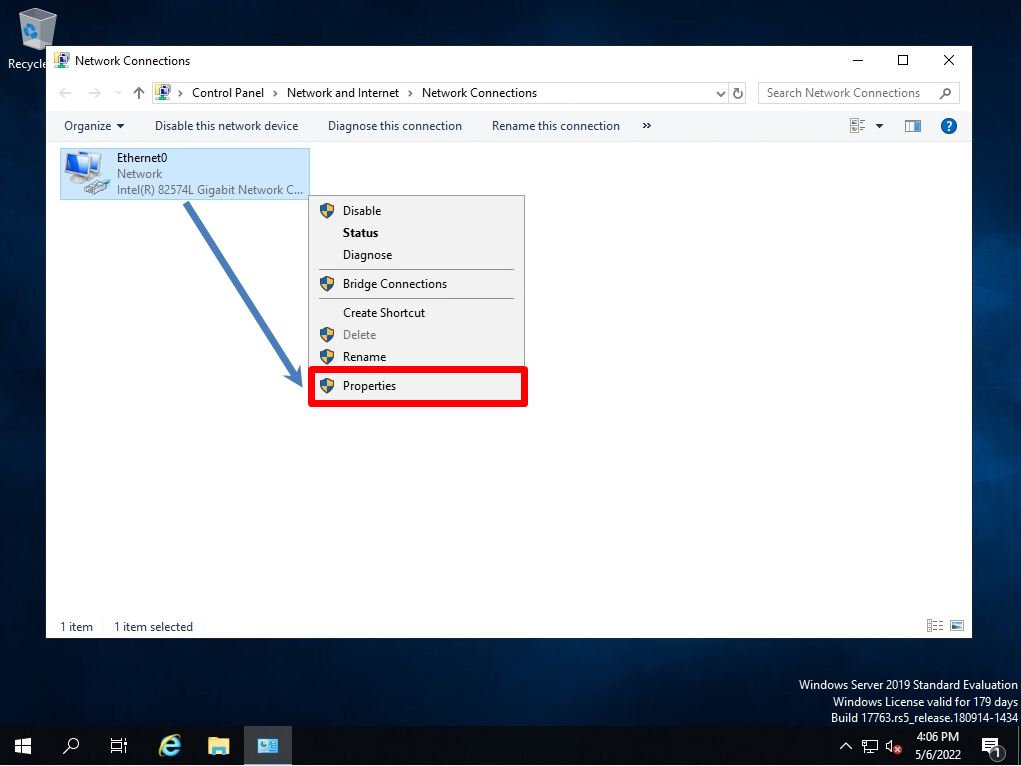
Right-click on the adapter whose private IP address you want to change -> select Properties.
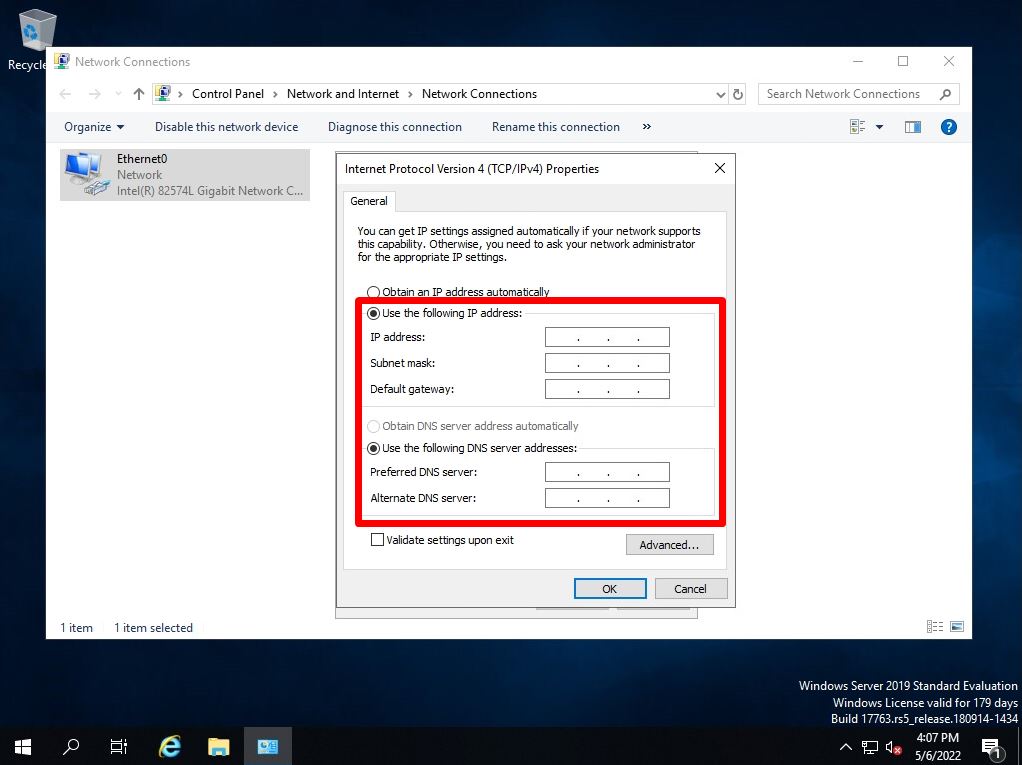
Step 4:
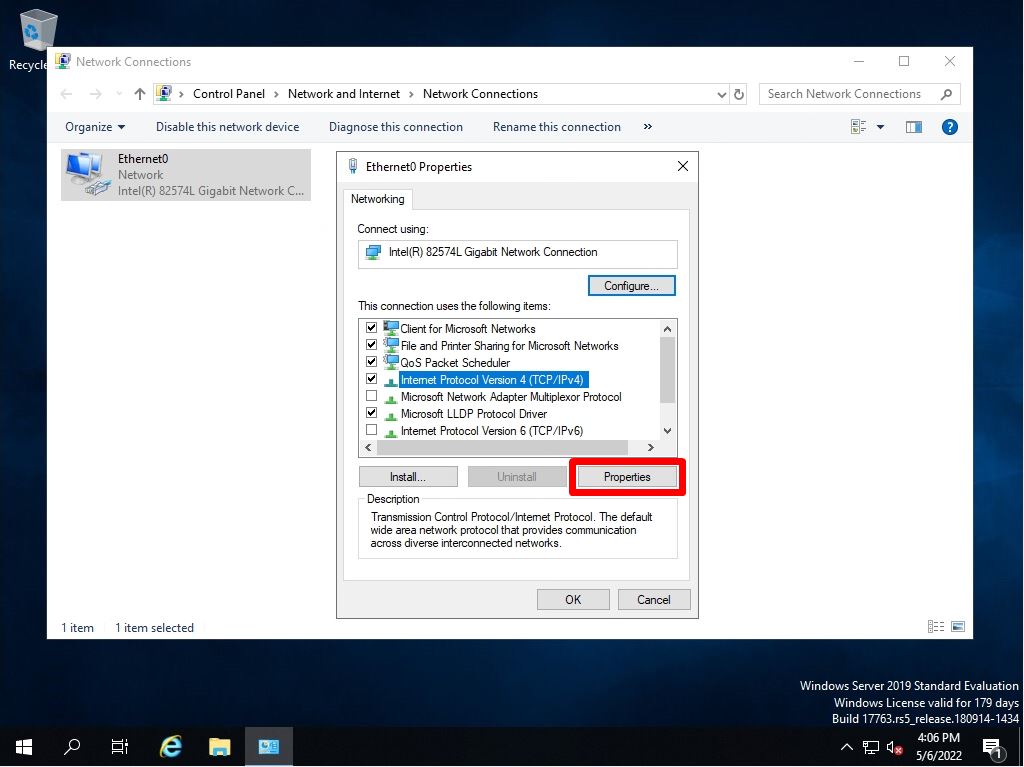
Select Internet Protocol Version 4 (TCP/IPv4) -> Properties.
Step 5:
Select “Use the following IP address” -> IP address-Enter the address of the DNS server.