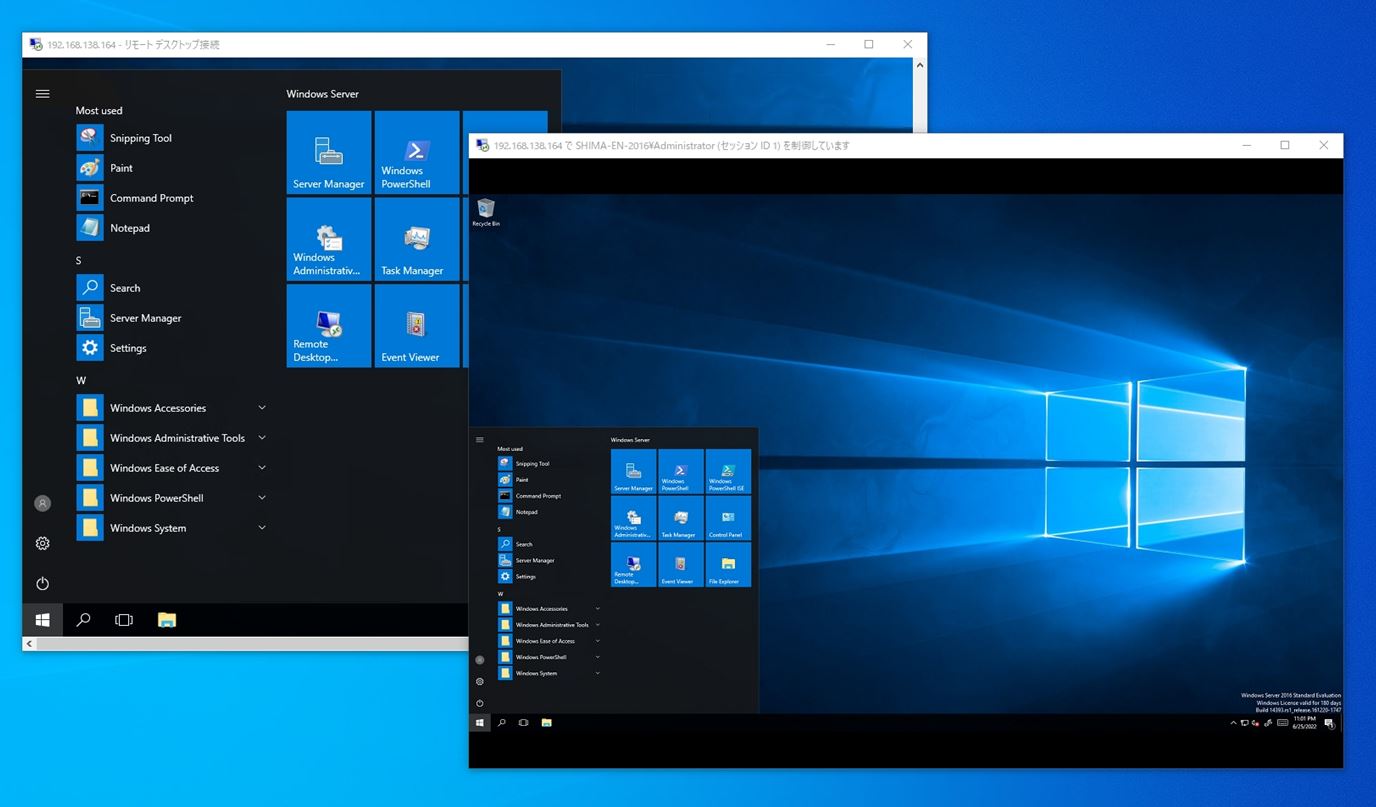
The remote desktop session shadowing setting of Windows Server 2016 is a function that allows two people to share the screen of the remote desktop destination from a terminal such as Windows 10. To enable it, change the “File and Printer Sharing Settings” in the Network and Sharing Center and the “Set rules for remote control of Remote Desktop Services user sessions” item in Group Policy on the Windows Server 2016 side.
As a usage scene that recommends session shadowing, when building or changing settings of Windows Server, there are cases where multiple people want to see the same screen and check if there are any mistakes before setting. The demand for working remotely is increasing. We recommend that you use it as needed.
Windows Server 2016:Change prerequisite settings
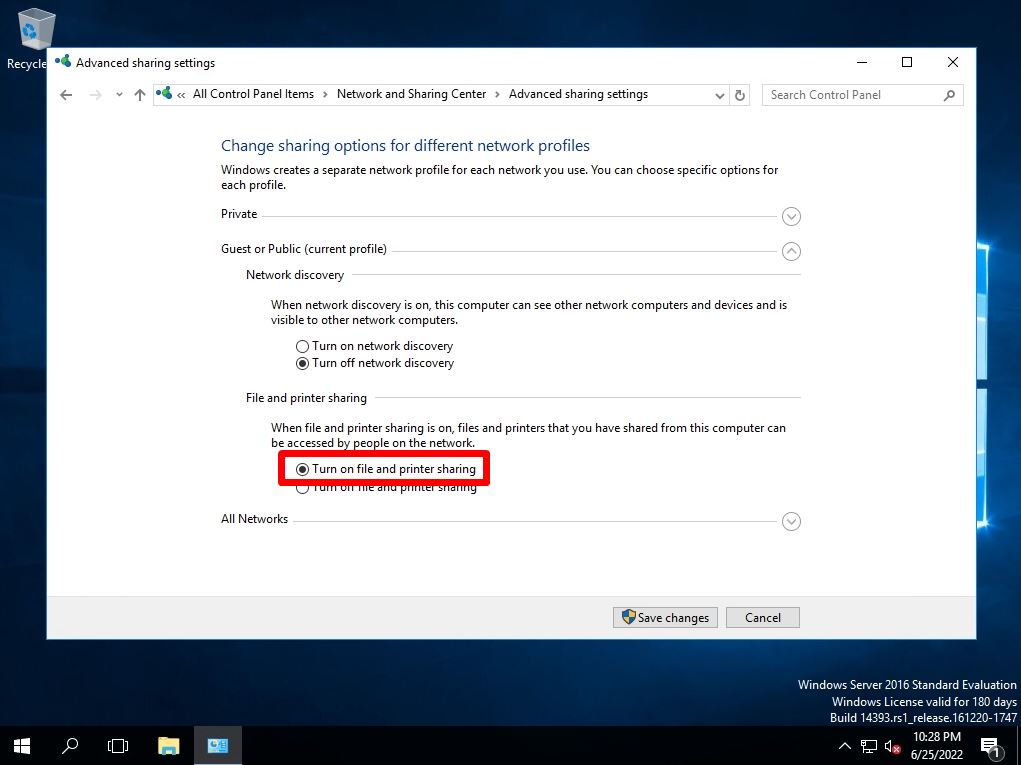
Enable Windows Server 2016 File and printer sharing as a prerequisite for using Remote Desktop Session Shadowing.
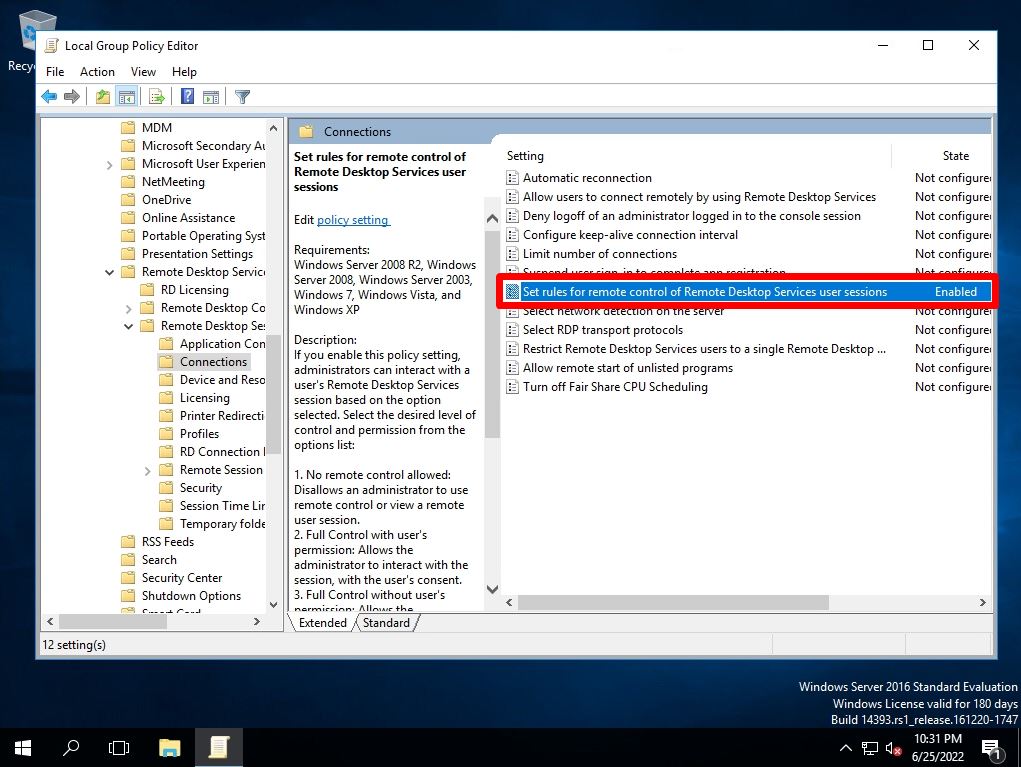
As a prerequisite for using Remote Desktop Session Shadowing, enable “Set rules for remote control of Remote Desktop Services user sessions” in the Group Policy setting of Windows Server 2016.
[Computer Configuration]
-[Administrative Templates]
-[Windows Components]
-[Remote Desktop Services]
-[Remote Desktop Session Host]
- [Connections]
-[Set rules for remote control of Remote Desktop Services user sessions]
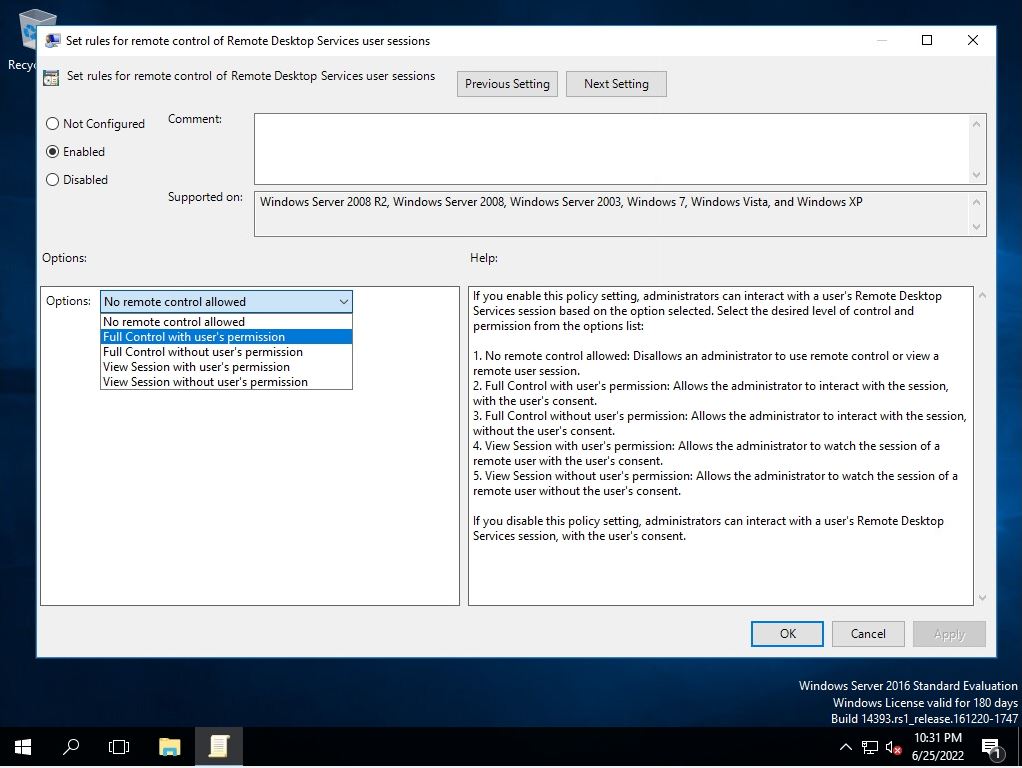
Set the setting value set in Group Policy according to the situation.
*In this article, full control is selected and option settings are changed with the permission of the user.
Windows Server 2016:Check Session ID
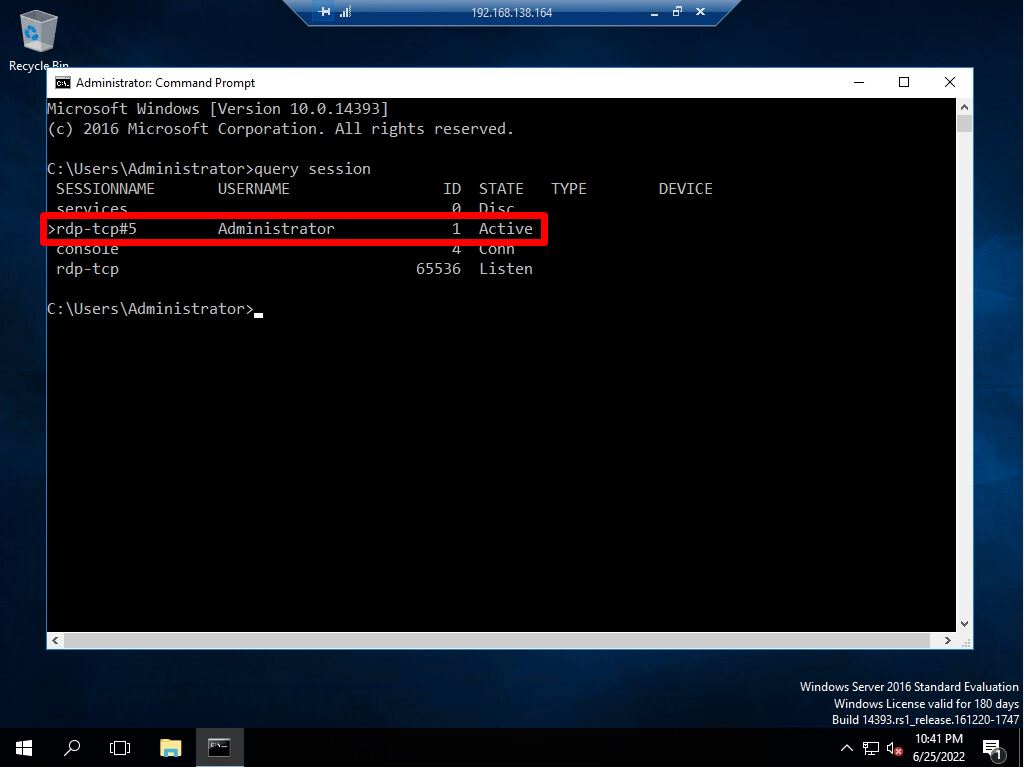
To share the screen of the remote desktop destination, you need to connect with the same Session ID. Make an RDP connection to Windows Server 2016 and check the Session ID.
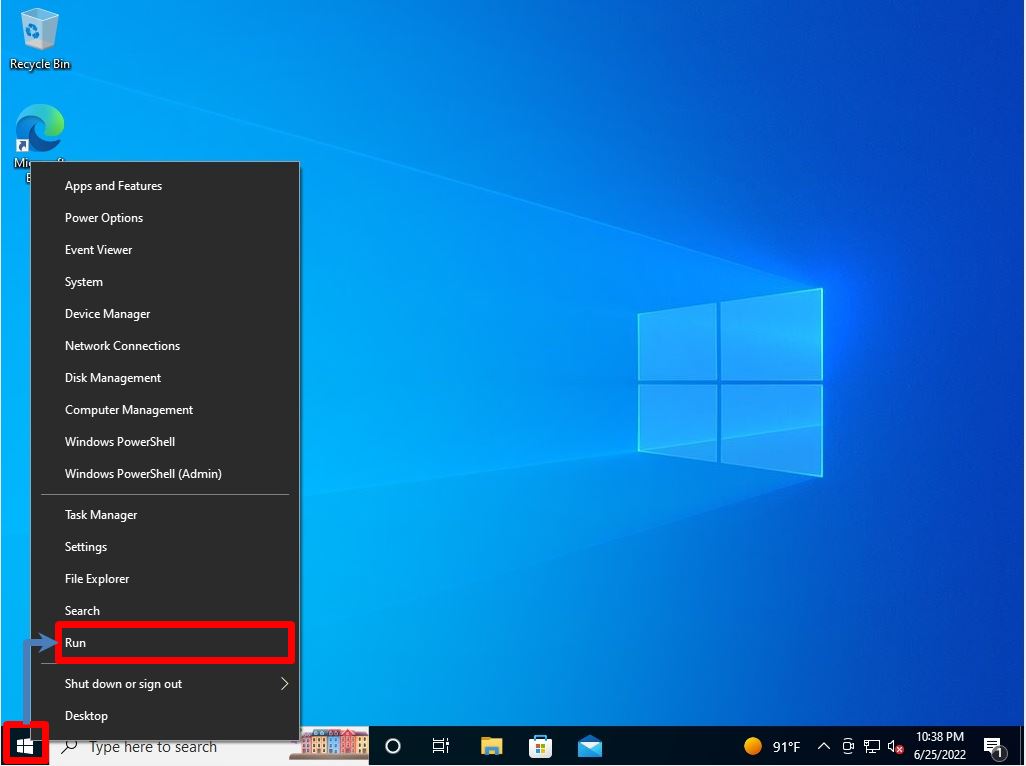
Step 1:
Select “Run” on the connection source terminal.
Step 2:
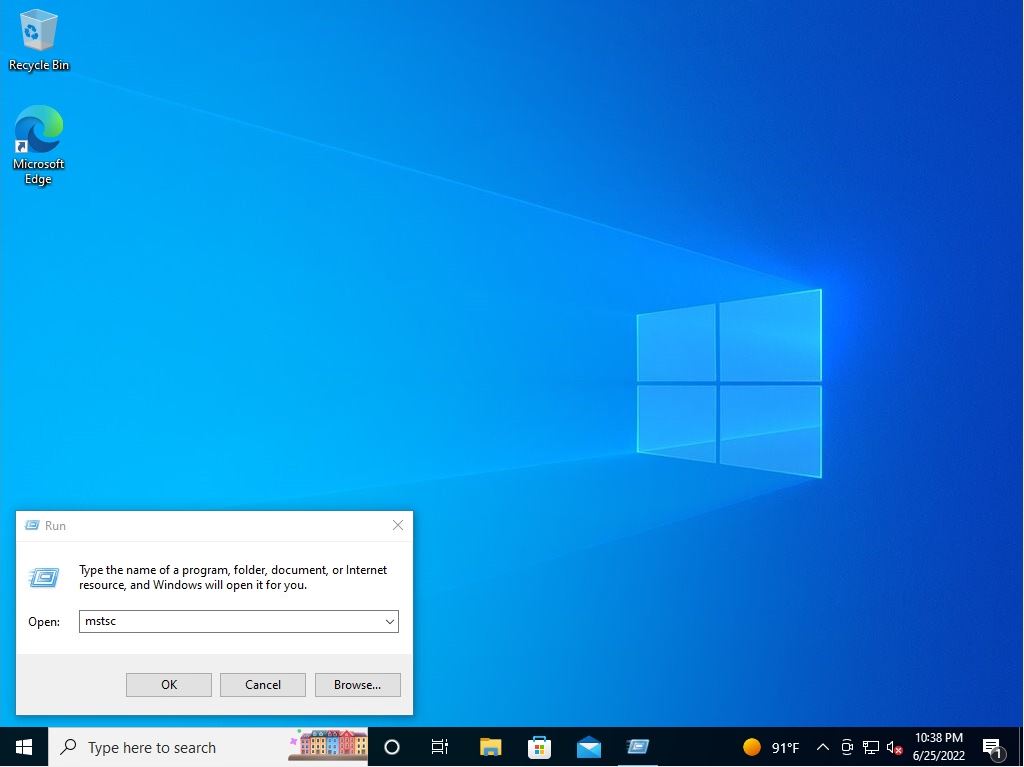
Enter mstsc -> select OK.
Step 3:
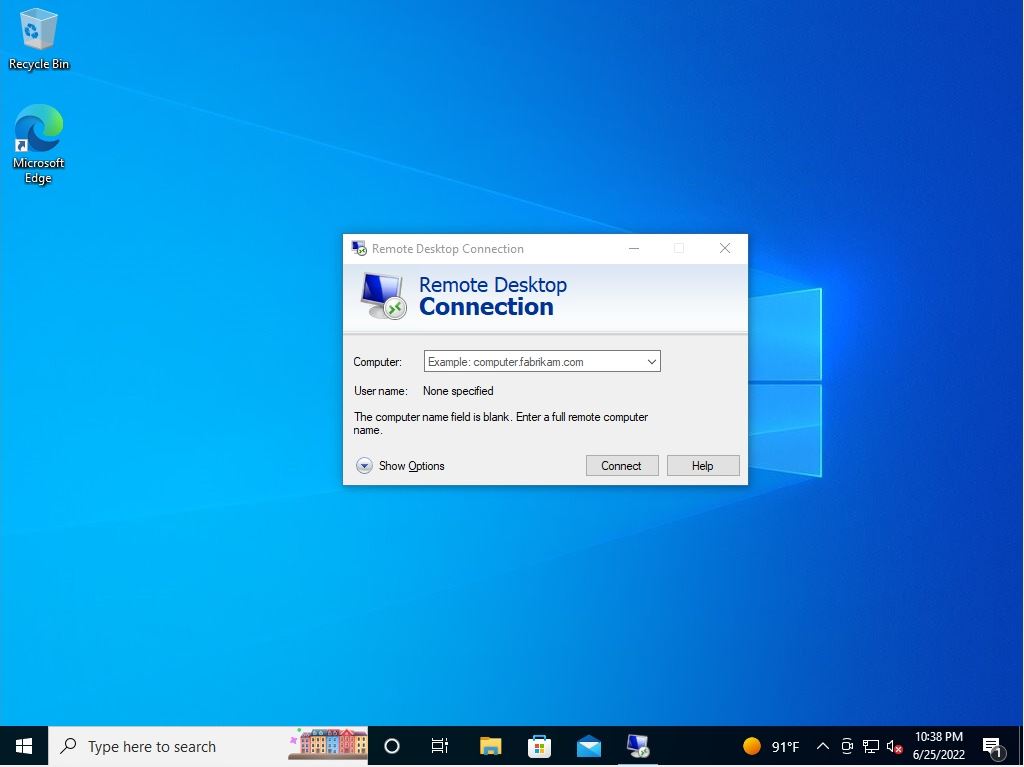
Enter the computer name or IP address of the remote connection destination and select the connection.
Step 4:
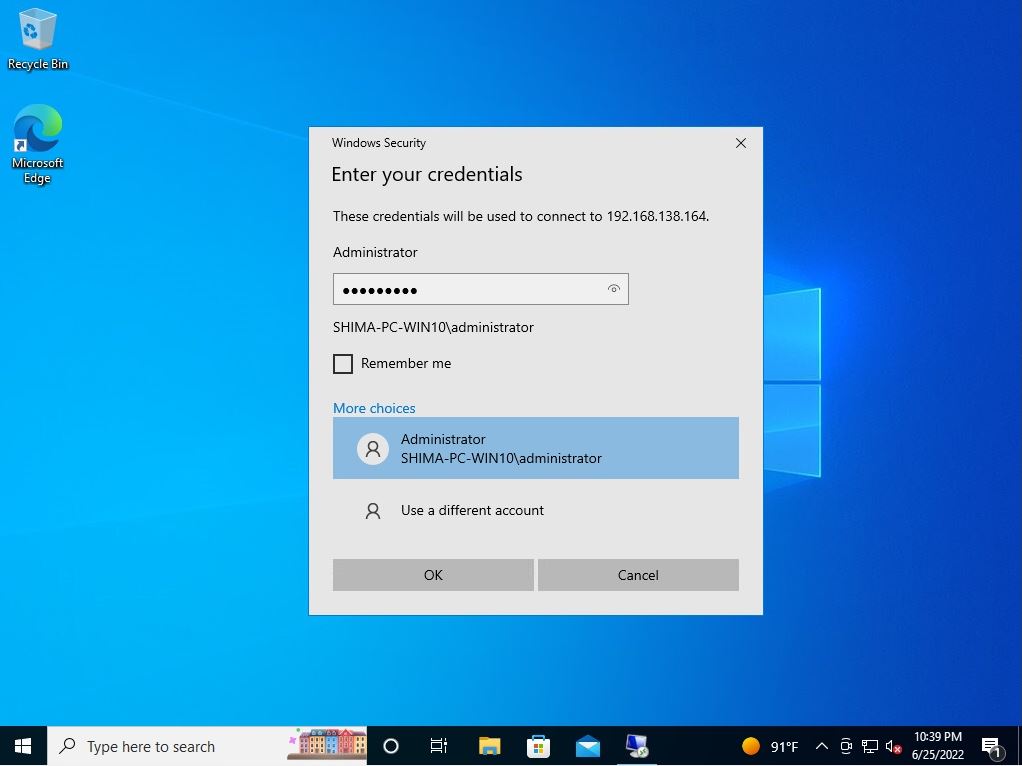
Enter the account password to connect to on the credentials entry screen.
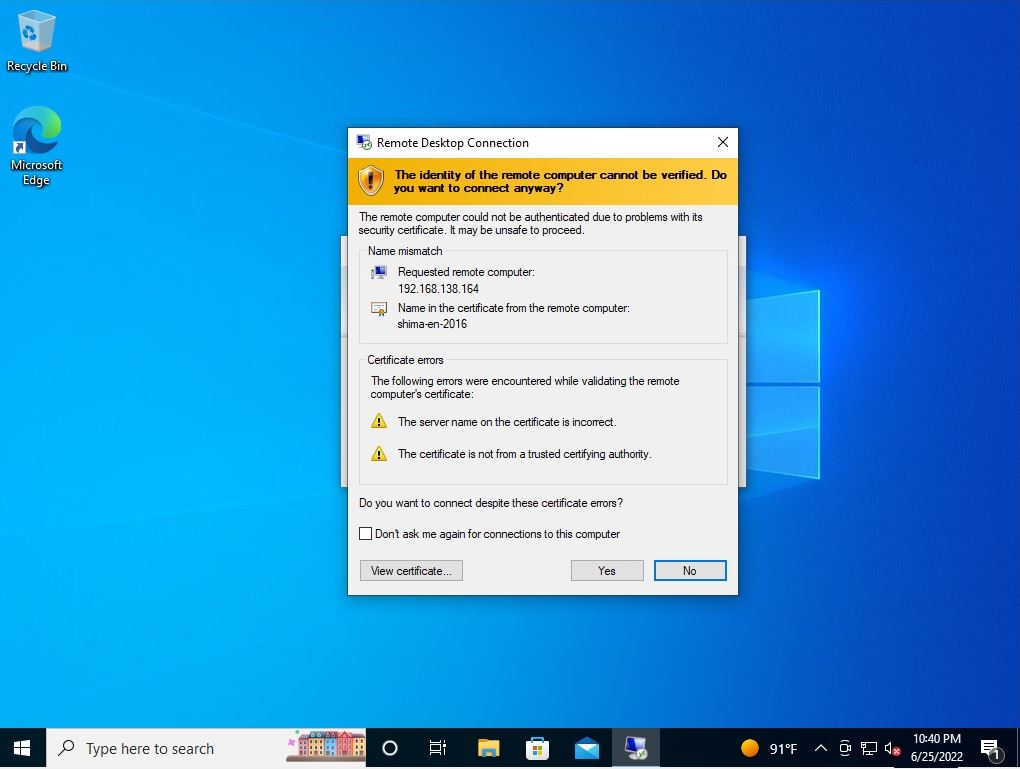
Select “Yes” when the security certificate screen is displayed.
Step 5:
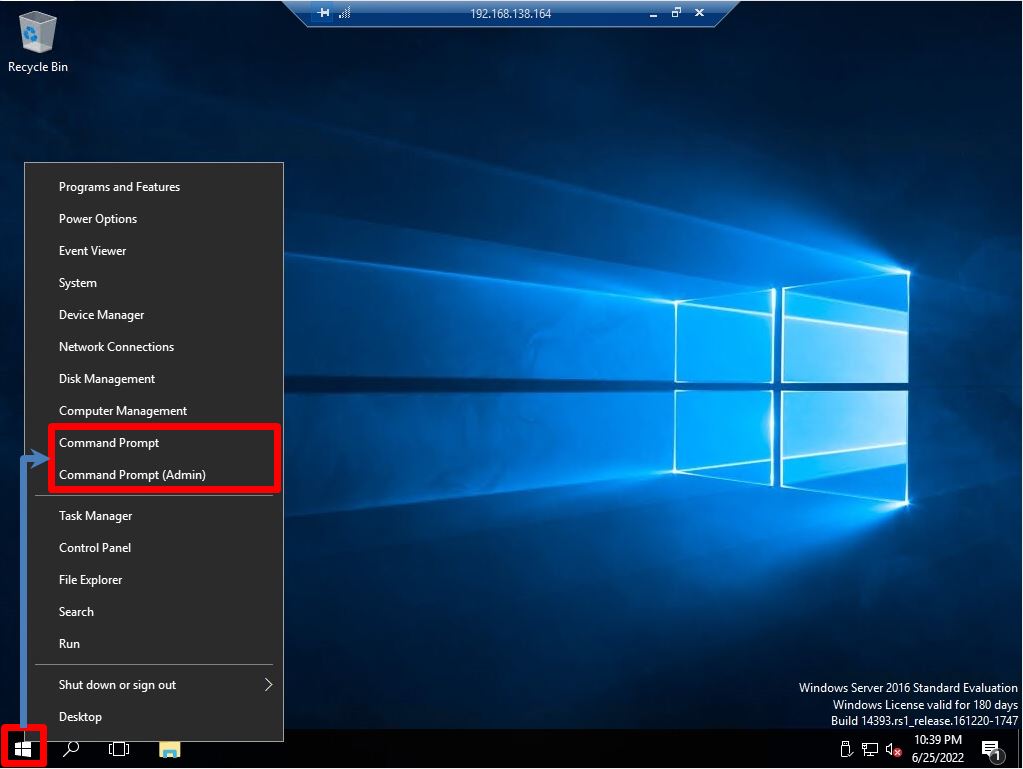
Right-click the Windows mark at the bottom left of the Windows Server 2016 desktop to which you want to connect remotely -> select Command Prompt.
Step 6:
Execute the “query session” command to check the session ID. The ID is displayed in the format of rdp-tcp# [ID].
Share the screen of the remote desktop destination from the client terminal
Step 1:
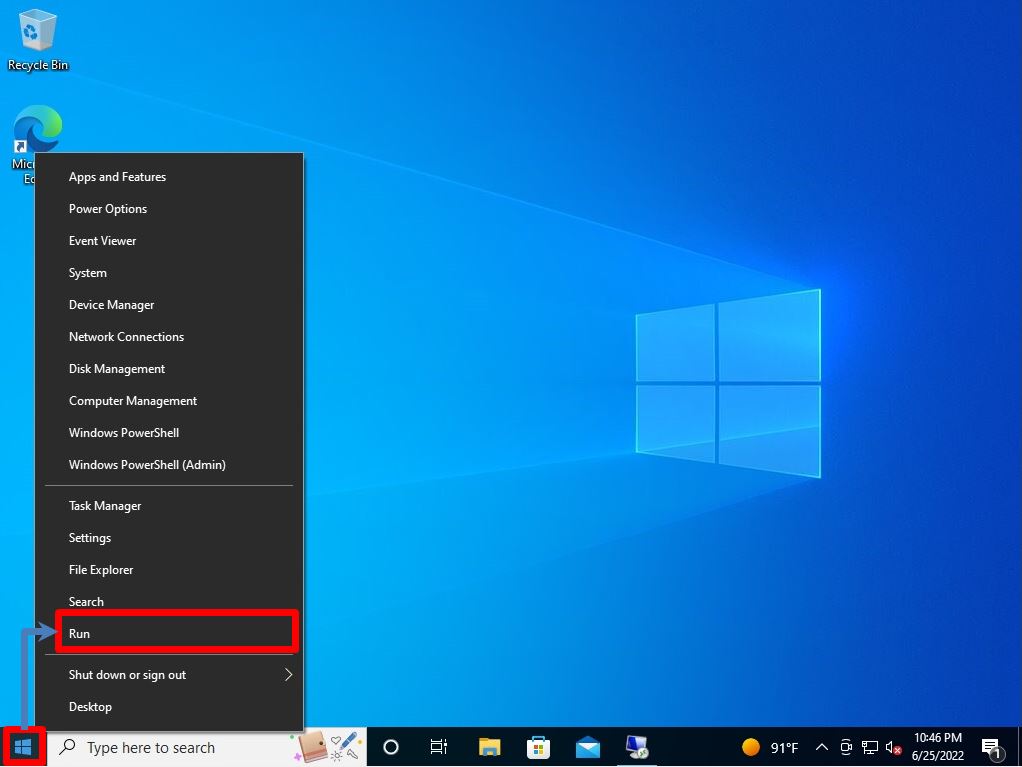
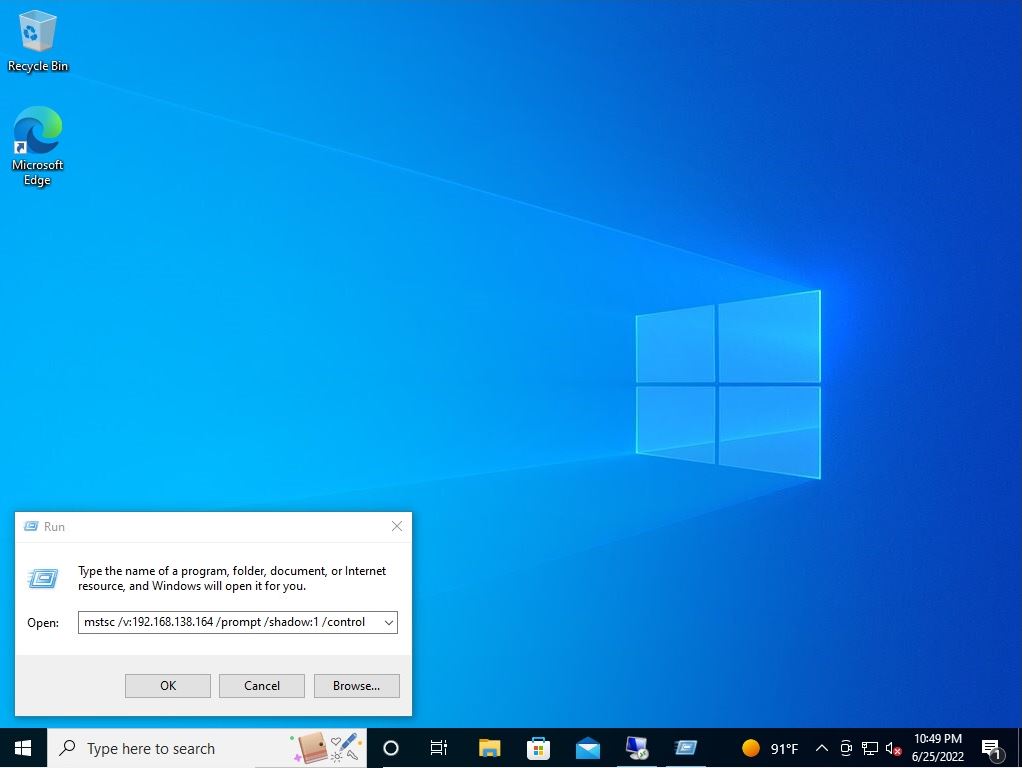
Select “Run” on the second person’s device.
Step 2:
Enter and execute the command in the following format.
mstsc /v:[IP address or host name of remote connection destination] /prompt /shadow: [session ID] /control
Step 3:
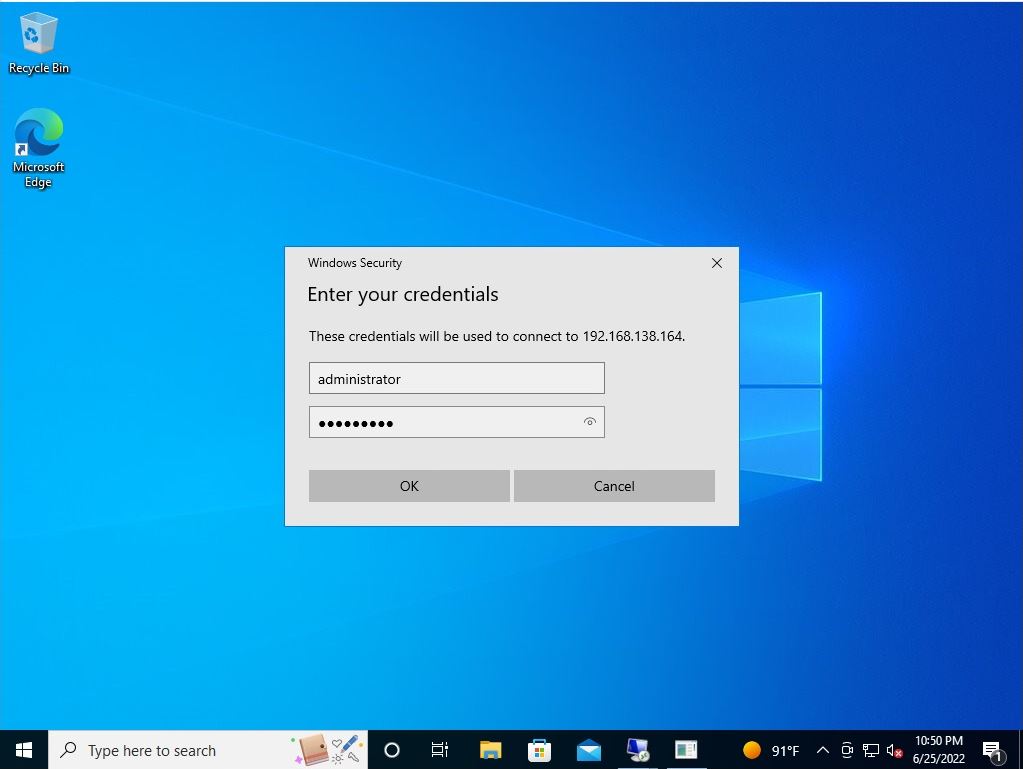
Credential entry screen:Enter the account password to connect to.
Step 4:
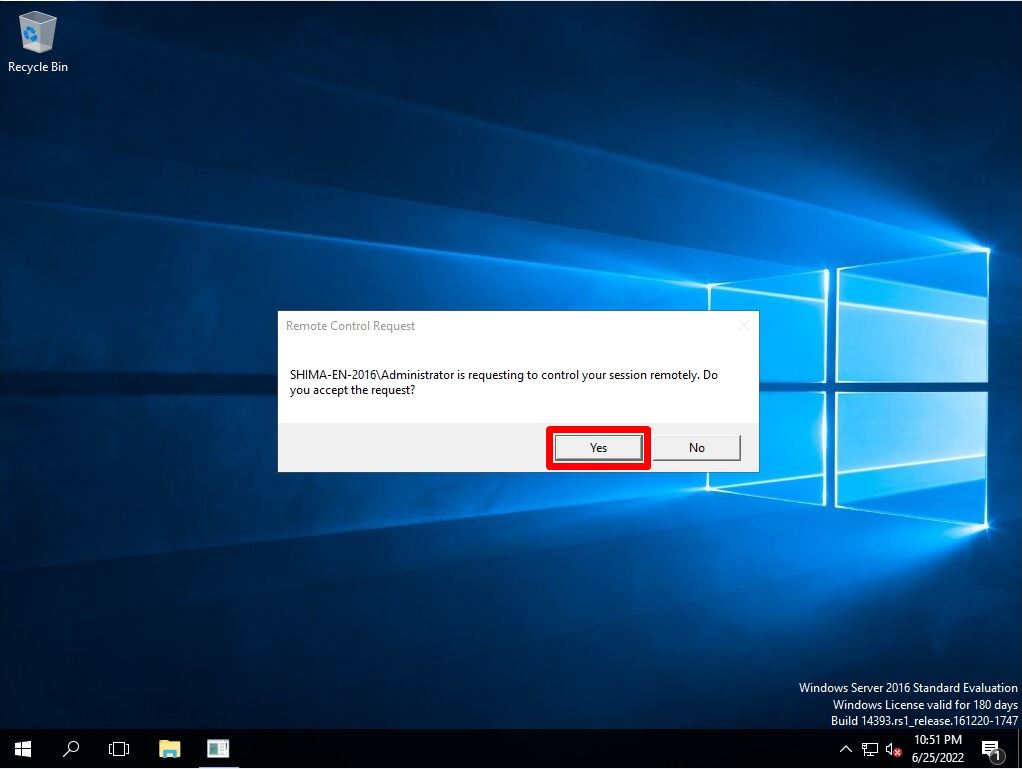
The acceptance of the remote control request is displayed on the screen of the terminal that is already remotely connected. Select “Yes”.
Step 5:
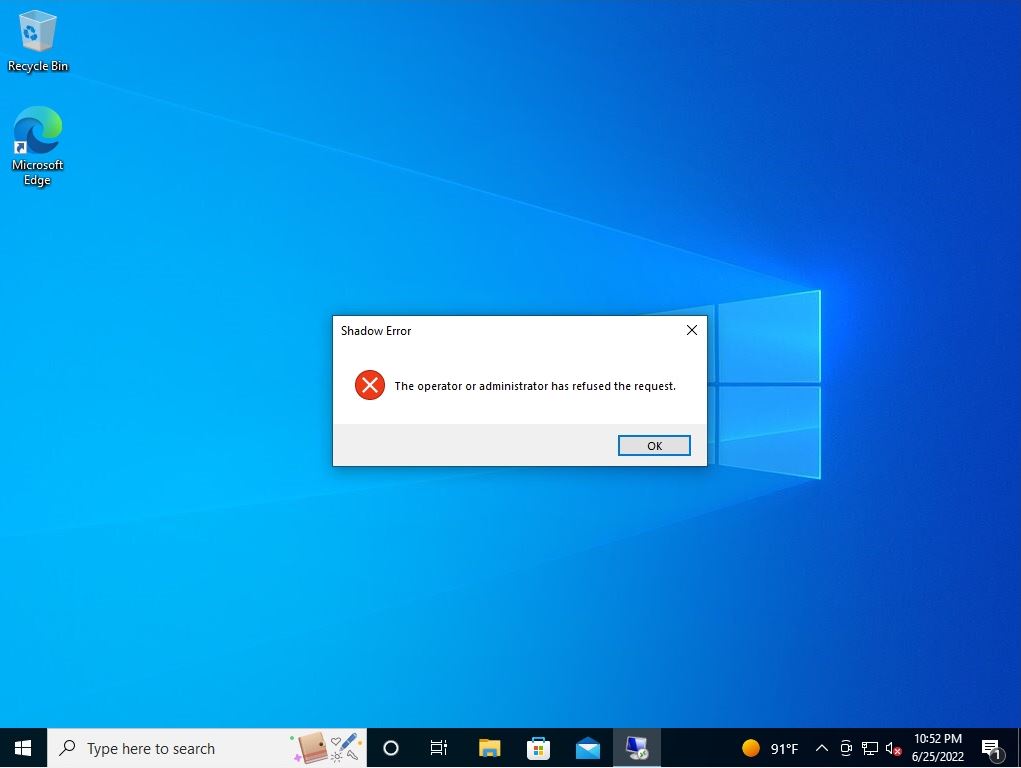
Confirm that you can share the screen of the remote desktop destination.
