Ubuntu is a popular Linux distribution for desktop use. To use Ubuntu 22.04 LTS with Hyper-V on Windows 11, enable Hyper-V from Control Panel -> Select Ubuntu 22.04 LTS on the operating system selection screen -> Ubuntu 22.04 for free by creating a virtual machine You can install LTS.
In this article, we will explain a series of procedures and operation methods with images so that you can operate Ubuntu 22.04 LTS with GUI with Hyper-V installed in Windows 11 Pro. * Microsoft Hyper-V is not installed in Windows 11 Home edition and cannot be enabled.
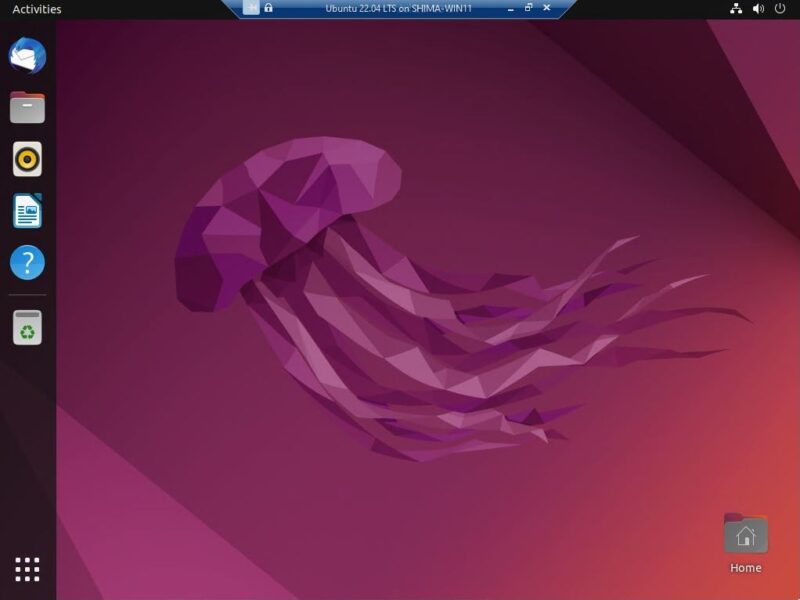
Windows 11: Microsoft Hyper-V Enabled
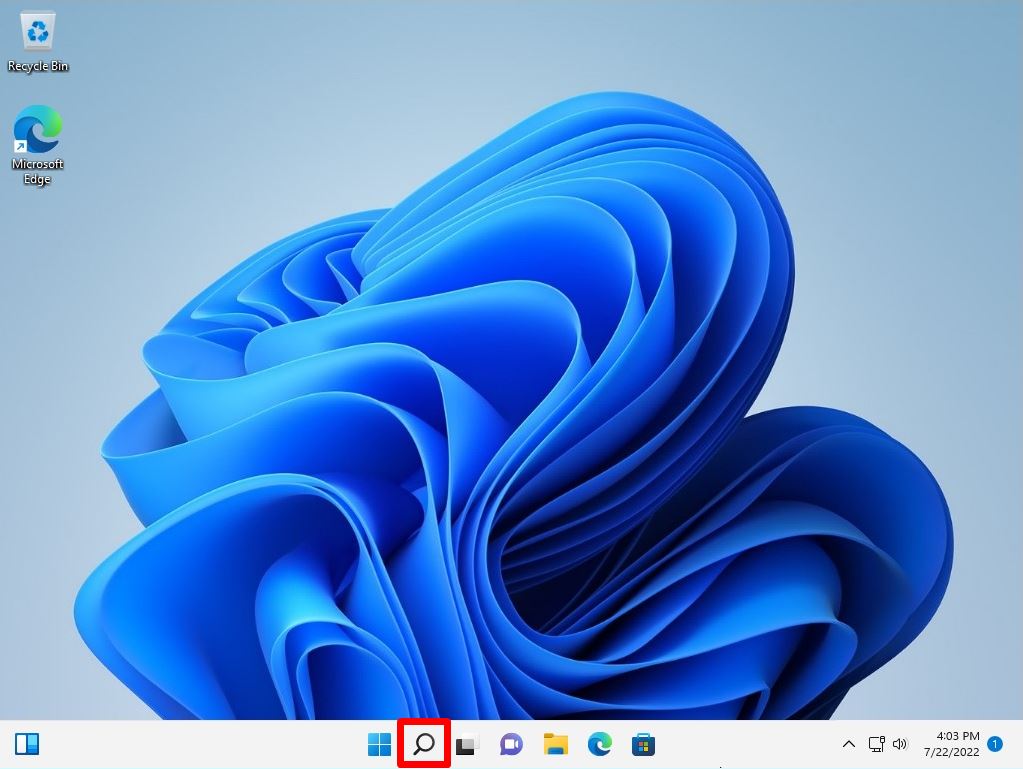
Step 1:
Select “Search Box” on the taskbar.
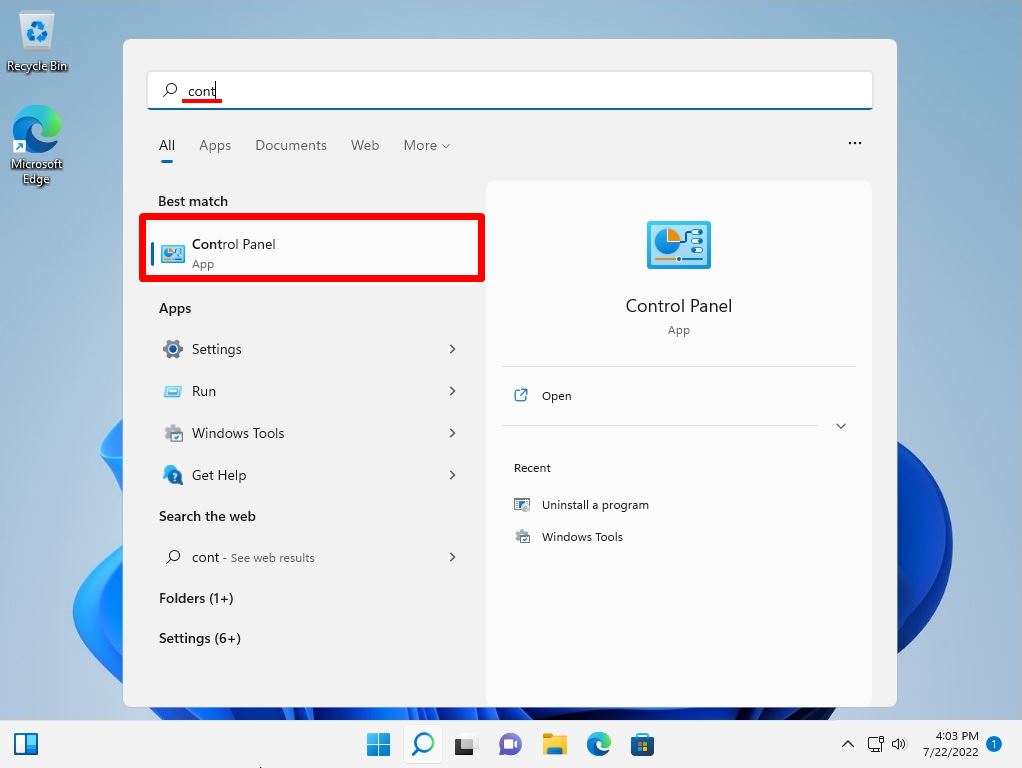
Step 2:
Enter “cont”-> Select “Control Panel”.
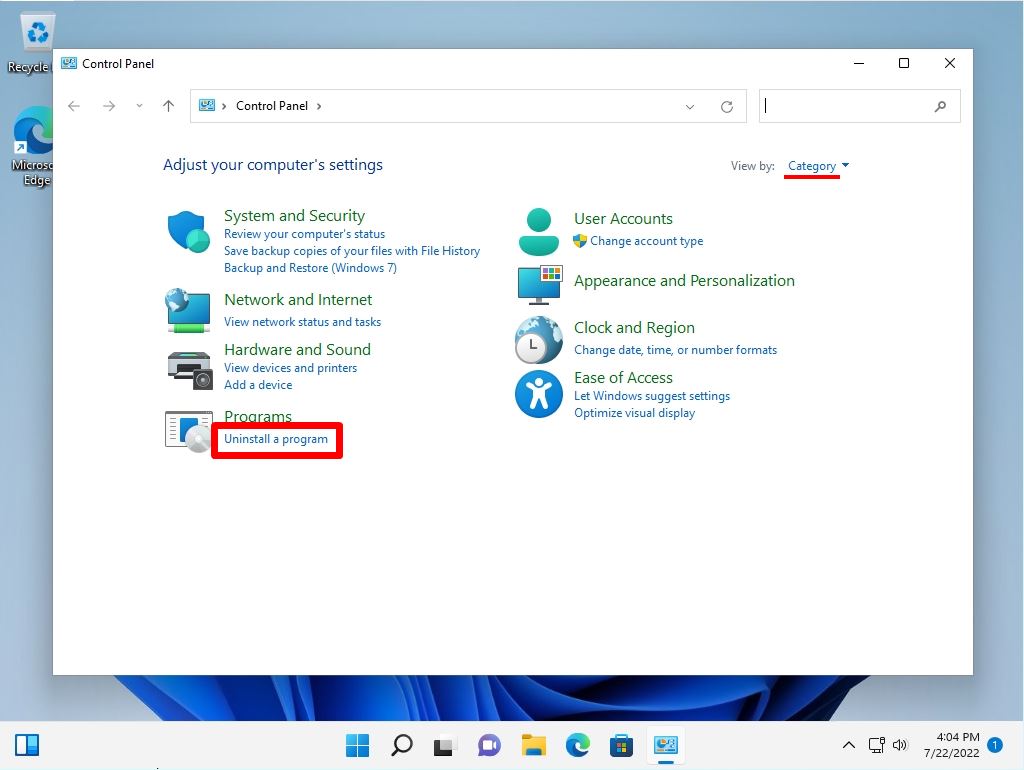
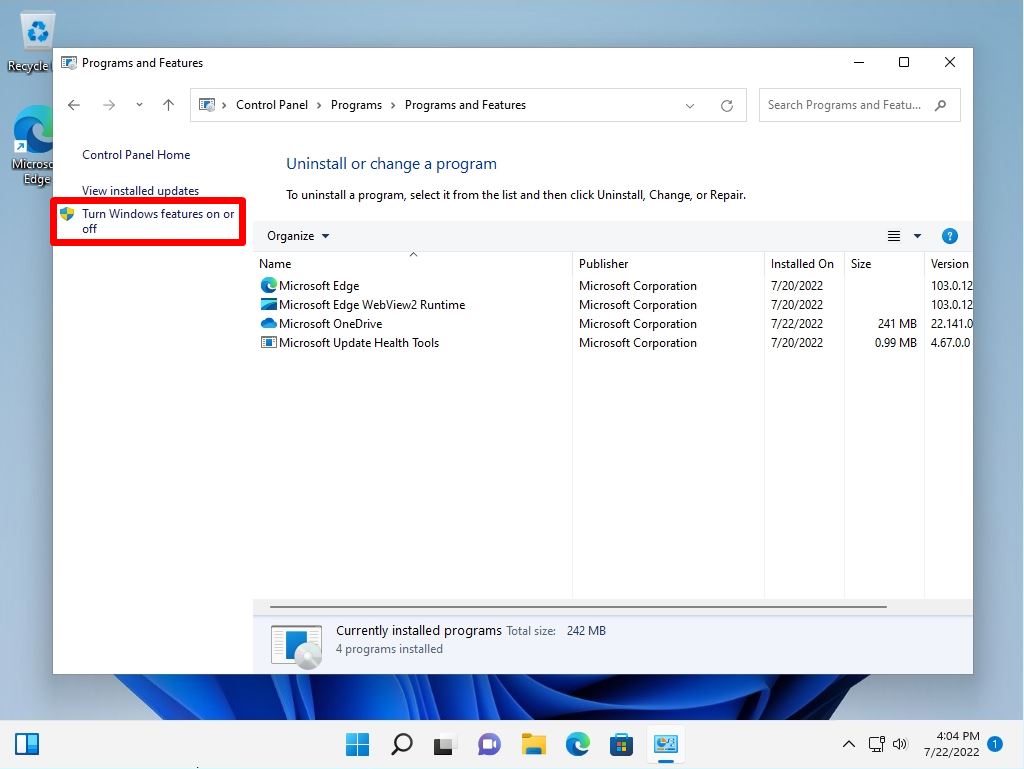
Step 3:
View by: Select Category -> Uninstall a program.
Step 4:
Programs and Features screen: Select “Turn Windows features on or off”.
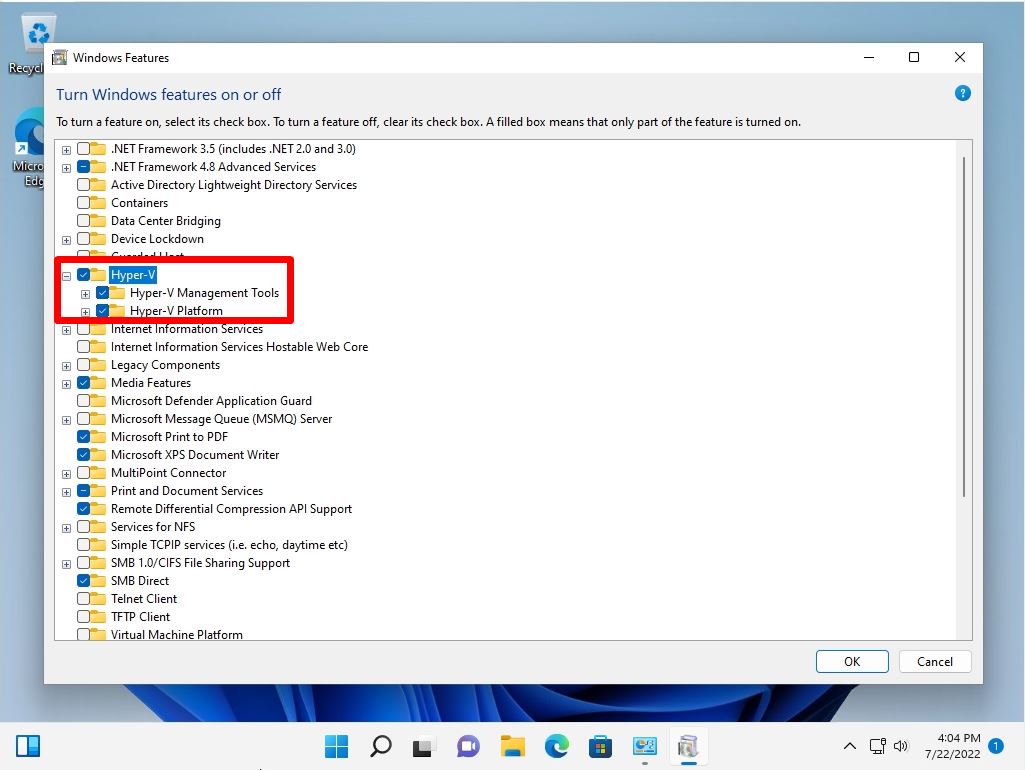
Step 5:
Enable “Hyper-V”-> Select “OK”.
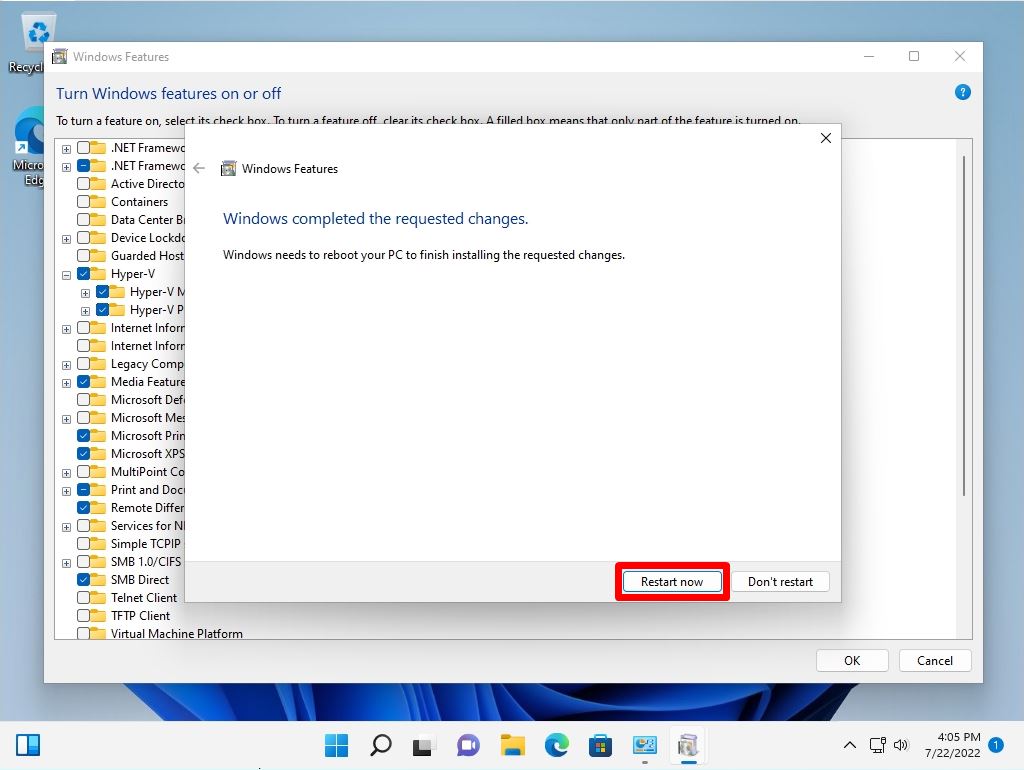
Step 6:
Select “Restart now”.
Windows 11 Hyper-V: Ubuntu 22.04 LTS Installation / Virtual Machine Creation
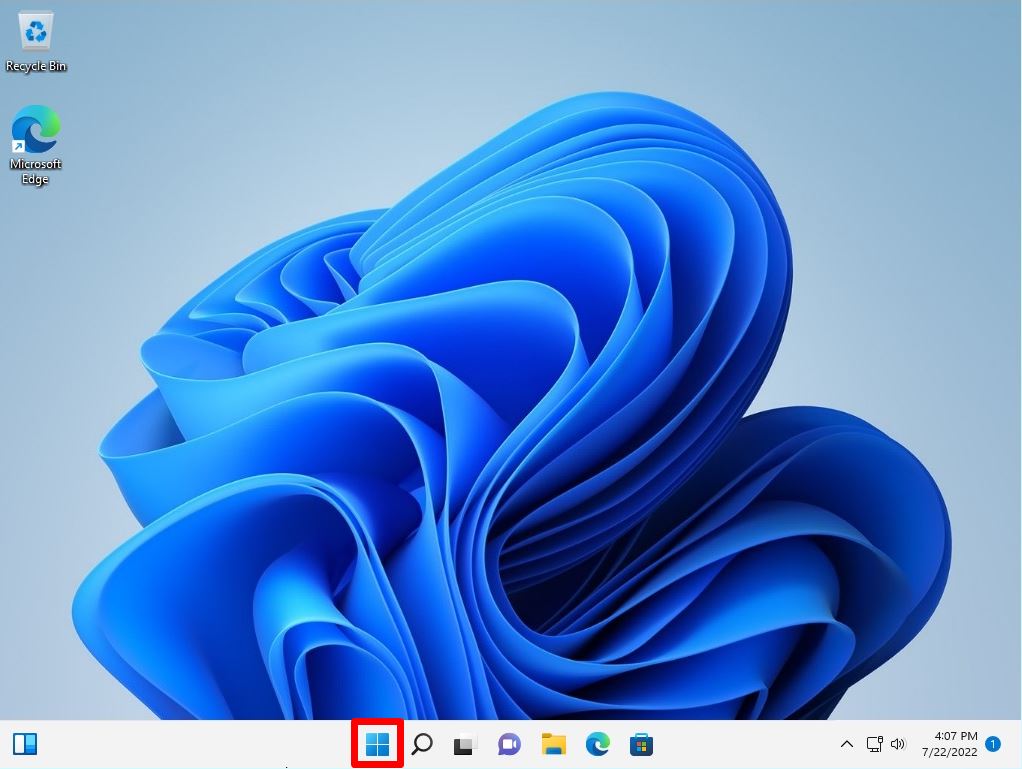
Step 1:
Select the Windows mark on the taskbar.
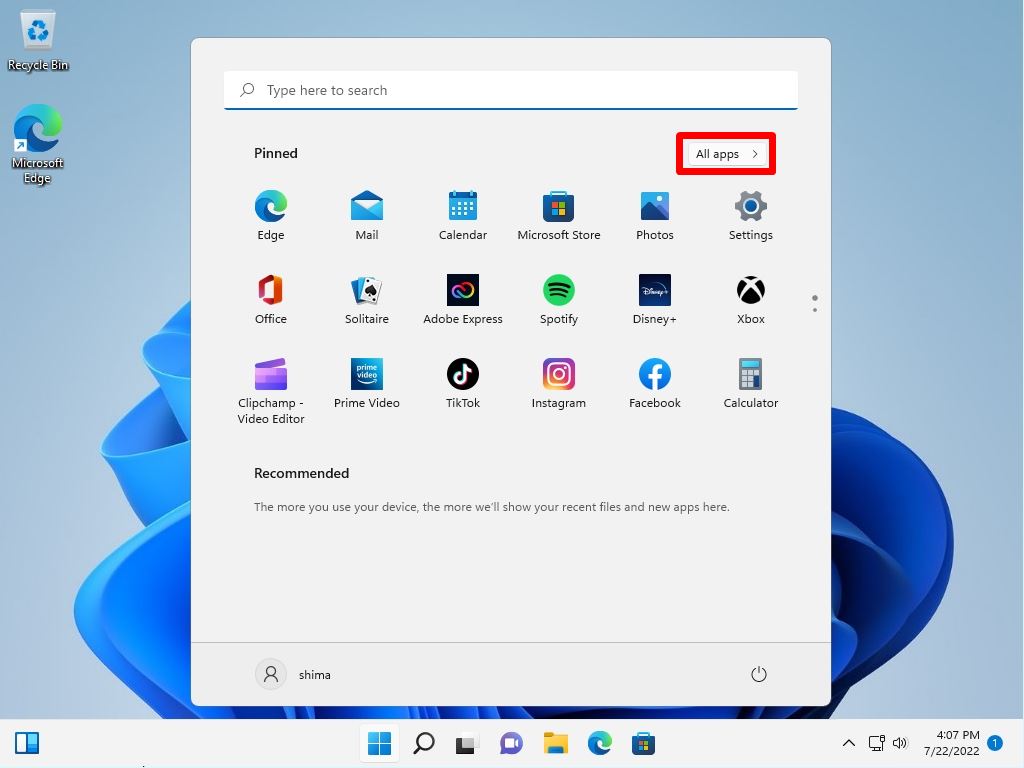
Step 2:
Select “All apps”.
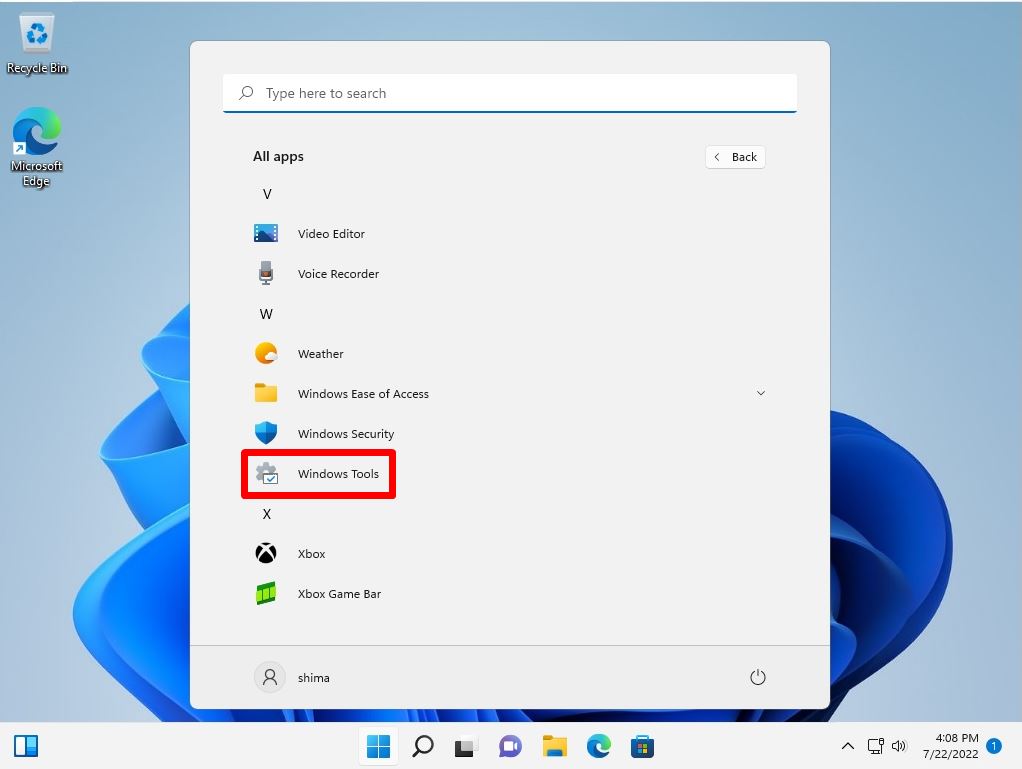
Step 3:
Select “Windows Tools”.
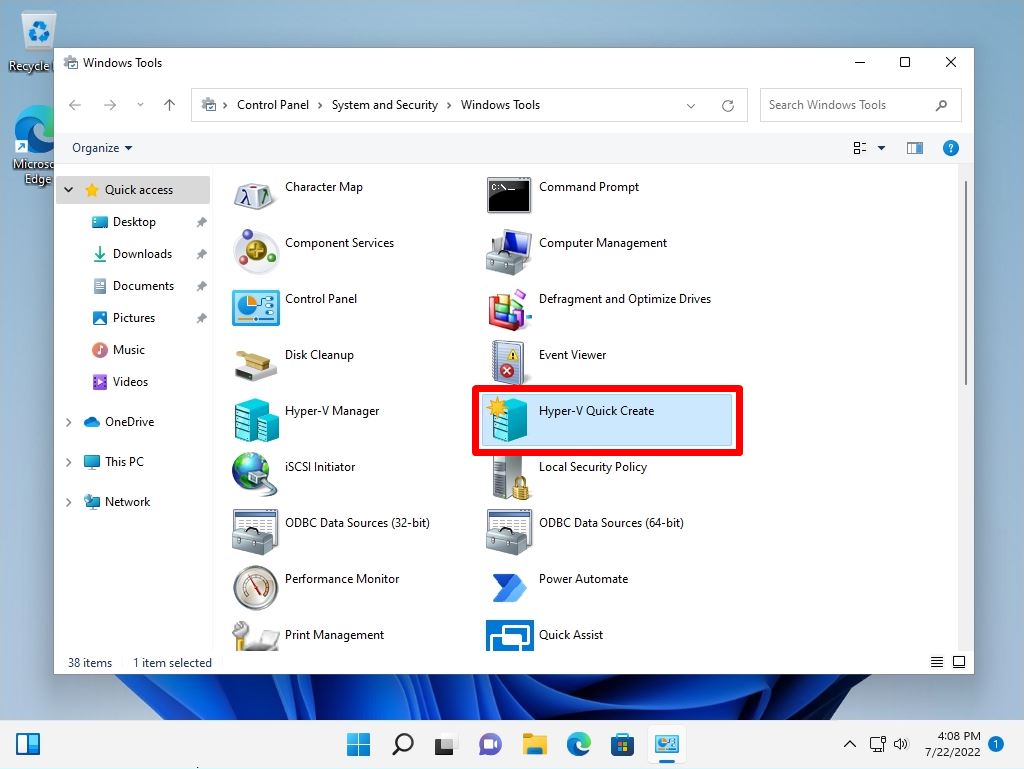
Step 4:
Select “Hyper-V Quick Create”.
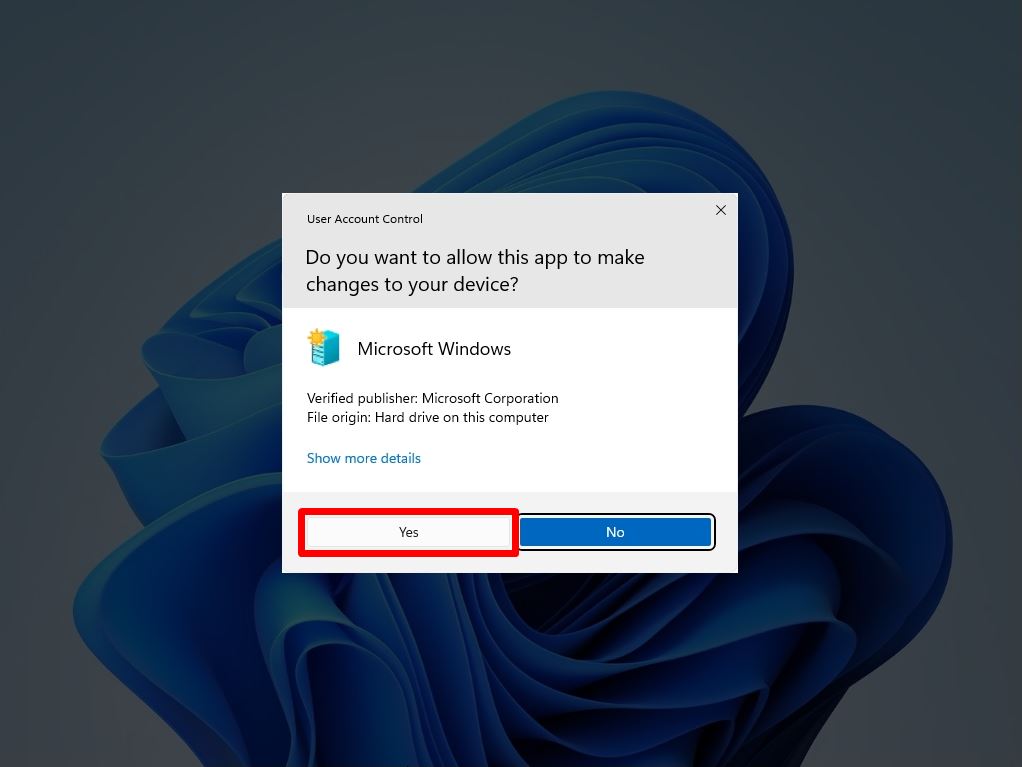
Select “Yes” when the User Account Control screen is displayed.
Step 5:
Select “Ubuntu 22.04 LTS” –> Select “Create Virtual Machine”.
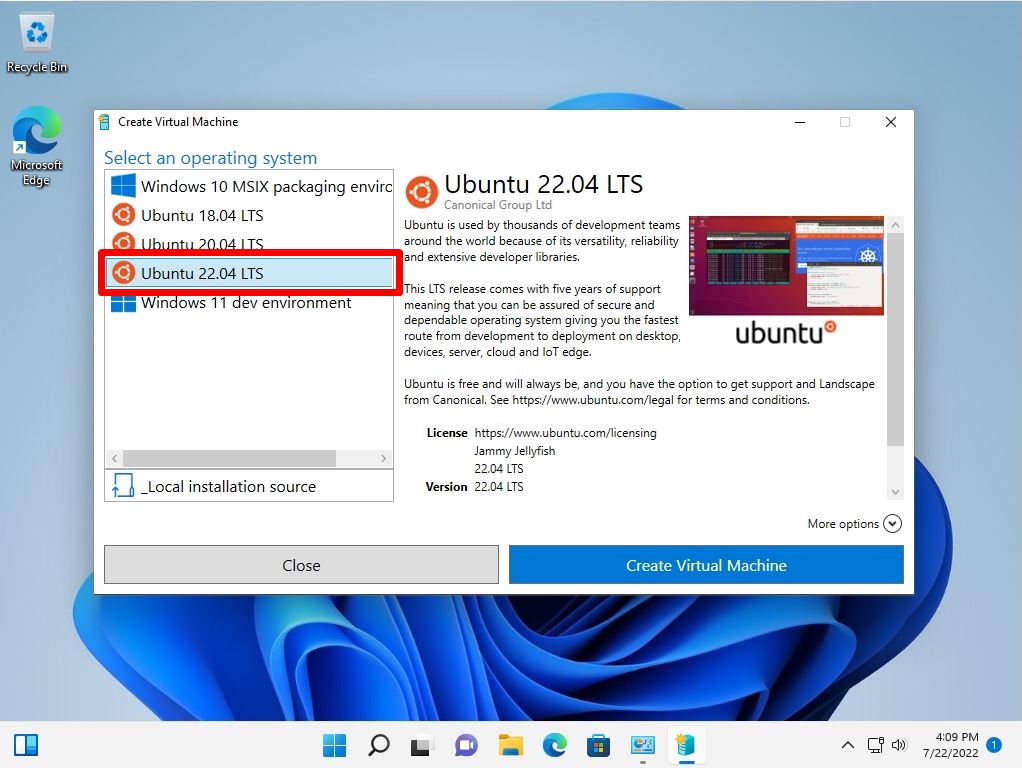
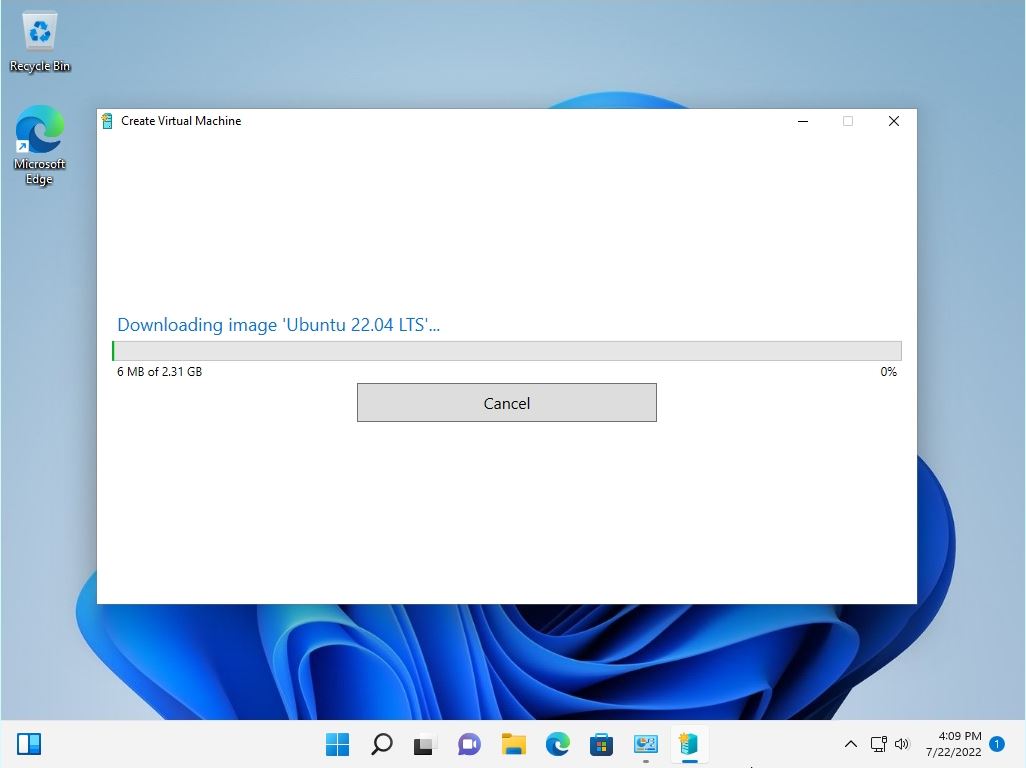
Image Ubuntu 22.04 LTS download / virtual machine creation process starts. Wait a moment for it to finish.
Windows 11 Hyper-V: Ubuntu 22.04 LTS Initial Settings
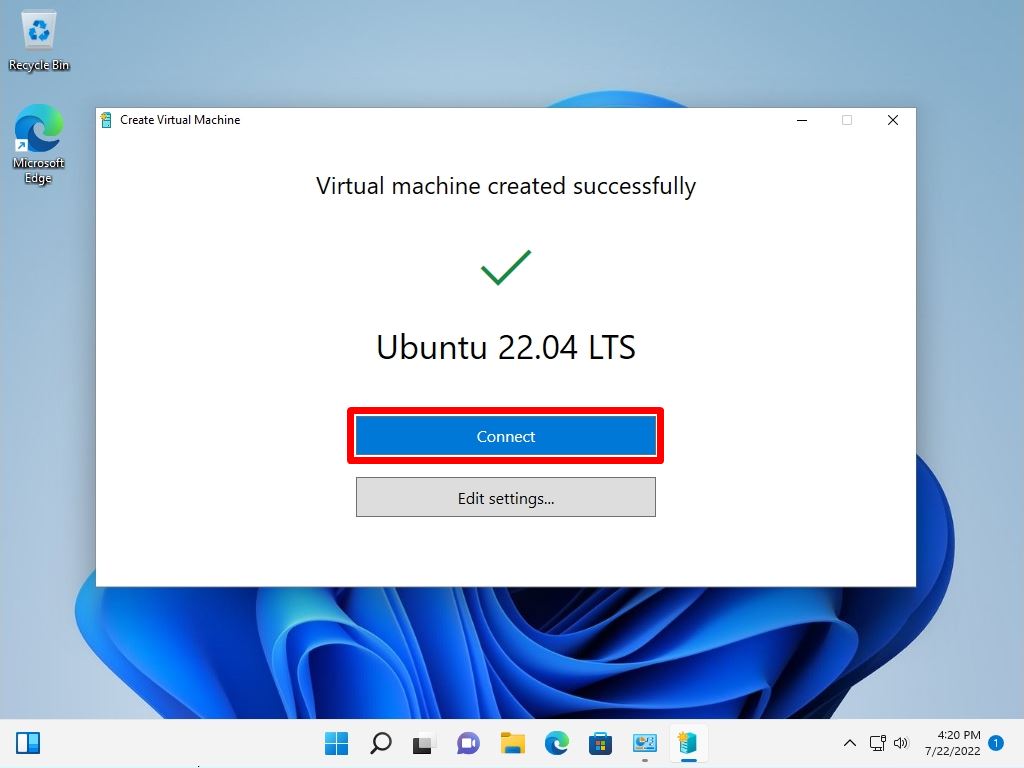
Step 1:
Select “Connect”.
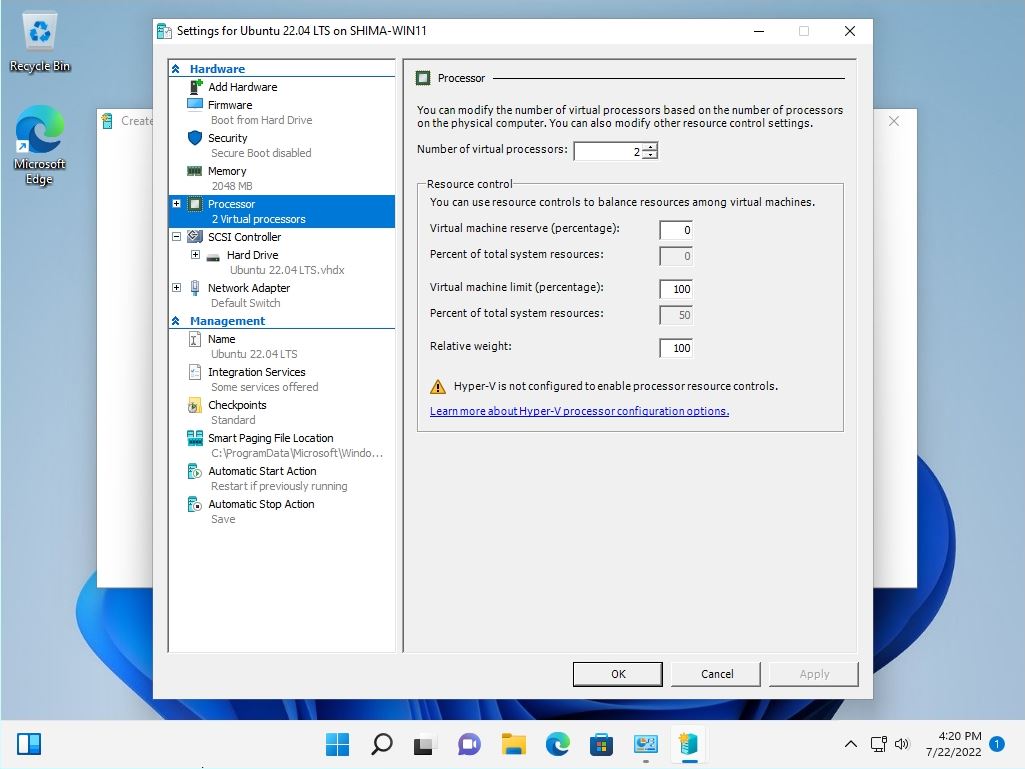
When changing the CPU / memory size You can change the specifications of the virtual machine by selecting “Edit settings”. In this article, the CPU / memory size change screen is described for reference.
Hardware: You can change the memory of the virtual machine in the memory item.
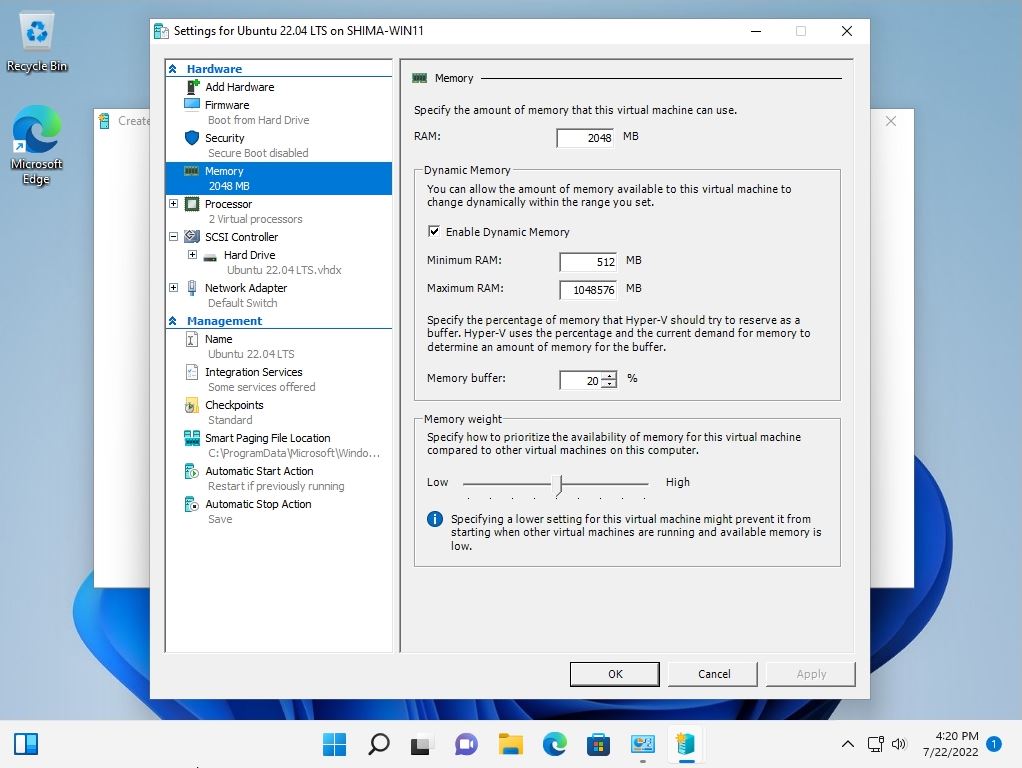
Hardware: You can change the number of virtual processors in the Processor item.
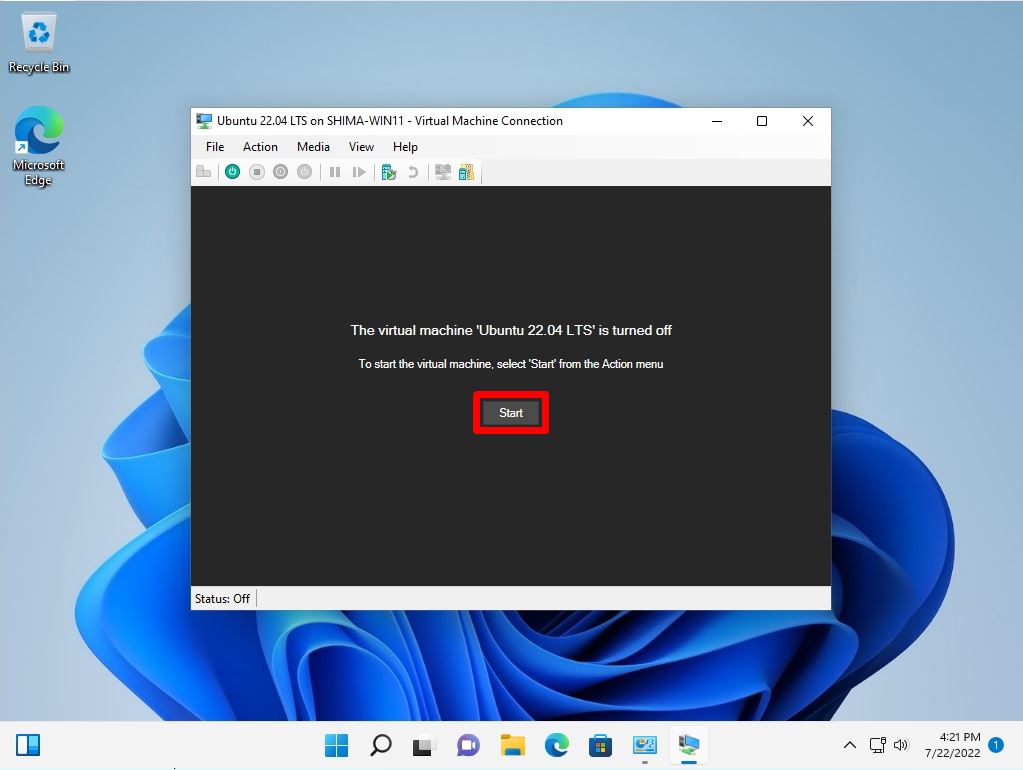
Step 2:
Select “Start”.
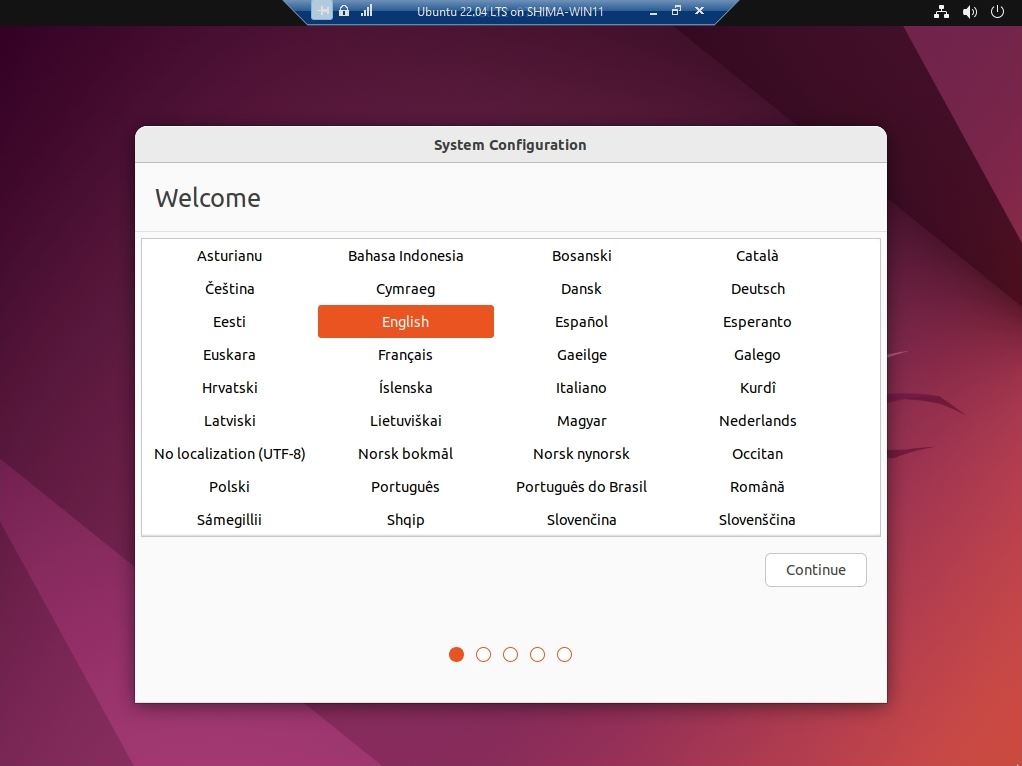
Step 3:
Select your language and select Continue.
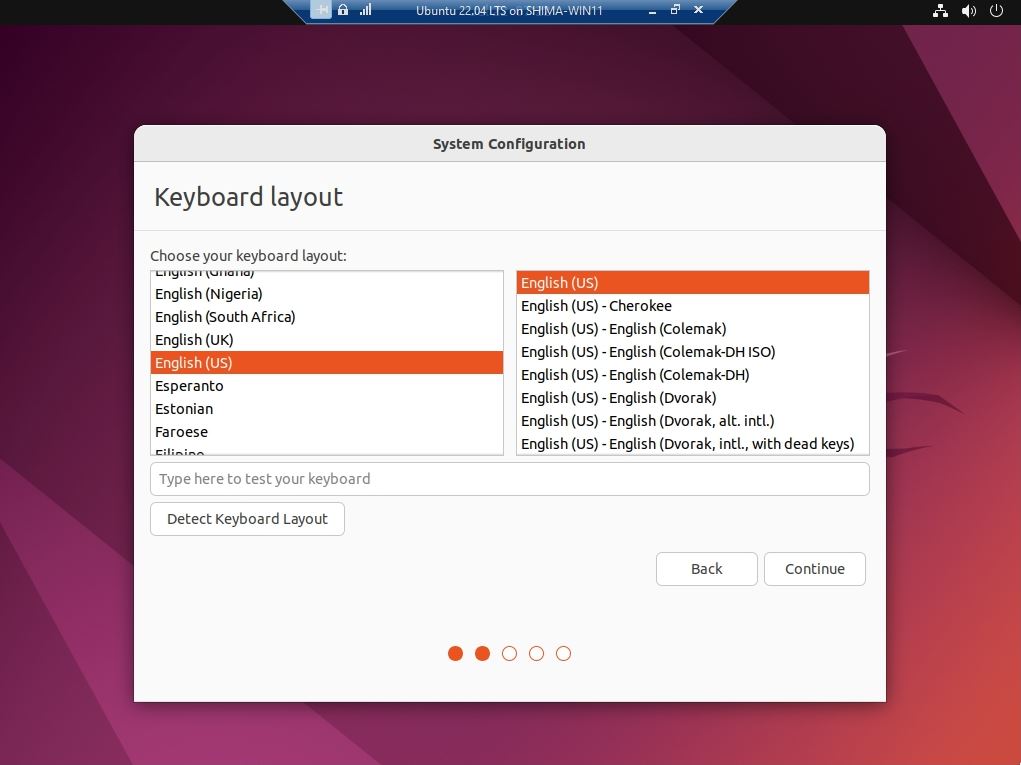
Step 4:
Select the keyboard layout language and select Continue.
Step 5:
Click a location (region) and select Continue.
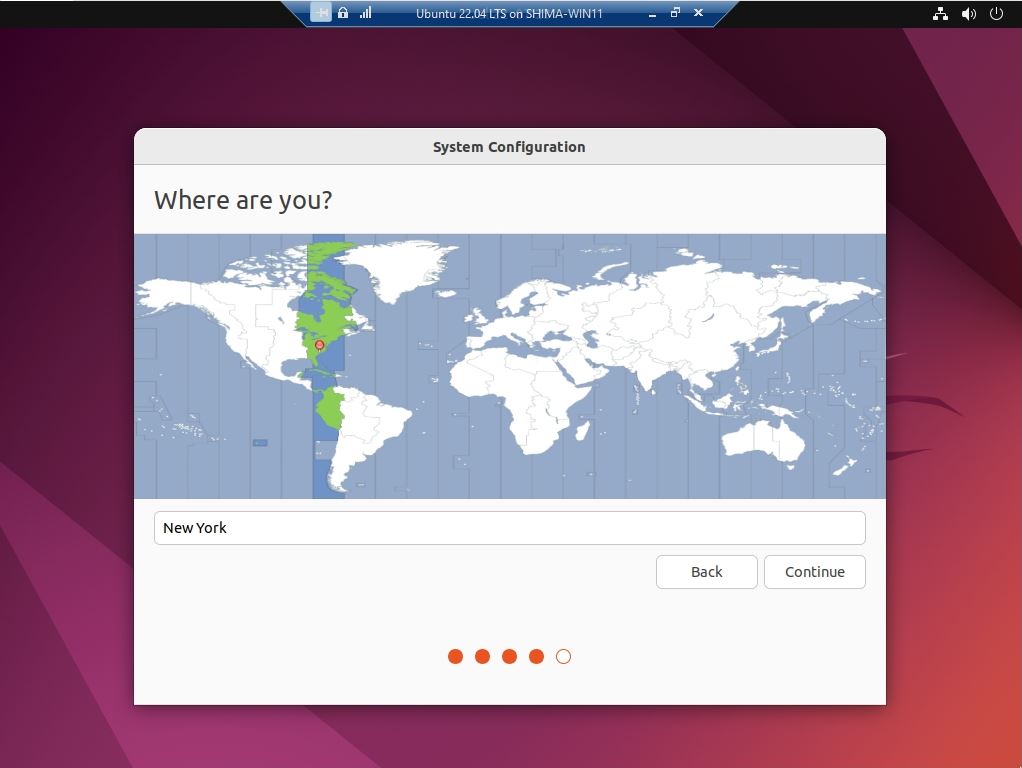
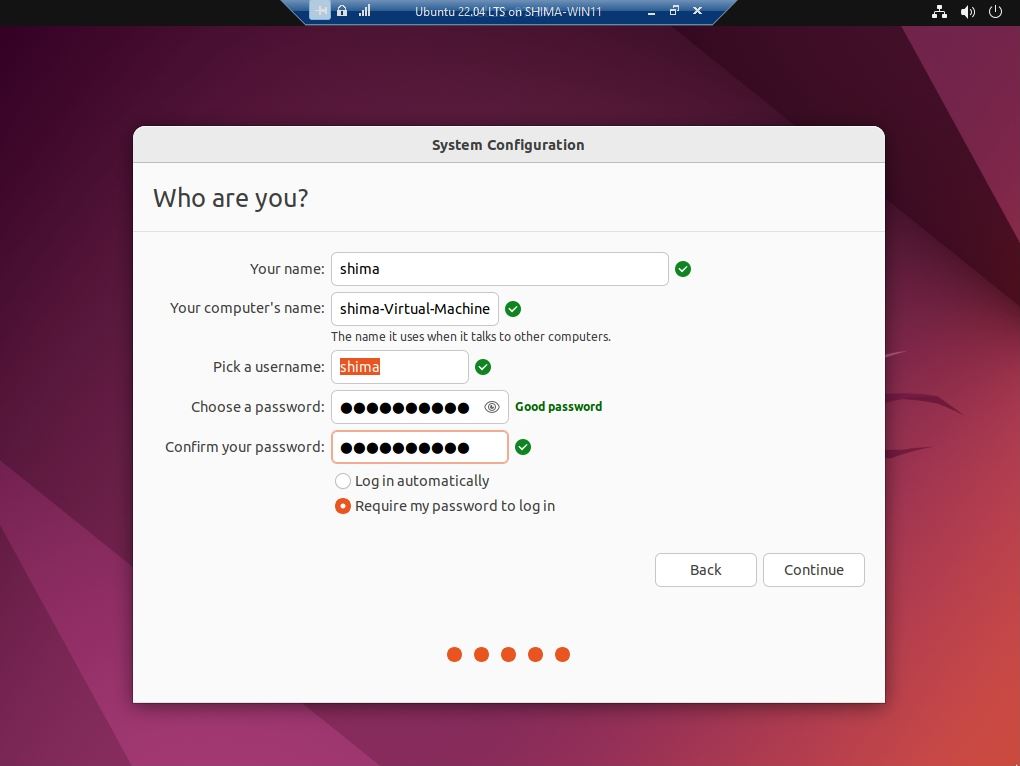
Step 6:
Enter your name (login account) and password –> select Continue.
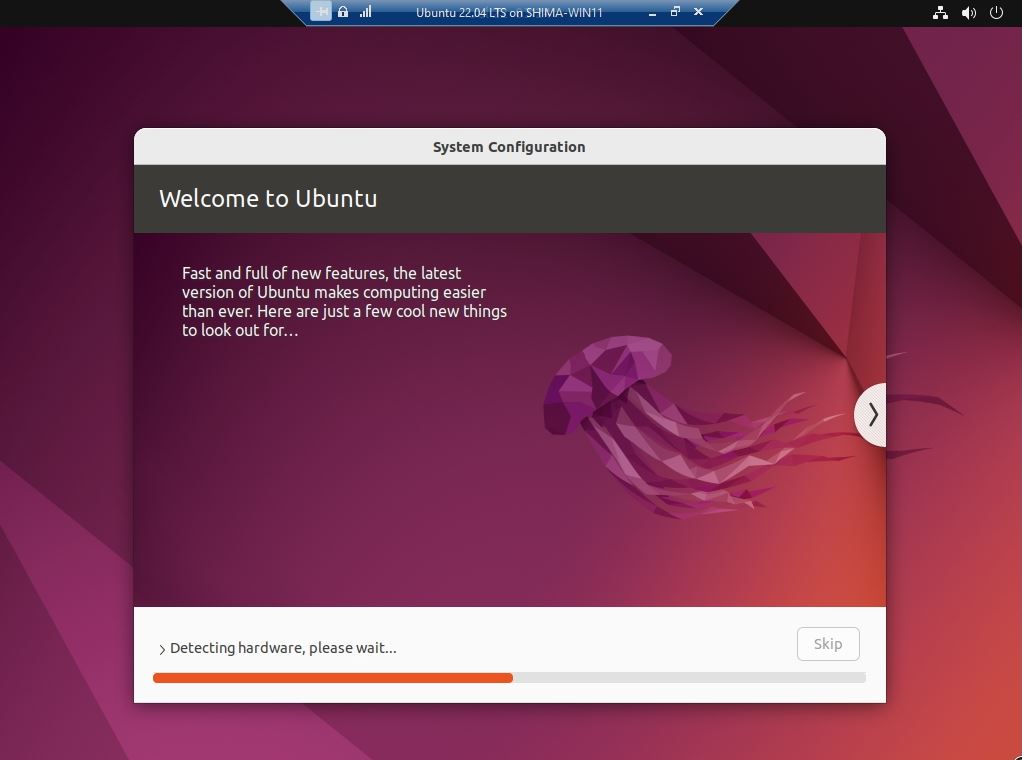
The initial setup process for Ubuntu 22.04 LTS will start. Wait a moment for it to finish.
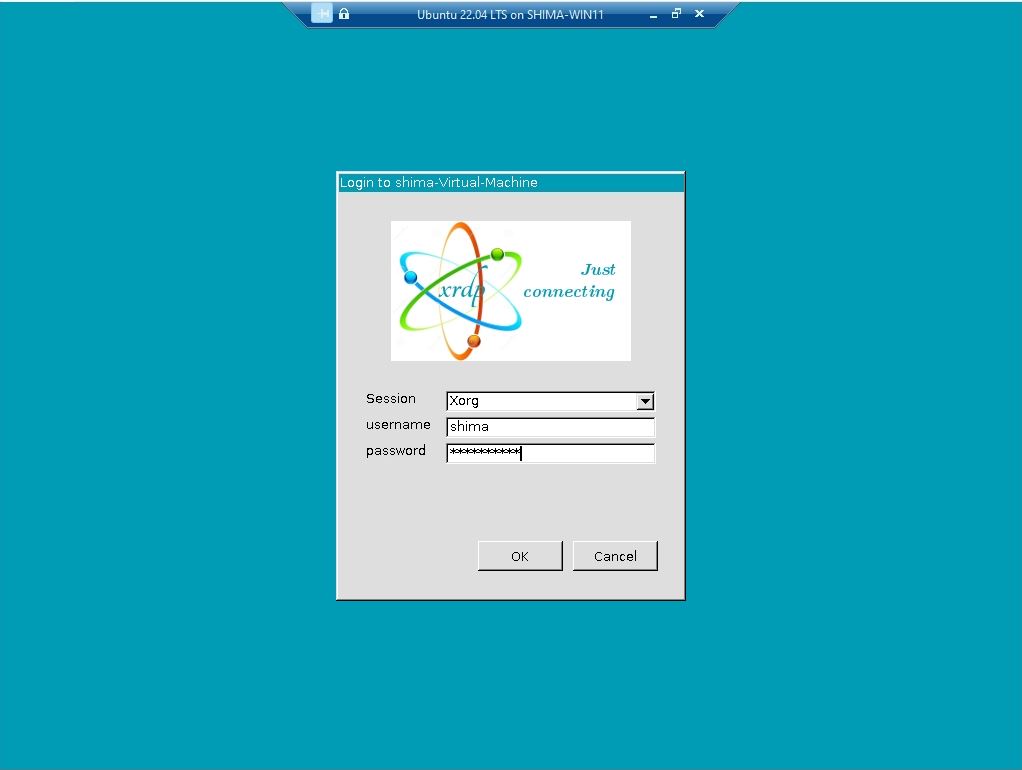
Windows 11 Hyper-V: Ubuntu 22.04 LTS Login
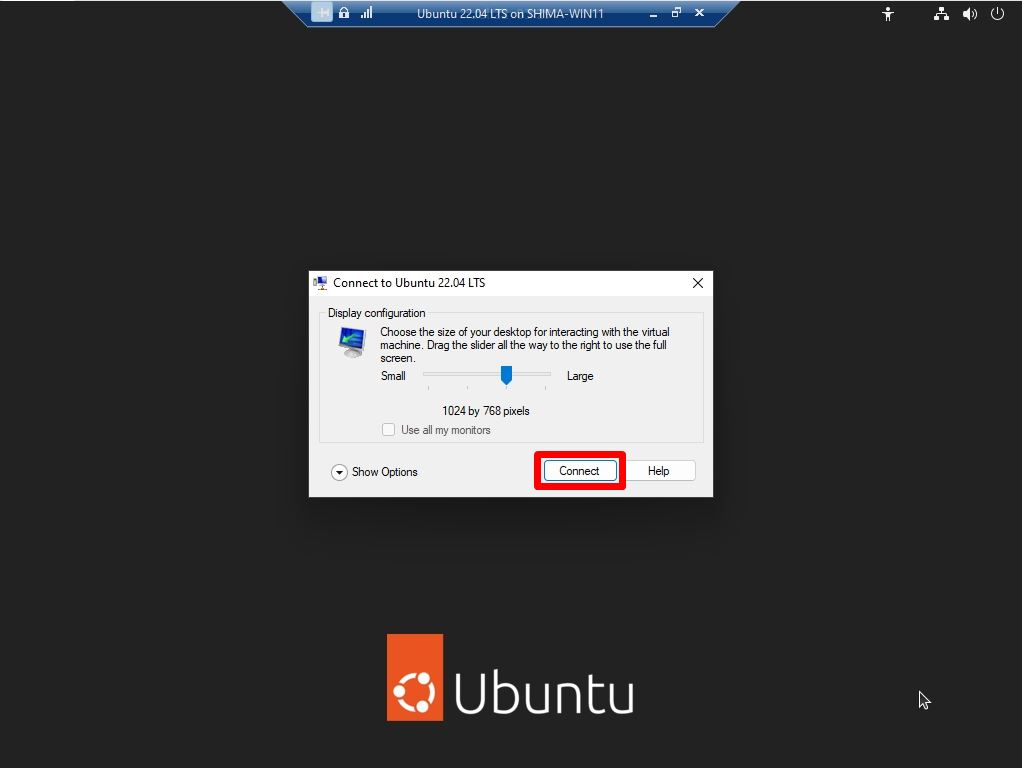
Step 1:
Select “Connect”. * The size of the screen to be displayed can be changed as desired.
Step 2:
Log in to the Ubuntu virtual machine Enter the information below.
■ Session: Xorg (default)
■ username: Enter the “your name” set in the previous step
■ password: Enter the password set in the previous step
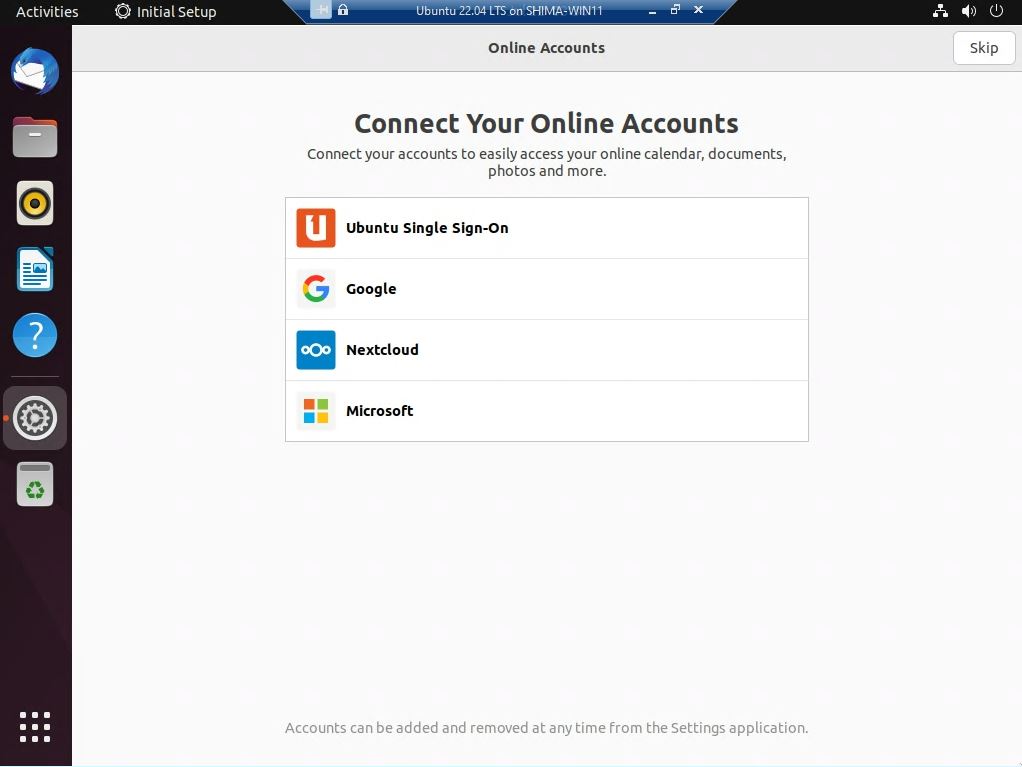
This time, I chose “Skip” because the purpose is only to install the OS on the virtual machine.
*You can set the connection / disconnection to the online service later, so you can skip it.
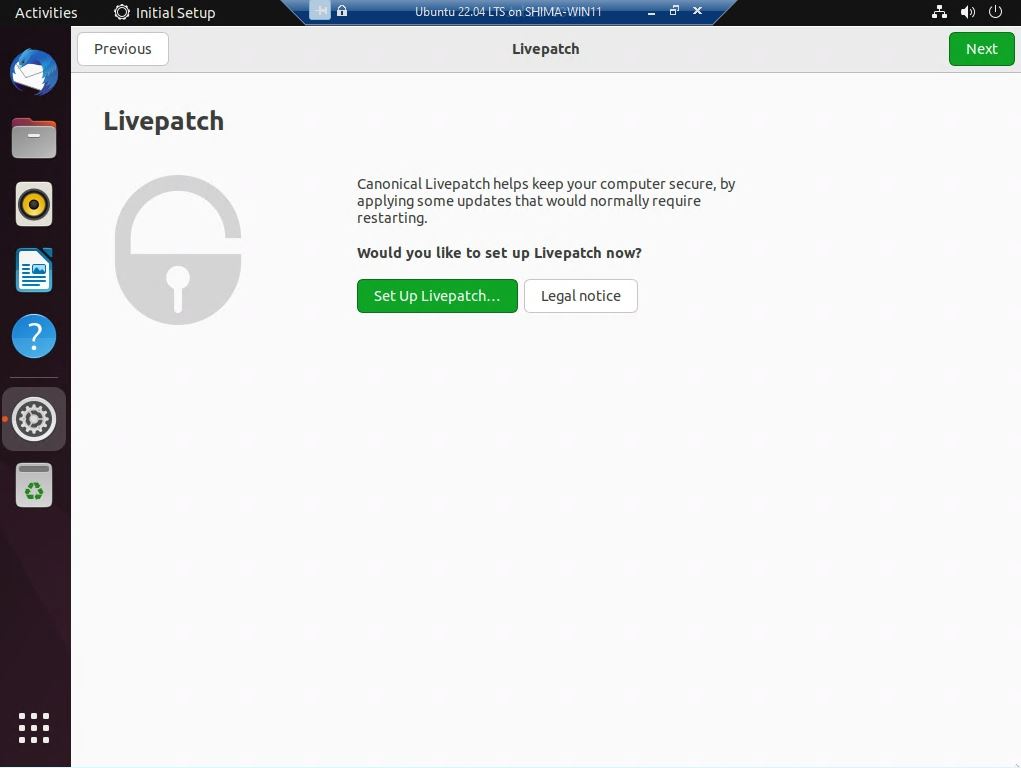
In this article, I chose “Next” without applying Livepatch because it is for OS installation only.
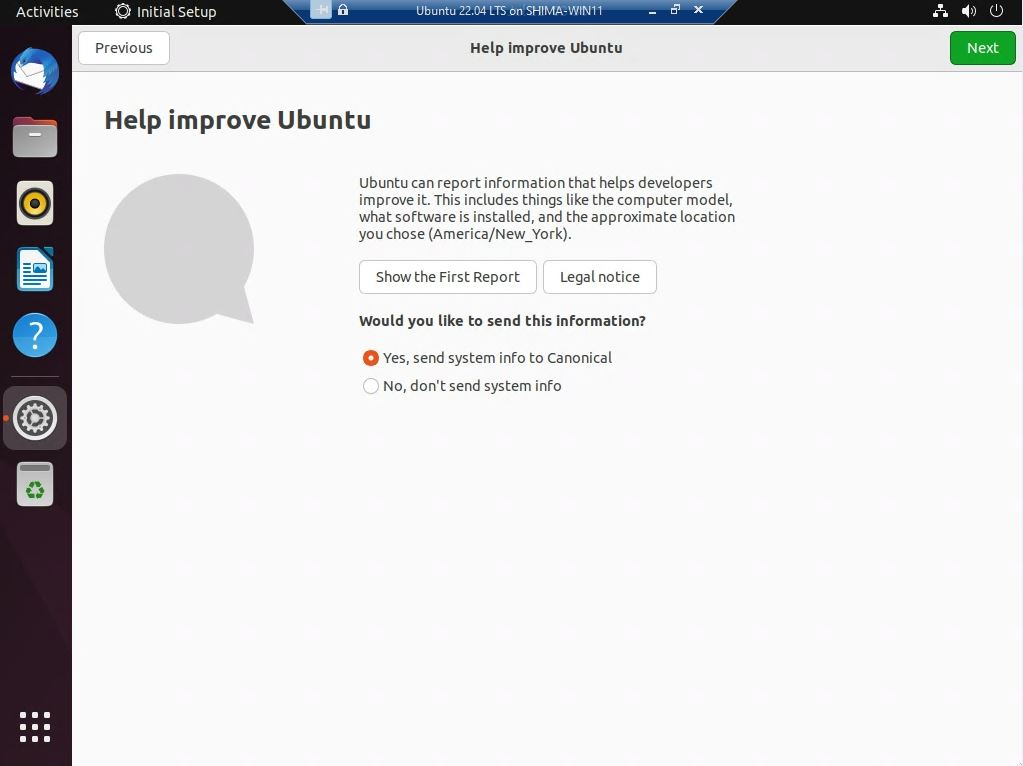
Help improve Ubuntu screen (help improve Ubuntu): Select Yes or No –> Select Next.
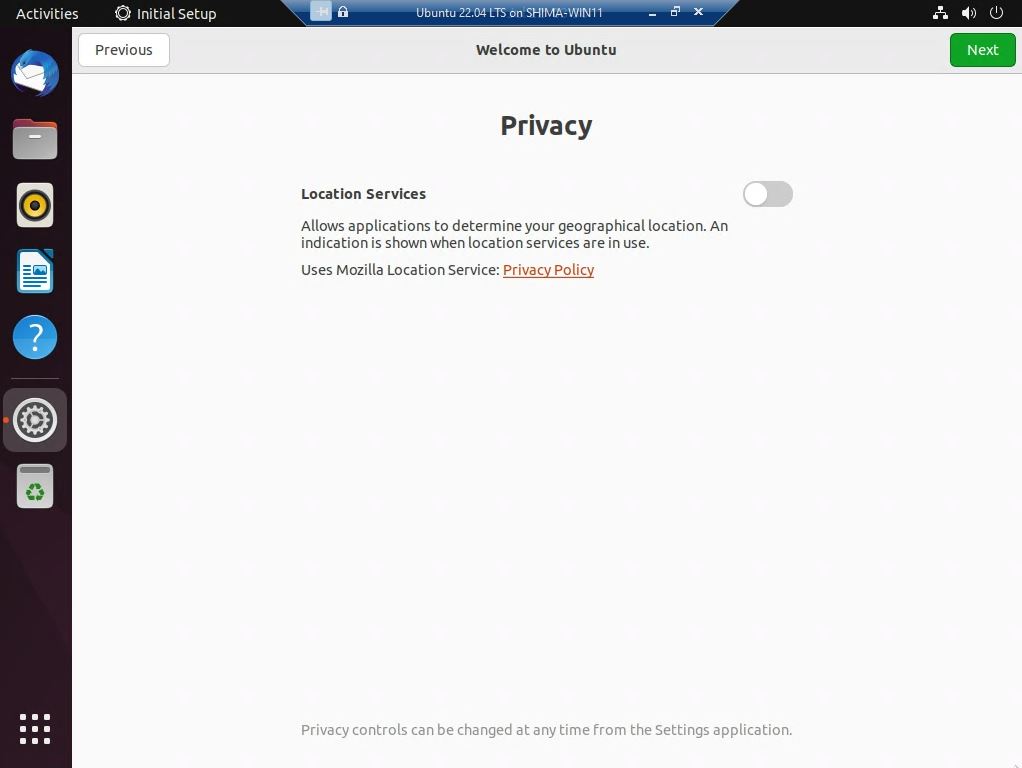
Privacy screen: If you enable the setting, you can share a highly accurate location over the network.
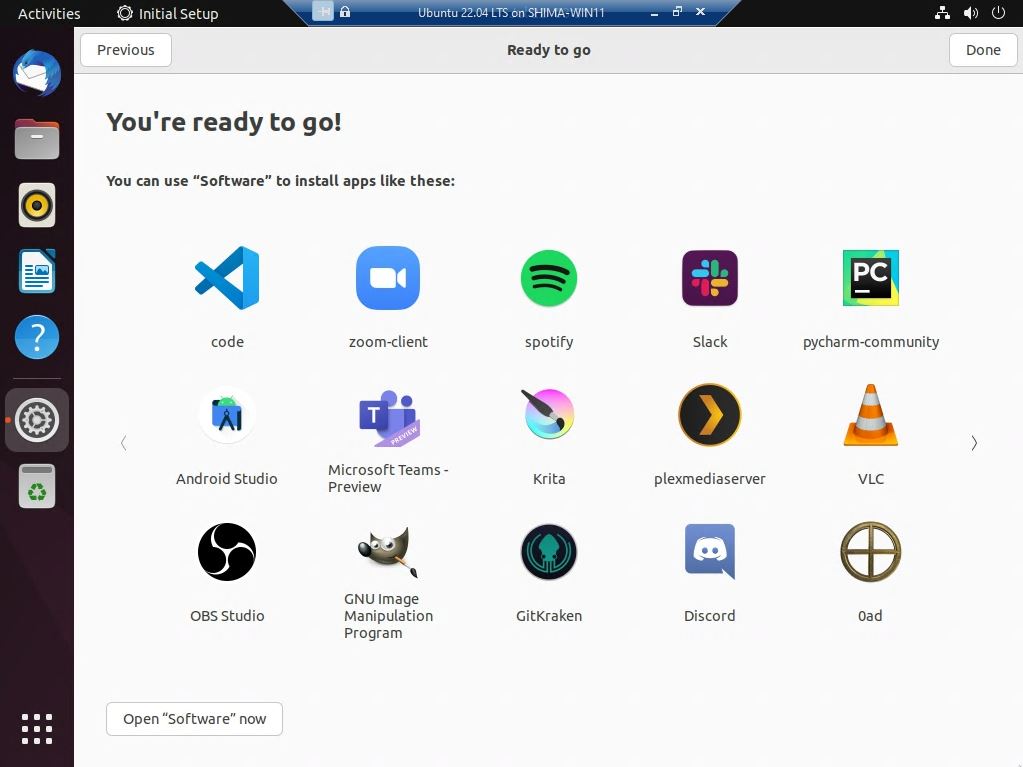
In this article, I chose “Done” without installing the displayed application because the purpose is to install the OS. * You can install the displayed application on the “You’re ready to go” screen.
Ubuntu 22.04 LTS installation is complete on Windows11 Hyper-V.
