Active Directory is a user management tool for centrally managing the functions and user information of Windows PCs using the domain authentication mechanism. It was introduced from Windows Server 2000 and has been introduced by many companies and educational institutions to this day. As a merit of introducing Active Directory, the system administrator can collectively manage various information and status related to the personal computer, which can greatly reduce the management effort.
This article will walk you through the steps to install Active Directory Domain Services in Windows Server 2016 and promote it to a domain controller.
Windows Server 2016:Active Directory Domain Services Installation
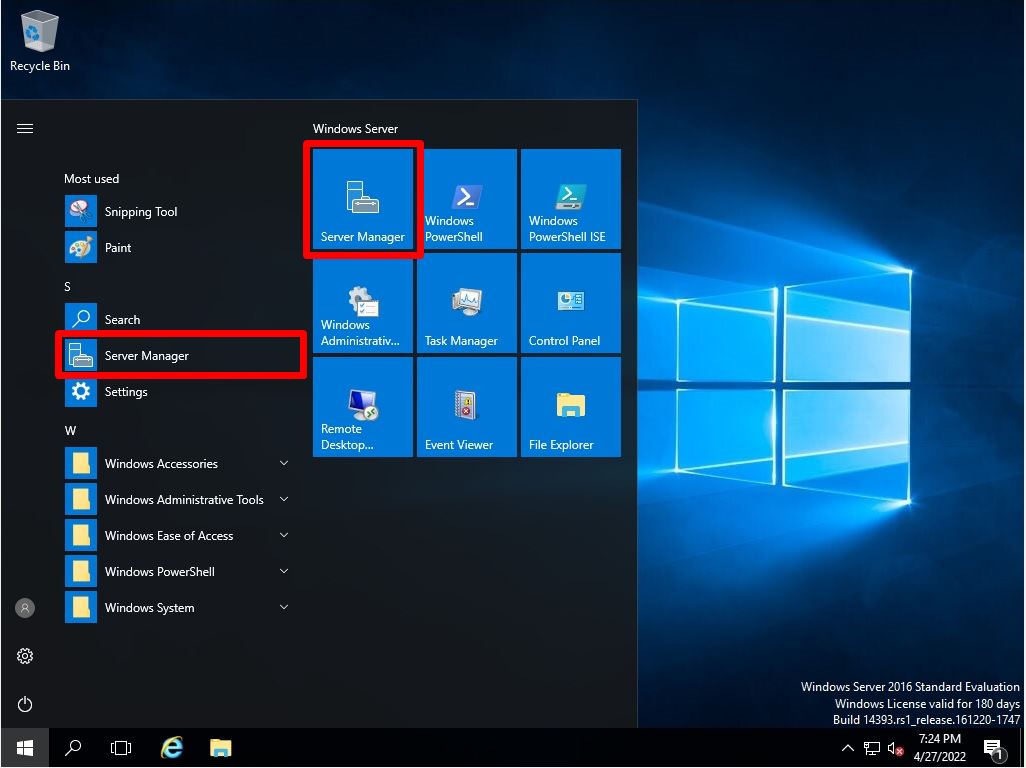
Step 1:
Select the Windows mark at the bottom left of your desktop.

Step 2:
Select Server Manager.
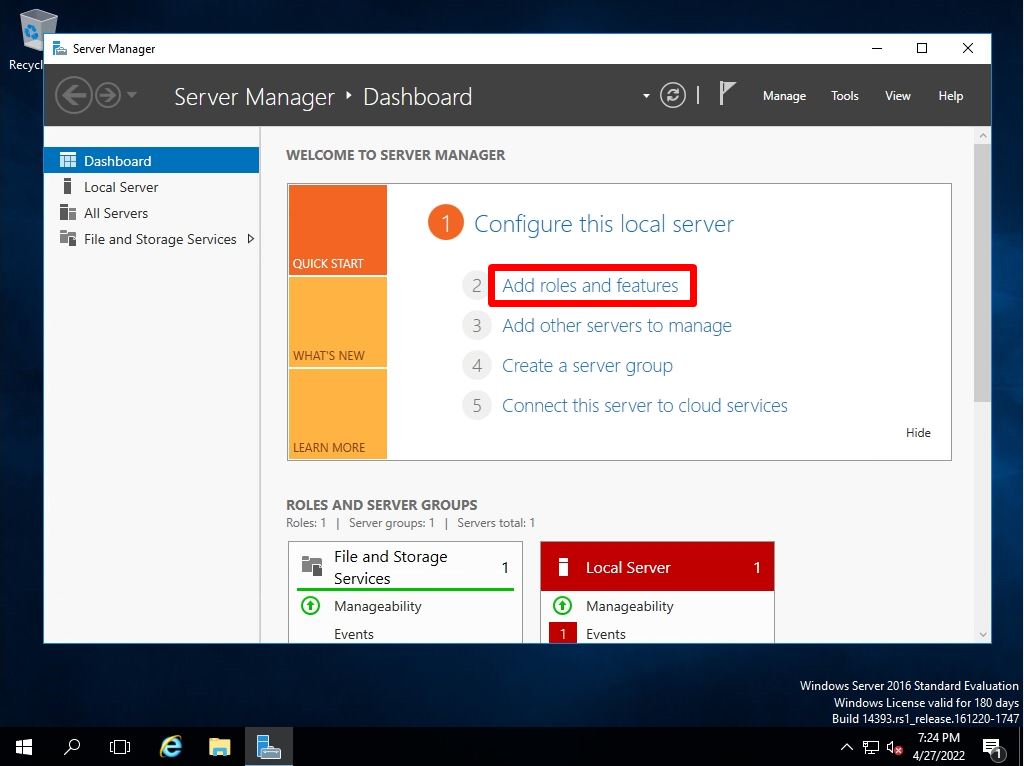
Step 3:
Select Add Roles and Features.
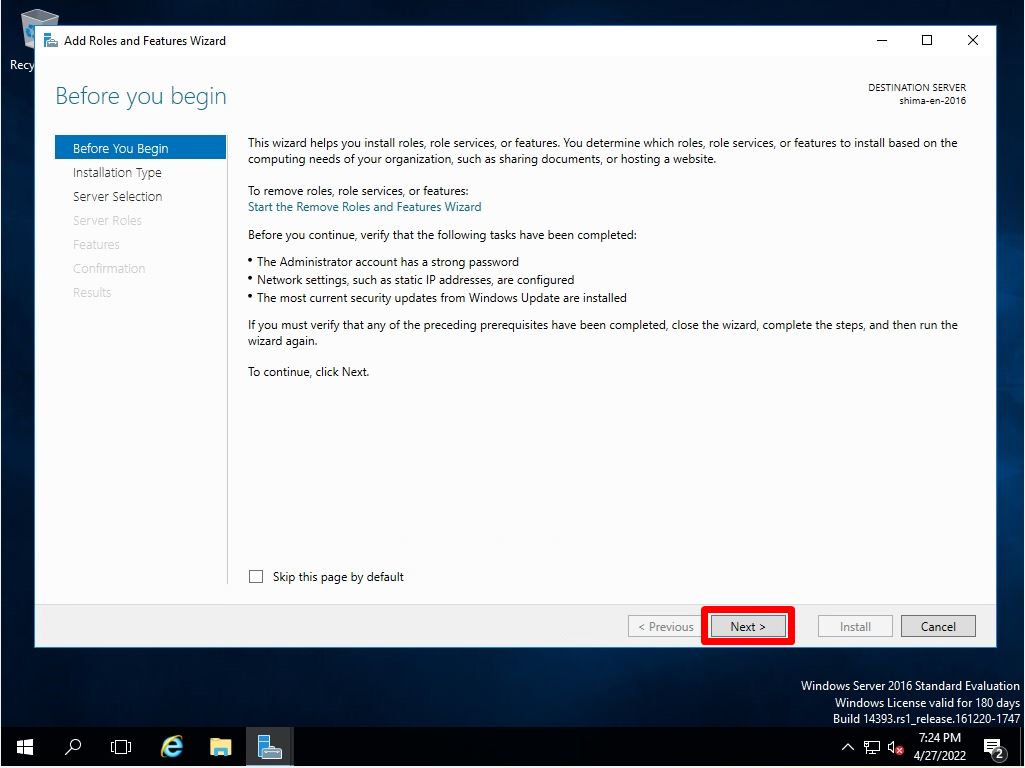
Step 4:
Before you begin screen: Select Next.
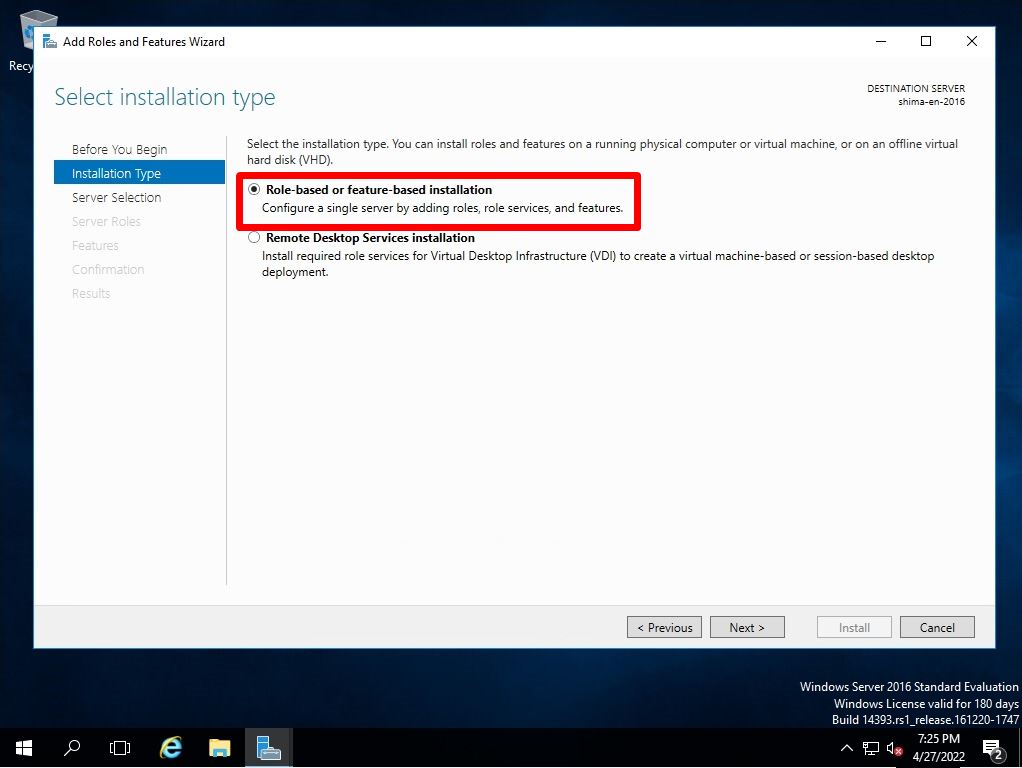
Step 5:
Select installation type screen: Select Role-based or feature-based installation -> Next.
Step 6:
Select destination server screen: Select “Select a server from the server pool” -> “Next”.

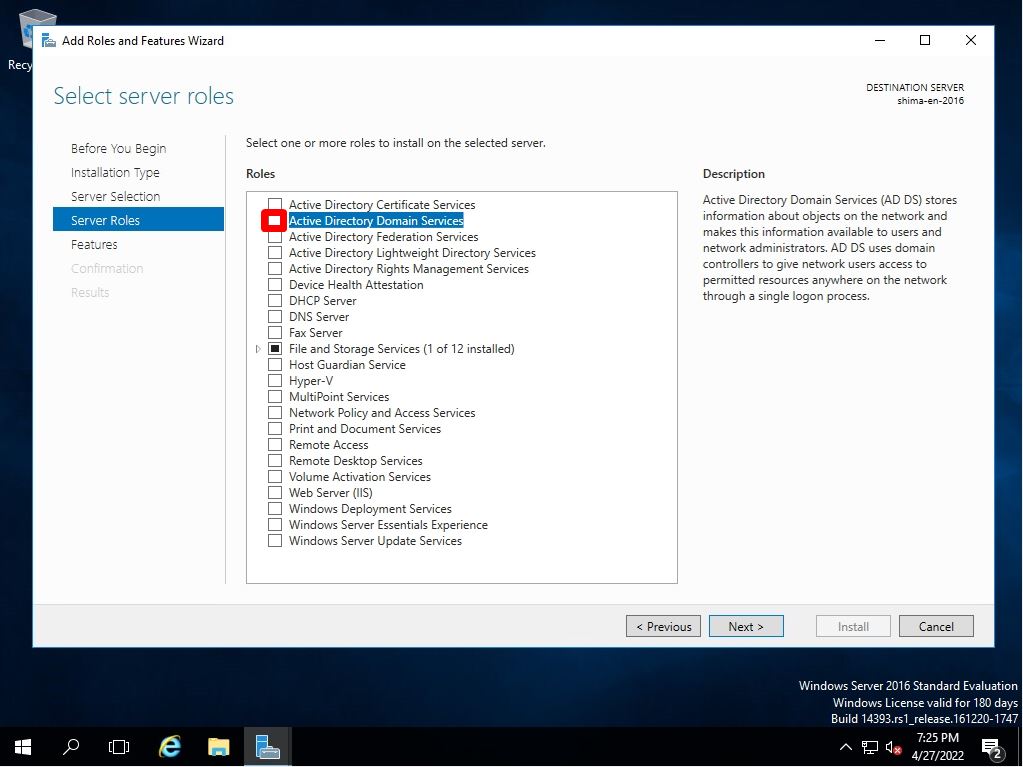
Step 7:
Select server roles screen: Select Active Directory Domain Services.
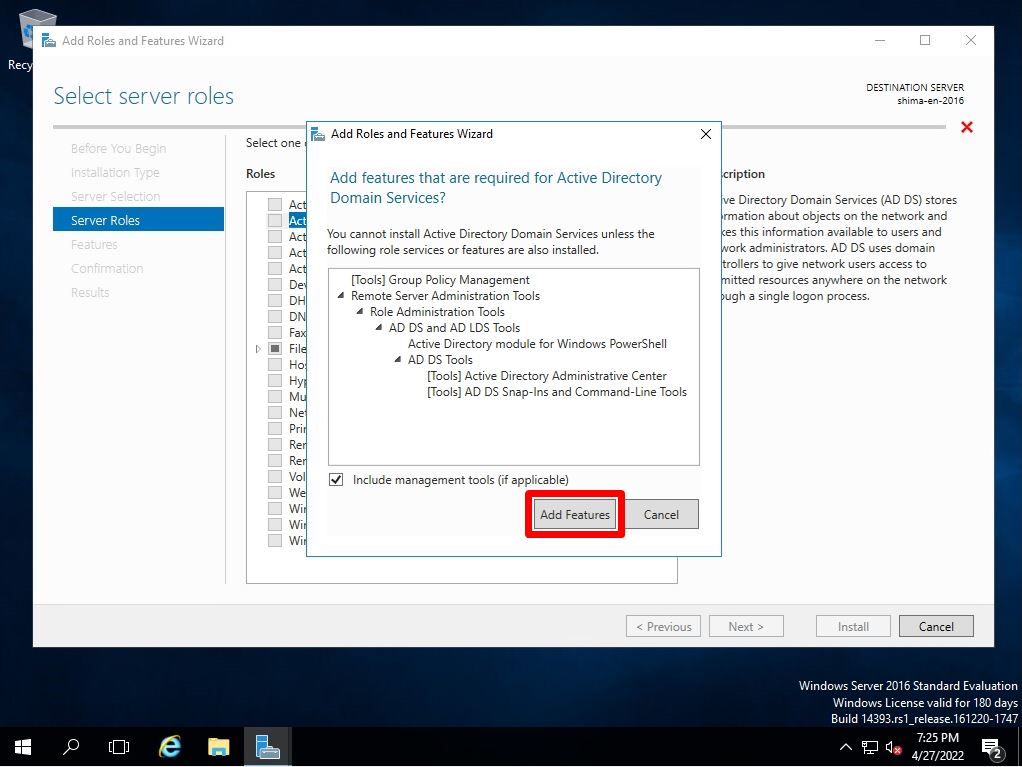
Step 8:
Select Add Features.
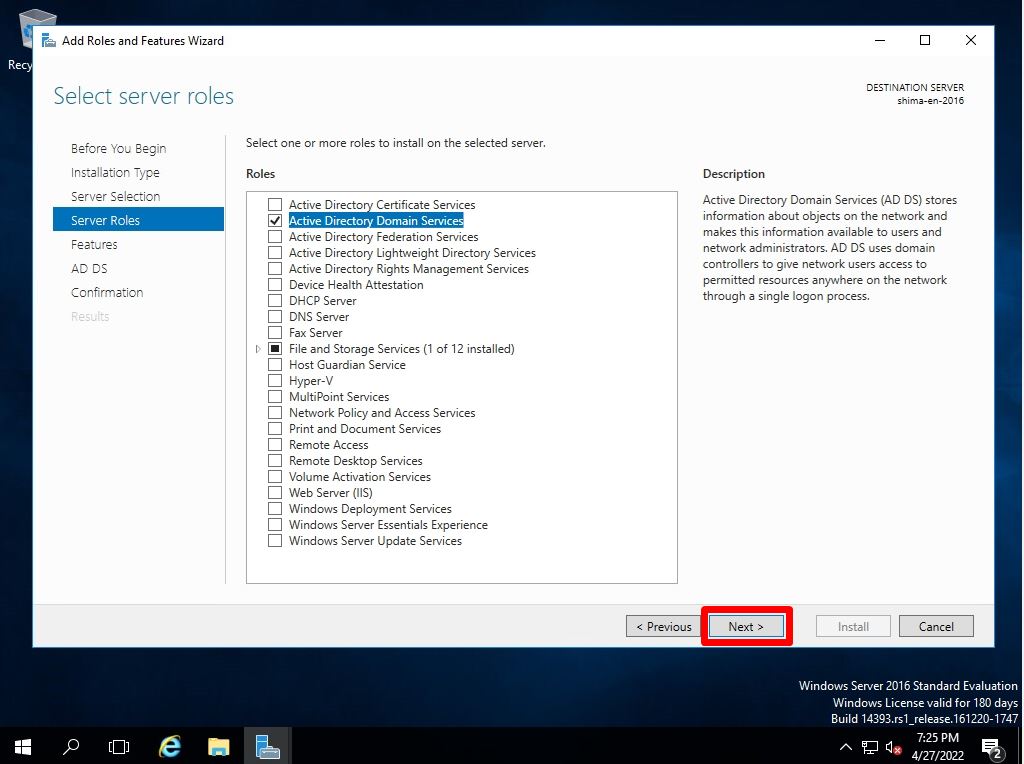
Step 9:
Select server roles screen: Make sure the Active Directory Domain Services checkbox is enabled and select Next.
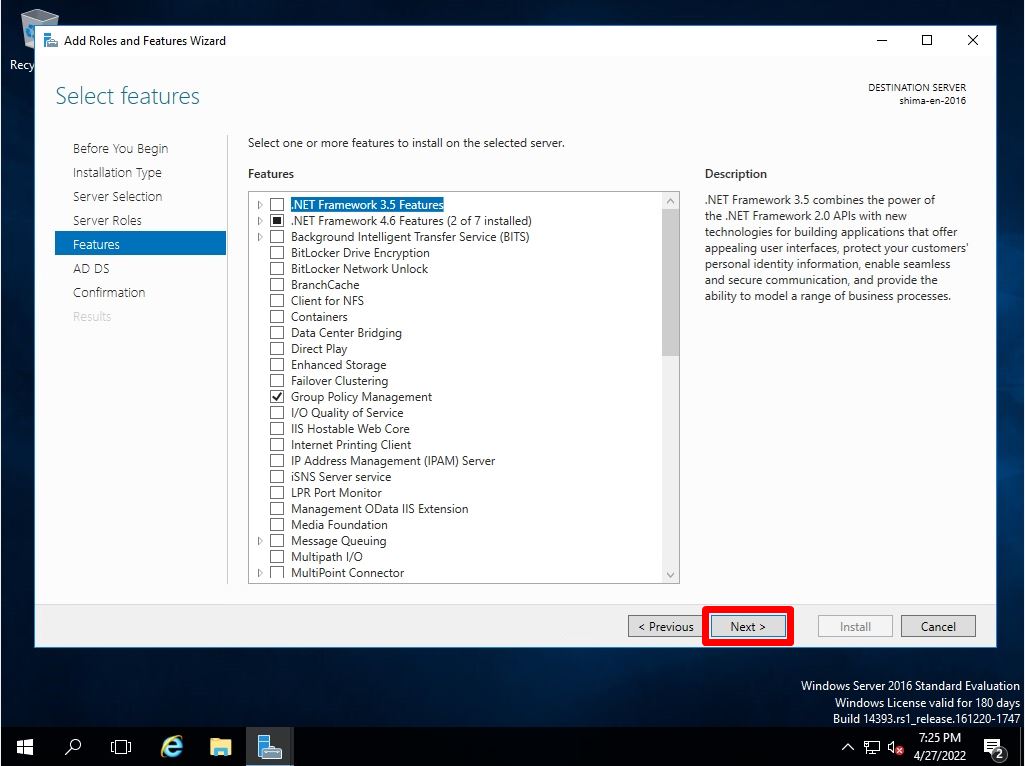
Step 10:
Select features screen: Select “Next” without selecting anything.
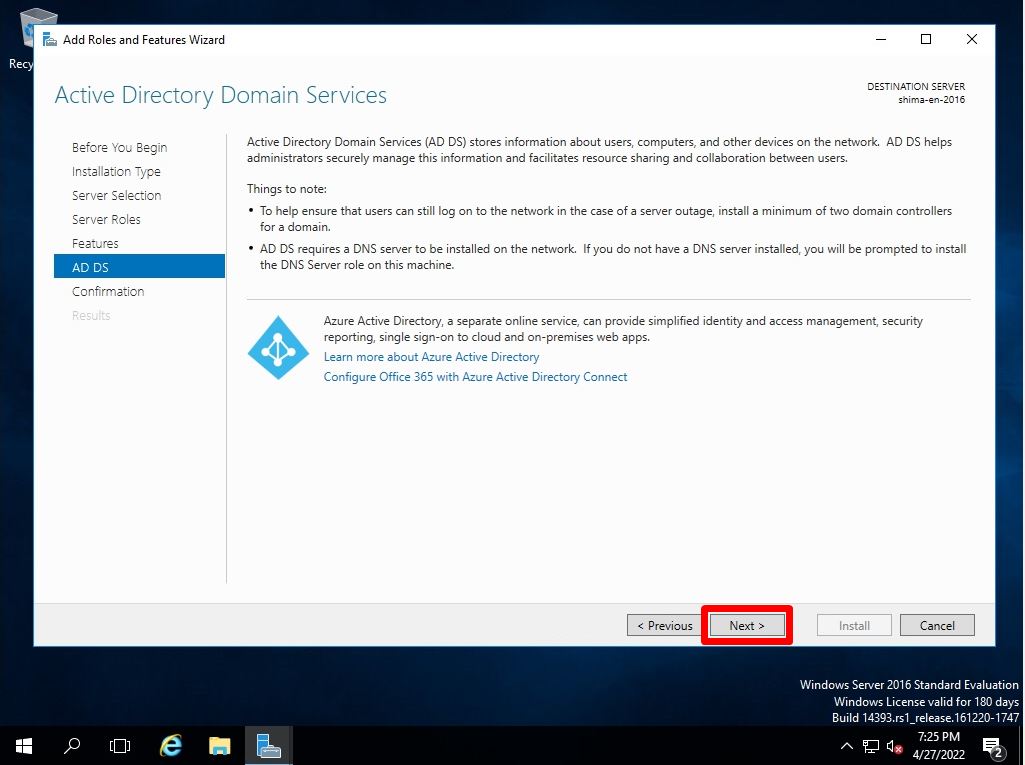
Step 11:
Active Directory Domain Services screen: Select Next.
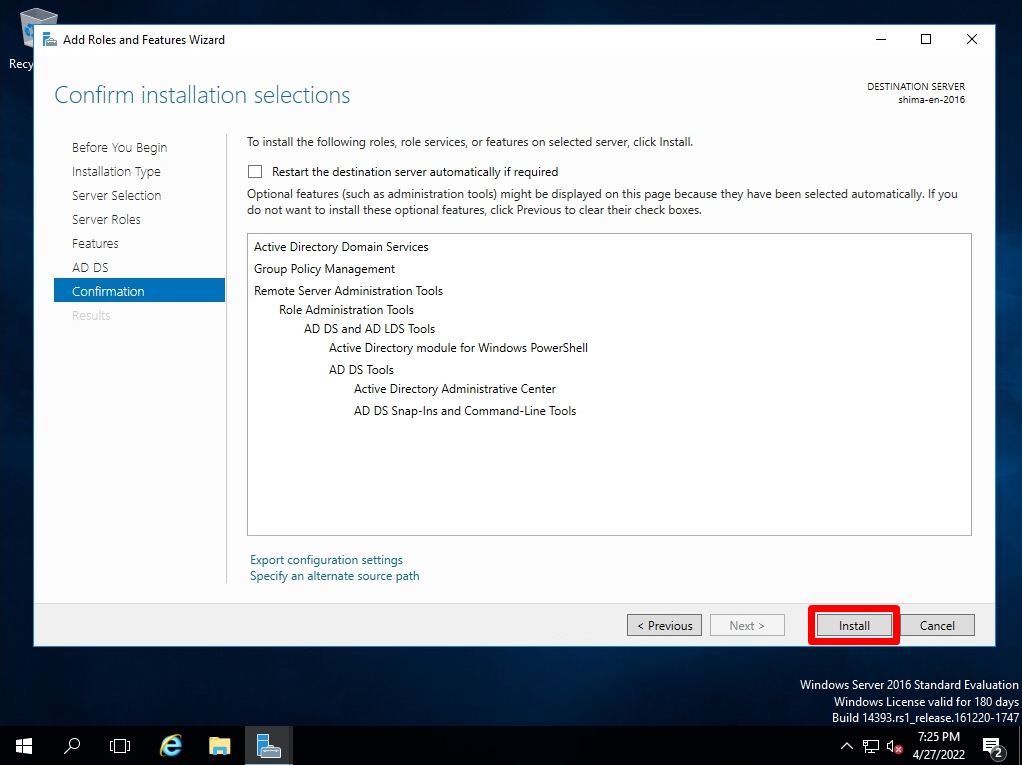
Step 12:
Confirm installation selections screen : Select “Install”.
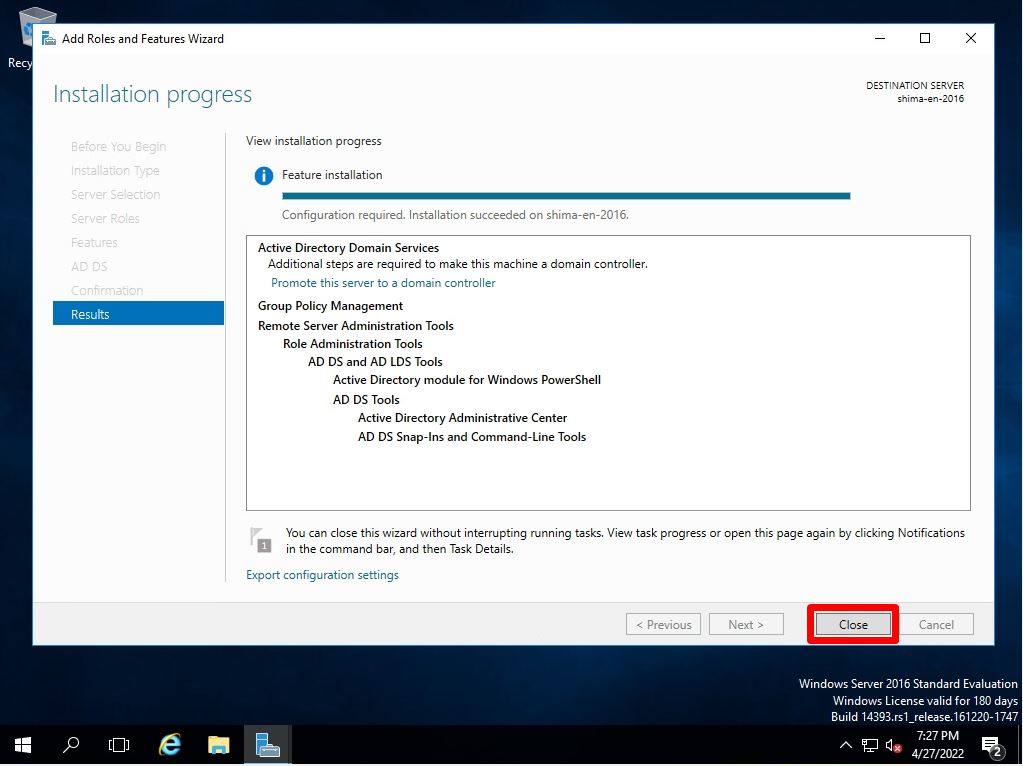
Step 13:
Installation progress screen: Select “Close”.
Windows Server 2016:Promoted to Domain Controller
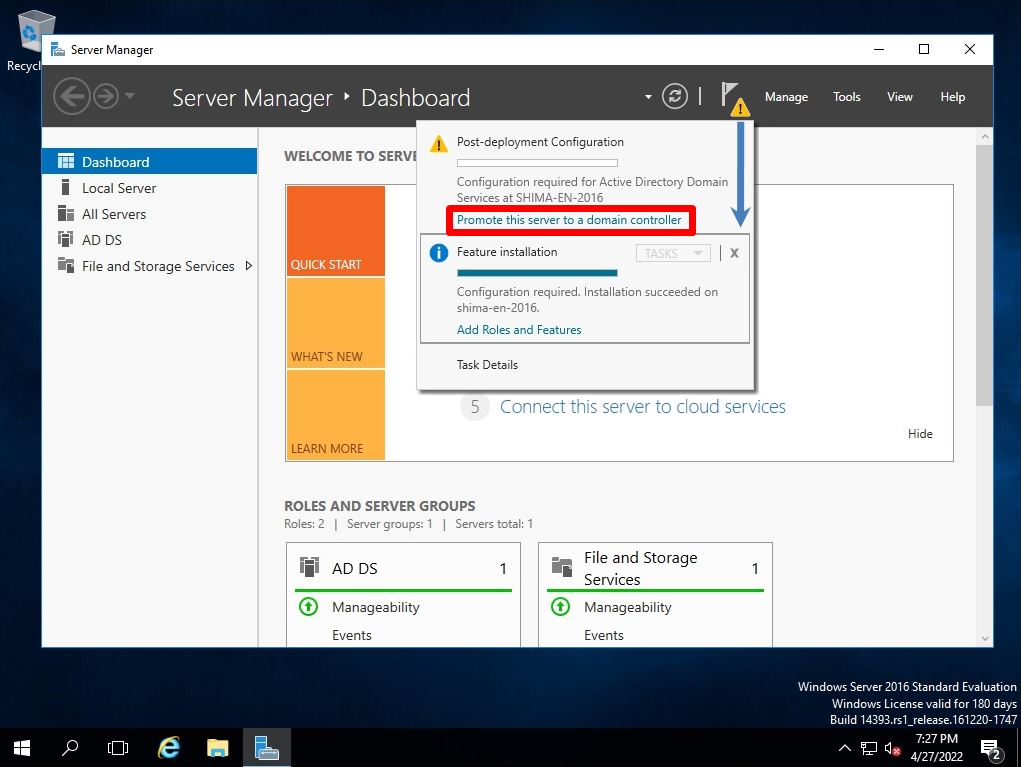
Step 1:
Server Manager Dashboard screen: Select Promote this server to a domain controller.
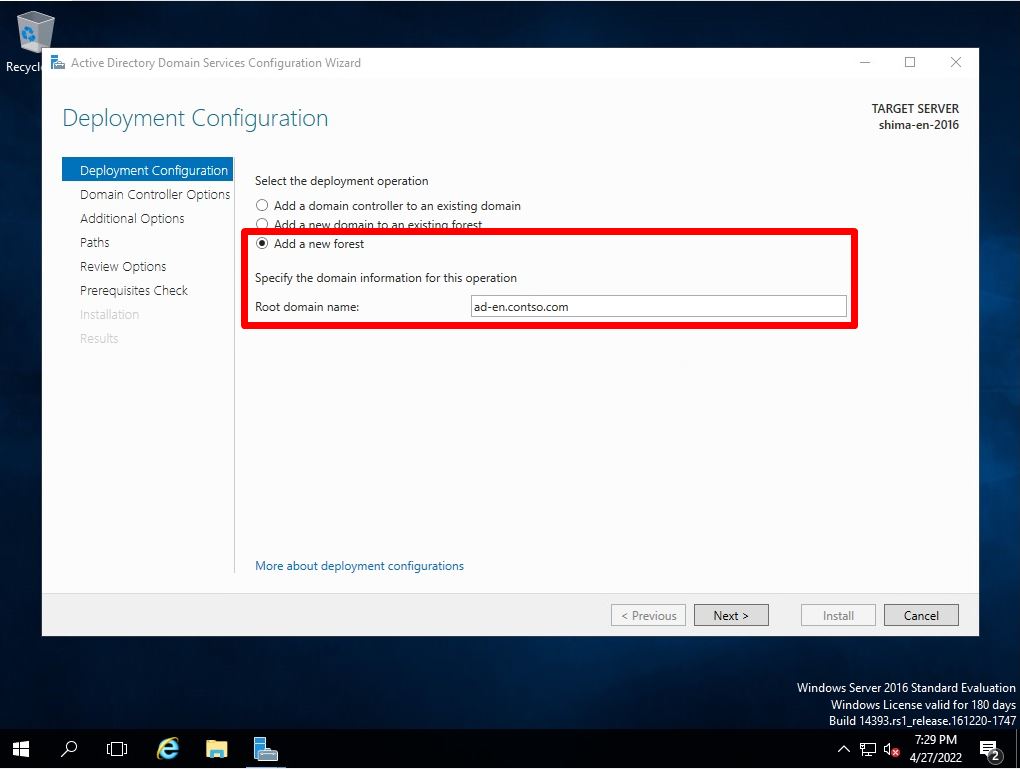
Step 2:
Deployment configuration screen: Add a new forest –> Enter Root domain name –> Select Next
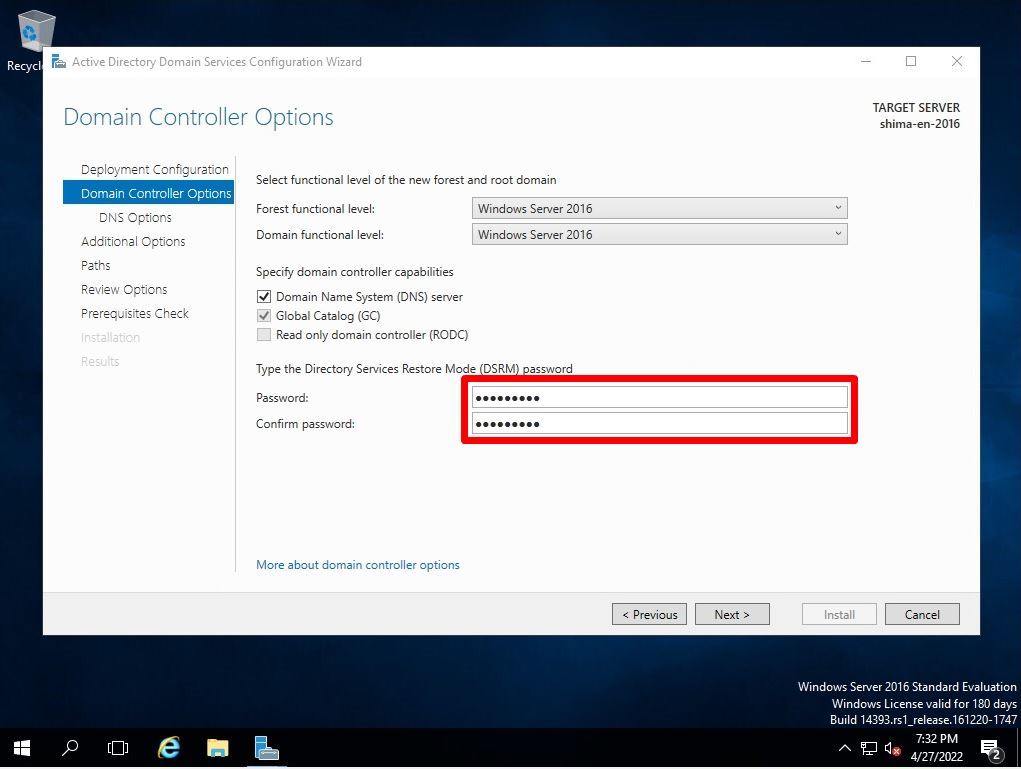
Step 3:
Domain Controller Options screen: Enter Directory Services Restore Mode (DSRM) password –> Select Next.
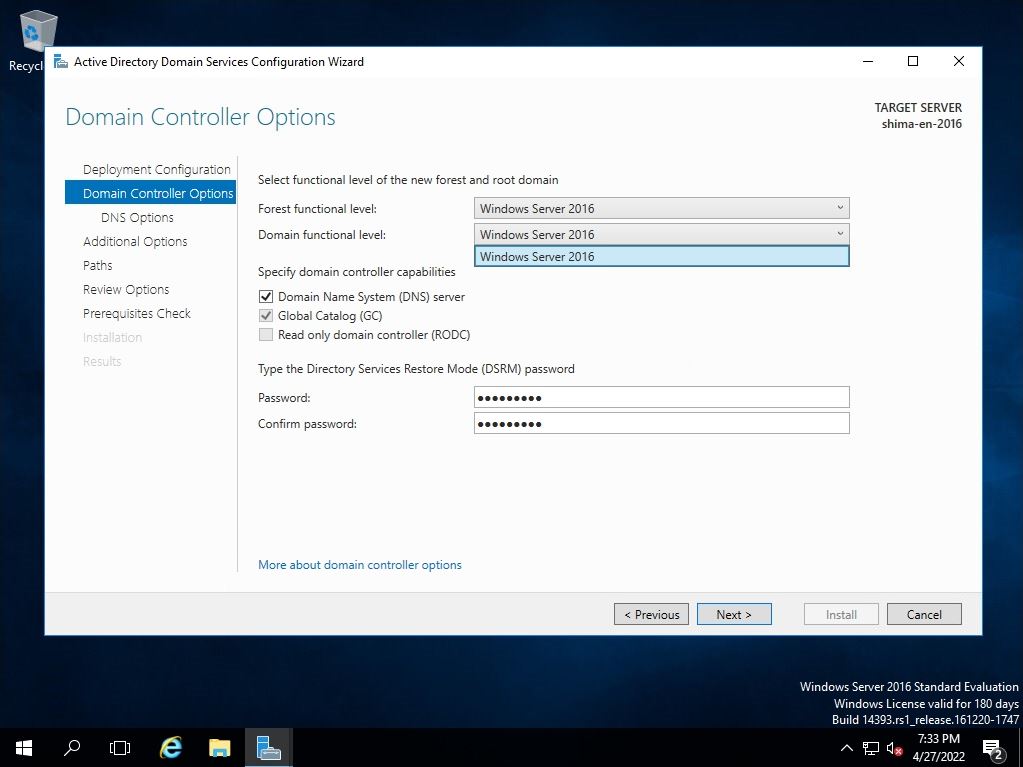
I checked the functional level of the forest. A new forest functional level “Windows Server 2016” has been added.

I checked the functional level of the domain. The functional level of the new domain has been changed to “Windows Server 2016”.
Step 4:
DNS Options screen: Select Next.

Step 5:
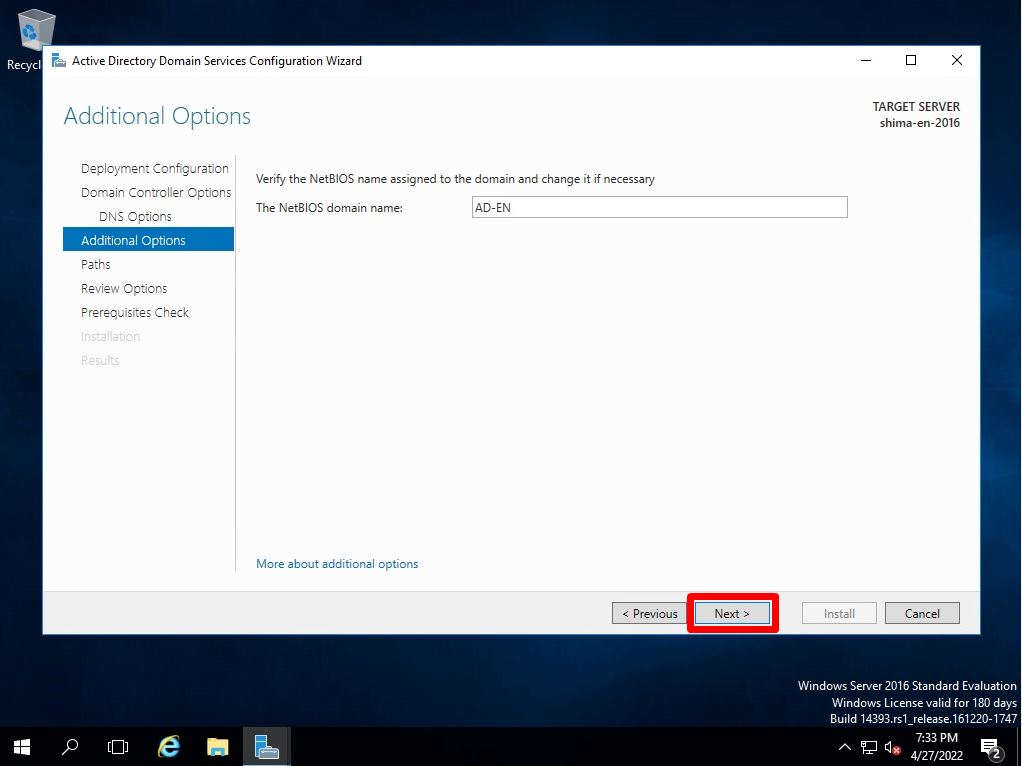
Additional options screen: The subdomain is automatically specified as the NetBIOS domain name from the domain name you entered as the root domain name. Change it if necessary.
Step 6:
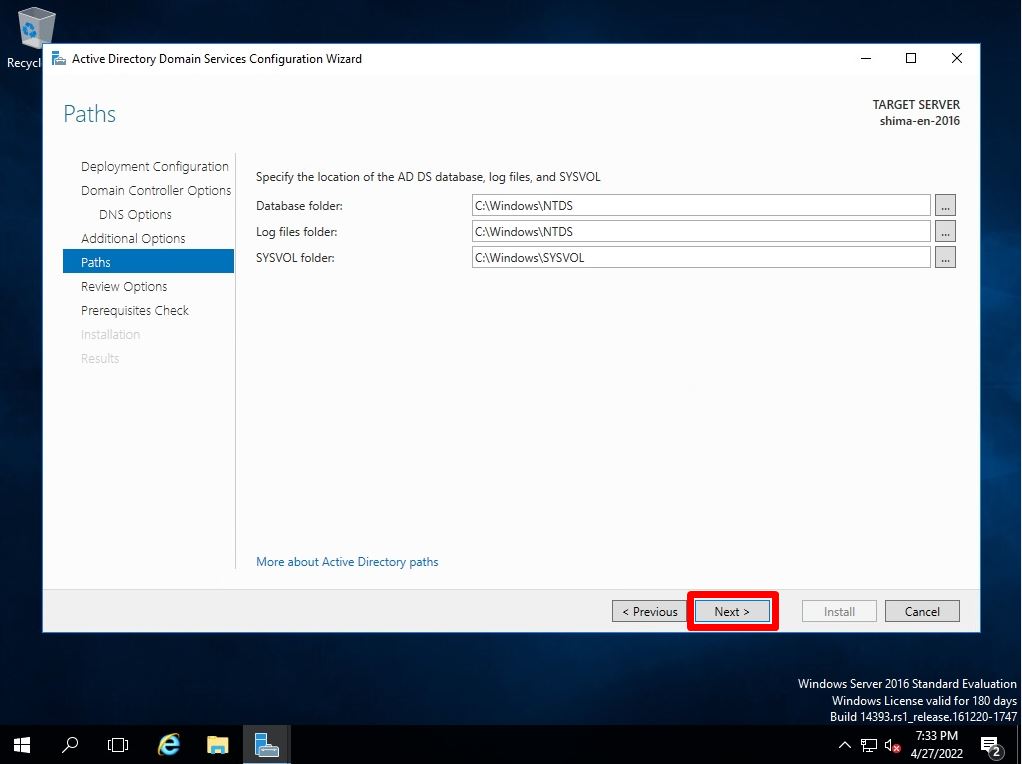
Path screen: You can specify the path of the database folder used by Active Directory, the log file folder, and the SYSVOL folder. * Since there is no reason to change it in this article, it is set by default.
Step 7:
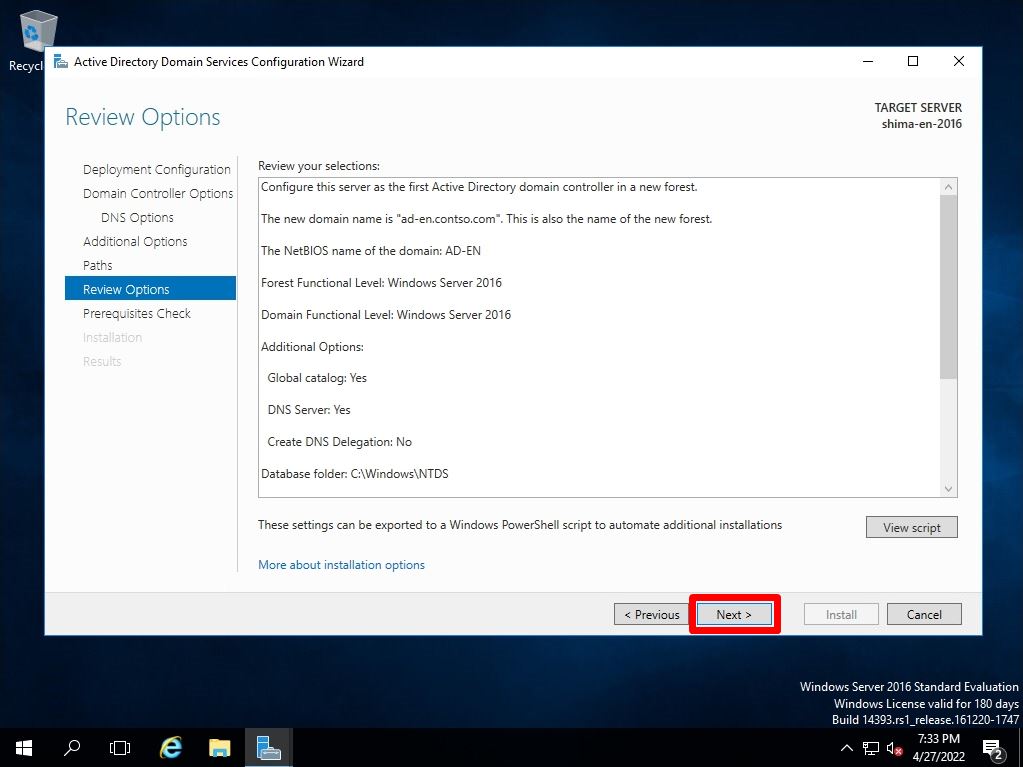
Review Option screen: Confirm the settings and select “Next”.
Step 8:
Prerequisites check screen: After confirming that the prerequisite check has passed, select “Install”.
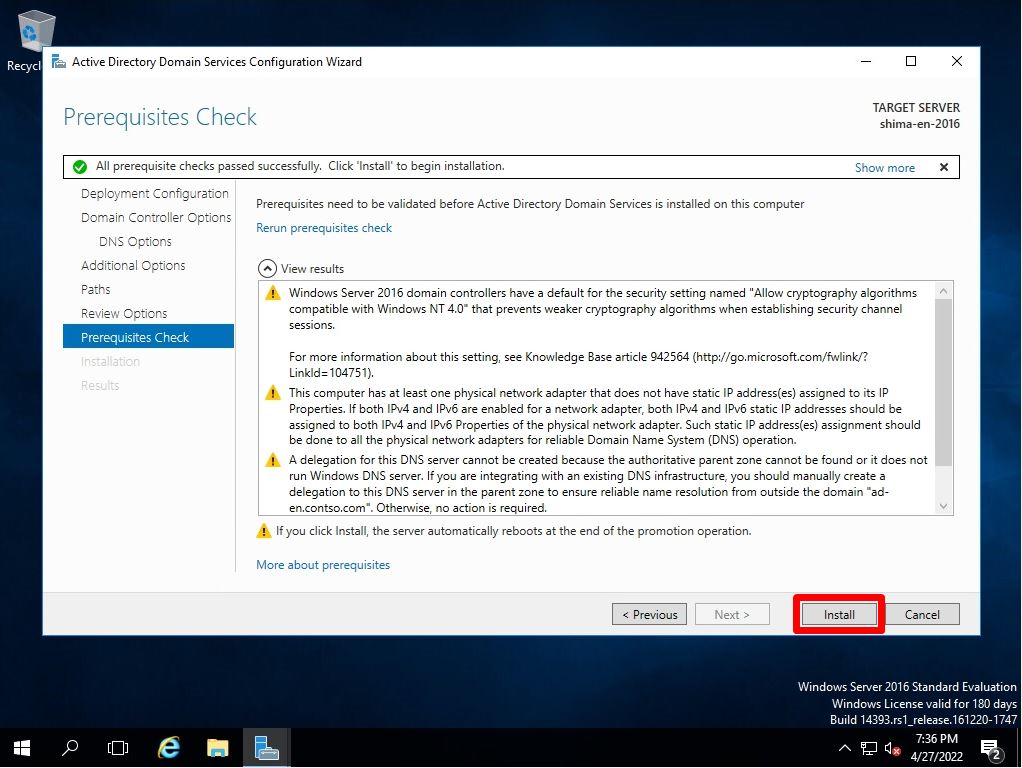
The server will restart automatically. Windows Server 2016 Active Directory server initial construction is complete.