In order to connect and recognize the hard disk / SSD to be added separately from the Hard disk / SSD on which Windows 8.1 is installed, “Disk Management”-> “Initialize Disk” * Online storage -> You need to format the “unallocated” area. After formatting, it can be used as a new partition (D drive, E drive, etc.)
This article describes the procedure for connecting additional storage to Windows 8.1 and mounting it as a new drive.
Windows8.1 PC:Recognize additional Hard disk / SSD
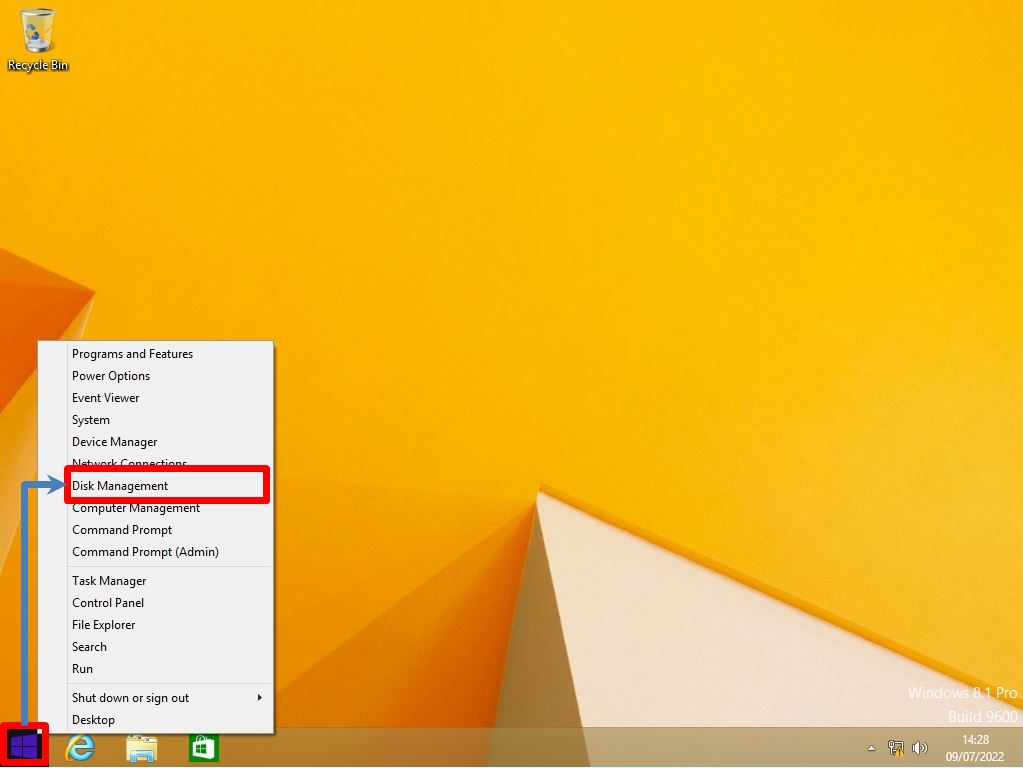
Step 1:
Right-click on the Windows mark -> select “Disk Management”.
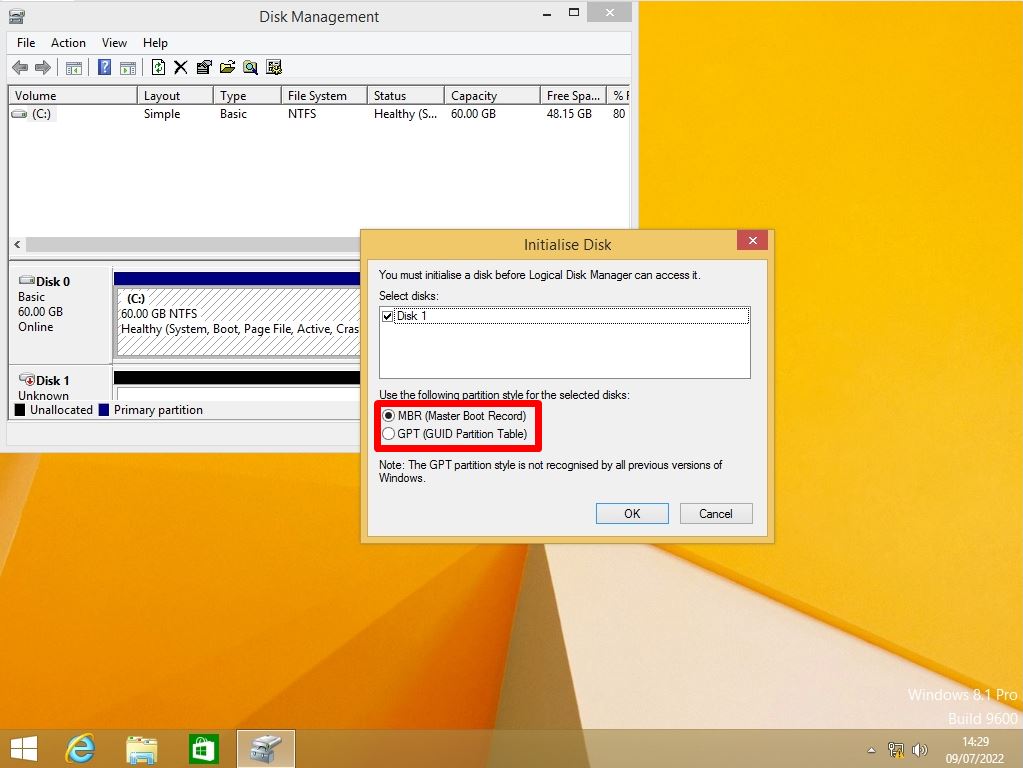
Step 2:
Initialize Disk screen: Select the partition style of MBR (Master Boot Record) / GPT (GUID Partition Table) -> Select “OK”.
This section explains the difference between MBR (Master Boot Record) and GPT (GUID Partition Table).
■ MBR (Master Boot Record)
・ Maximum disk size is limited to 2TB
・ Up to 4 partitions can be divided
■ GPT (GUID Partition Table)
・ Maximum disk size capacity can support 2TB or more
・ Up to 128 partitions can be divided
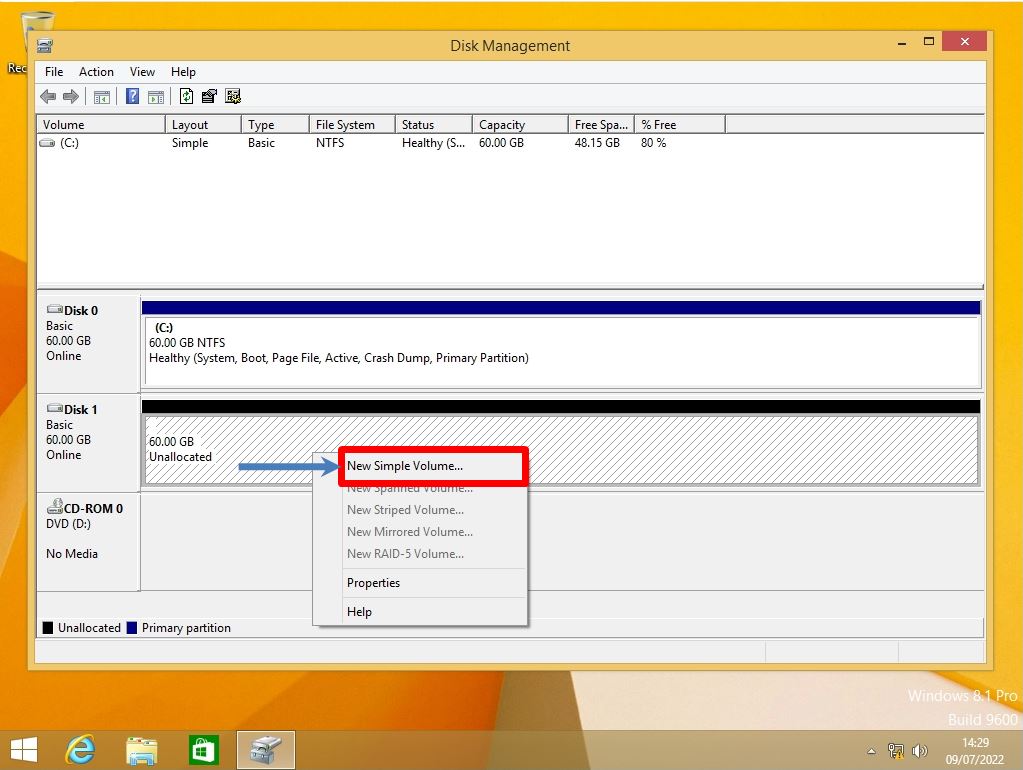
Step 3:
Right-click on “Unallocated” -> Select “New Simple Volume”.
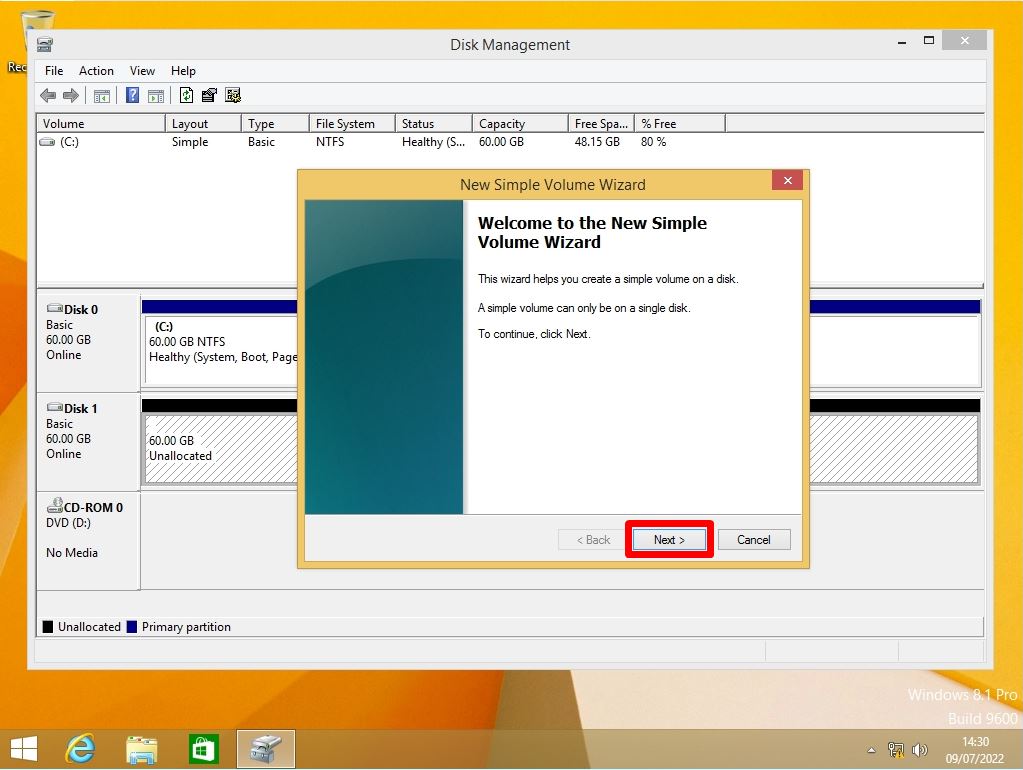
Step 4:
Start New Simple Volume Wizard: Select “Next”.
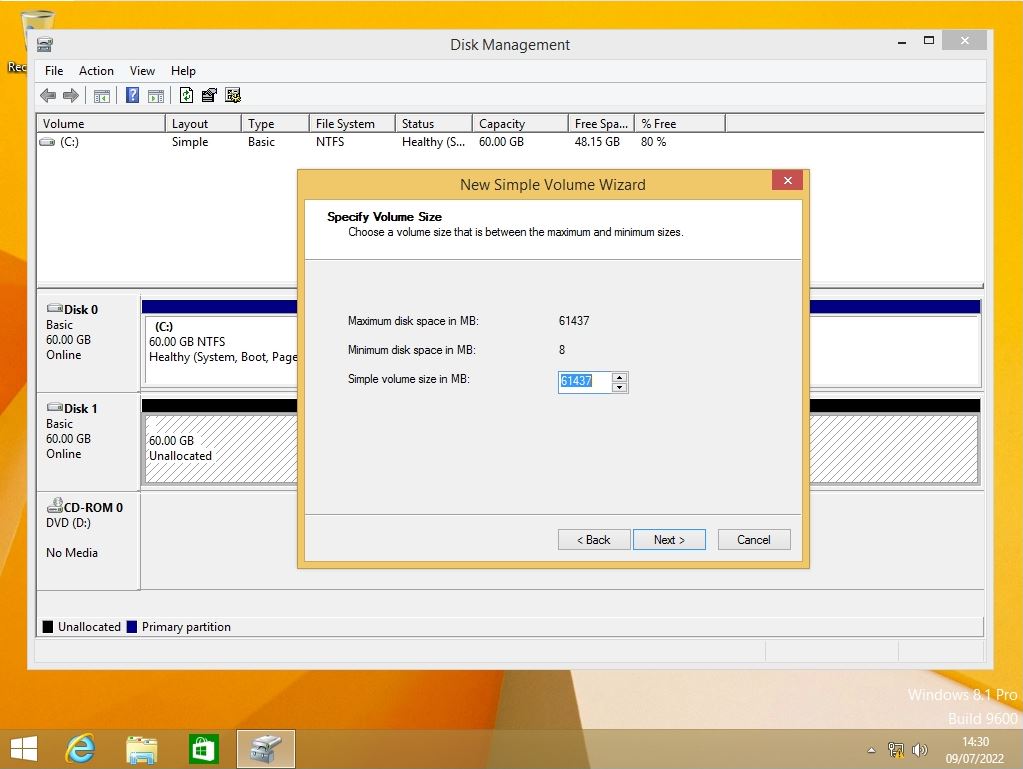
Step 5:
Volume size specification screen: Specify volume size -> Select “Next”.
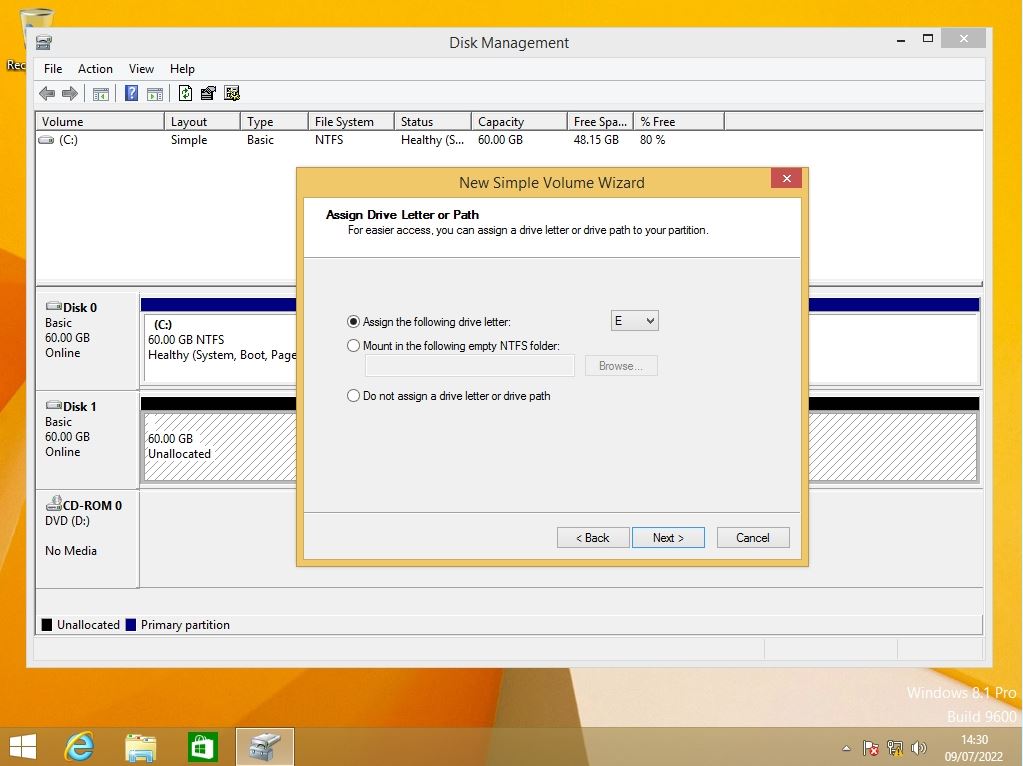
Step 6:
Drive letter or path assignment screen: Specify any drive letter -> Select “Next”.
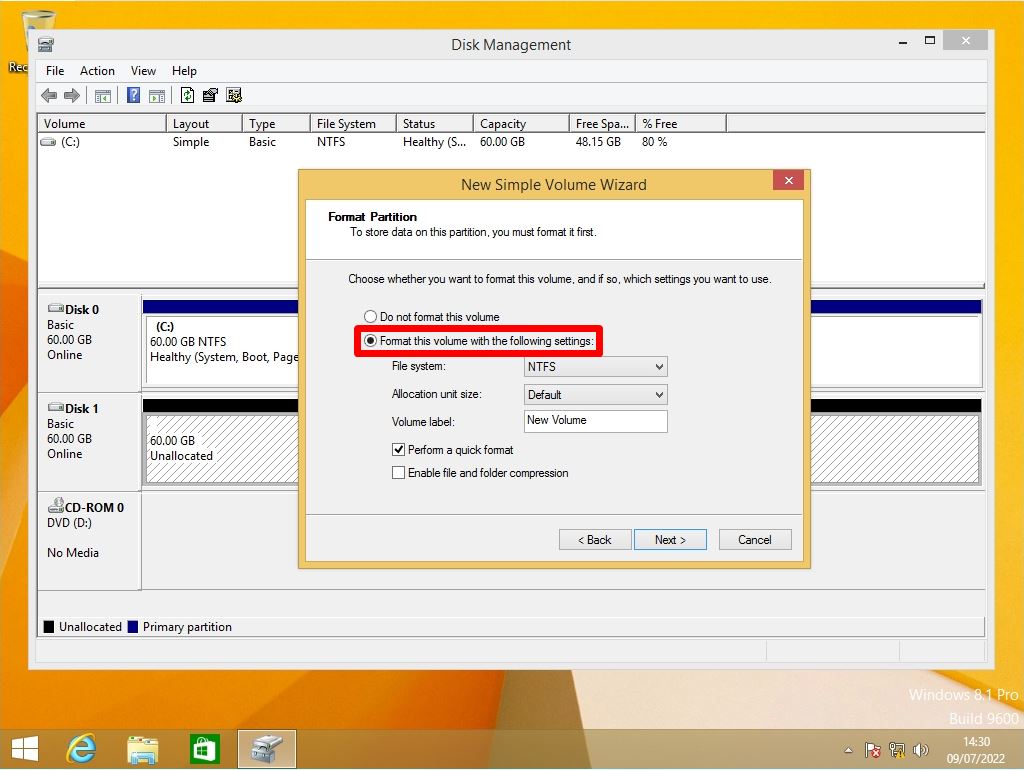
Step 7:
Format Partition screen: Select “Format this volume with the following settings”.
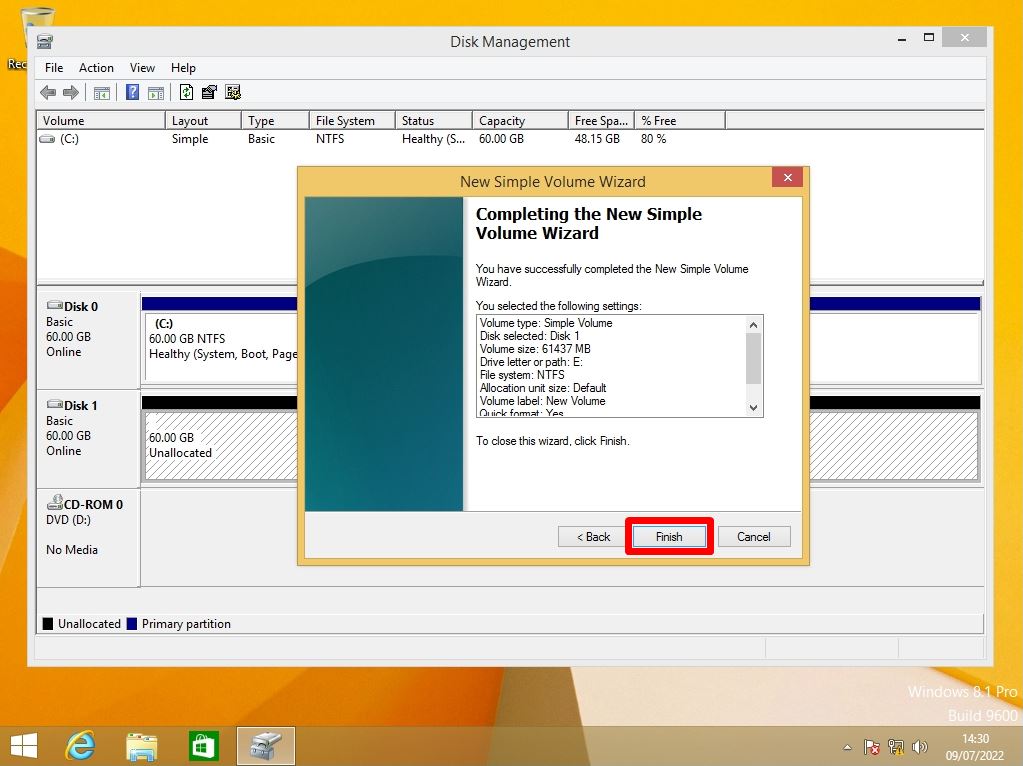
Step 8:
New Simple Volume Wizard Screen: Select “Finish”.
Step 9:
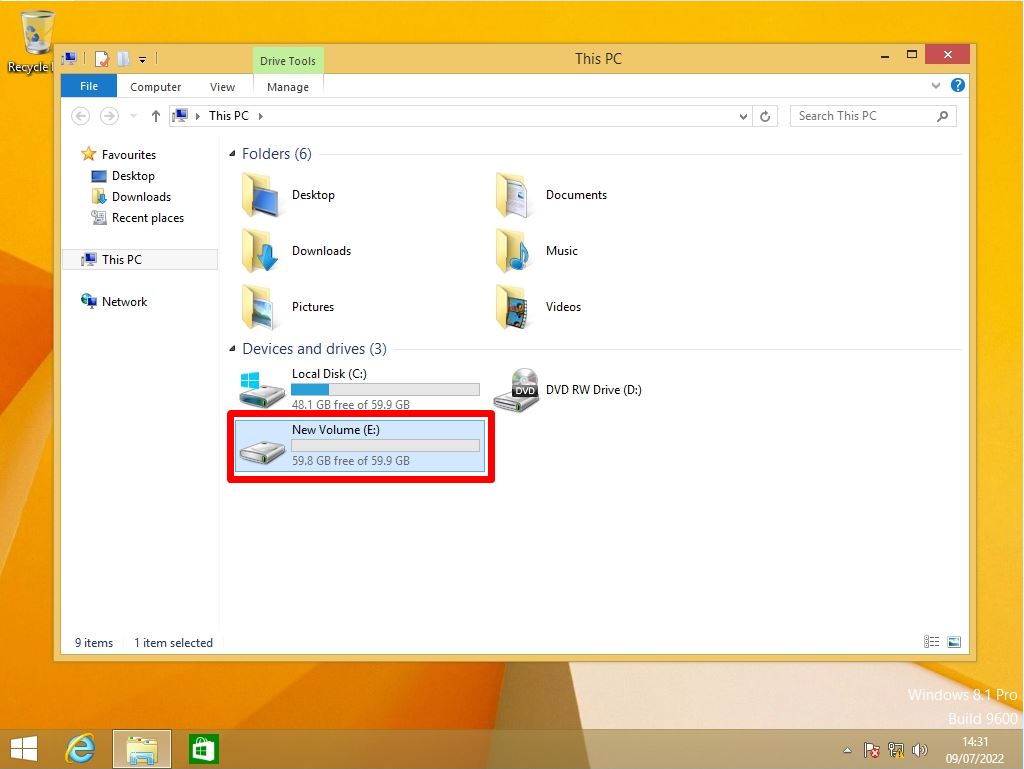
Check the volume label and volume size of the added storage.
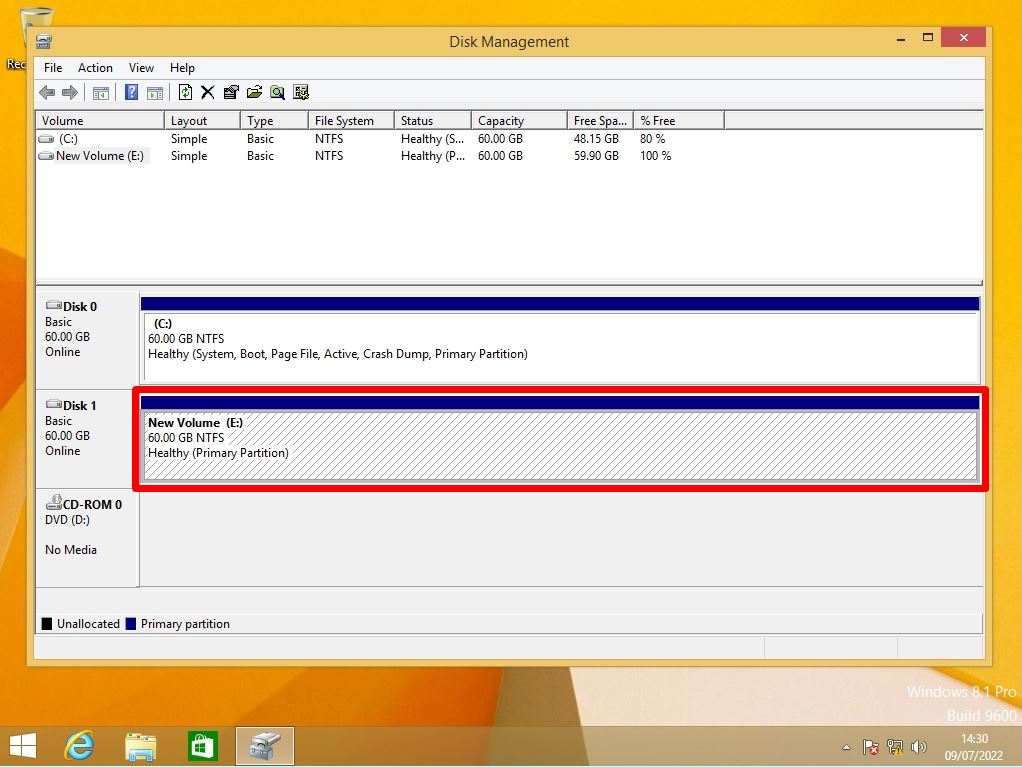
If you check it with Explorer, the newly added volume will be displayed and you will be able to use it.