Windows Defender, which is a standard feature of Windows 11 PCs, is security software that is pre-installed in the Windows OS of Windows Vista or later. “Real-time protection”, which is one of the functions of Windows Defender, constantly scans for threats from your computer, which may slow down your computer’s operation. In such cases, the virus scanning function can be disabled by changing the GUI (graphical intuitive operation), Group Policy, or registry.
Windows 11 Home edition is basically not available because it does not come standard with the Local Group Policy Editor (gpedit.msc), but Windows 11 Pro edition comes with the Local Group Policy Editor as standard and can be used. This time, I will explain how to temporarily disable Windows Defender using the GUI, and how to set permanent disabling using the local Group Policy Registry.
GUI:Temporary Disabling Windows Defender
Step 1:
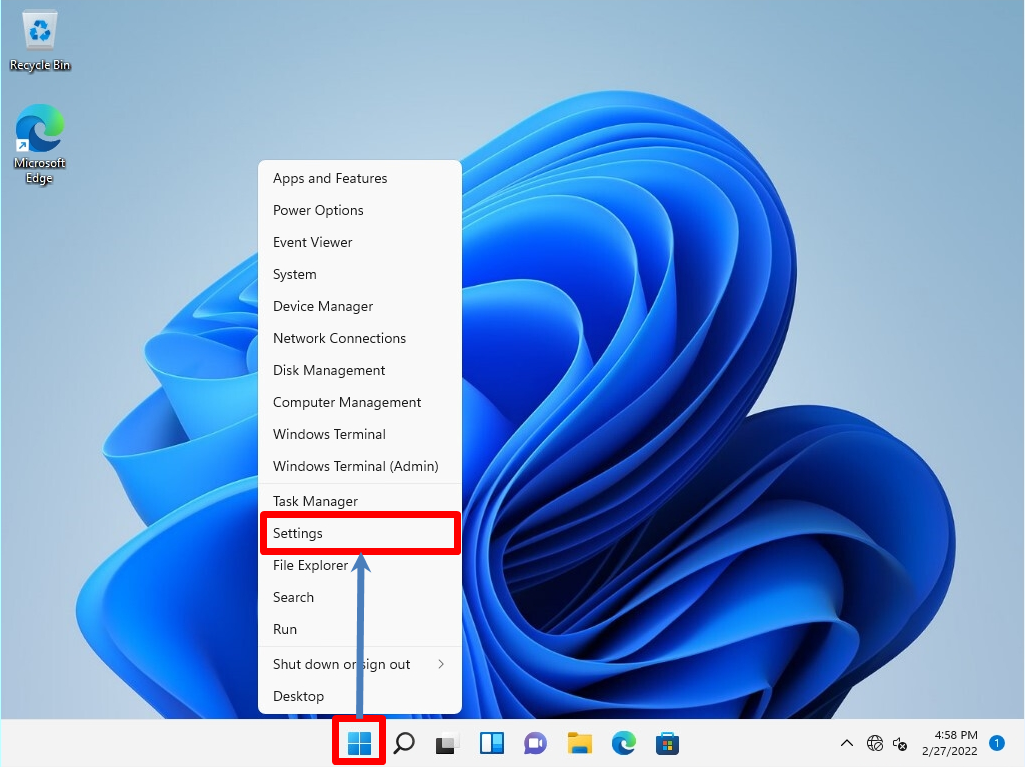
Right-click on the Windows mark on the taskbar -> select Settings.
Step 2:
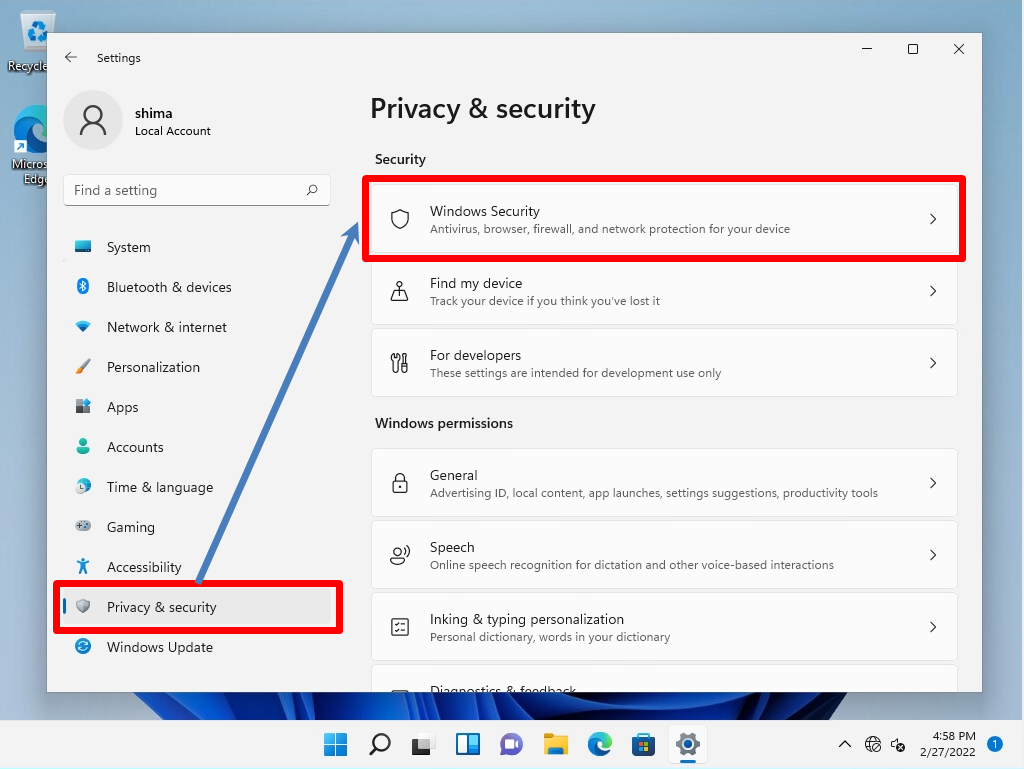
Select Privacy & security -> Windows Security.
Step 3:
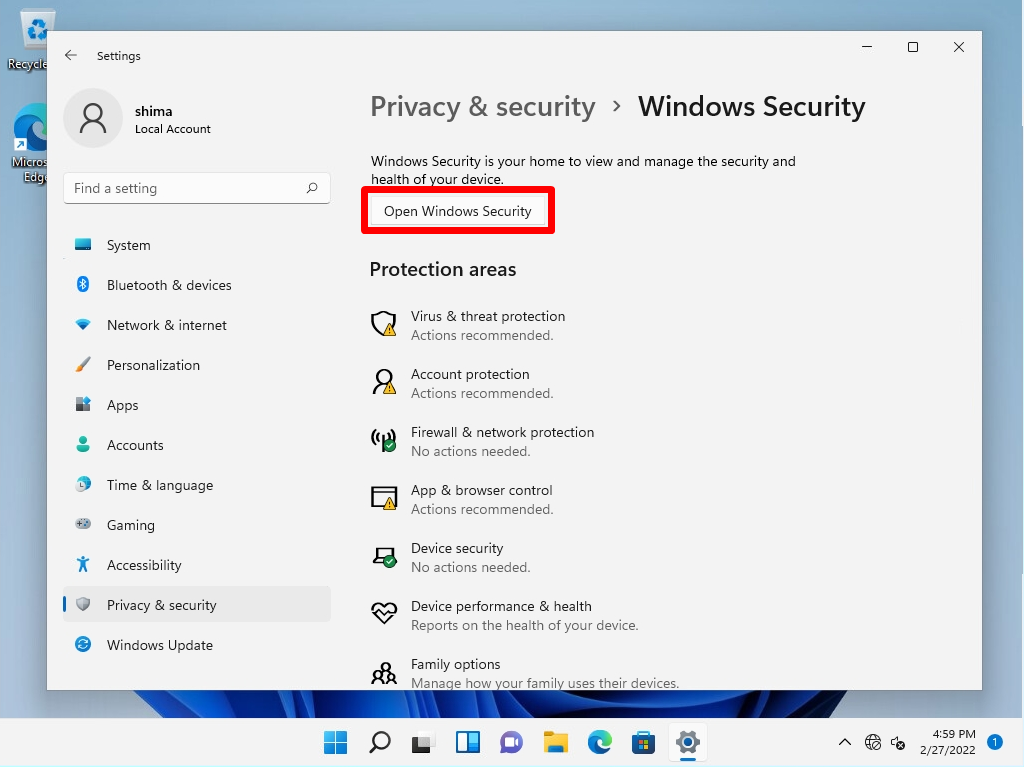
Select Open Windows Security.
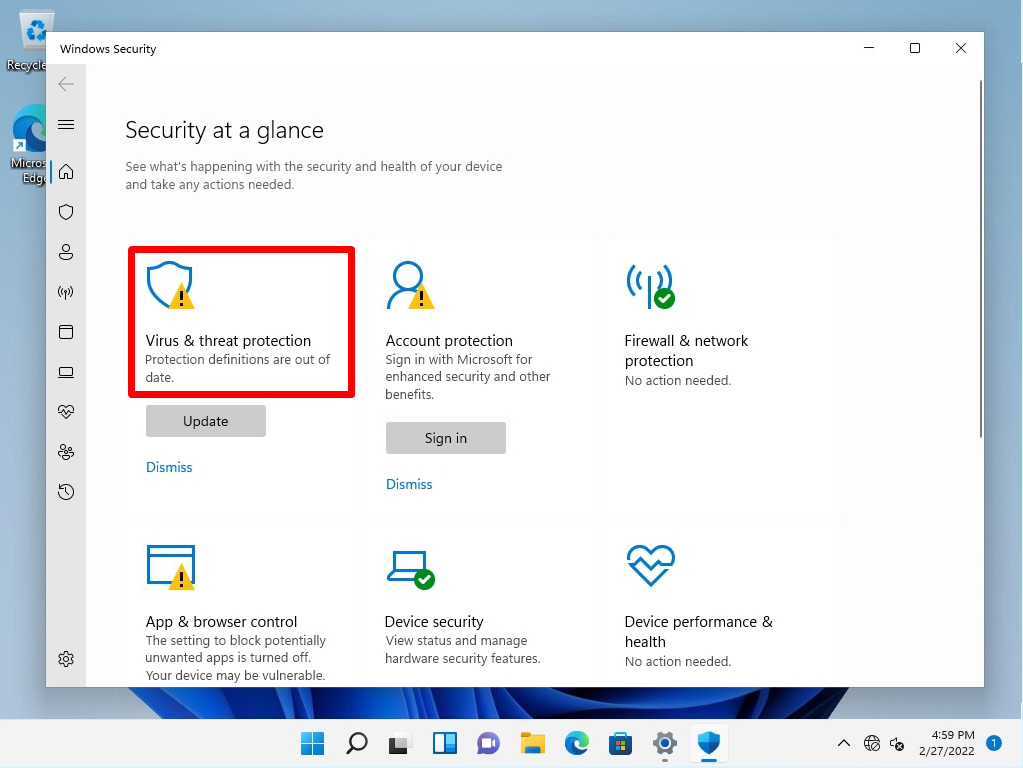
Step 4:
Select Virus & threat protection.
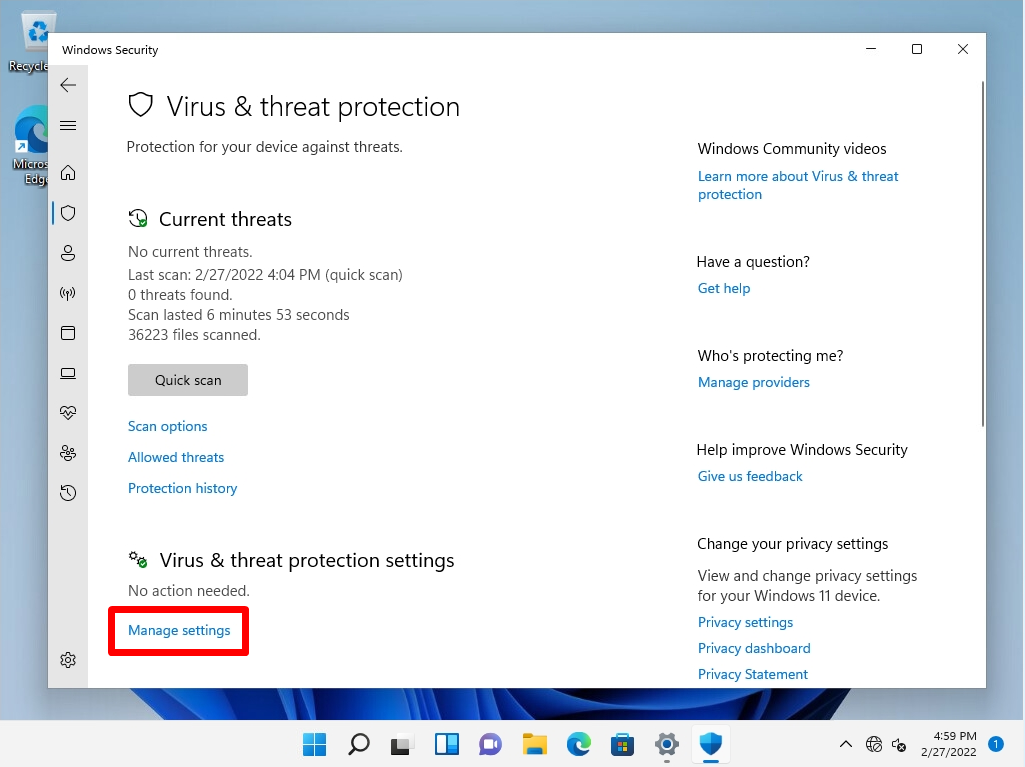
Step 5:
Select Manage settings.
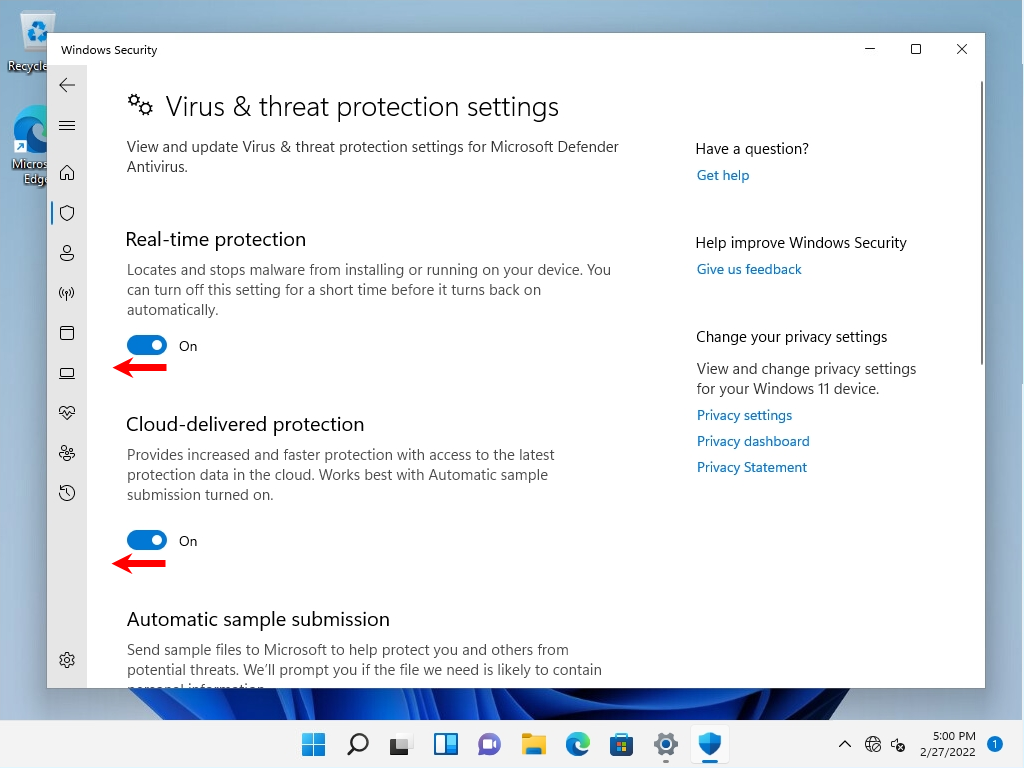
Step 6:
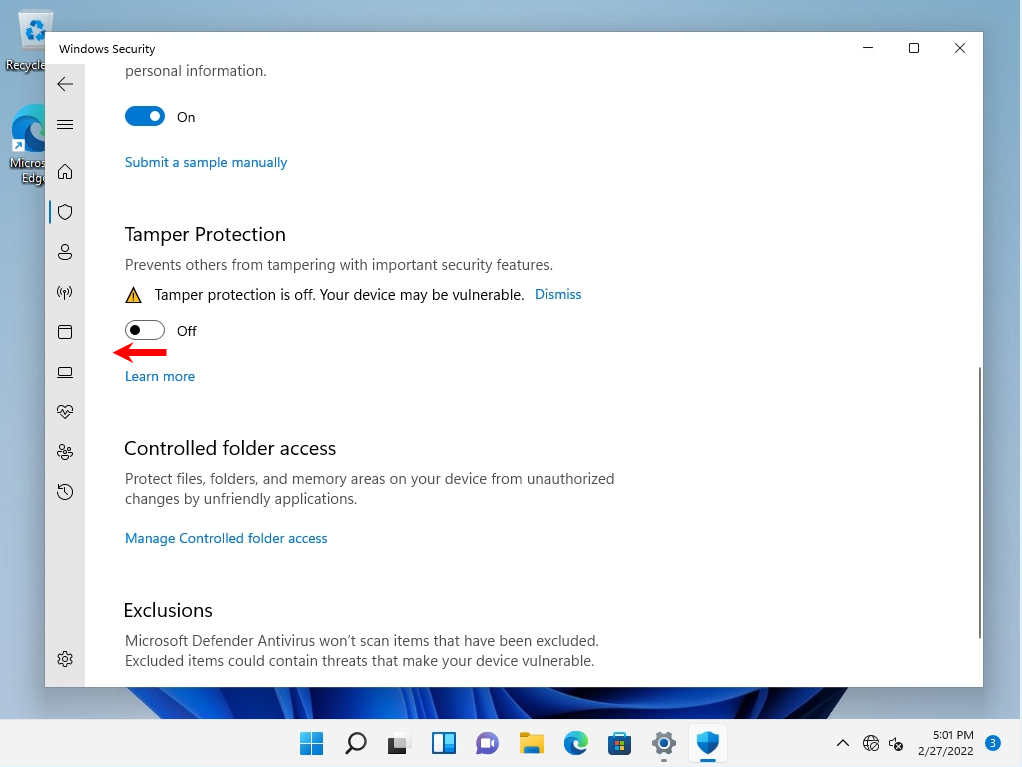
Disable the “Real-time protection” and “Cloud-delivered protection” switch buttons.
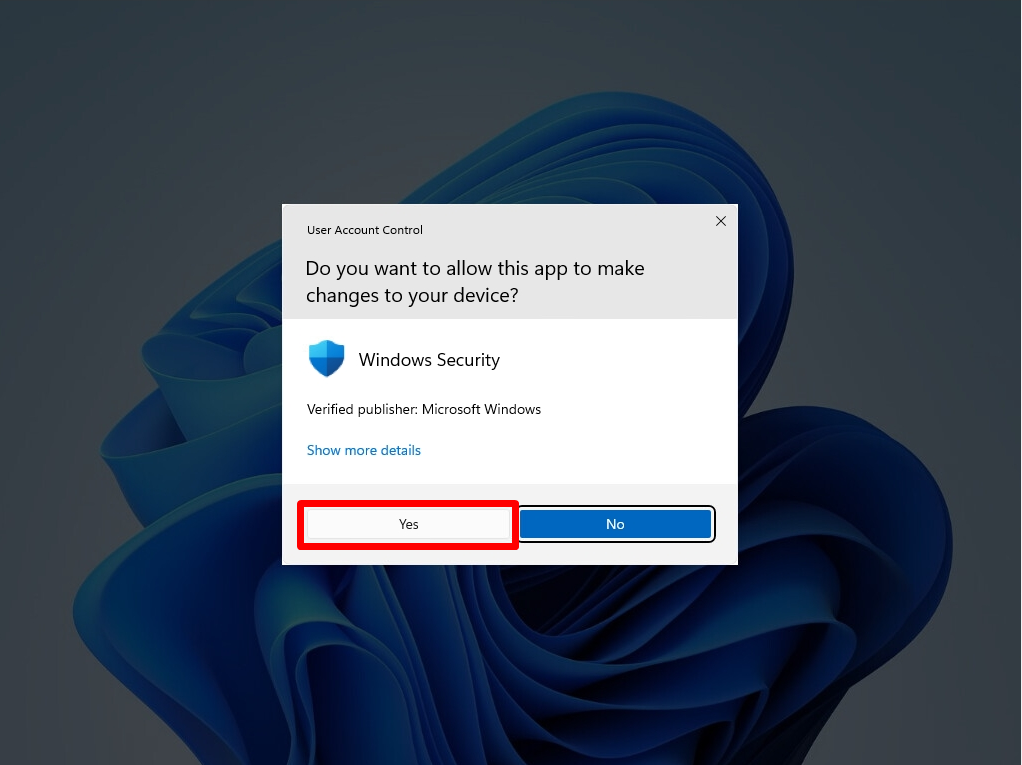
Step 7:
Select Yes on the User Account Control screen.
Local Group Policy:Disable Windows Defender
Change the Microsoft Defender antivirus measures in the local group policy after disabling “Real-time protection”, “Cloud-provided protection”, and “Falsification prevention” on the virus and threat prevention settings screen. If you do not disable it, the settings after changing the local group policy will not be applied and will return to the settings before the change when the computer is restarted
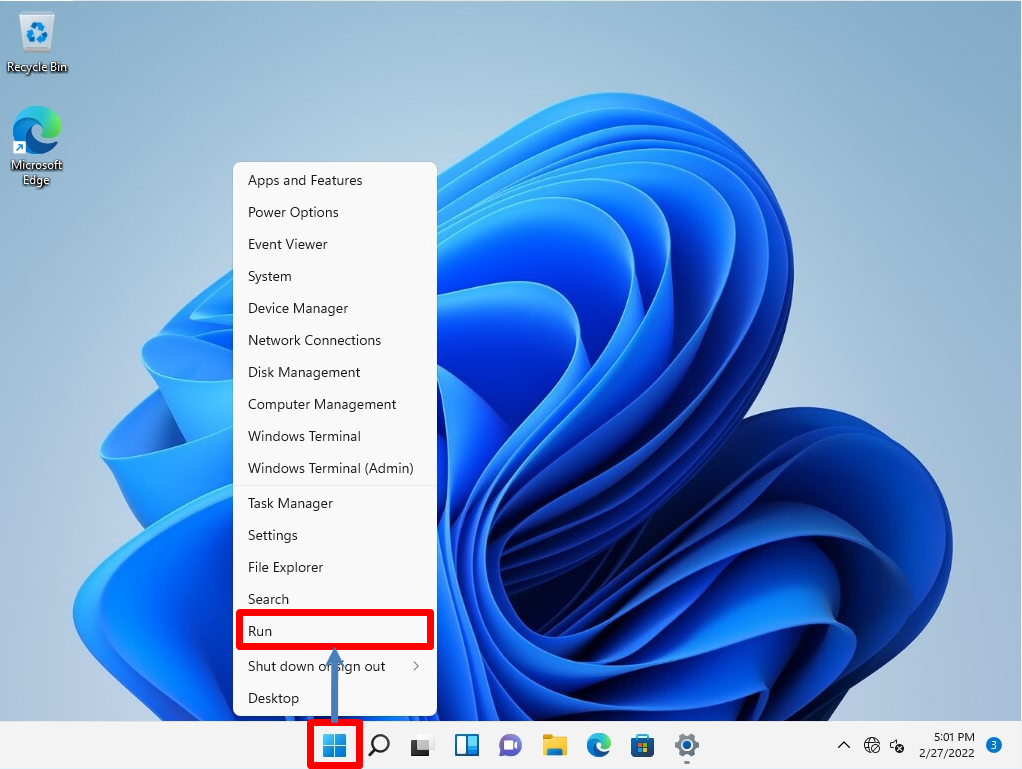
Step 1:
Right-click on the Windows mark on the taskbar -> select Run.
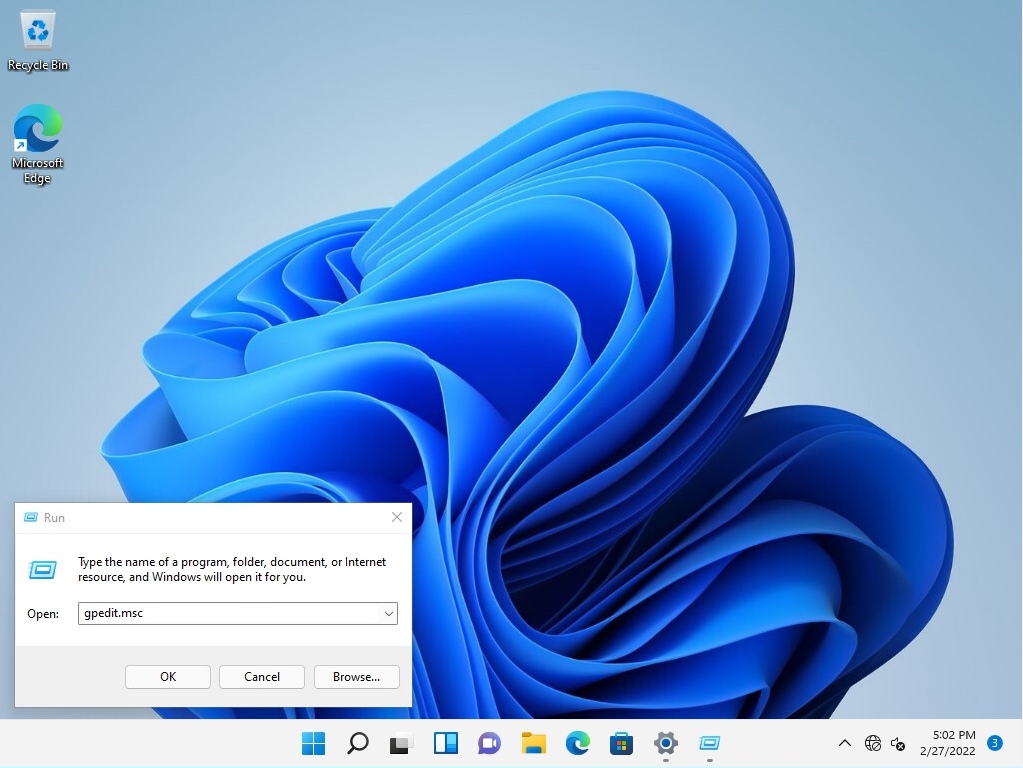
Step 2:
Enter “gpedit.msc” as the name -> select “OK”.
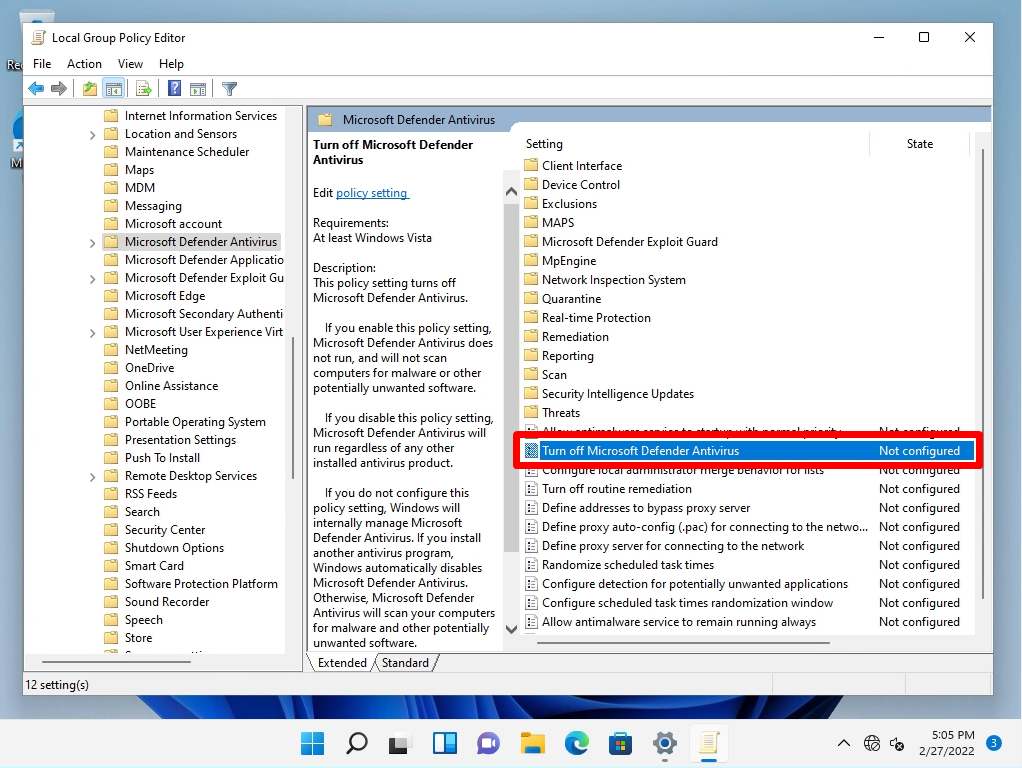
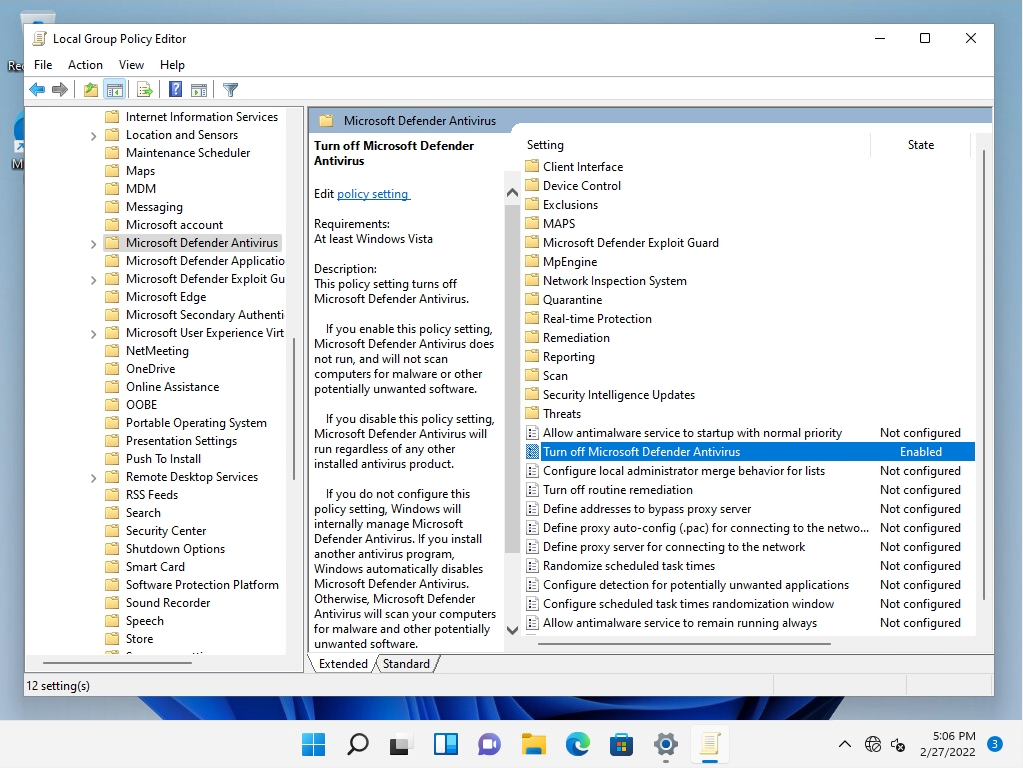
Step 3:
Go to Computer Configuration -> Administrative Templates -> Windows Components -> Microsoft Defender Antivirus and double-click Disable Turn off Microsoft Defender Antivirus.
Step 4:
Select Enabled -> Select OK.
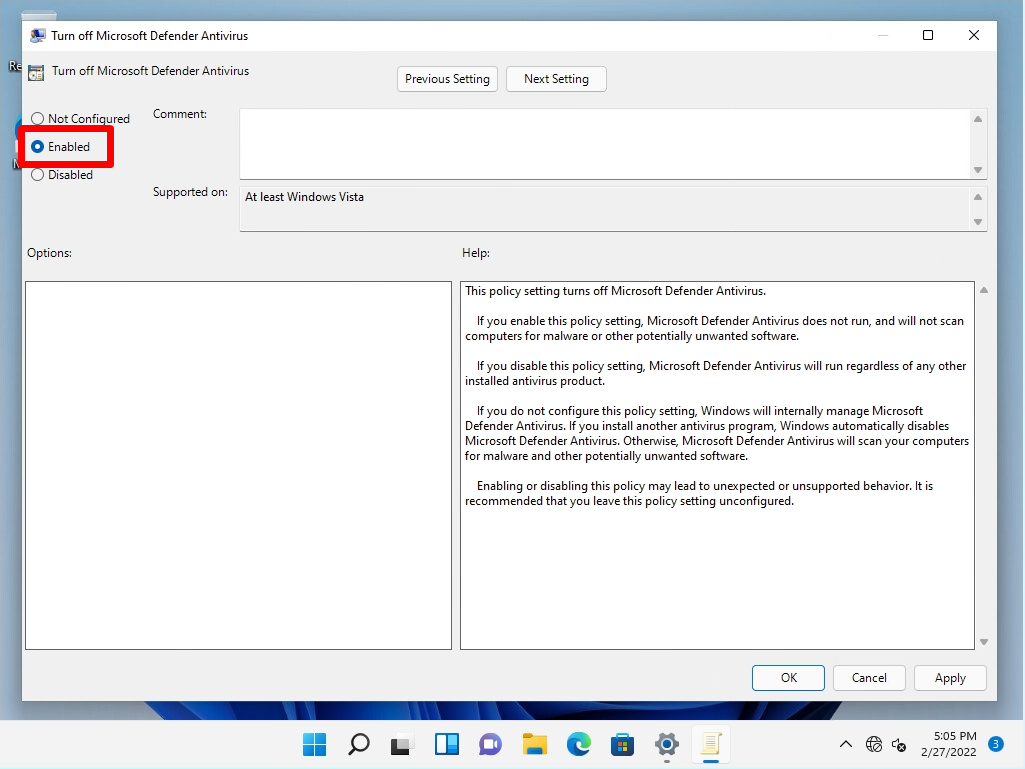
Step 5:
Confirm that the state is Enabled.
Step 6:
Restart your computer at any time to apply the setting changes.
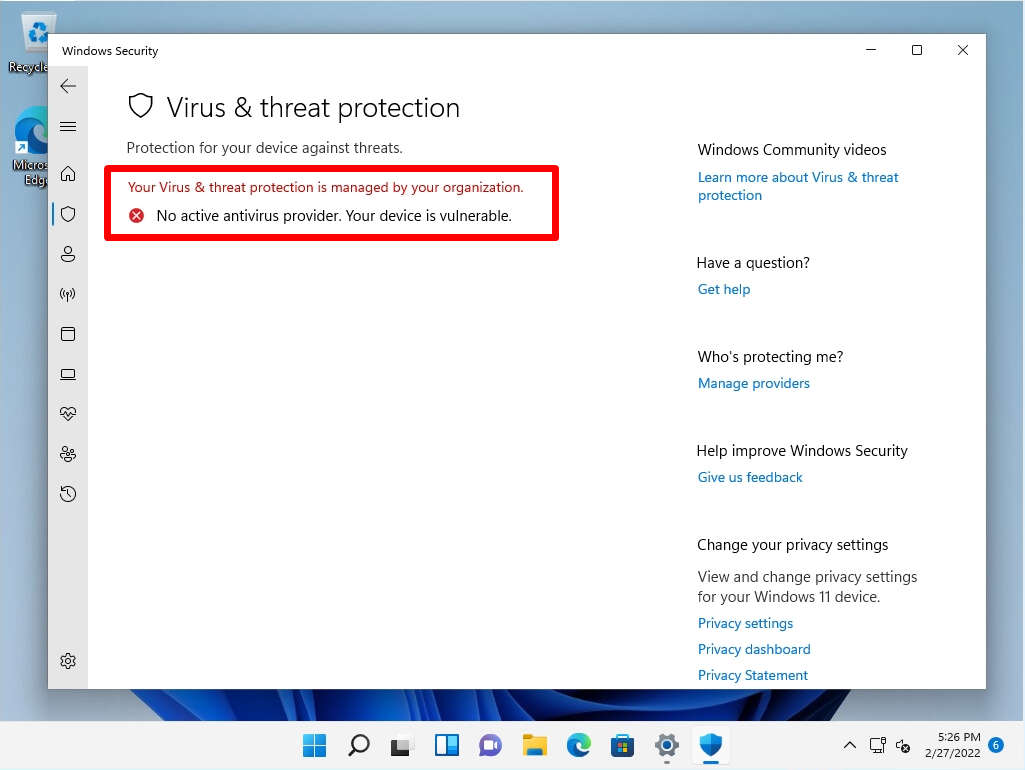
If the Local Group Policy settings have been applied, the Virus and Threat Prevention screen will display “Your Virus & threat protection is managed by your organization.”

Registry Editor: Disable Windows Defender
Make changes to Microsoft Defender Antivirus in the Registry Editor after disabling “Real-time protection”, “Cloud-provided protection”, and “Falsification prevention” on the virus and threat protection settings screen. If you do not disable it, the changed settings in Registry Editor will not be applied and will return to the old settings when the computer is restarted.
Step 1:
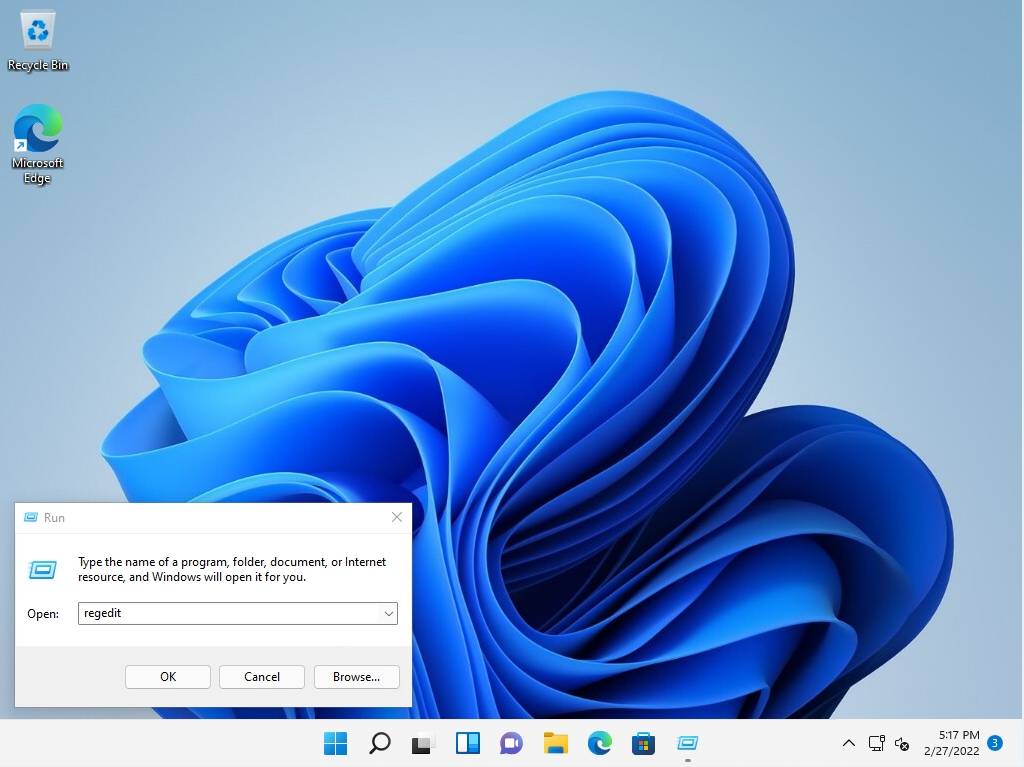
Right-click on the Windows mark on the taskbar -> select Run.

Step 2:
Enter “regedit” as the name -> select “OK”.
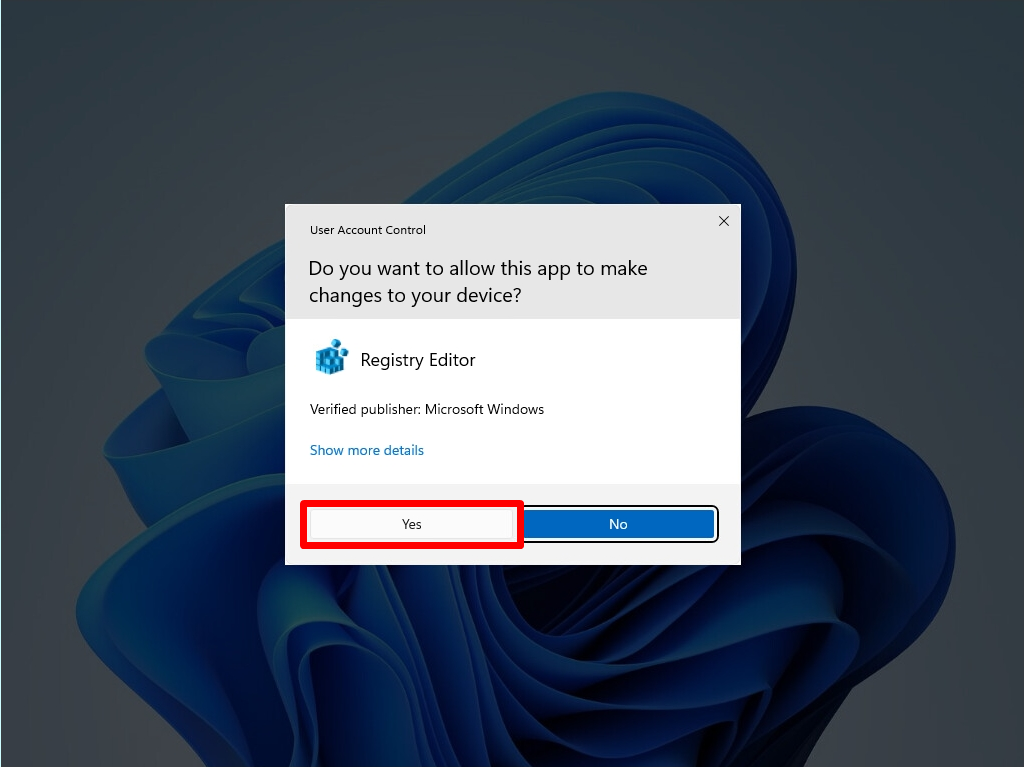
Step 3:
Select “Yes” on the User Account Control screen to start the Registry Editor.
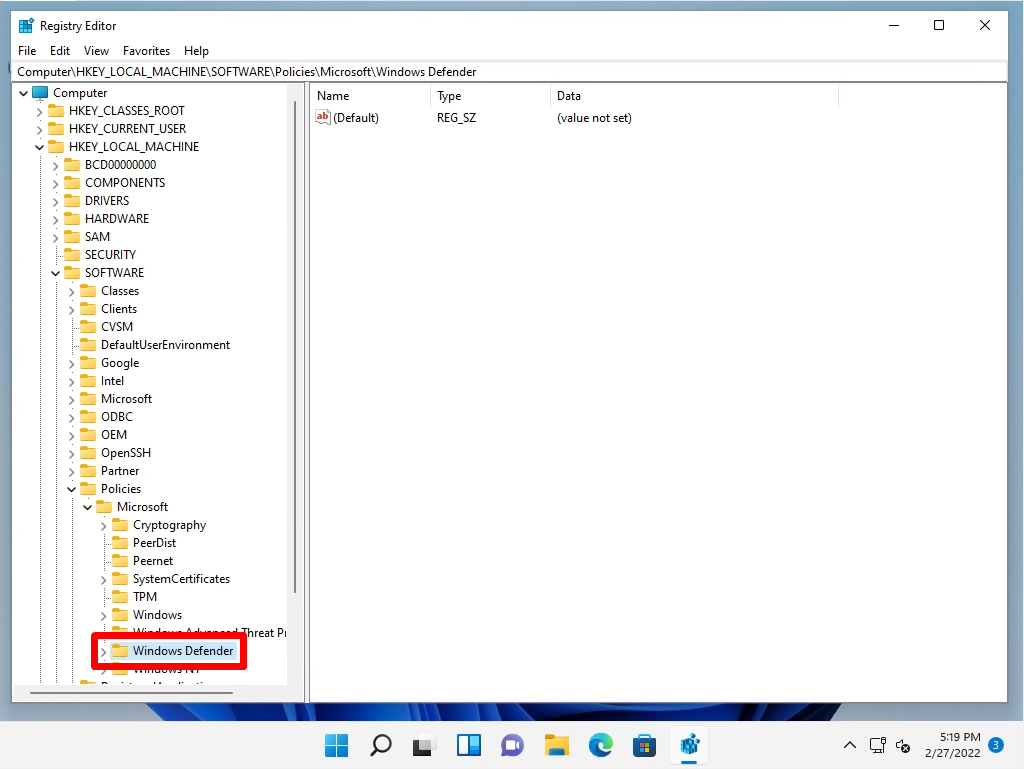
Step 4:
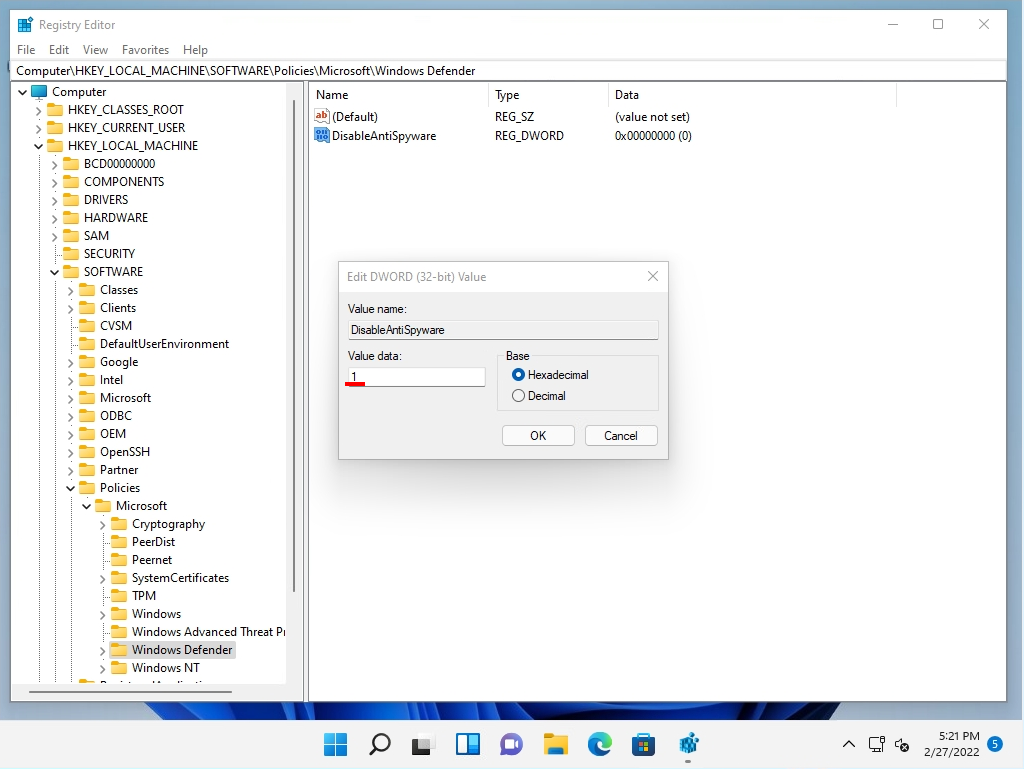
Select HKEY_LOCAL_MACHINE -> SOFTWARE -> Policies -> Microsoft -> Windows Defender
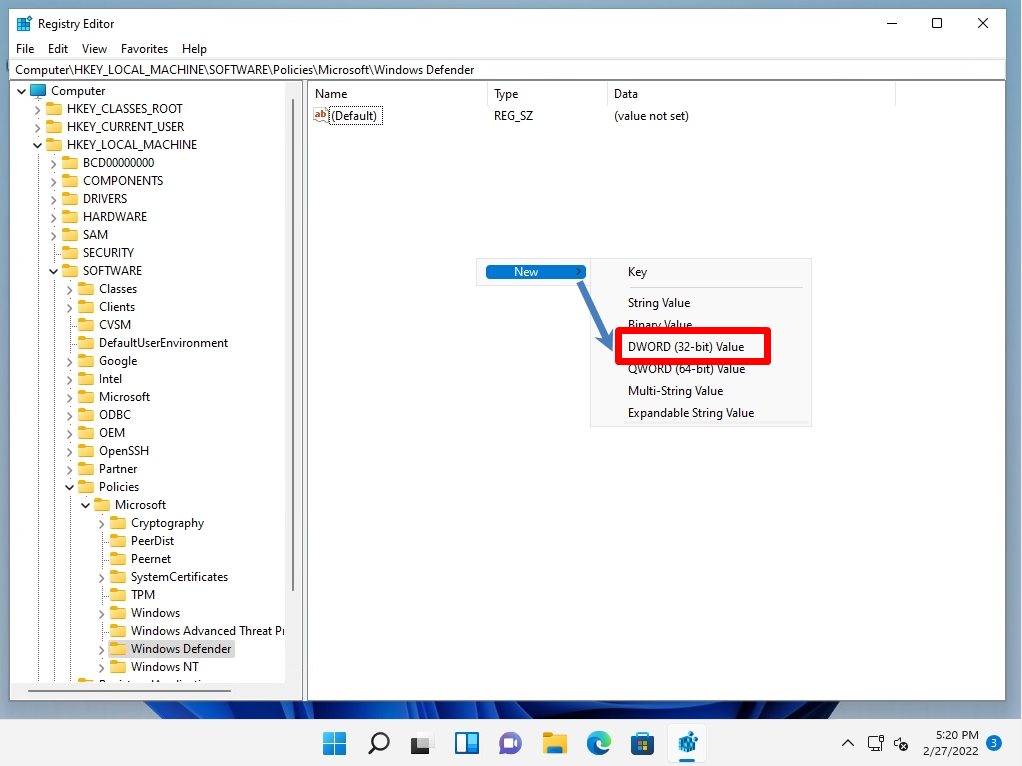
Step 5:
Right-click on a blank area -> New -> DWORD (32-bit) Value.
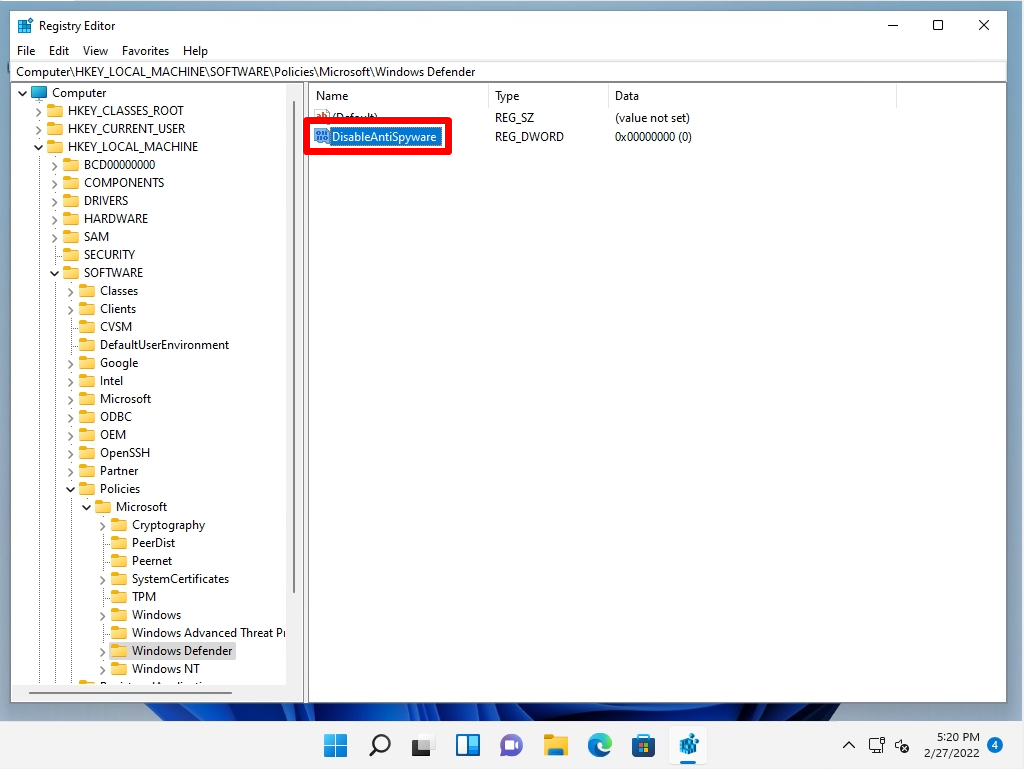
Step 6:
Rename it to “DisableAntiSpyware”.
Step 7:
Select Disable AntiSpyware -> Modify.
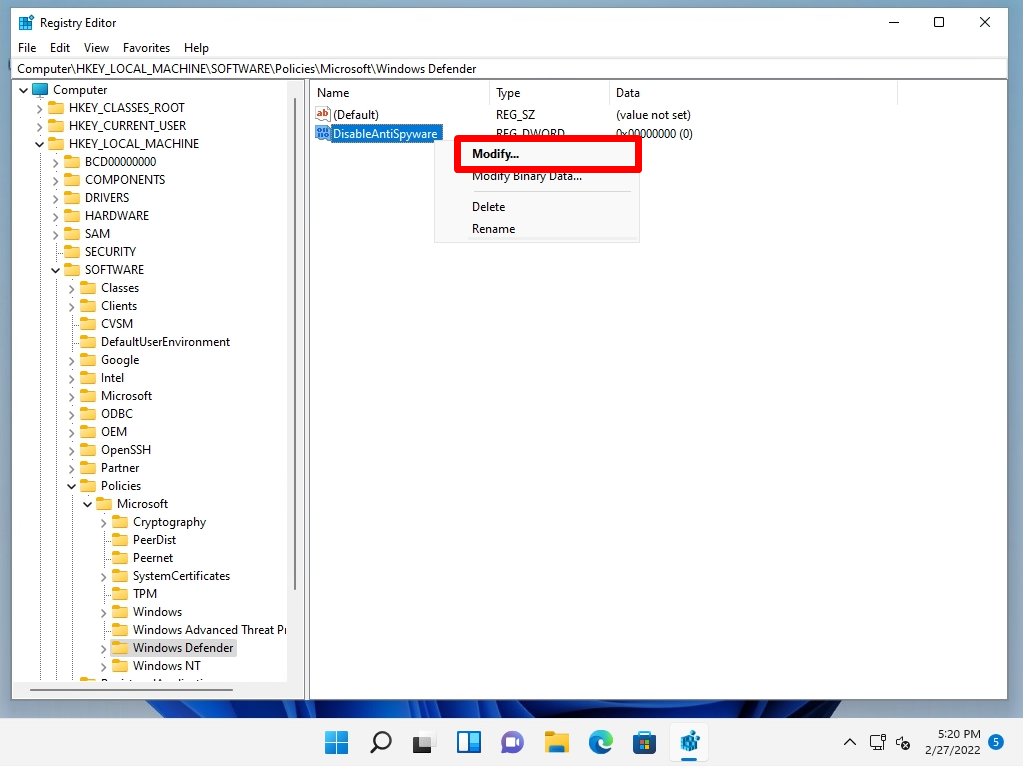
Step 8:
Change the value data from 0 to “1”-> select OK.
If the Registry Editor settings have been applied, the Security Summary screen will display “Virus & threat protection is managed by your organization.”
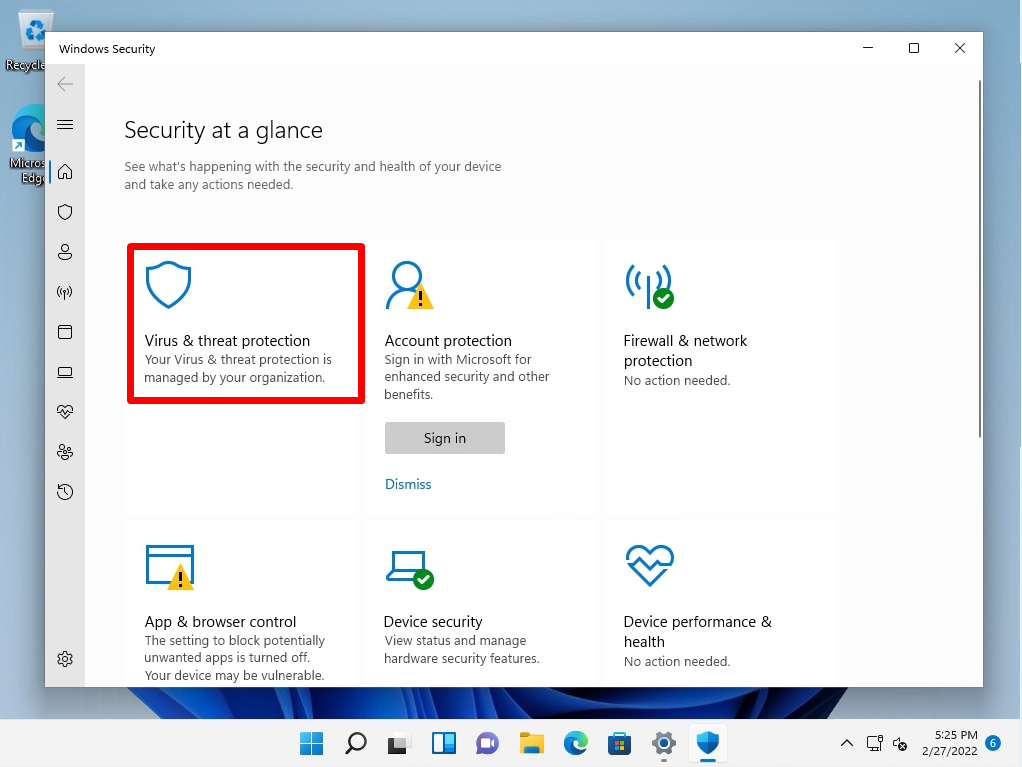
If the Registry Editor settings are applied, the Virus and Threat Prevention screen also displays “Your Virus & threat protection is managed by your organization.”