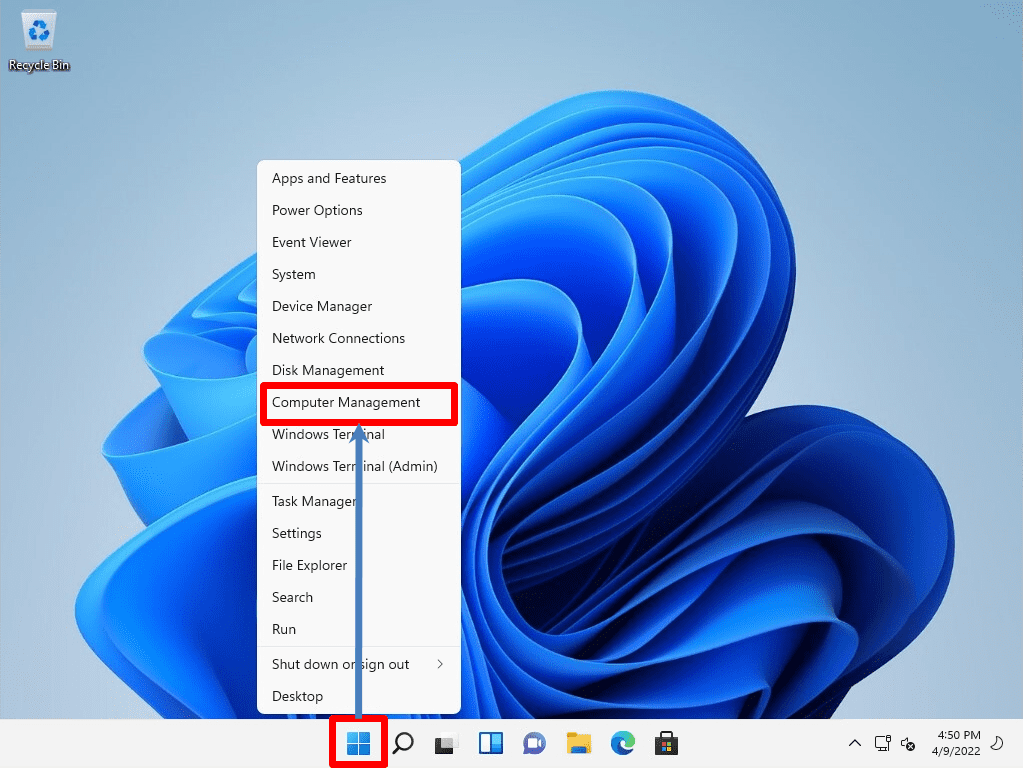
If you want to create an additional local user for Windows 11, you can create it by right-clicking the Windows mark on the taskbar -> “Computer Management” -> “System Tools”-> “Local Users and Groups”. * For Windows 11 Home edition, local users and groups are not displayed on the “Computer Management” screen.
Windows 11:How to create and log in to a local account user
Step 1:
Right-click Windows Marks on the taskbar -> select Computer Management.
Step 2:
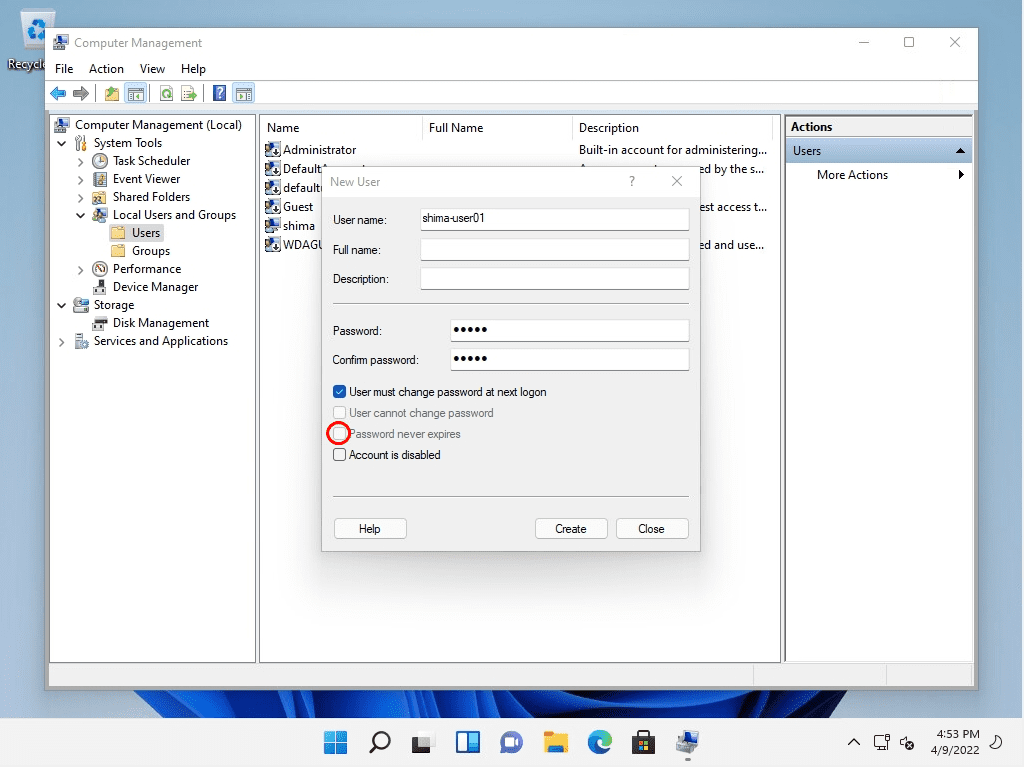
Right-click System Tools -> Local Users and Groups -> Users -> Select New User.

Step 3:
Enter “Username” and “Password”-> Select “Create”.
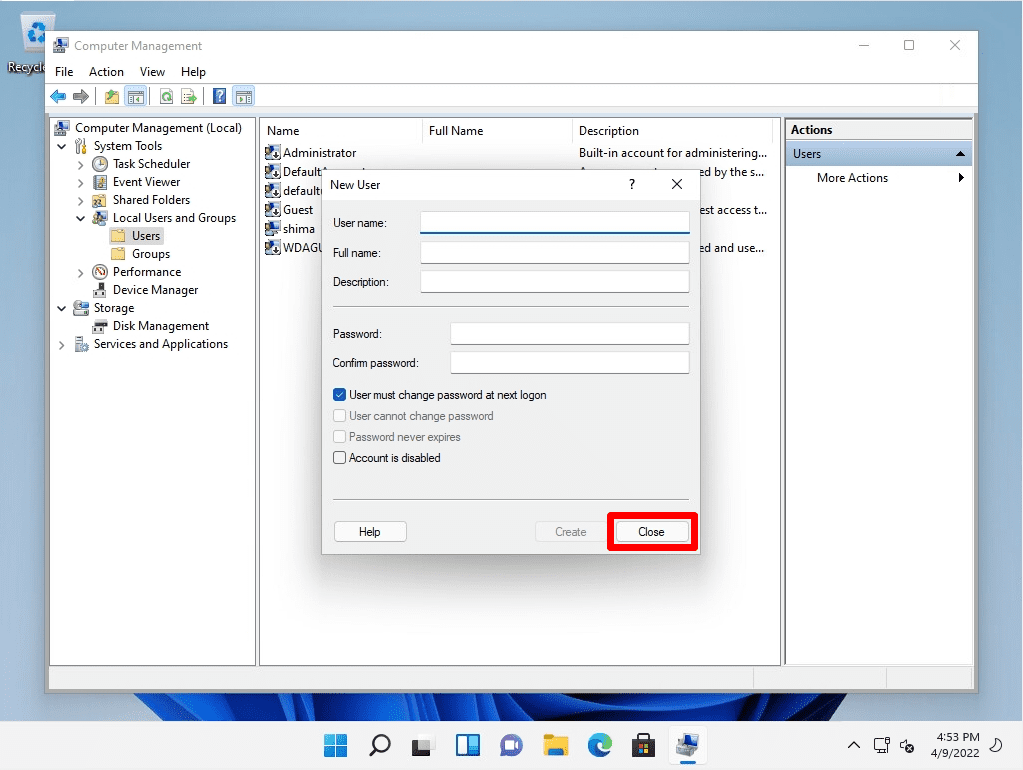
Step 4:
Select Close on the New User screen.
Step 5:
Confirm that the newly created local user is displayed.
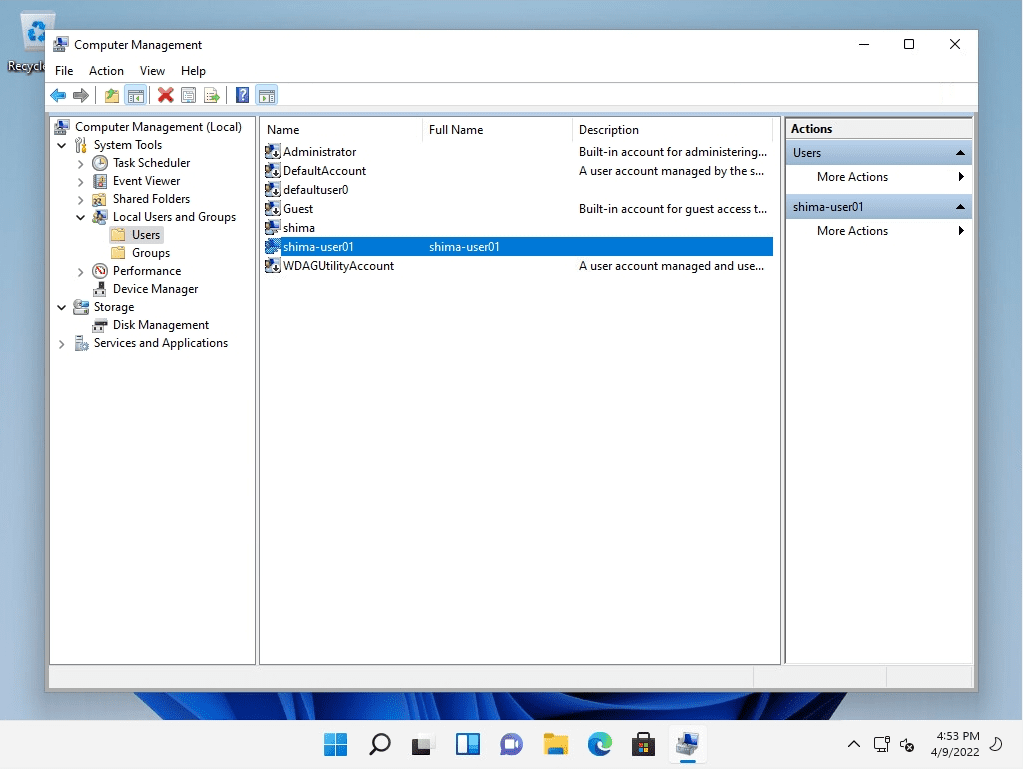
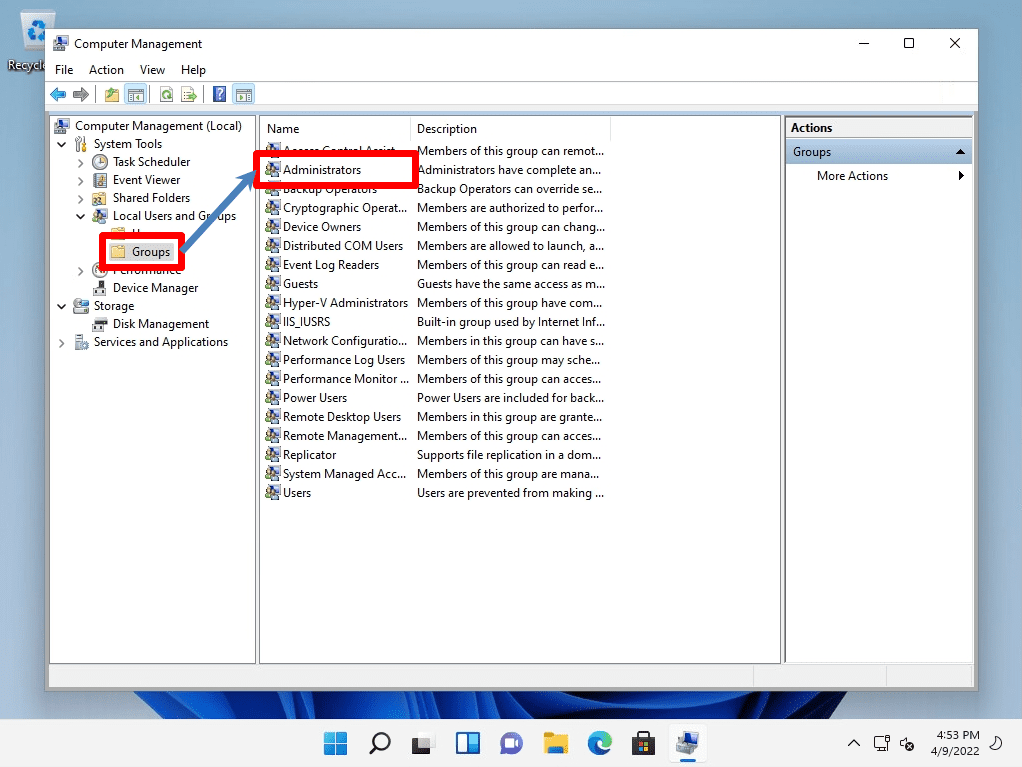
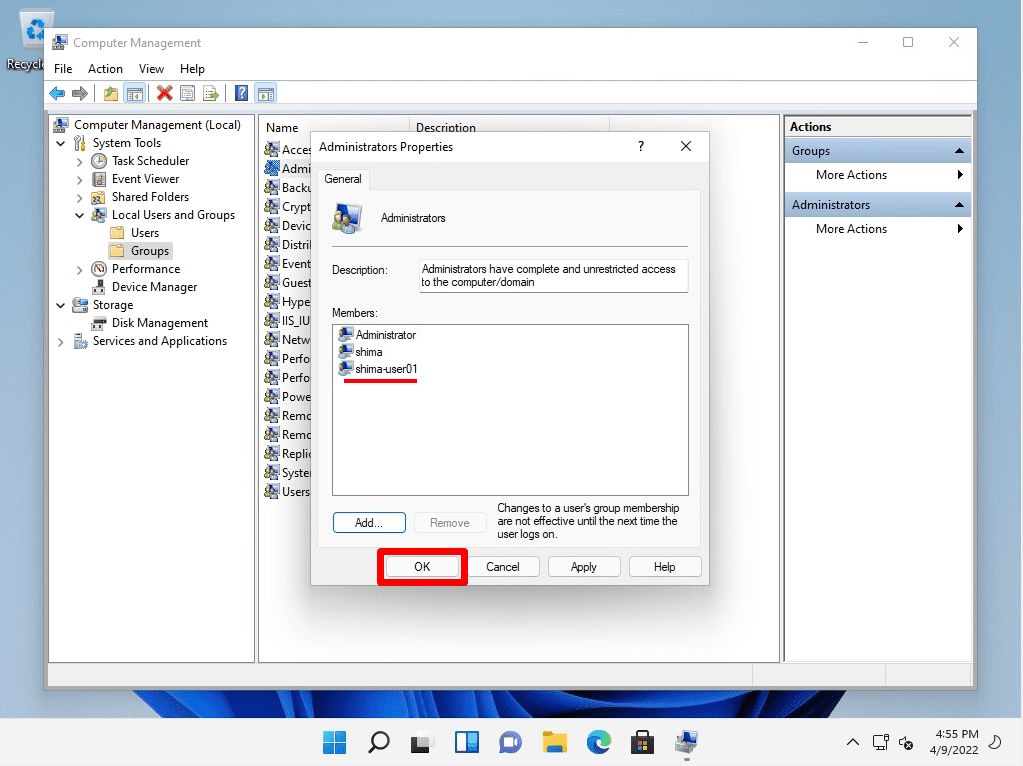
The newly created local user is a standard user. If you want to grant administrator privileges to standard users, select Computer Management -> System Tools -> Local Users and Groups -> Groups-Administrators. The difference between the administrator and the standard user is briefly explained below.
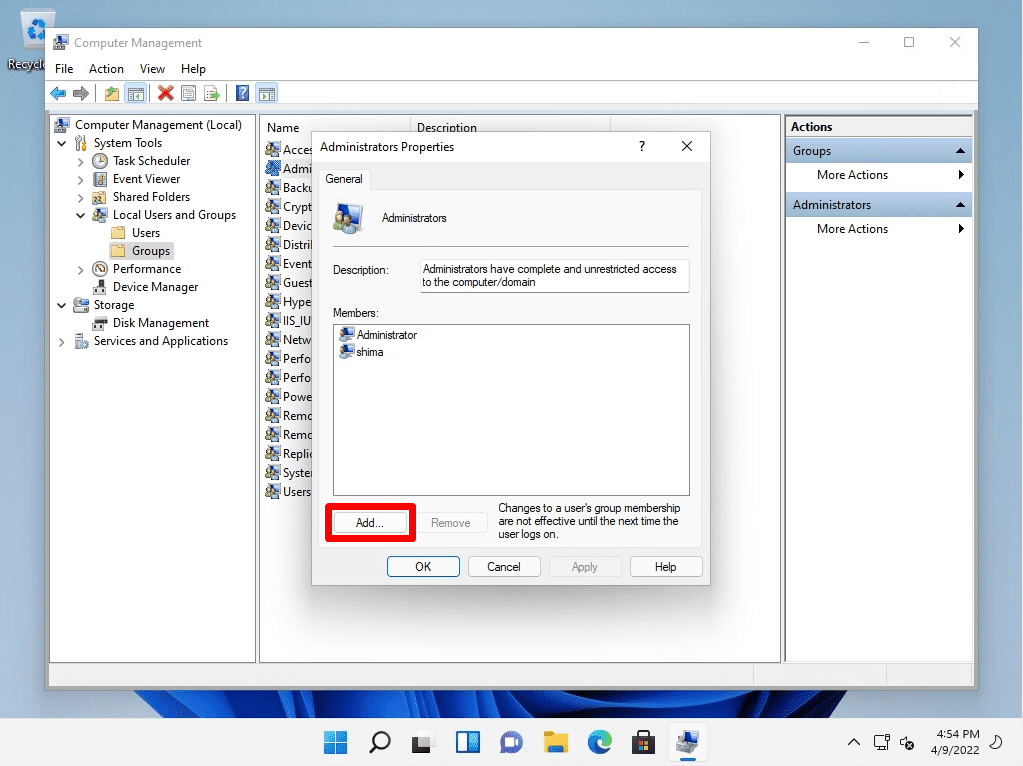
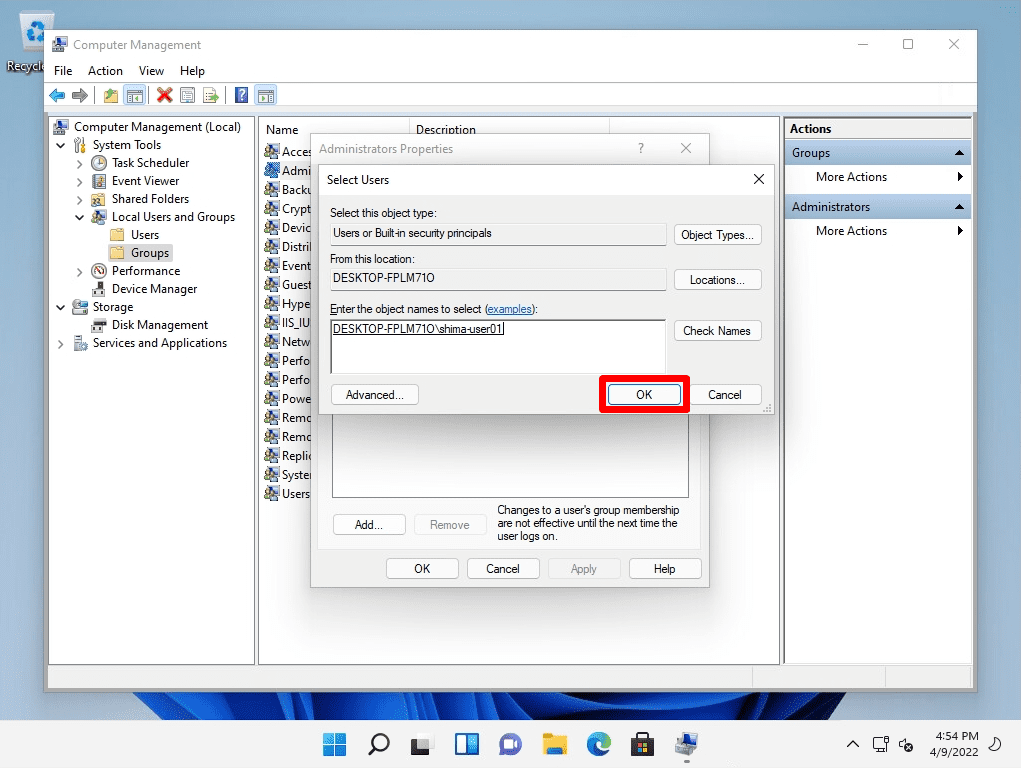
Select “Add” on the Administrators Properties screen.
Enter the local login user on the Select Users screen -> select Check Names.
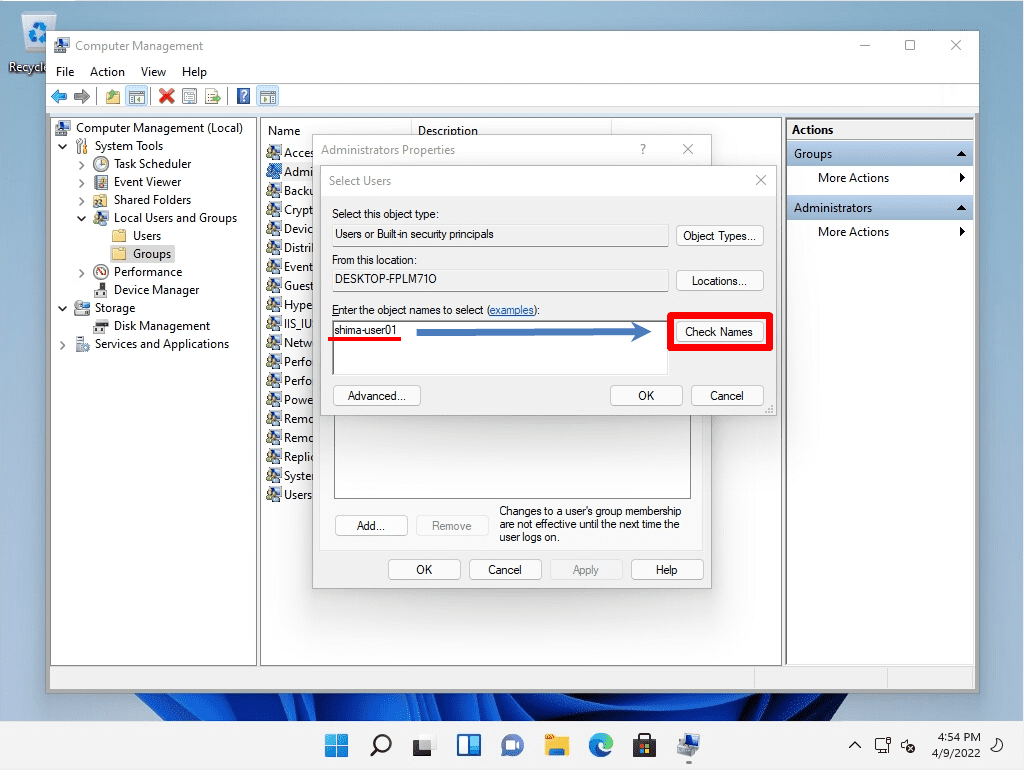
If the names match, the underlined name is displayed.
Administrators Properties -Confirm that you see the account you added to the properties of the members you belong to.
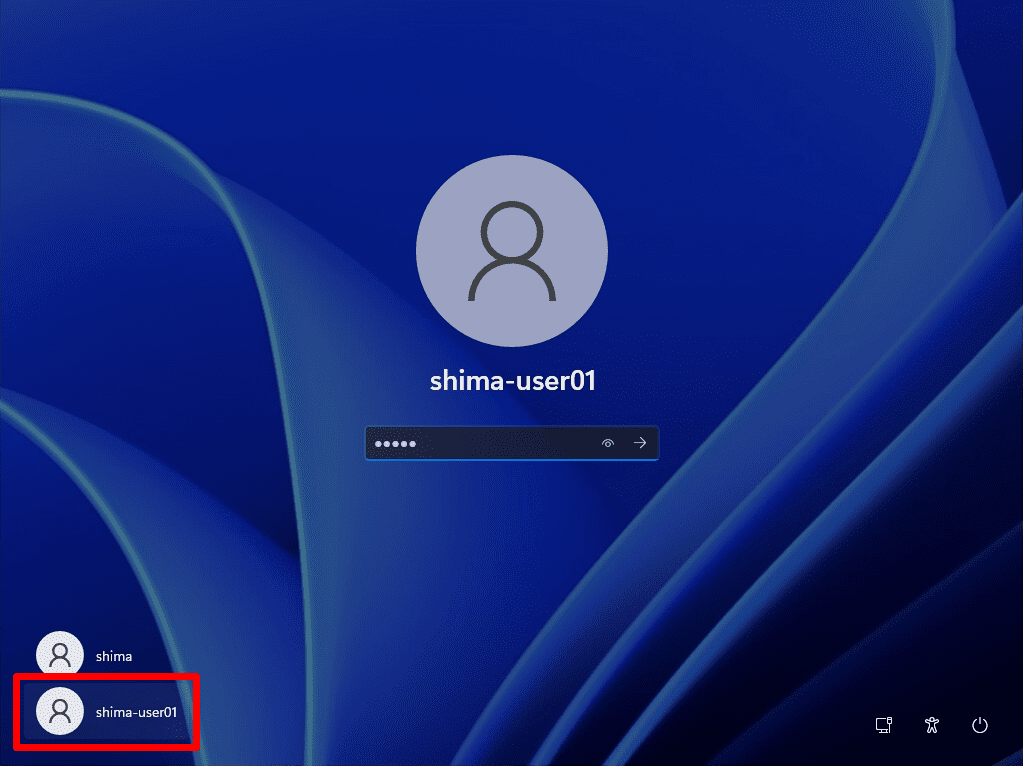
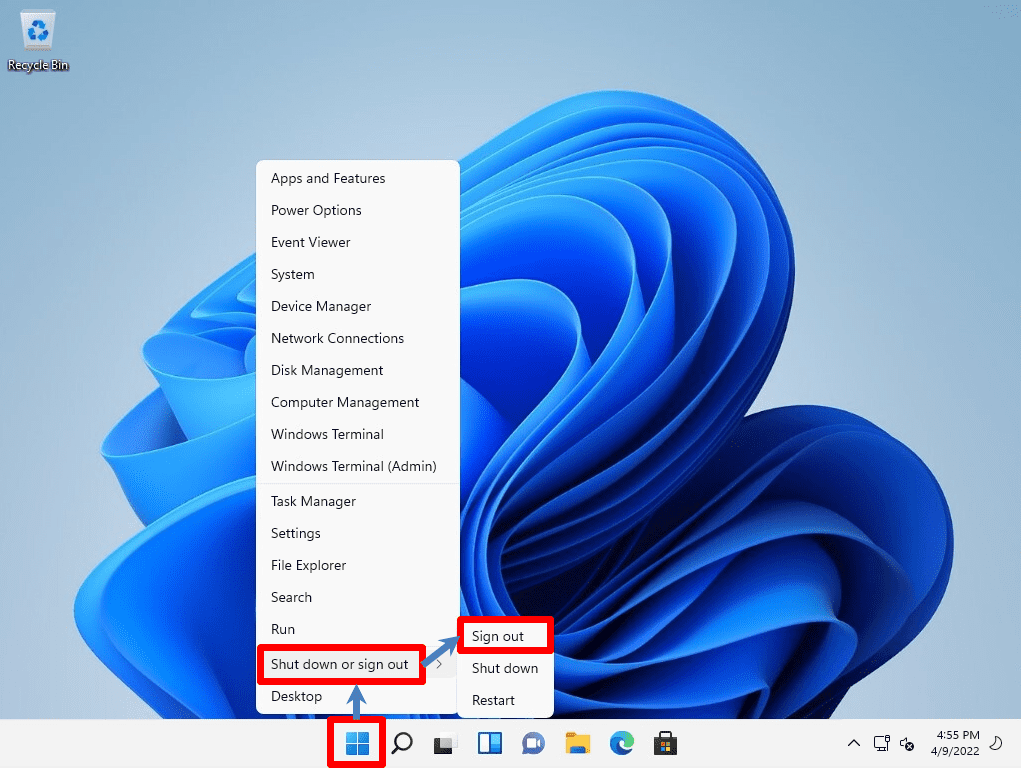
Step 6:
Check if you can log in as the newly created local user.
Right-click Windows Marks on the taskbar -> Shut down or sign out-> Select Sign out.
Step 7:
Select the newly created local account -> Enter the password to log in to the desktop screen.