Windows 10:You can check the installed version of Internet Information Services (IIS) by using GUI commands (command prompt, Windows PowerShell). Check by the following method.
- GUI:Windows Administrative Tools -> Internet Information Services (IIS) Manager -> Check on the Help tab
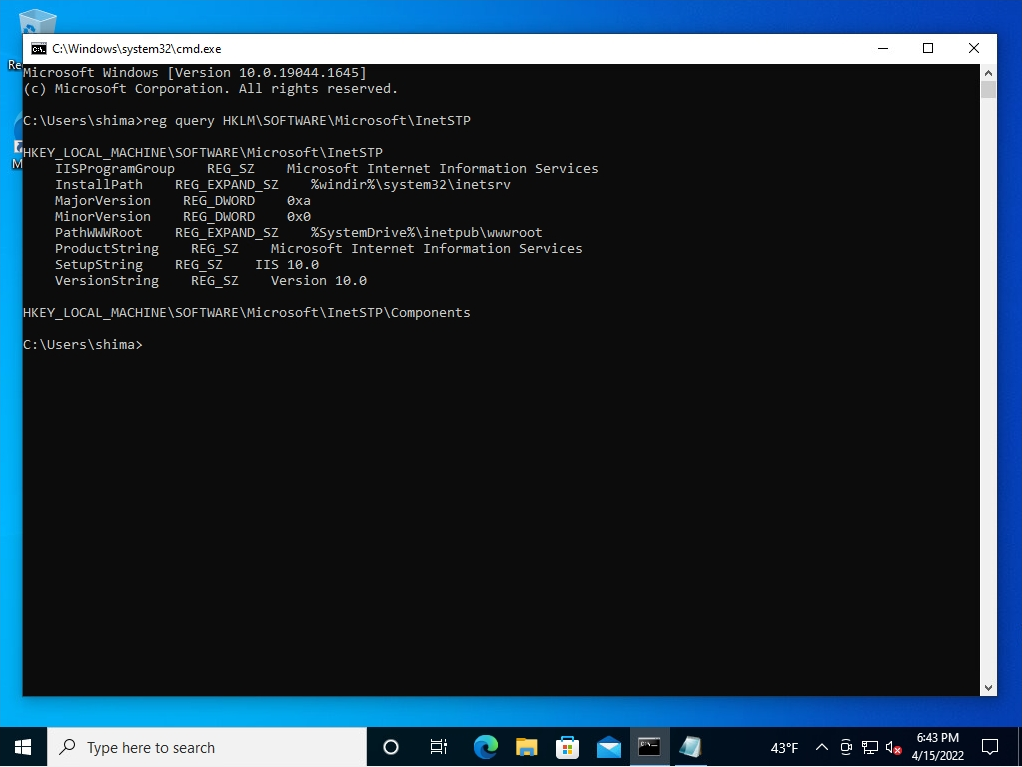
- Command prompt:Execute the “reg query HKLM\SOFTWARE\Microsoft\InetStp\” command
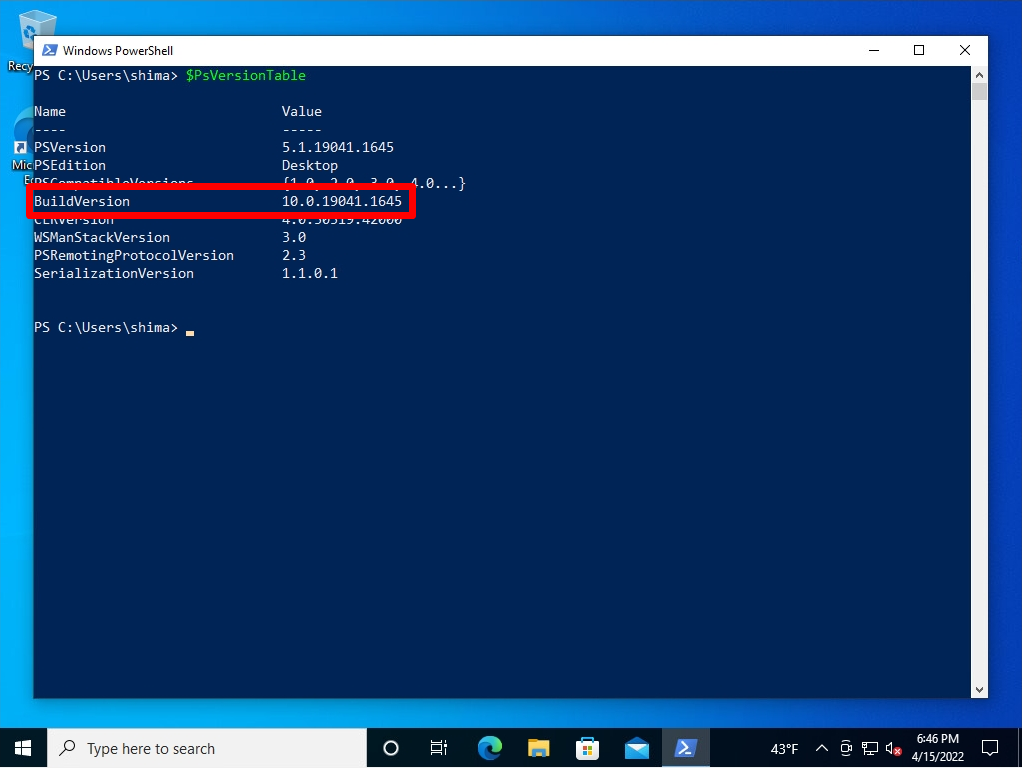
- Windows PowerShell:Run the “$PSVersionTable” command
GUI:Internet Information Services (IIS) Manager Help tab
Step 1:
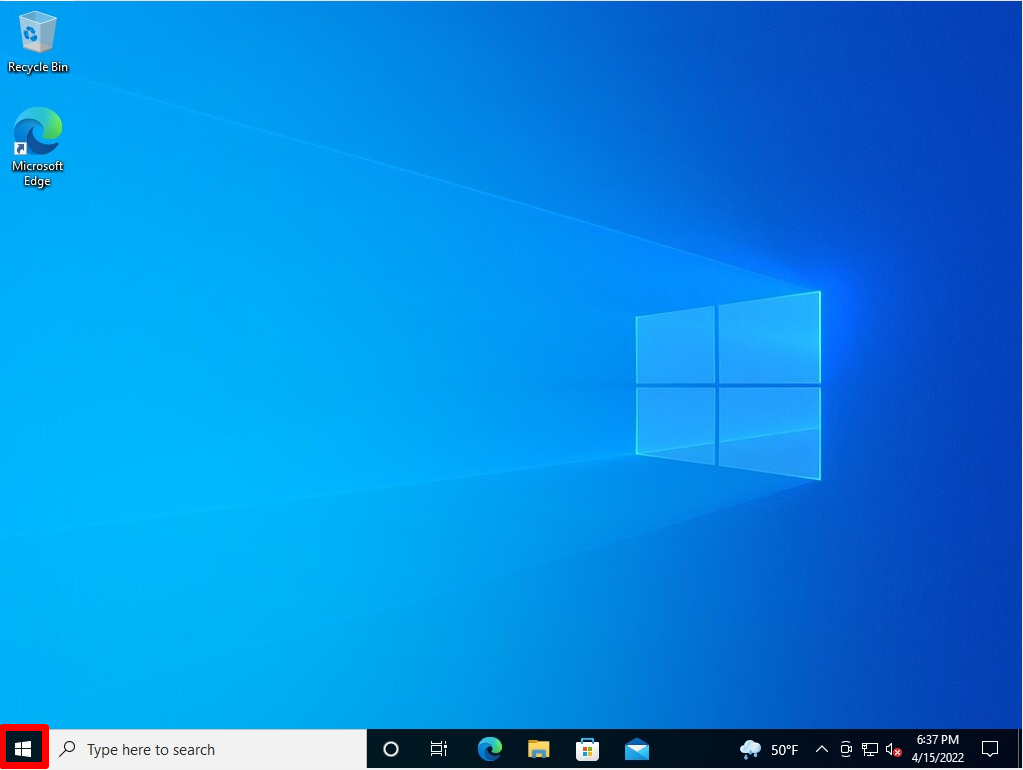
Click the Windows mark at the bottom left of your desktop.
Step 2:
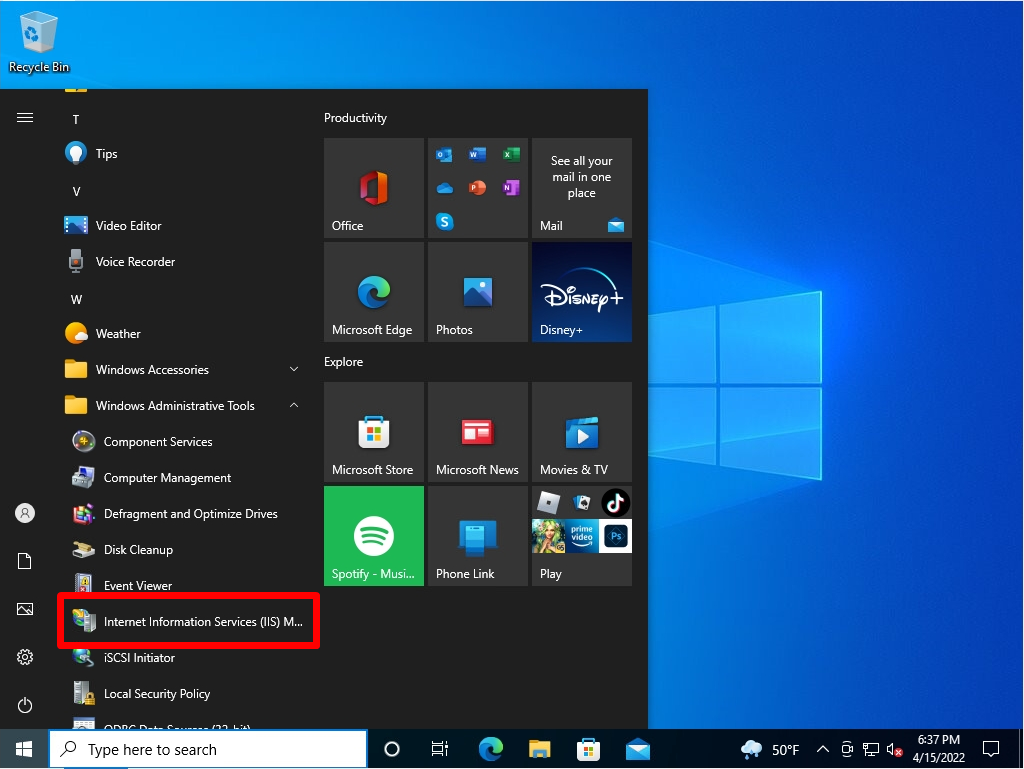
Select Windows Administrative Tools -> Internet Information Services (IIS) Manager.
Step 3:
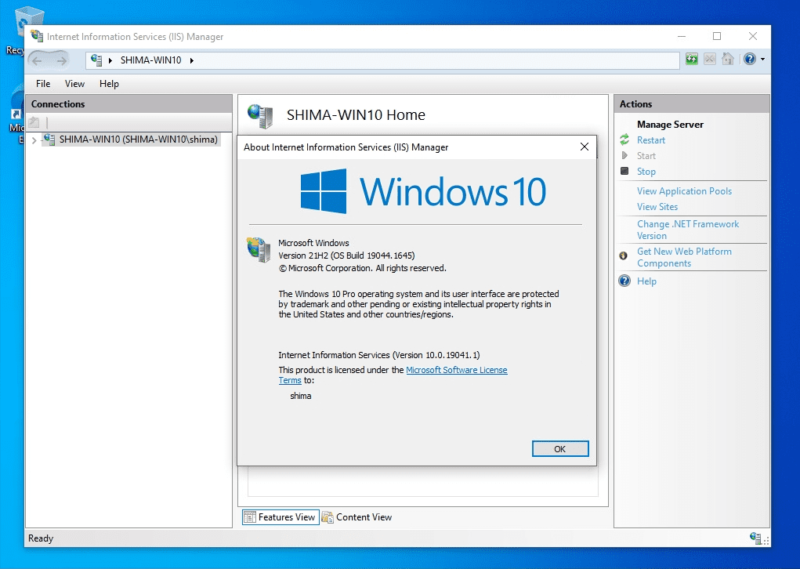
Internet Information Services (IIS) Manager screen:Help tab -> Select About Internet Information Services.
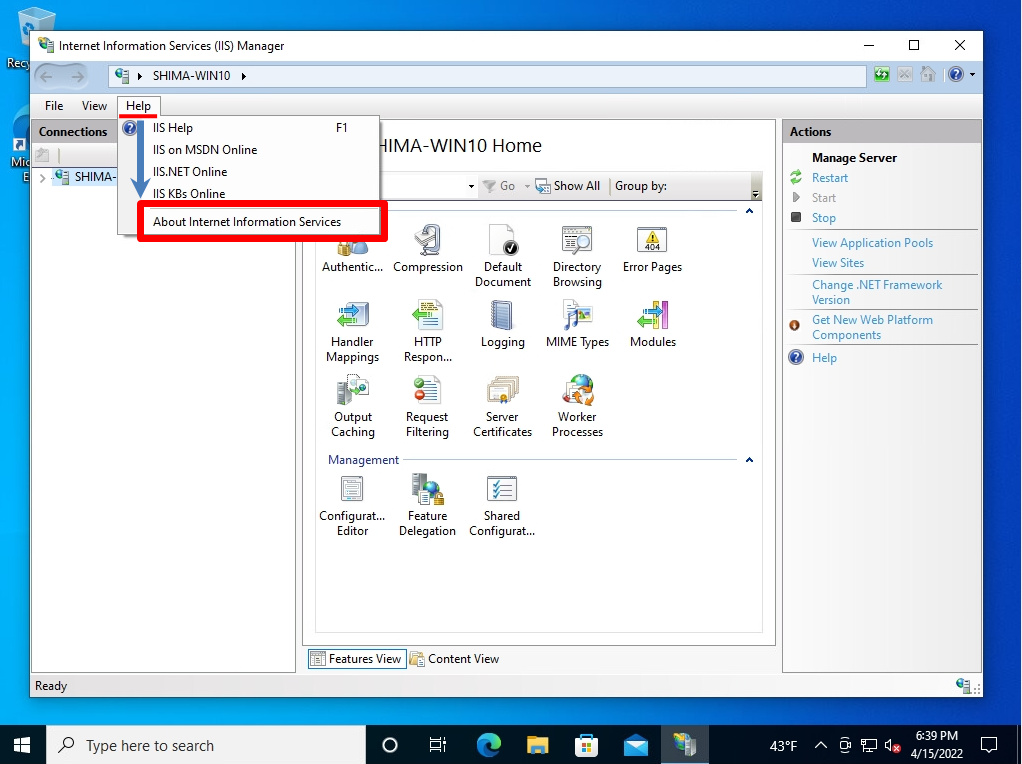
Step 4:
About internet Information Services (IIS) Manager screen:Displays Internet Information Services (IIS) Version information.
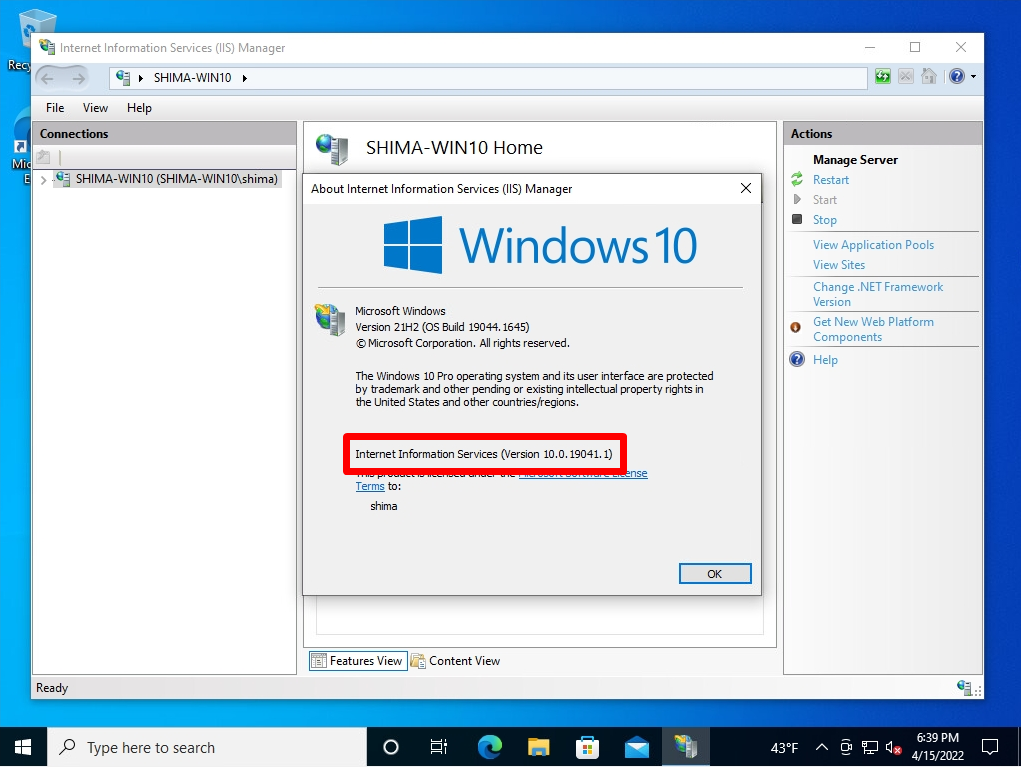
Command prompt:”reg query HKLM\SOFTWARE\Microsoft\InetStp” command
Step 1:
Right-click the Windows mark at the bottom left of the desktop and select Run.
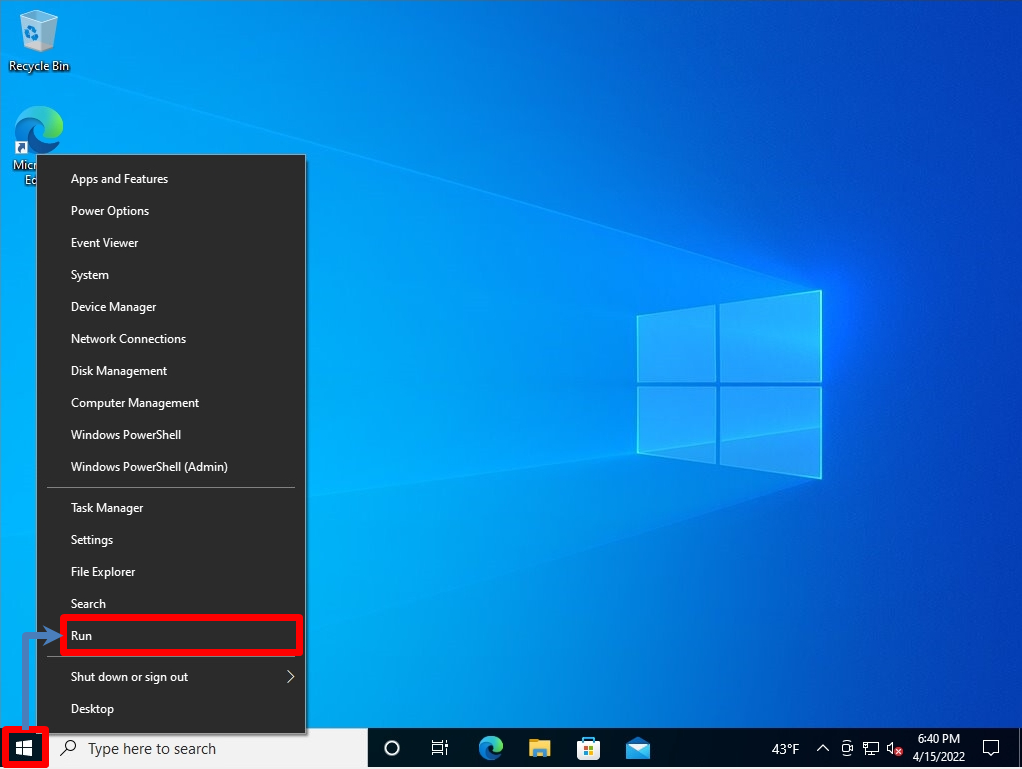
Step 2:
Run screen: Enter cmd –> Select OK.
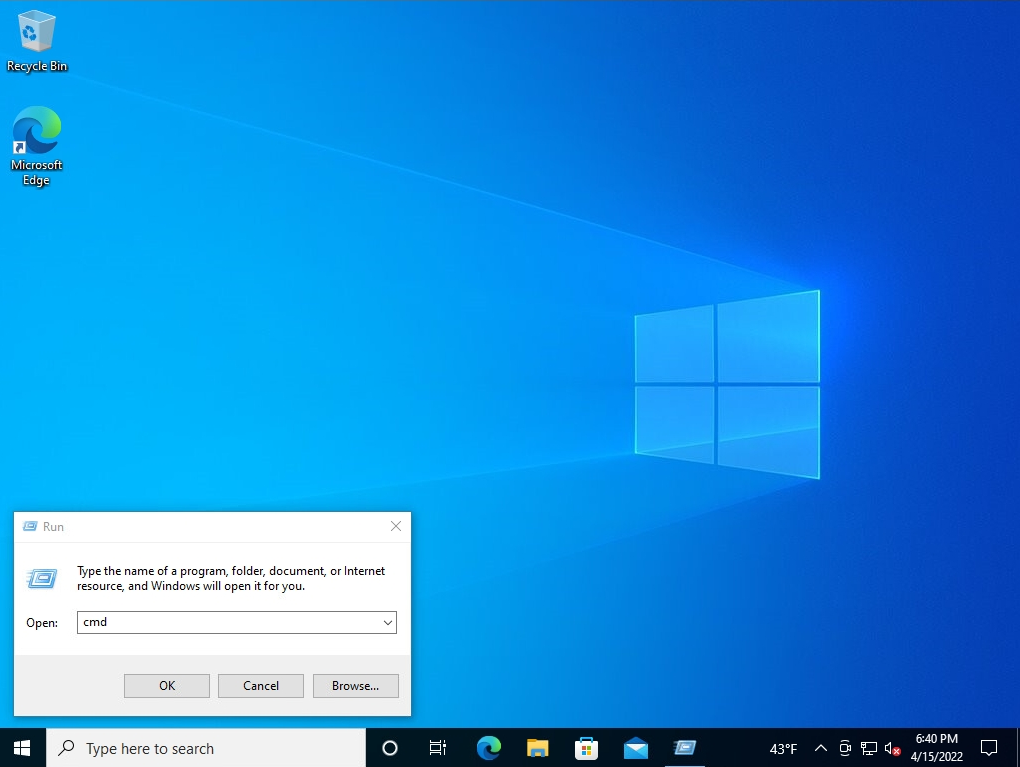
Step 3:
Execute “reg query HKLM\SOFTWARE\Microsoft\InetStp” command -> VersionString Field: Internet Information Services (IIS) Version information is displayed.
Windows PowerShell:”$PSVersionTable” command
Step 1:
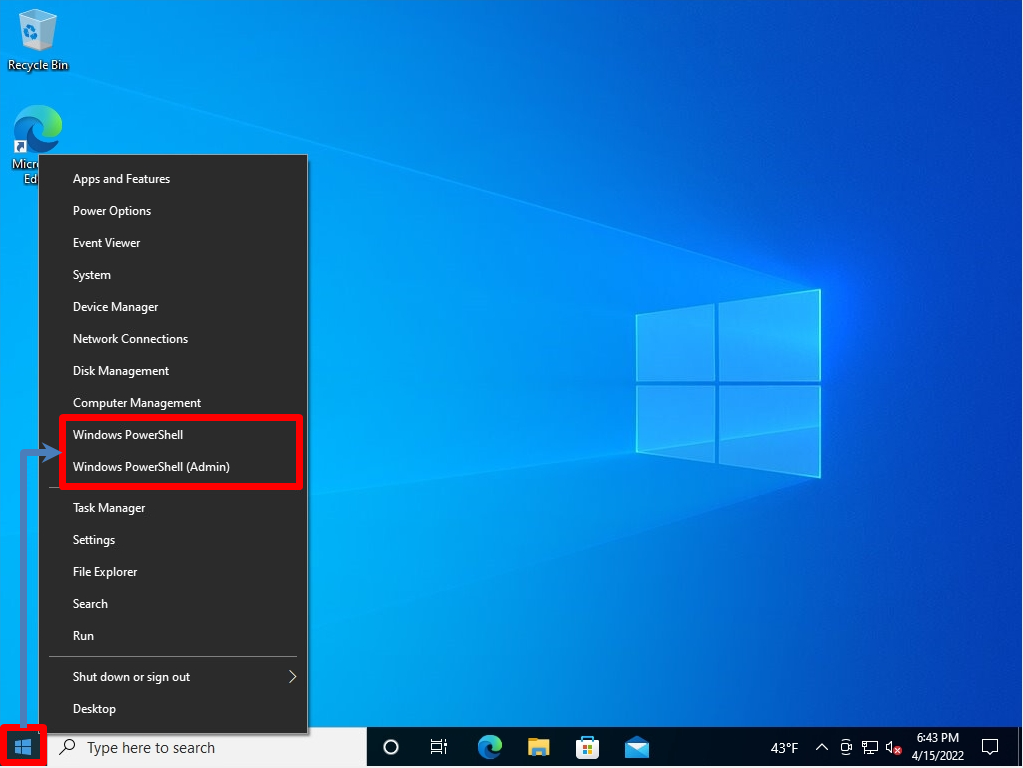
Right-click on the Windows mark at the bottom left of your desktop and select Windows PowerShell.
Step 2:
Execute “$PSVersionTable” command -> BuildVersion Item: Internet Information Services (IIS) Version information is displayed.
