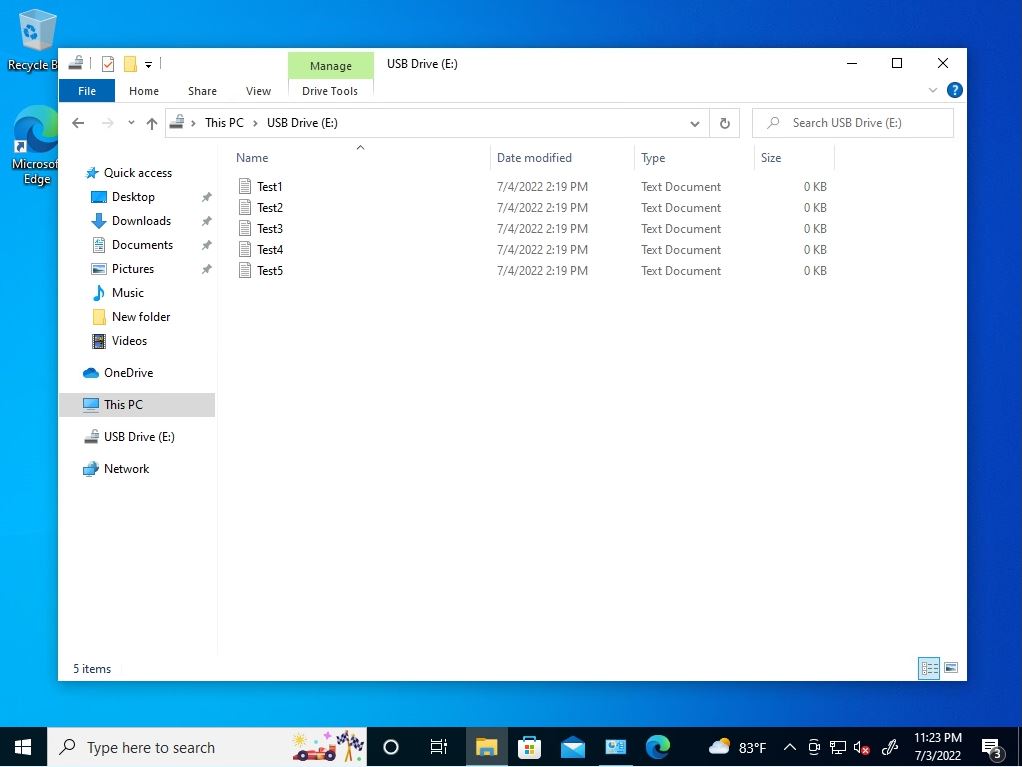
There are two main types of BitLocker: “BitLocker” that protects local internal disks (hard disks and SSDs) and “BitLocker To Go” that encrypts removable drives such as USB memory and external storage. BitLocker is standard on Windows 10 Pro, Education, and Enterprise editions. * This function is not installed in Windows 10 Home edition.
If you encrypt with the “BitLocker To Go” function in advance, if a third party connects to your PC when the external storage medium is lost, you will not be able to access the external storage medium without entering the password or recovery key. Therefore, it is a countermeasure against information leakage.
In this article, we will explain the USB memory encryption procedure using “BitLocker To Go” using a Windows 10 Pro terminal.
Windows10: USB memory encryption with BitLocker To Go
Step 1:
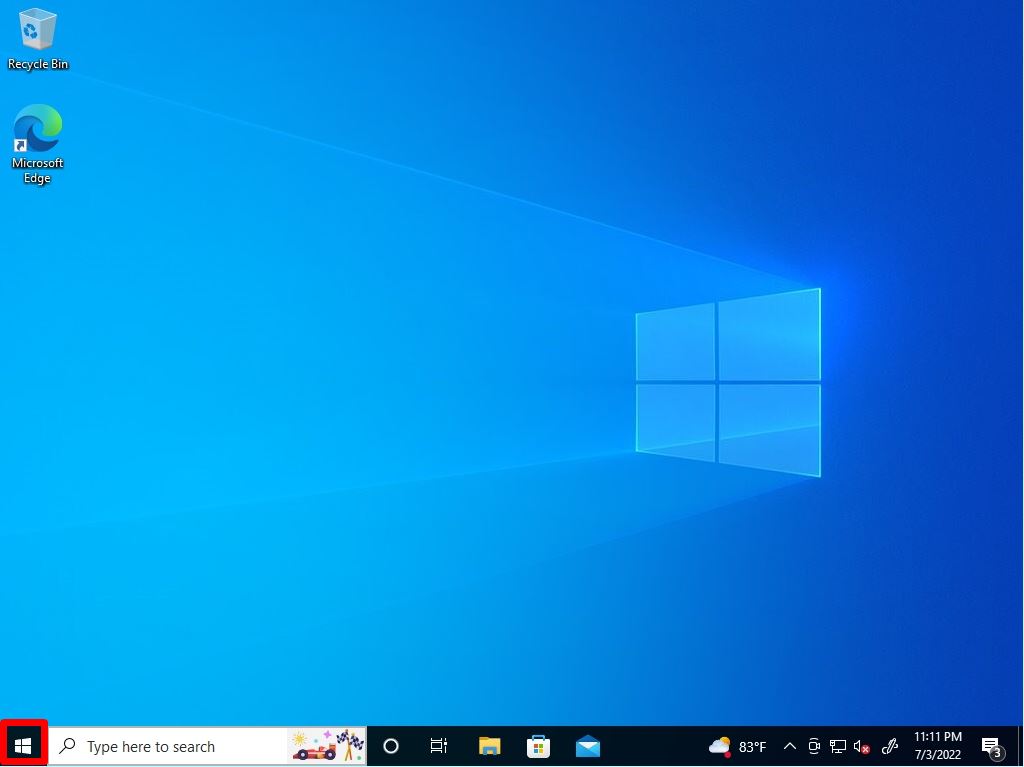
Select the Windows mark at the bottom left of your desktop.
Step 2:
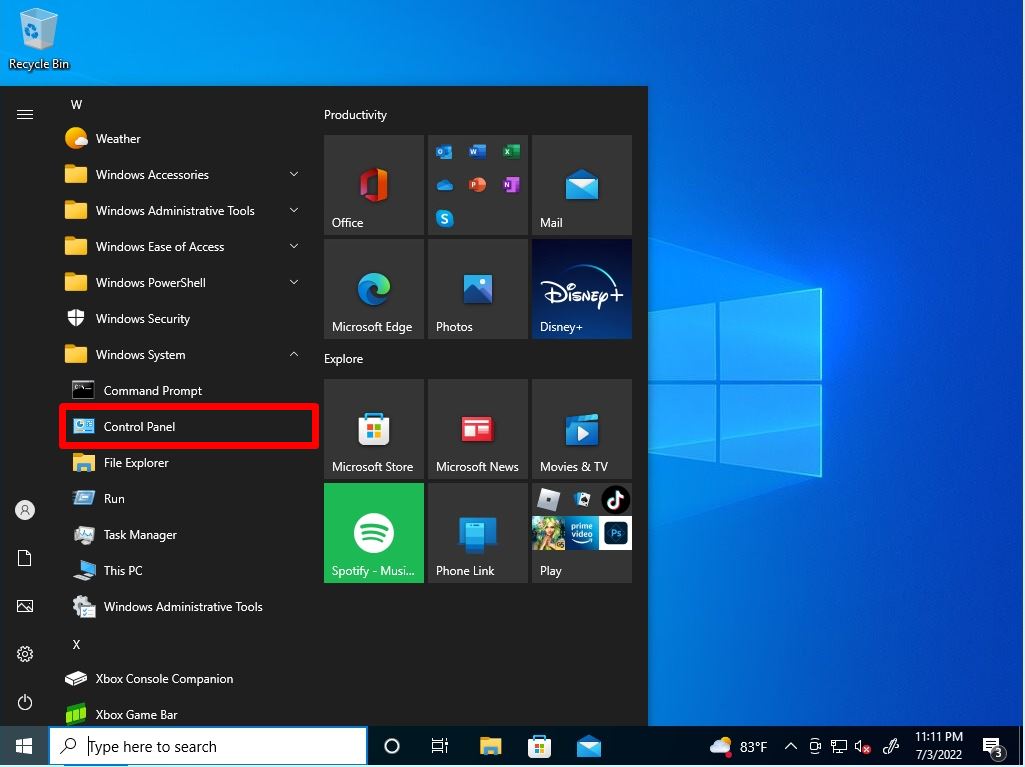
Select Windows System –> Control Panel.
Step 3:
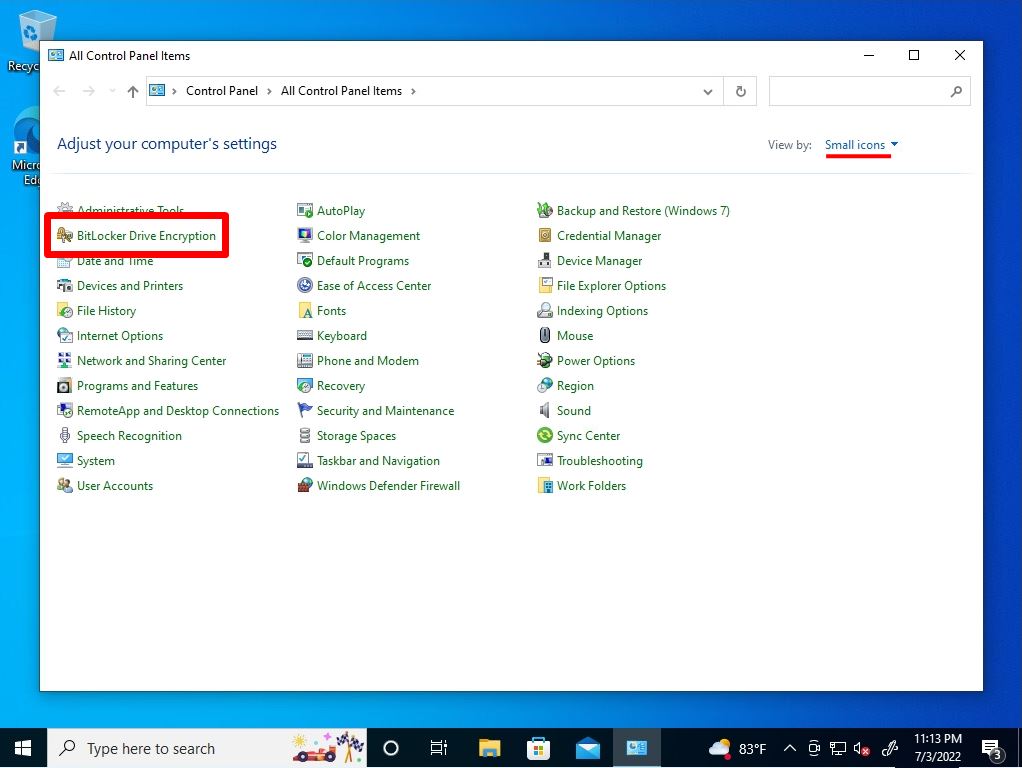
View by: Select Small icons -> BitLocker Drive Encryption.
Step 4:
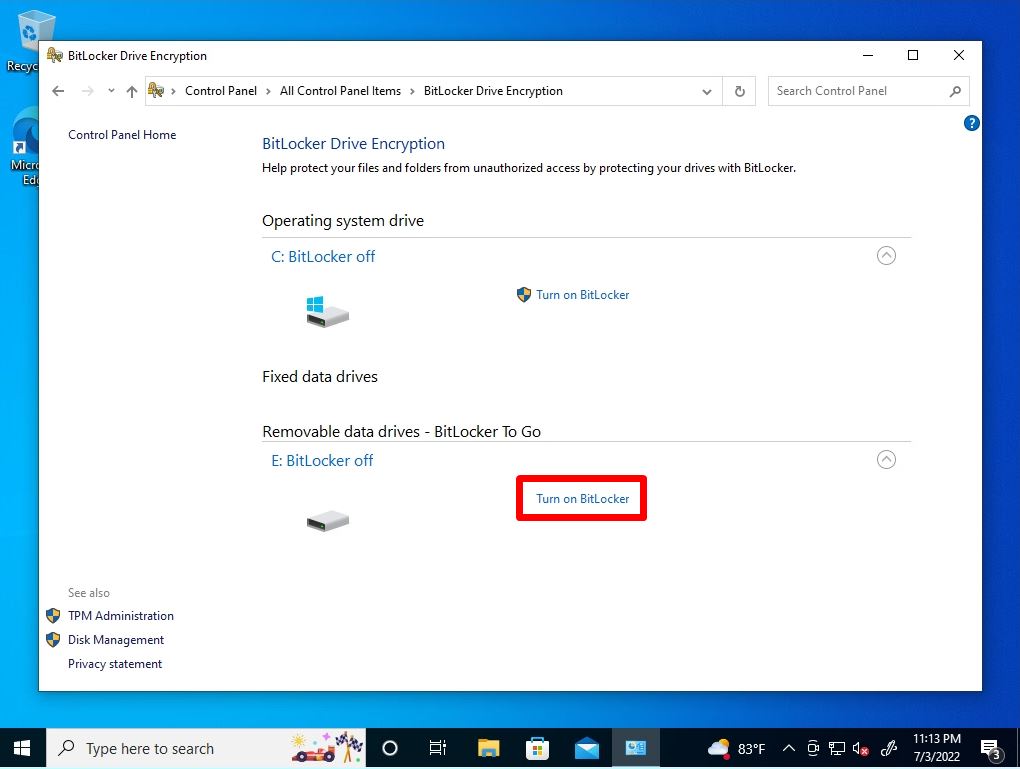
After inserting the removable drive to be encrypted into your computer, select “Turn on BitLocker”.
Step 5:
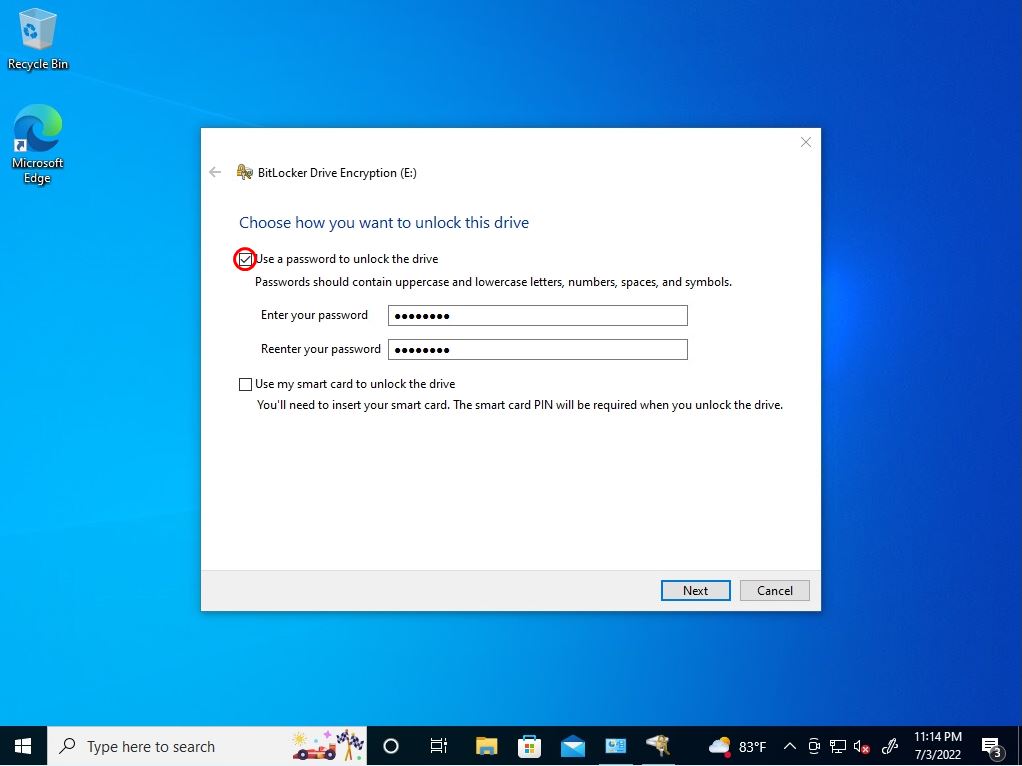
Enable “Use a password to unlock the drive” -> Enter password -> Select Next.
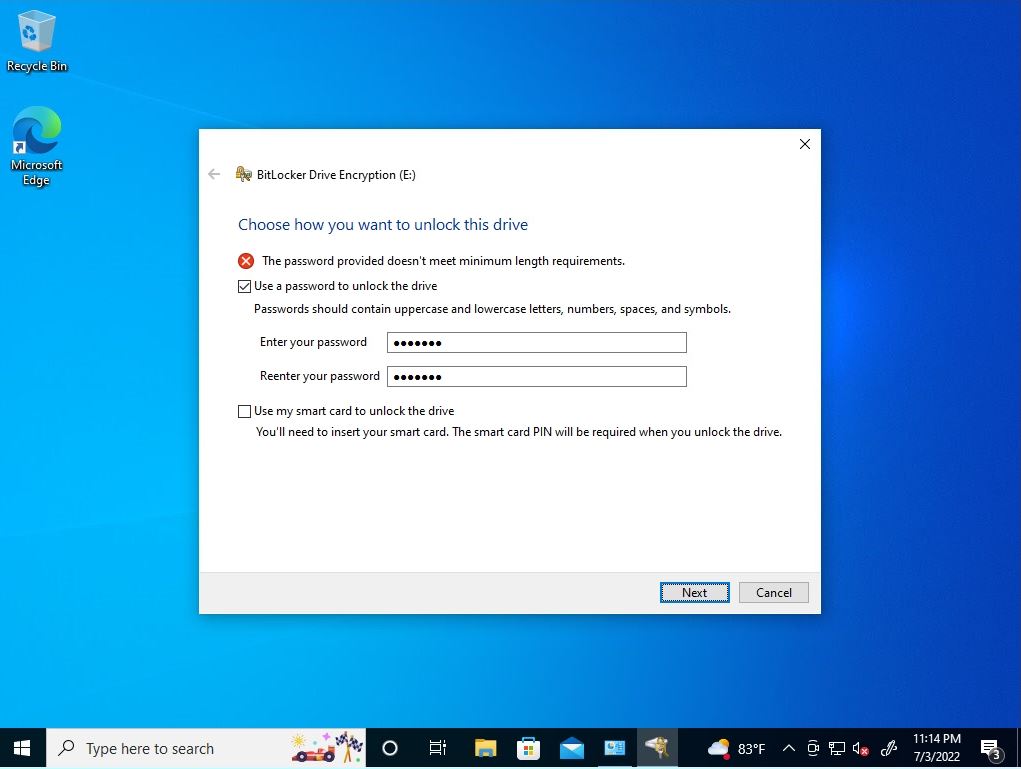
If the password is 8 characters or less, “The password provided doesn’t meet minimum length requirements.” is output and cannot be set.
Step 6:
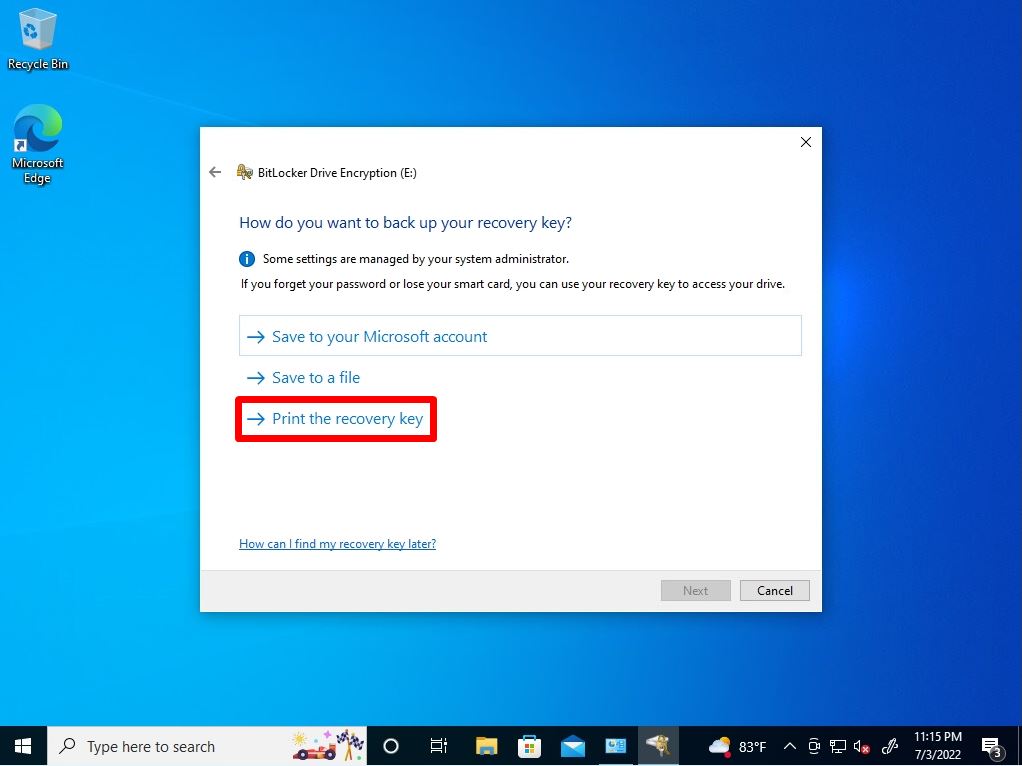
You cannot move to the next screen unless you specify a backup method for one of the recovery keys and save the recovery key. * In this article, select “Print recovery key” and save the recovery key as PDF.
Step 7:
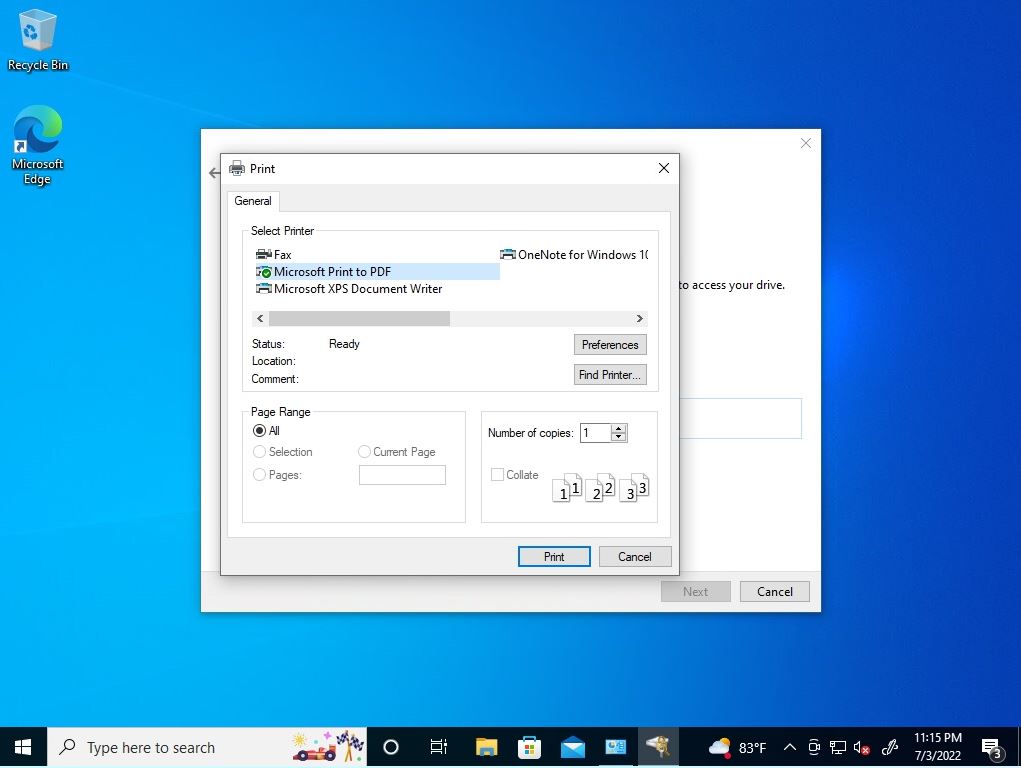
Select “Microsoft Print to PDF” -> Select “Print”.
In this article, “Microsoft Print to PDF” was selected instead of outputting as a paper medium, and it was output as a PDF file.
Step 8:
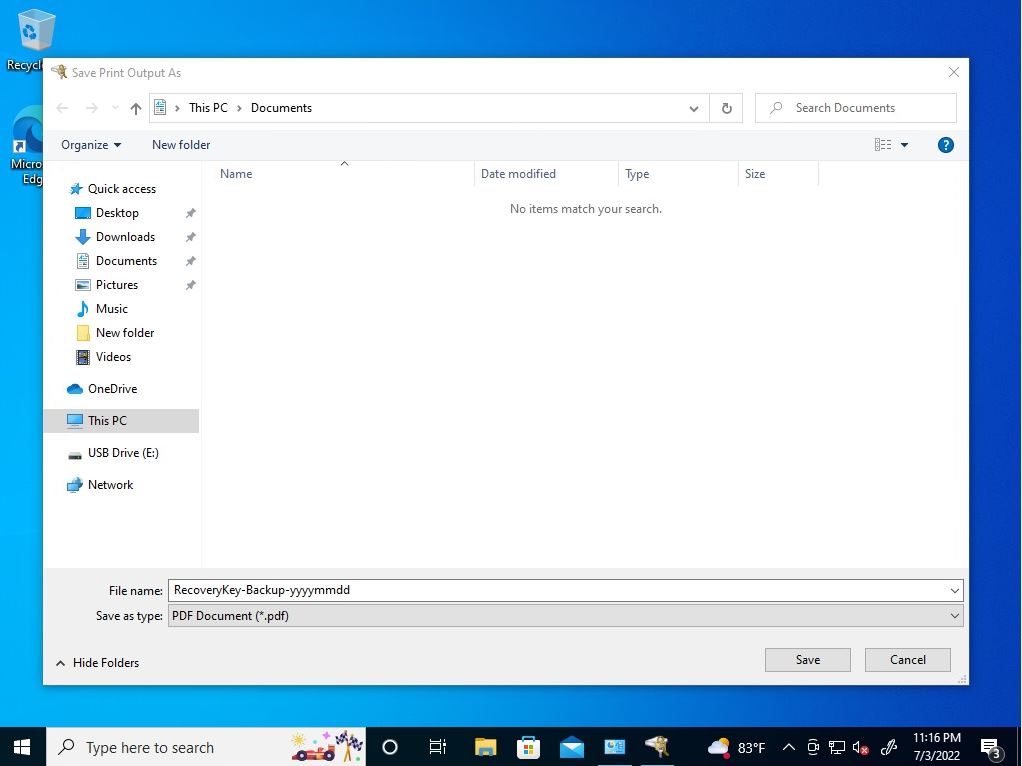
Enter the file name of the recovery key -> select “Save”.
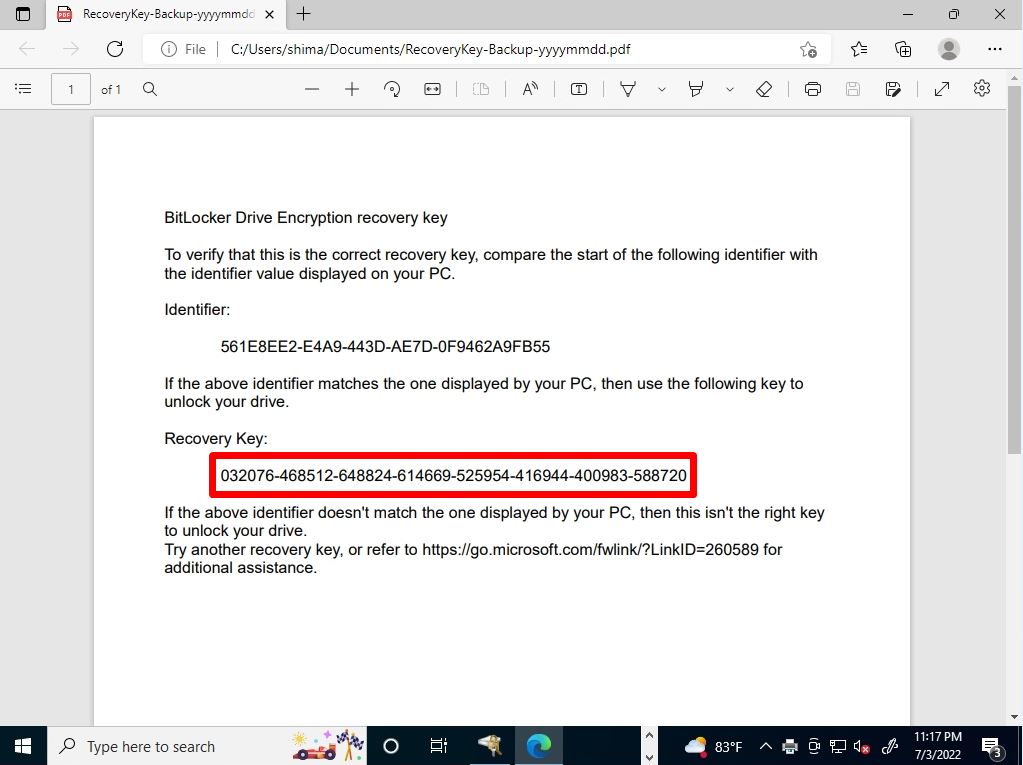
Confirm the recovery key. This is a 48-digit number in a file saved on your computer. If you forget your password, you can load the encrypted device with the recovery key.
Step 9:
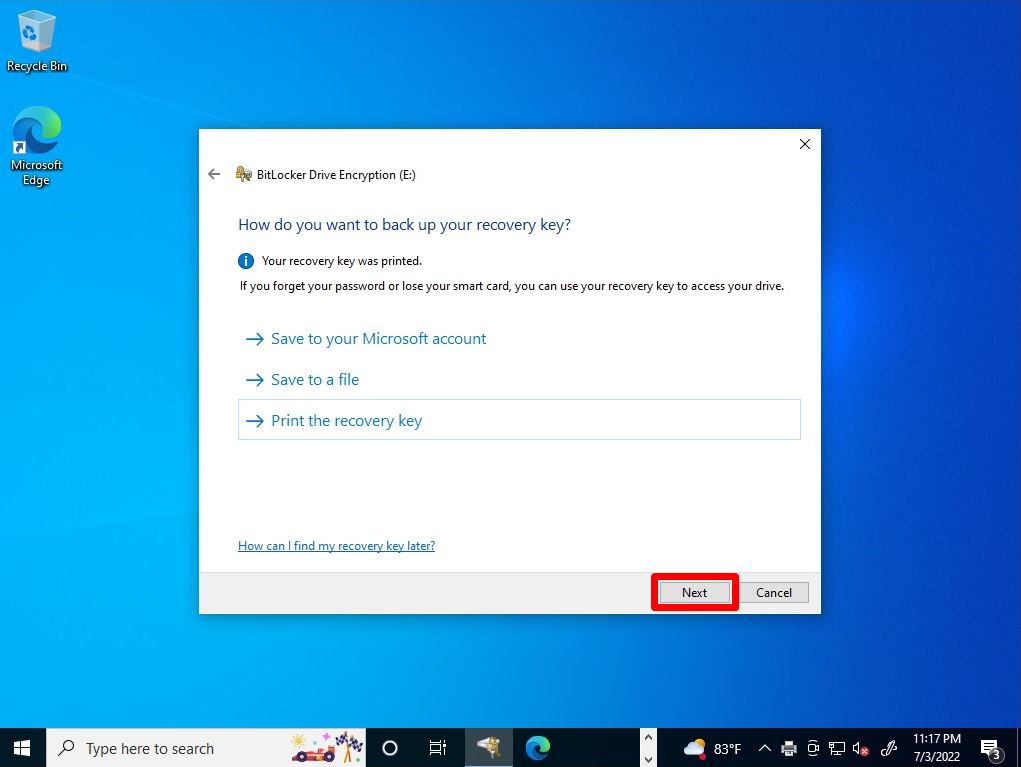
After saving the recovery key file, select Next.
Step 10:
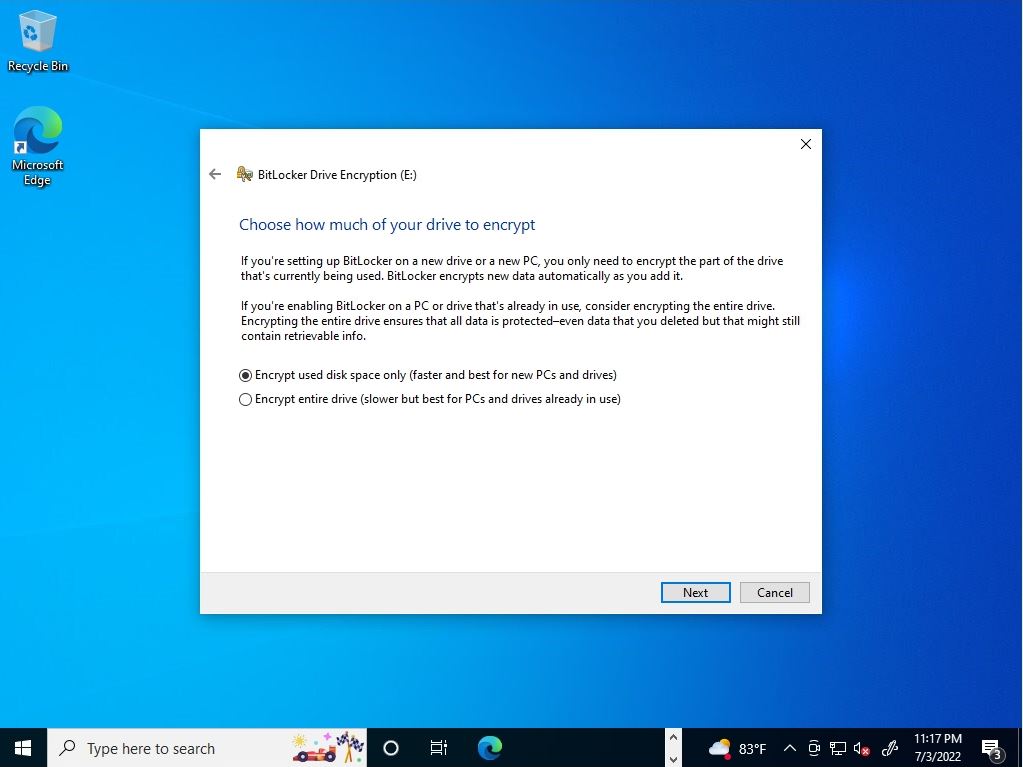
Then select the range to encrypt the drive. You can choose to encrypt only the used space of the drive or the entire drive. “Encrypt used disk space only” may save time because it only encrypts the data on the current drive, but if you want to make it more secure, “Encrypt the entire drive” Let’s choose.
Step 11:
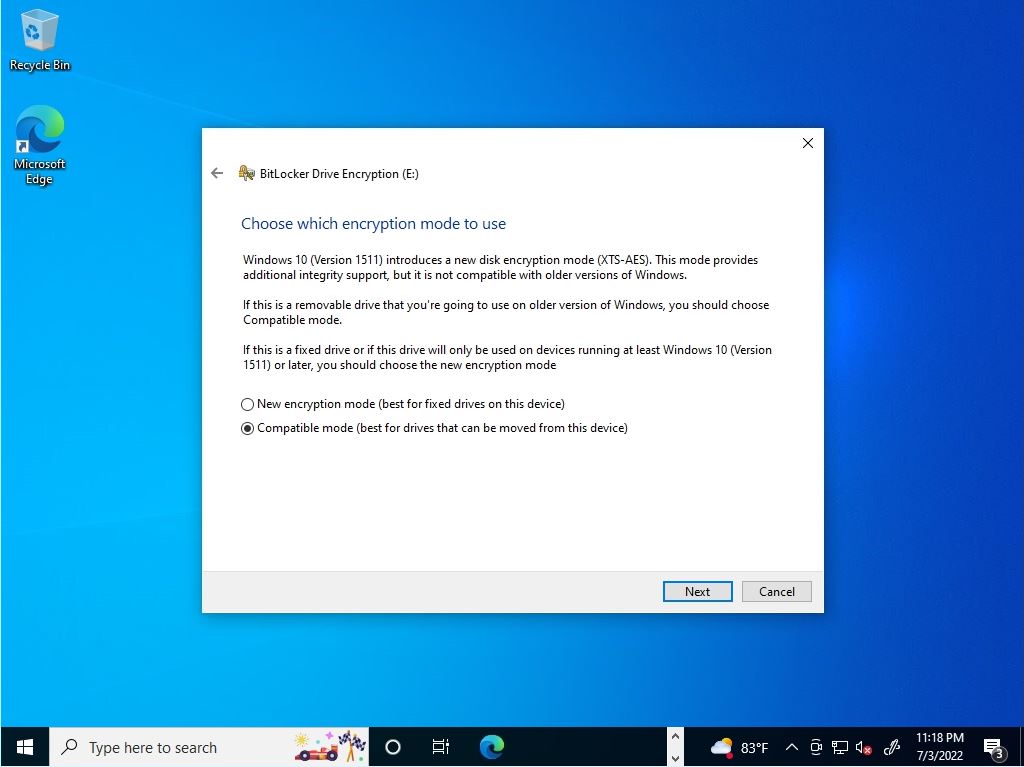
Select the encryption mode you want to use.
In this article, “Compatible mode (best for fixed drives on this device)” is selected so that it can be used on computers other than Windows 10.
Step 12:
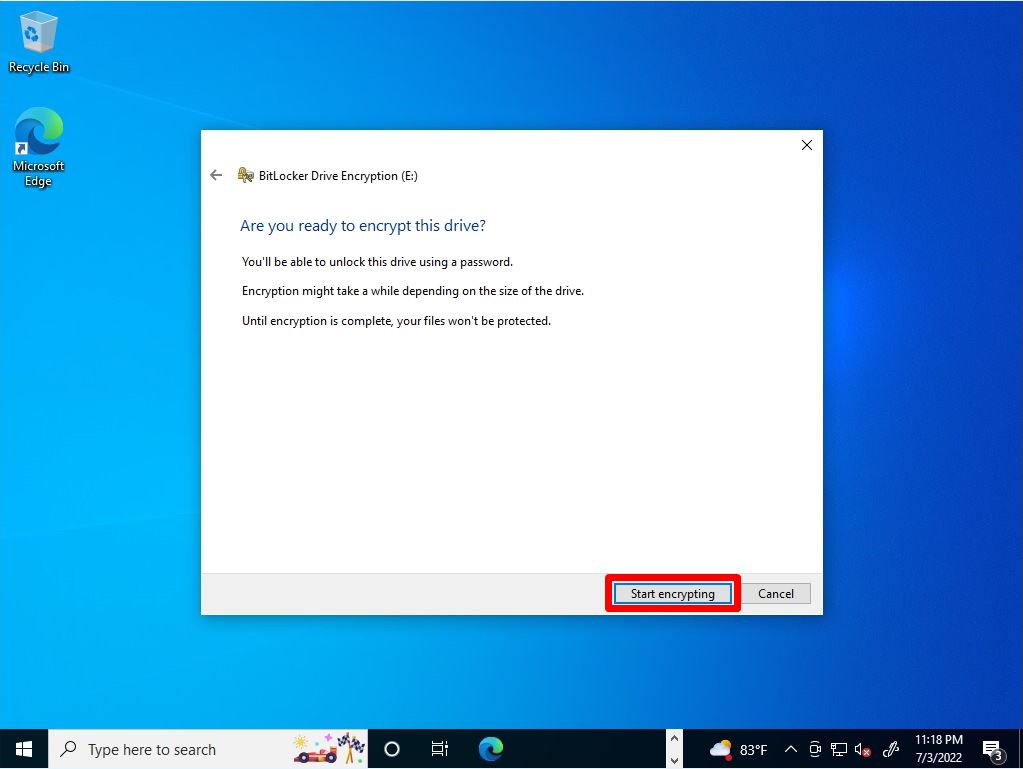
Select “Start encrypting”.
Step 13:
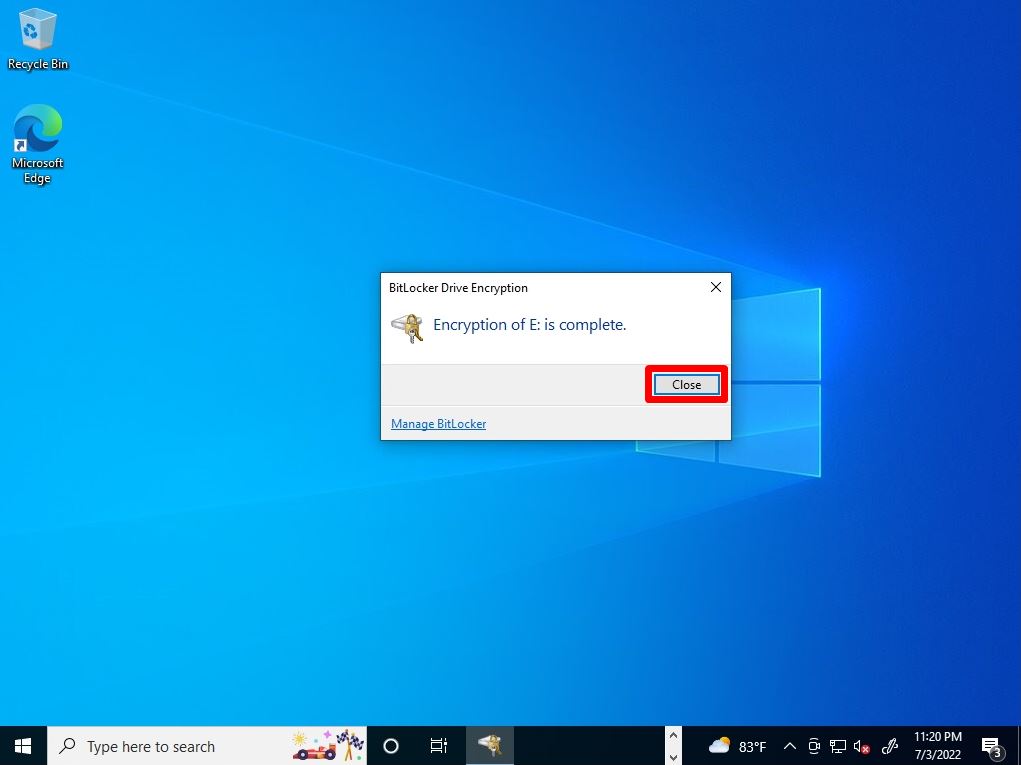
Select “Close” when the USB memory encryption is completed.
Windows10: Read a USB memory encrypted with BitLocker To Go
Step 1:
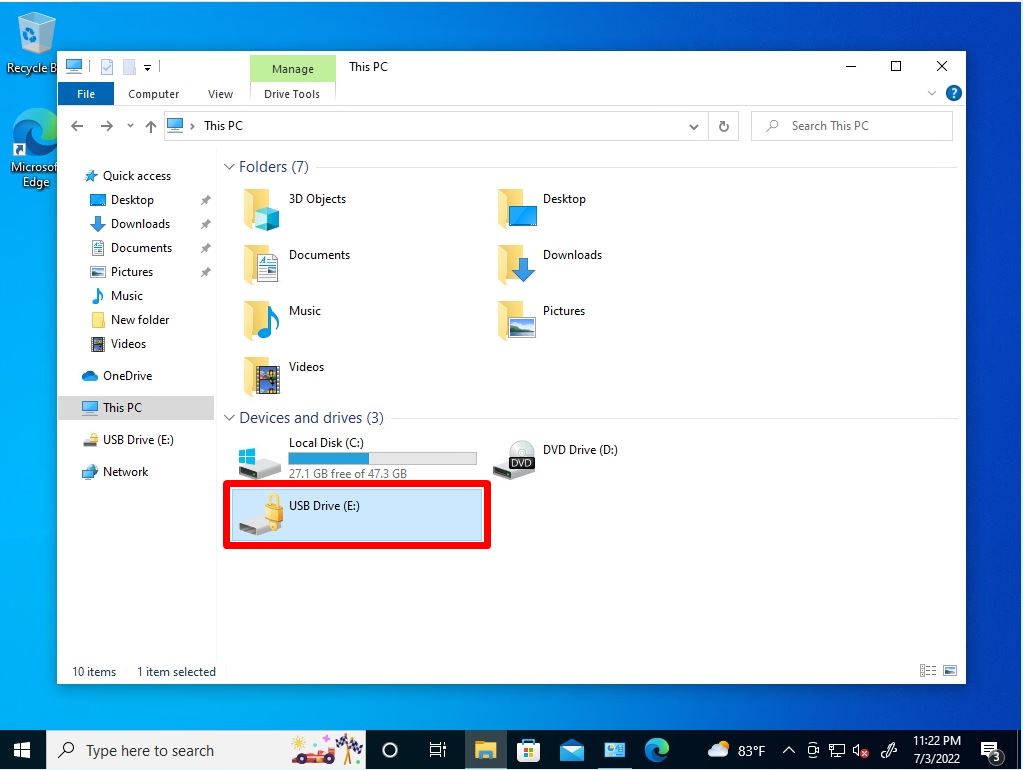
Insert the USB memory into your computer and double-click the encrypted USB memory.
Step 2:
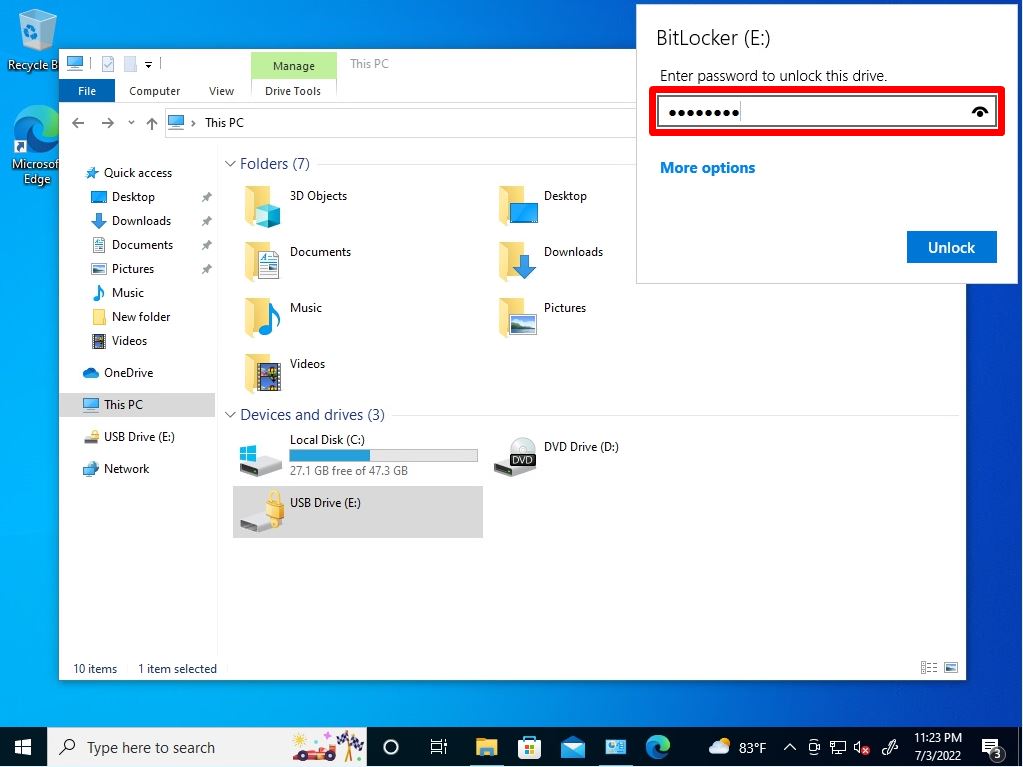
After selecting the device, the password entry screen will appear. Enter the password you have set -> Select “Unlock”.
Step 3:
The data stored on the device will be displayed after the USB memory is decrypted.
