“Microsoft .NET Framework” is a software development and execution program provided by Microsoft for free. It is a role like a part required to operate Windows software
.NET Framework 3.5 Features may be required depending on the application running on Windows Server 2019. By default, Windows Server 2019 has “.NET Framework 4.7 Features” installed and .NET Framework 3.5 Features not installed. Install .NET Framework 3.5 Features according to your system requirements. This time, I will explain how to install “.NET Framework 3.5” manually in an environment where you can connect to the Internet ※ In an environment where you can connect to the Internet, you do not need to use the physical OS installation disk or ISO file.
[Internet connection environment] Windows Server 2019: .NET Framework 3.5 install
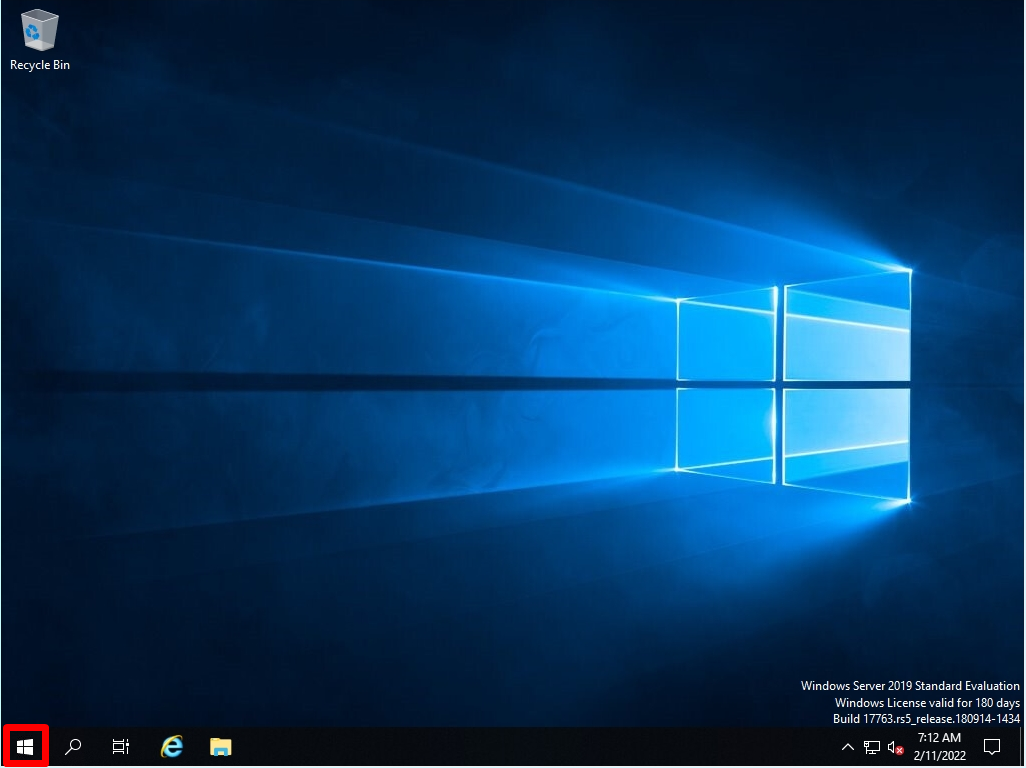
Step 1:
Select the Windows mark at the bottom left of the desktop screen
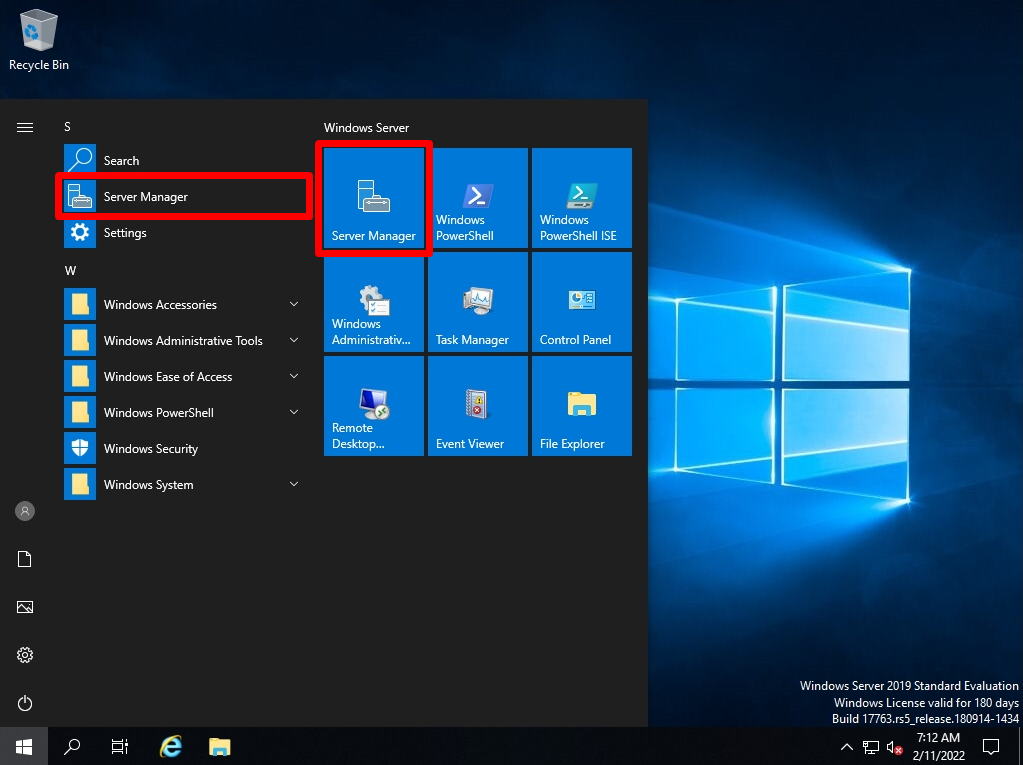
Step 2:
Select Server Manager
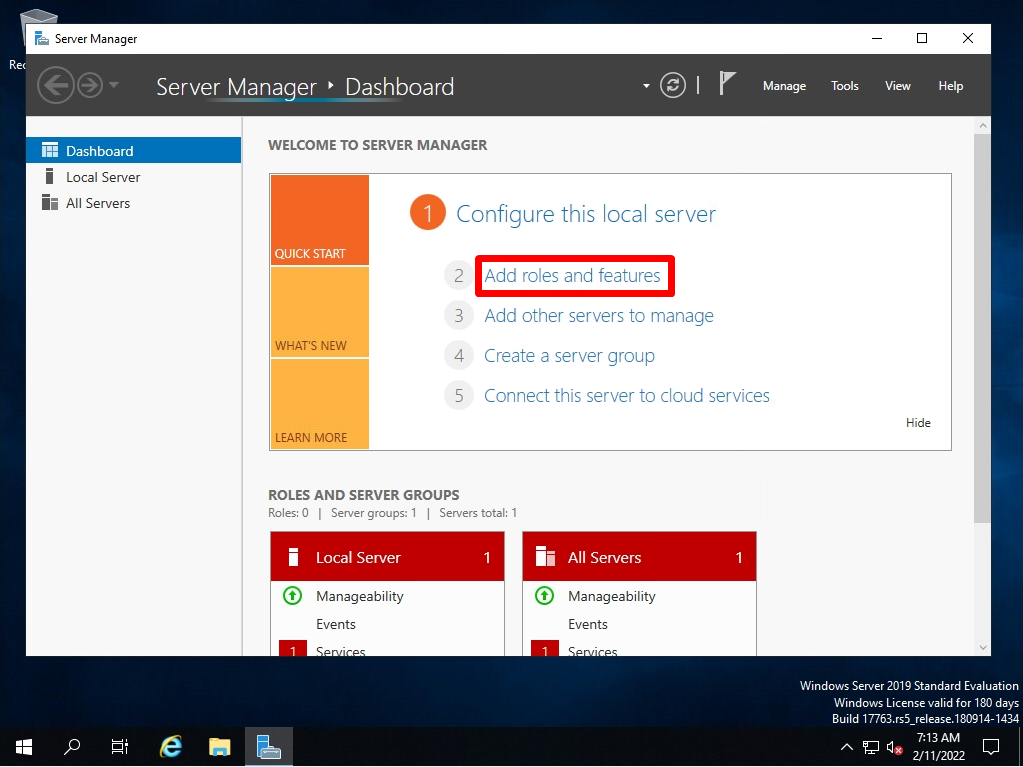
Step 3:
Select Add roles and features
Step 4:
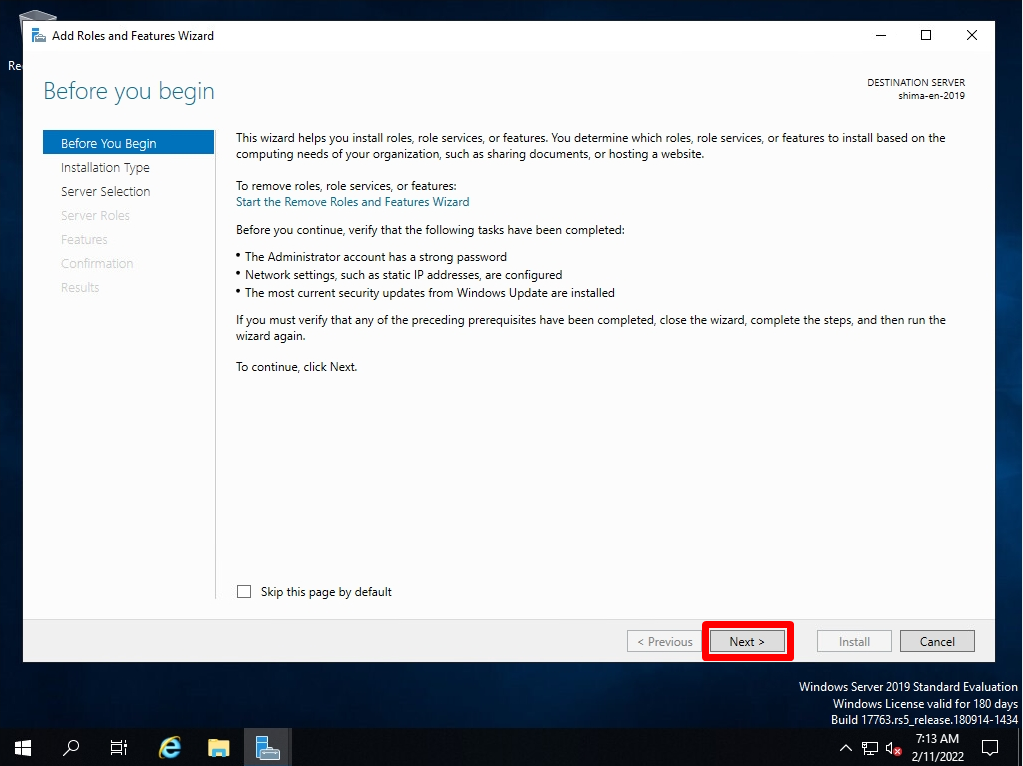
Before you begin screen: Select Next
Step 5:
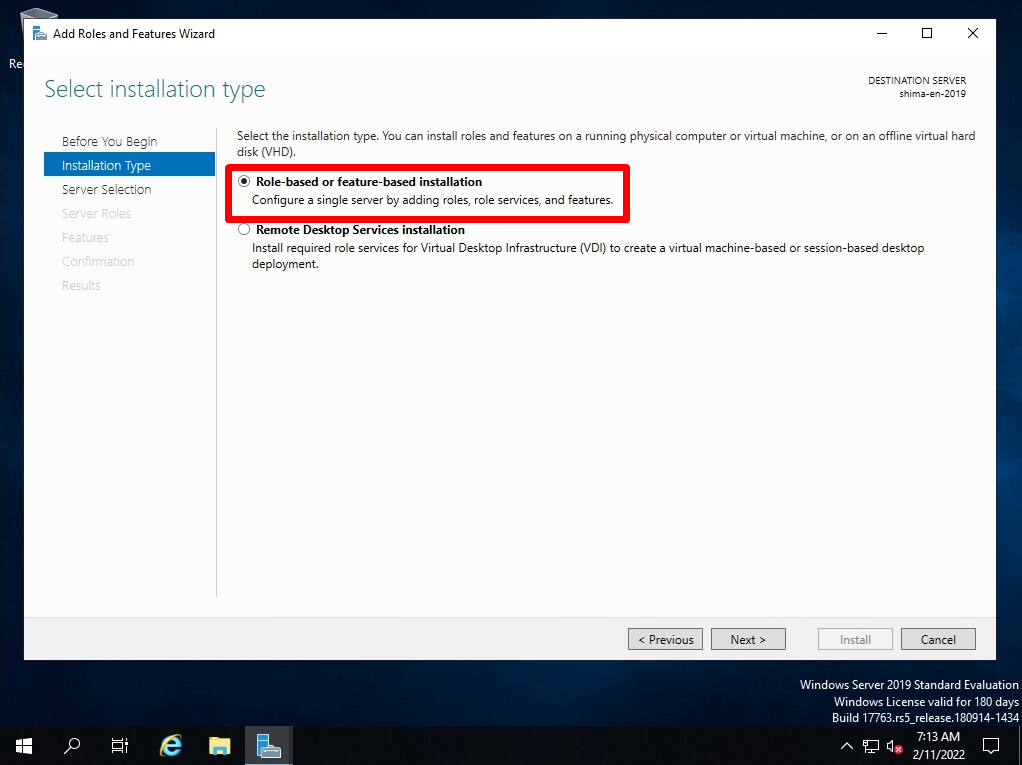
Select installation type screen: Select Role-based or feature-based installation -> Next.
Step 6:
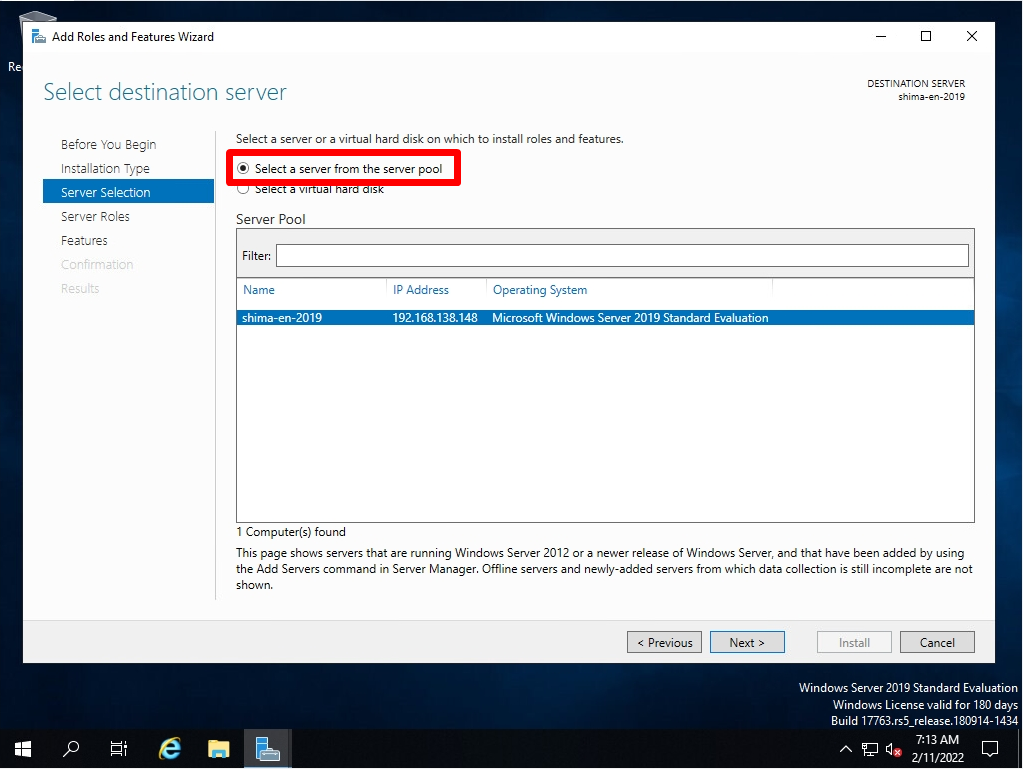
Select destination server screen: Select a server from the server pool -> Select Next
Step 7:
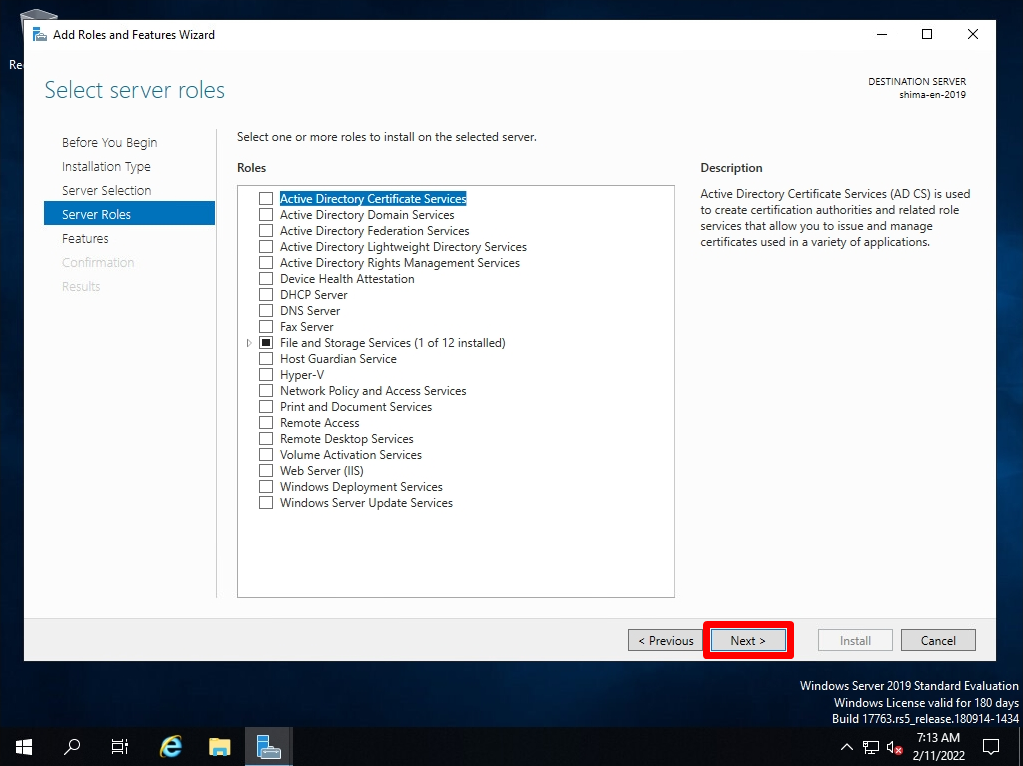
Select server roles screen: Select Next without selecting anything
Step 8:
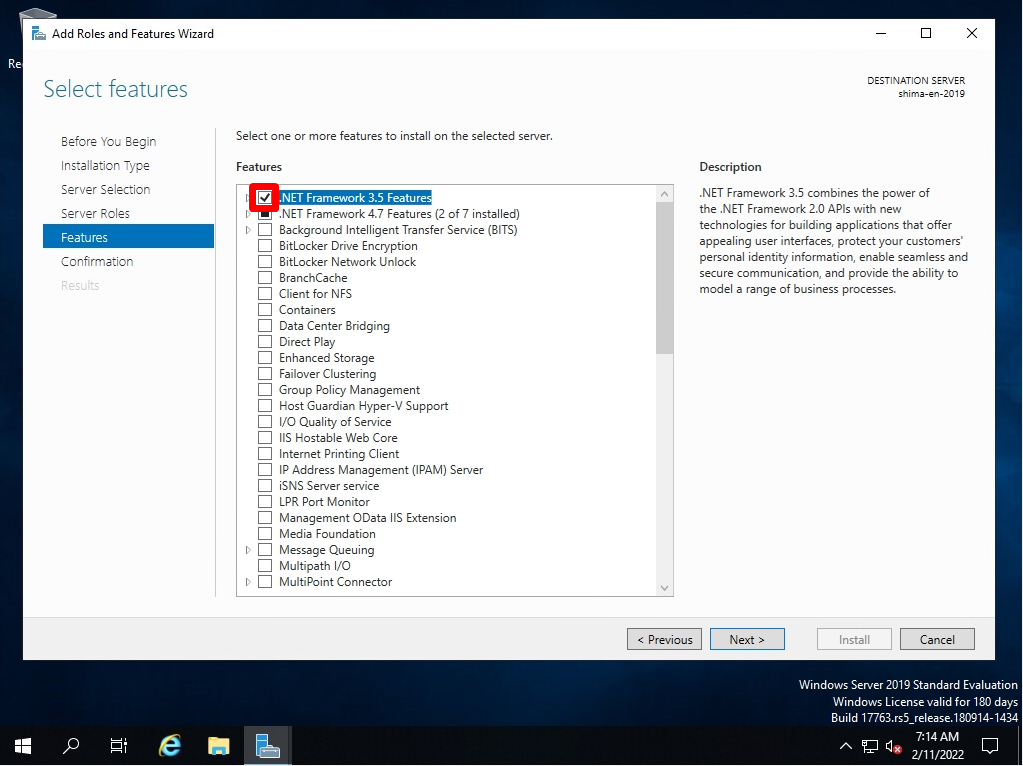
Select .NET Framework3.5 Features –> Select Next
Step 9:
Confirm installation selections screen: Select Install
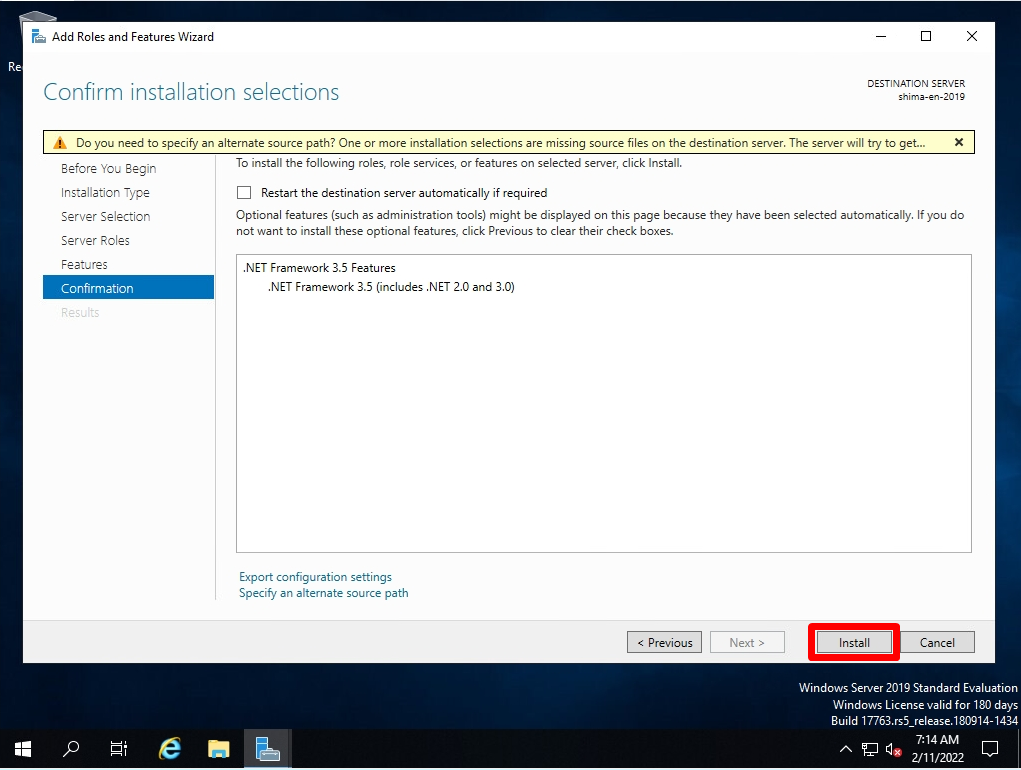
Installation progress screen: The installation will start. Wait a moment for the process to finish
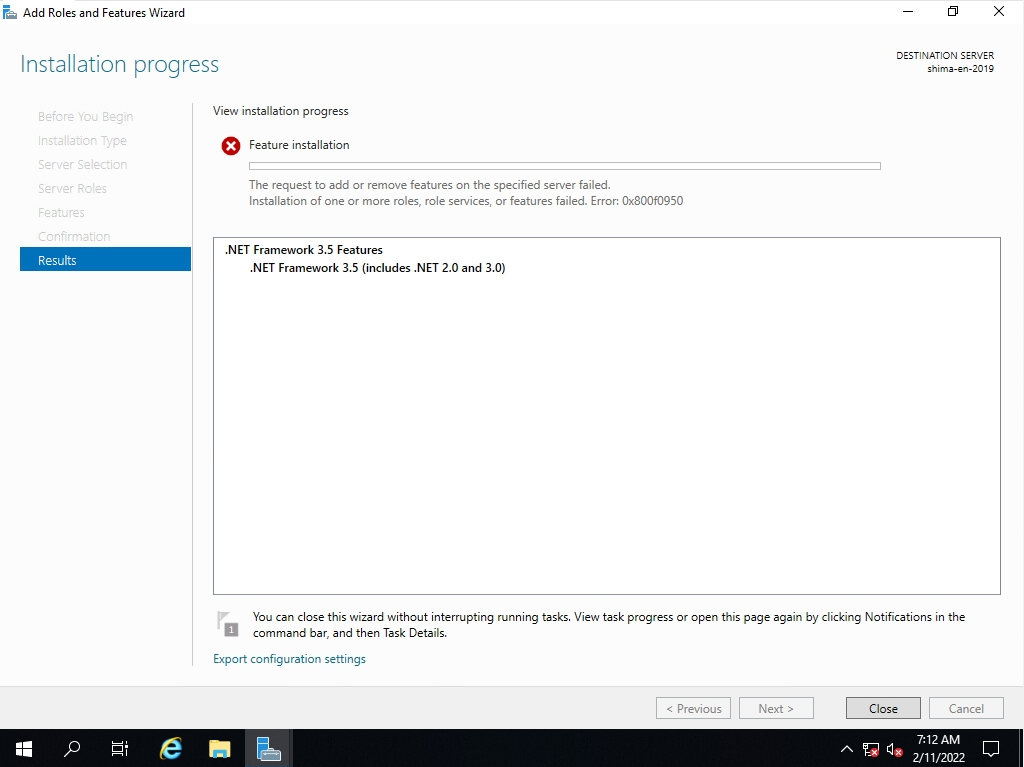
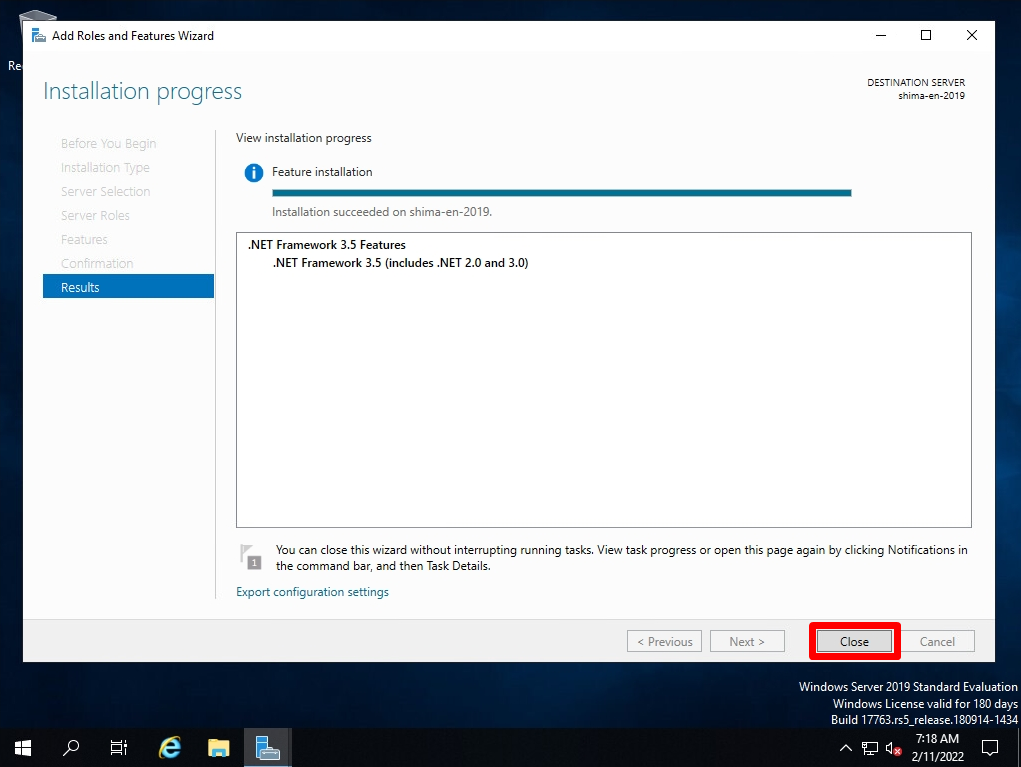
Step 10:
Installation progress screen: Installation is complete. Select Close
