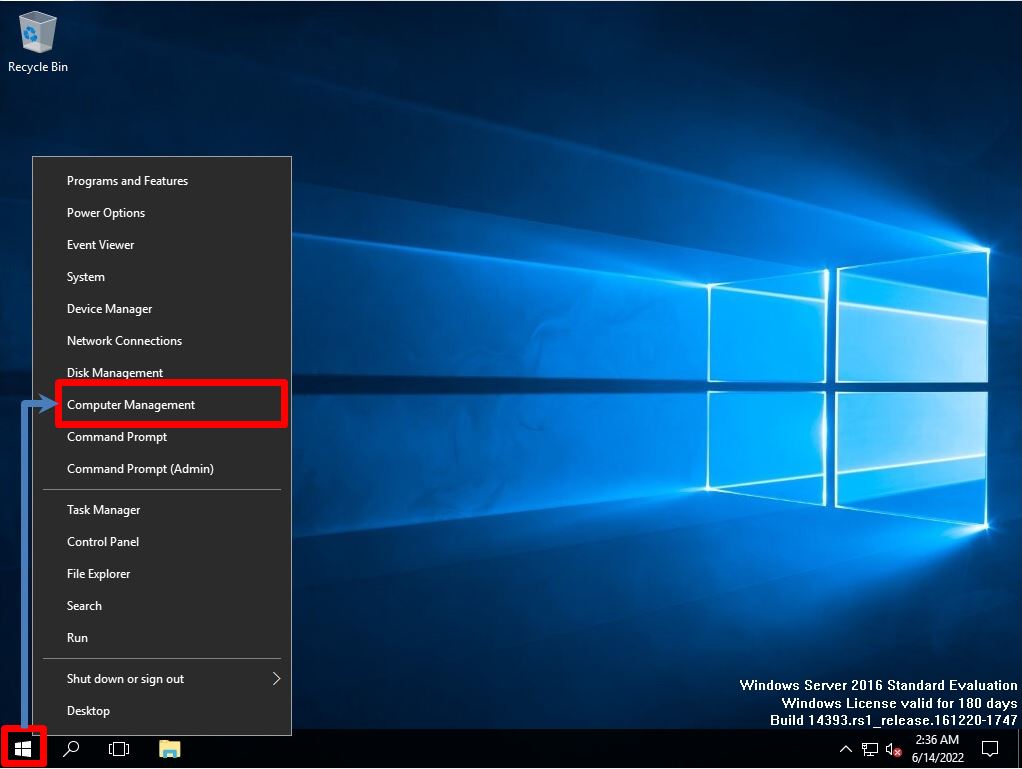
If you want to create an additional local user for Windows Server 2016, you can create it by right-clicking the Windows mark at the bottom left of the desktop screen -> Computer Management -> System Tools -> Local Users and Groups. ※If Windows Server 2016 is a domain controller, local users and groups will not be displayed. User management is managed by Active Directory users and computers.
Windows Server 2016:How to create and log in to a local account user
Step 1:
Right-click Windows Mark at the bottom left of the desktop screen -> select Computer Management.
Step 2:
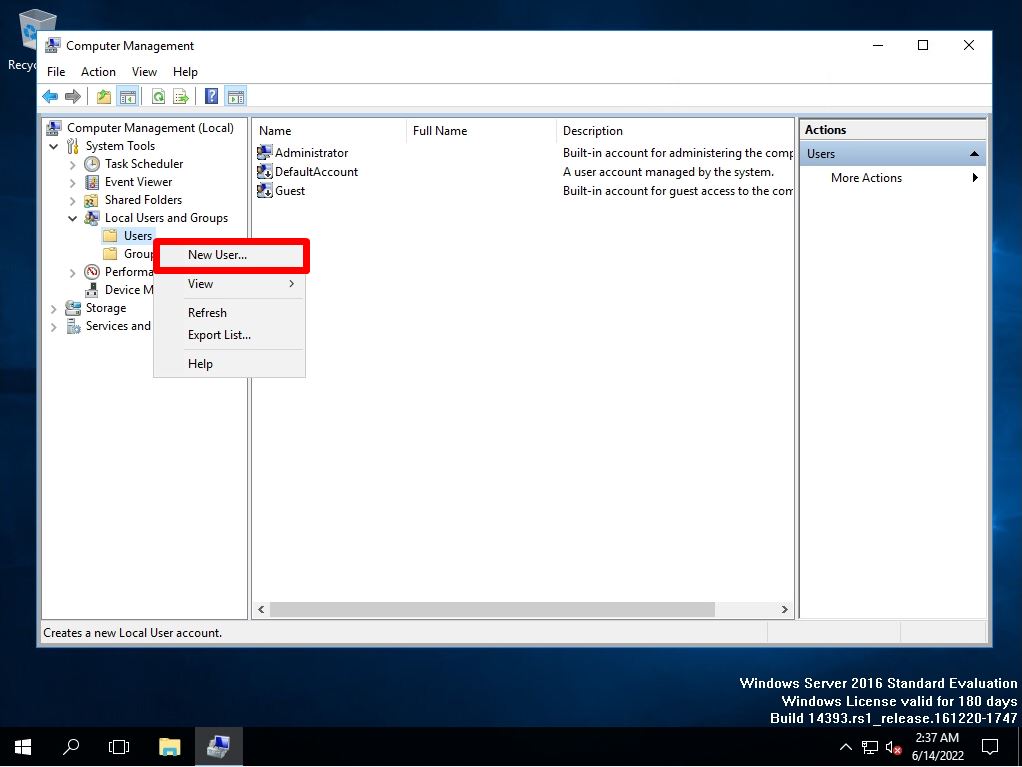
System Tools -> Local Users and Groups -> Users -> Select New User.
Step 3:
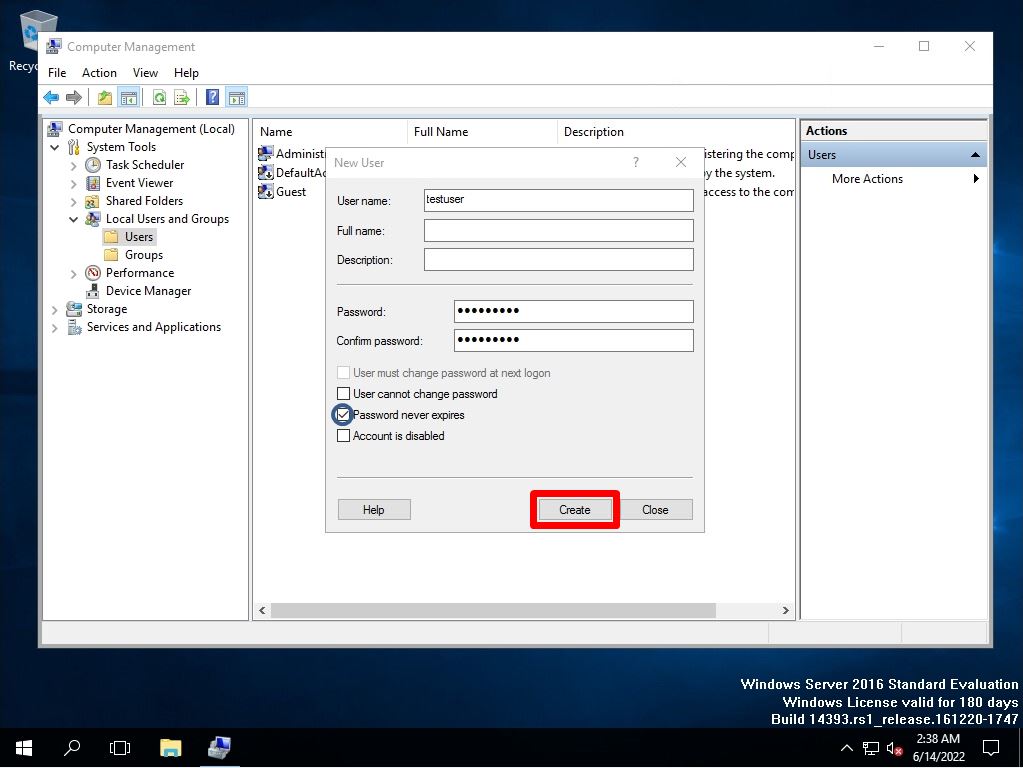
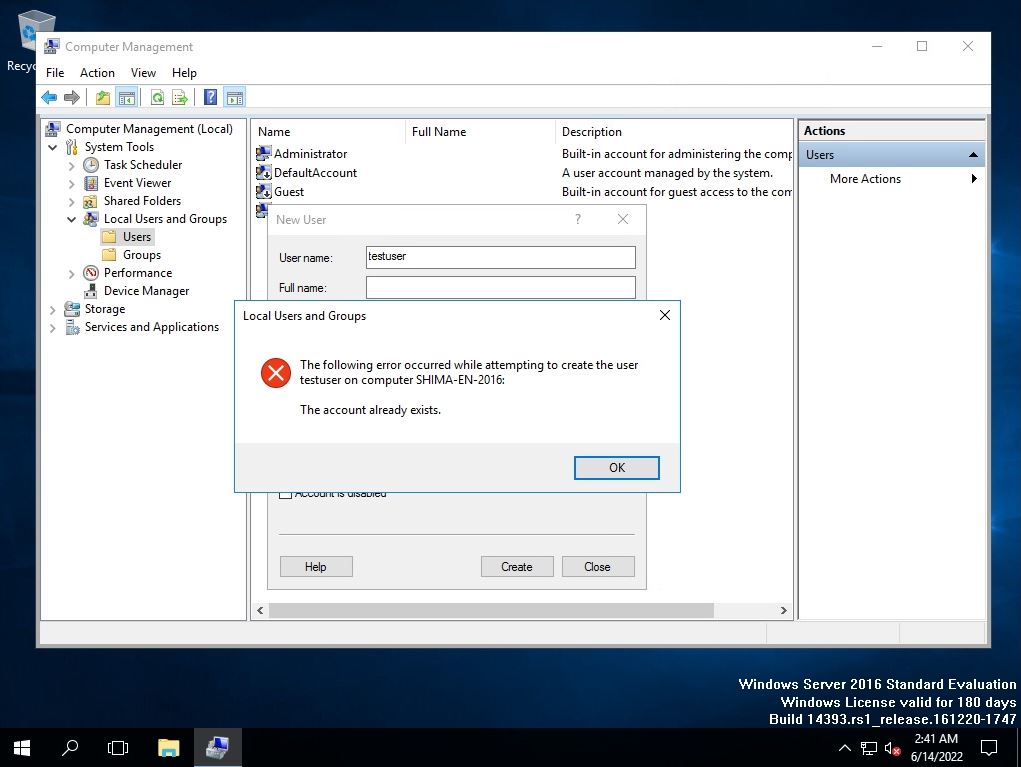
Enter Username and Password -> Select Create.
If the error message that the password does not meet the password policy conditions is output, the policy settings of the local group policy are set by default, so the following conditions are met and set.
Step 4:
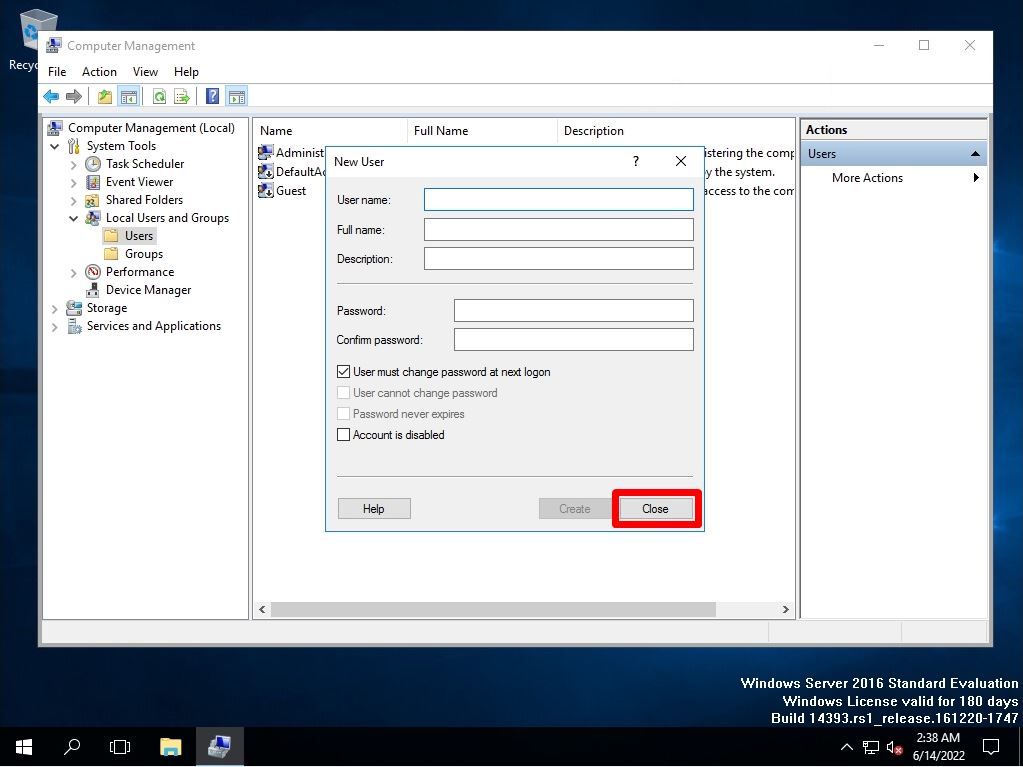
Select Close on the New User screen.
Step 5:
Confirm that the newly created local user is displayed.
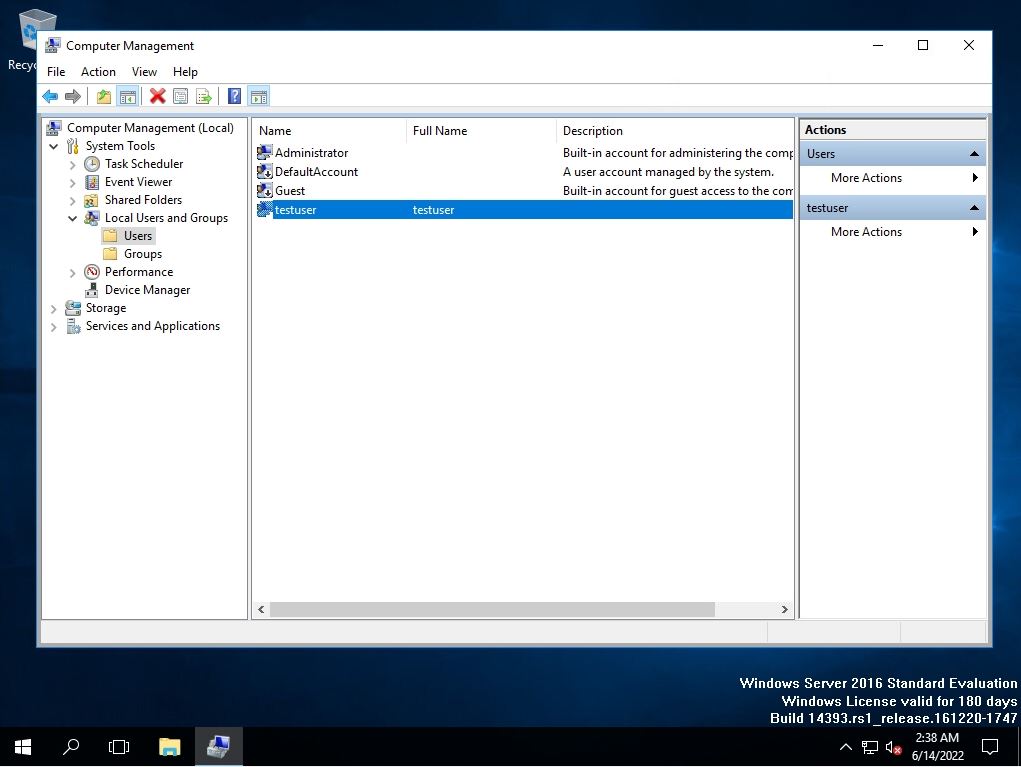
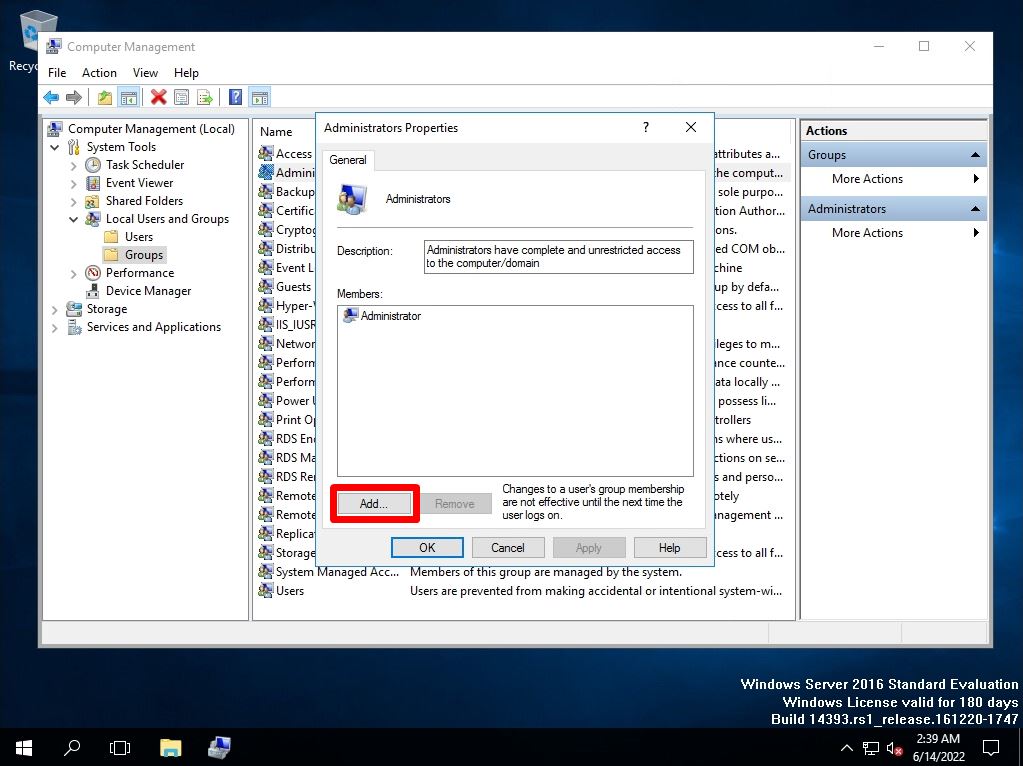
The newly created local user is a standard user. If you want to grant administrator privileges to standard users, select Computer Management -> System Tools -> Local Users and Groups -> Groups -> Administrators. The difference between the administrator and the standard user is briefly explained below.
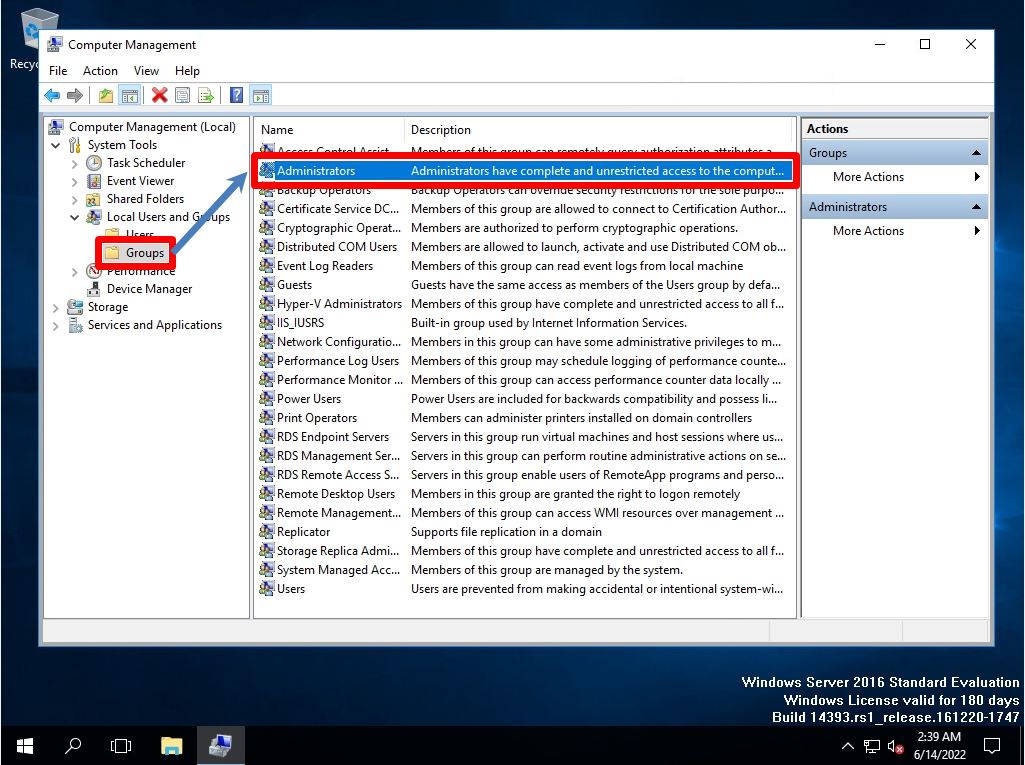
Select Add on the Administrators Properties screen.
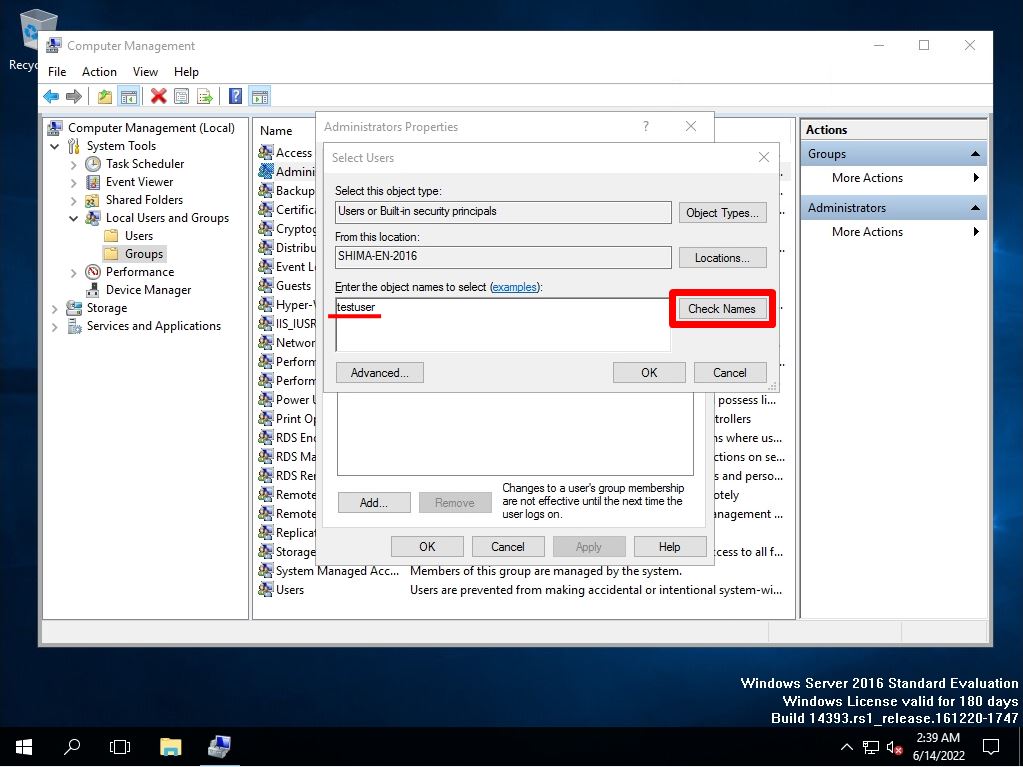
Enter the local login user on the Select Users screen -> select Check Names.
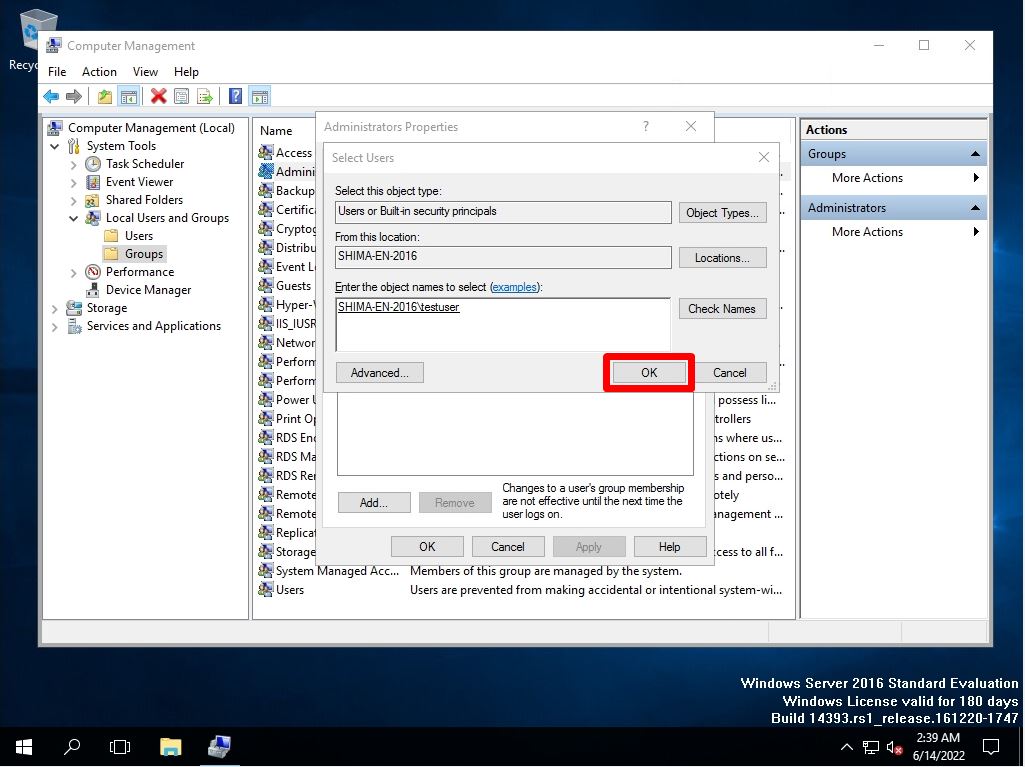
If the names match, the underlined name is displayed.
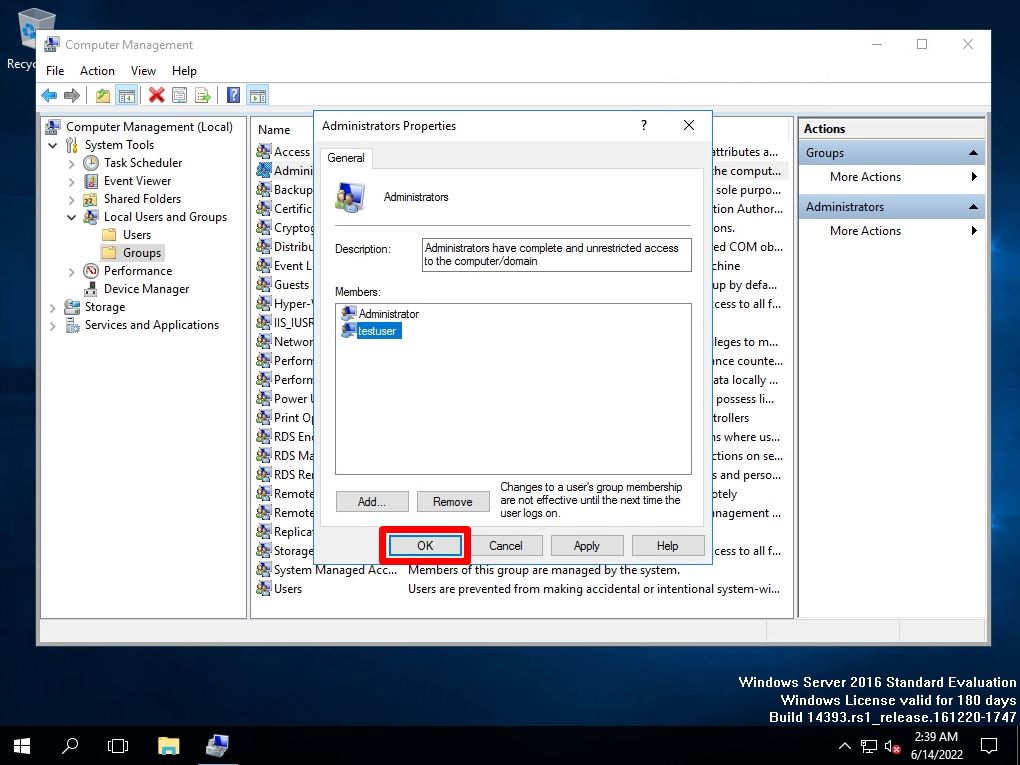
Administrators Properties screen -> Confirm that you see the account you added to the properties of the members you belong to.
Step 6:
Check if you can log in as the newly created local user.
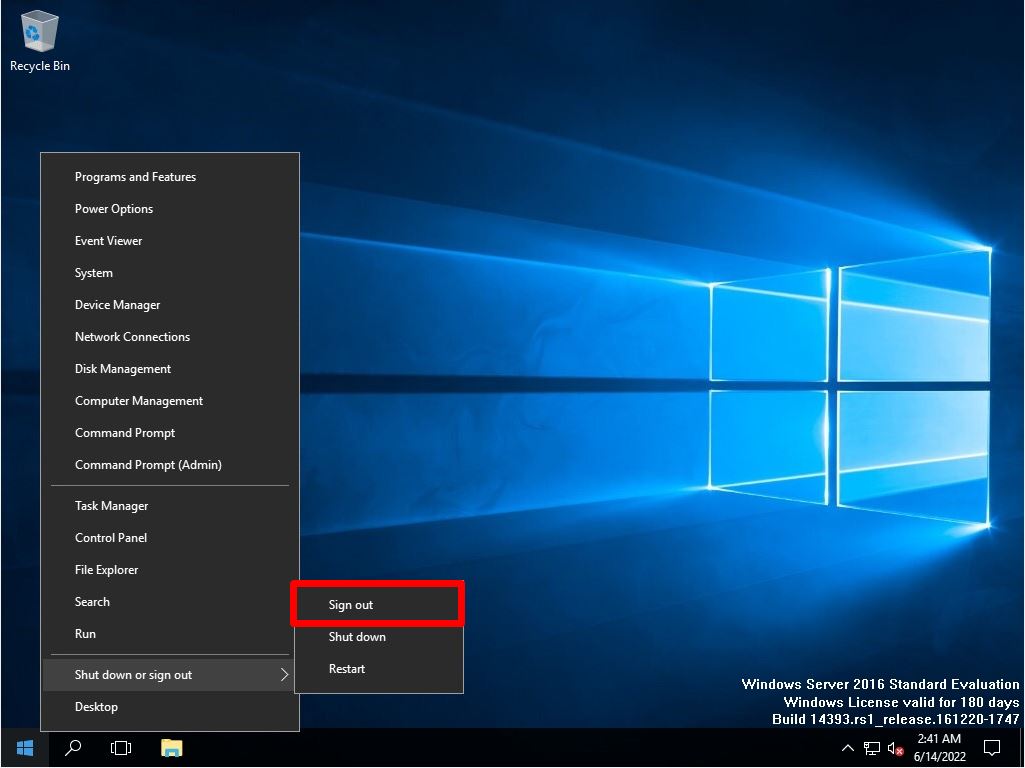
Right-click the Windows mark at the bottom left of the desktop screen -> select Shutdown or Sign out -> Sign out.
Step 7:
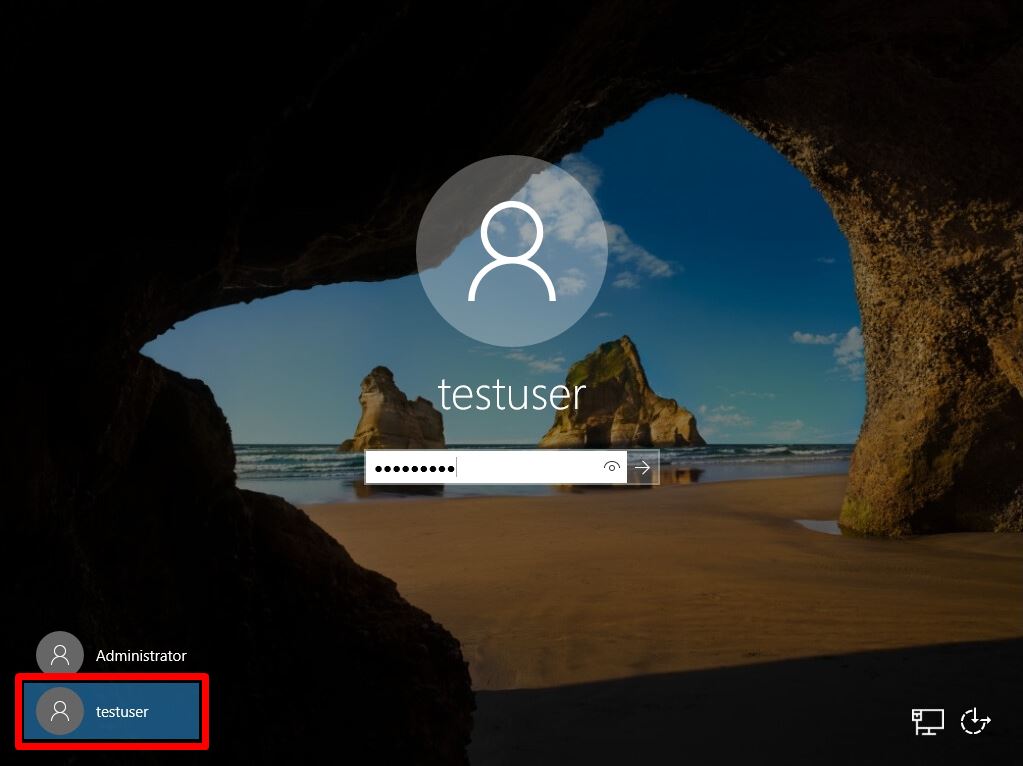
Select the newly created local account -> Enter the password to log in to the desktop screen.
