To enable Hyper-V and create a virtual machine on a Windows 11 computer, you need to enable the “Hyper-V” checkbox from the control panel. As a condition of the edition to be used, the Hyper-V function is not installed in Windows 11 Home. Run on Windows 11 Pro and above editions.
Windows 11 PC:How to enable Hyper-V
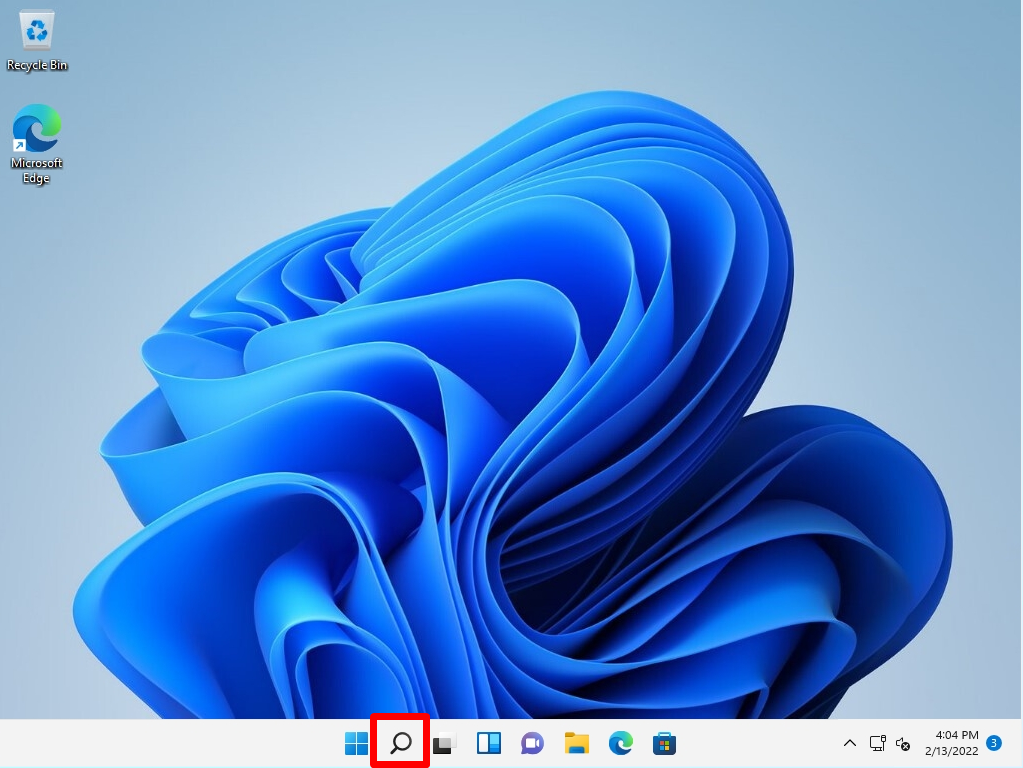
Step 1:
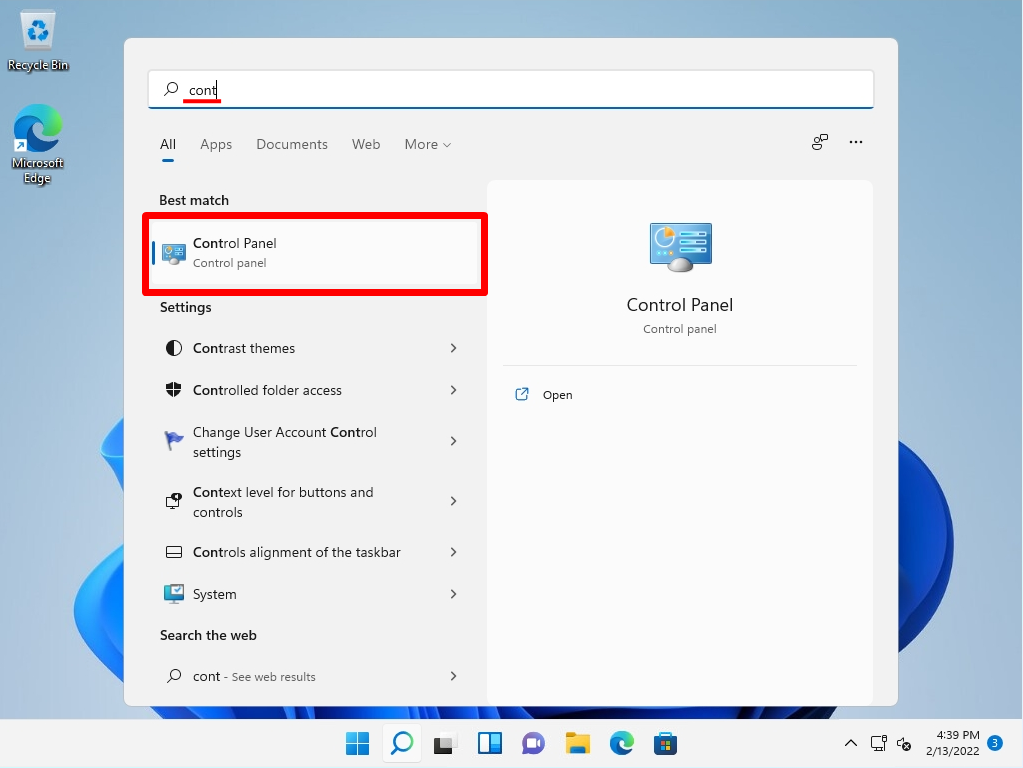
Select “Search Box” on the taskbar.
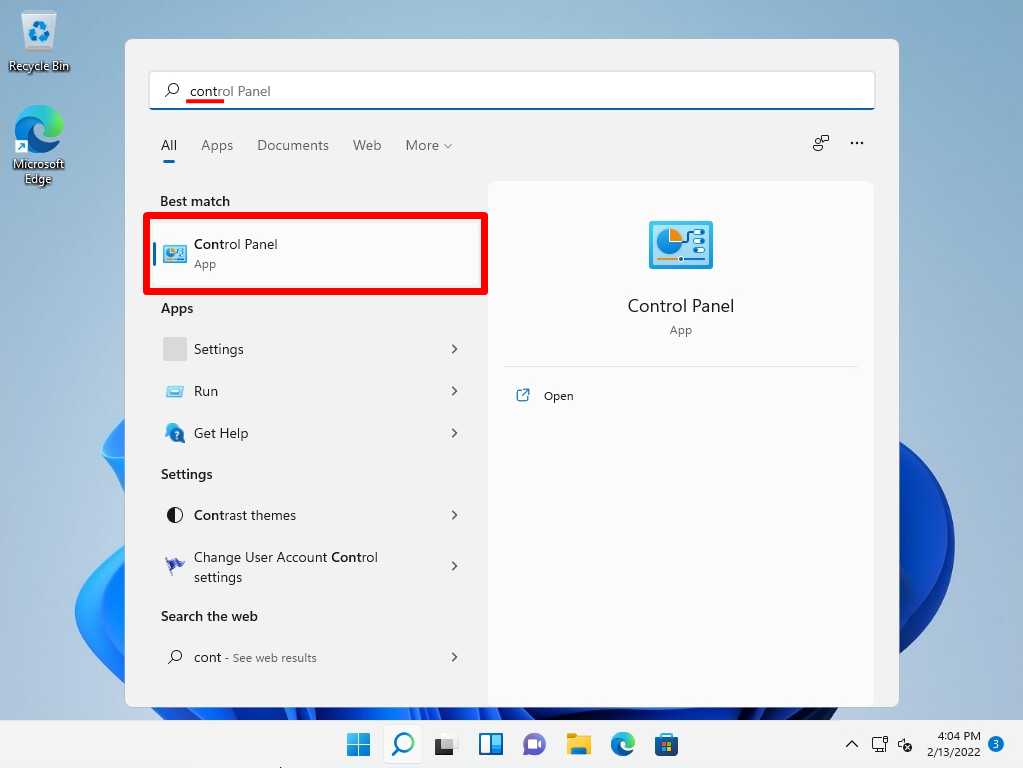
Step 2:
Enter “cont”-> Select “Control Panel”.
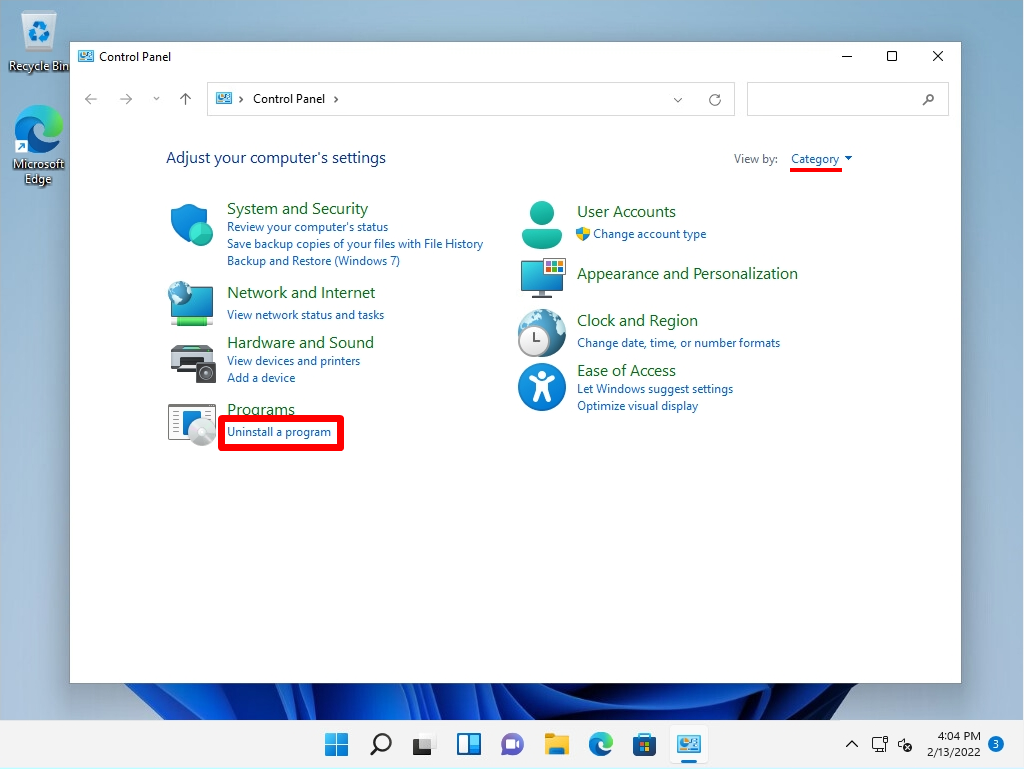
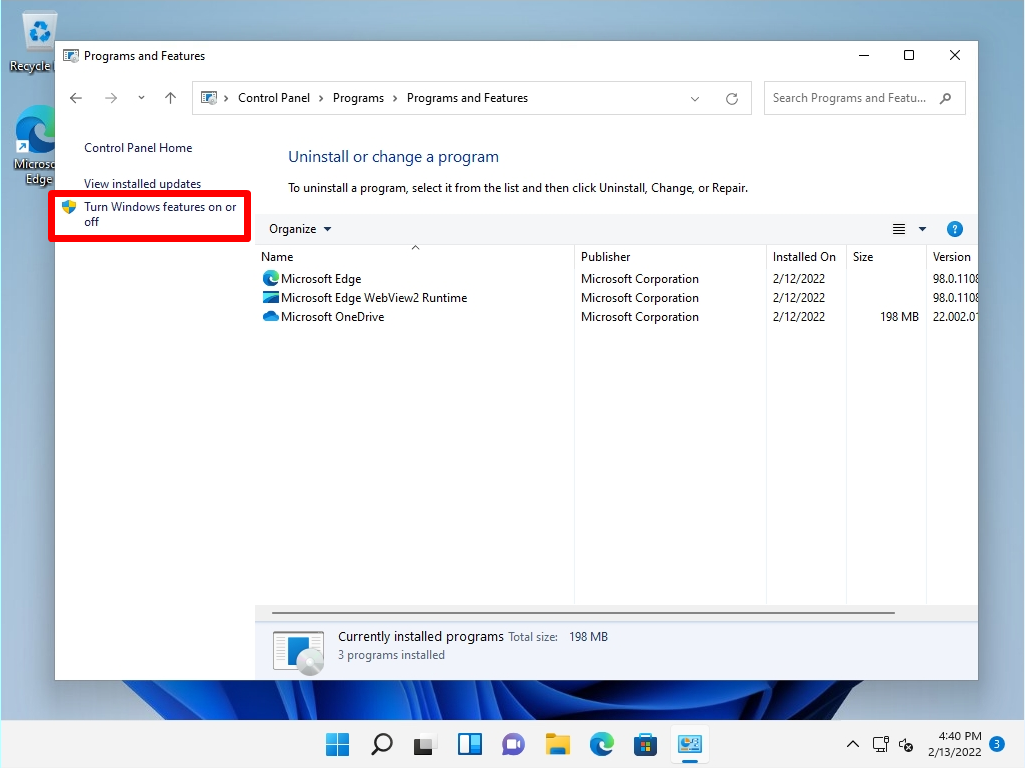
Step 3:
Control Panel screen: View by Select Category -> Uninstall a program.
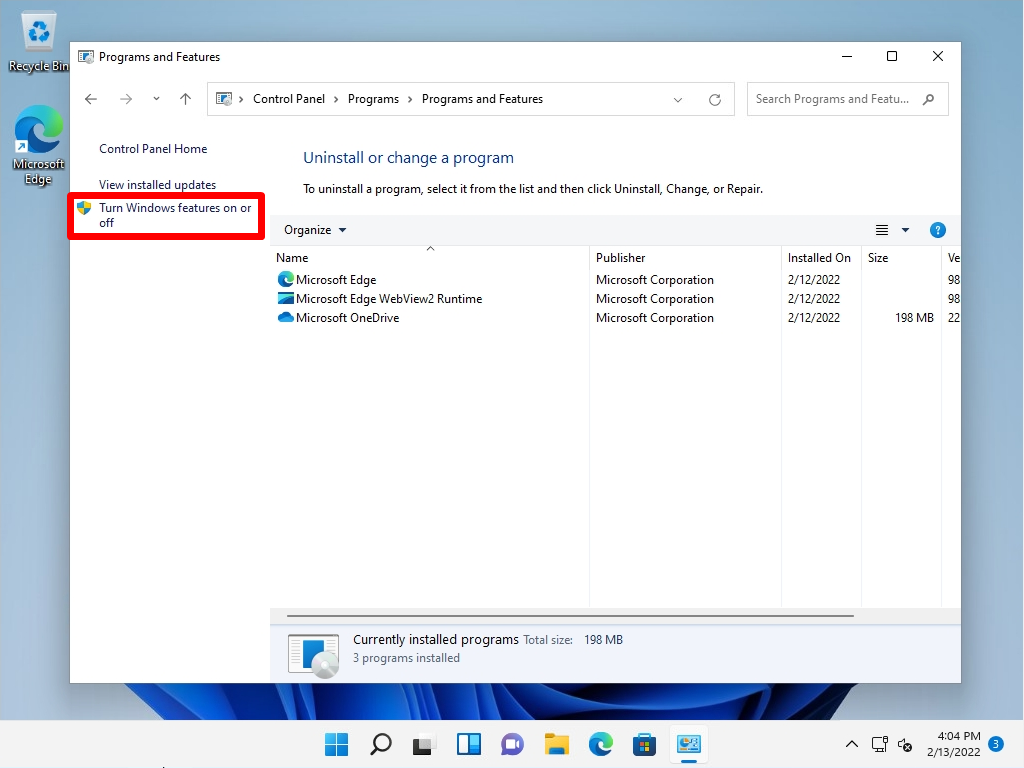
Step 4:
Programs and Features screen: Select “Turn Windows features on or off”.
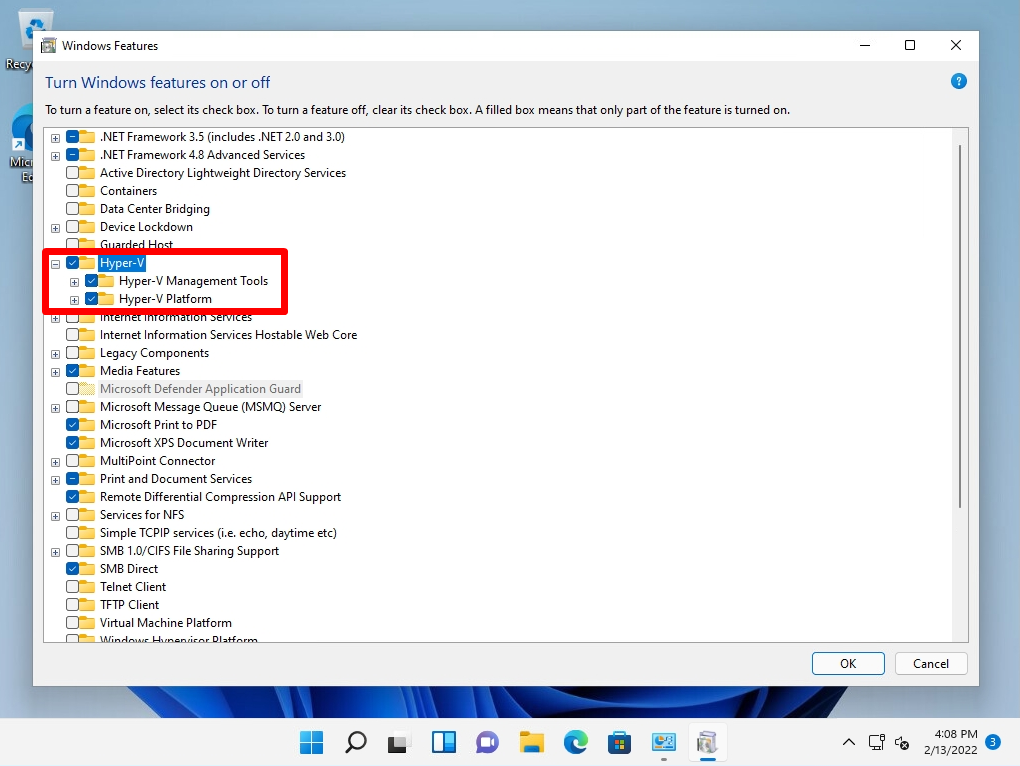
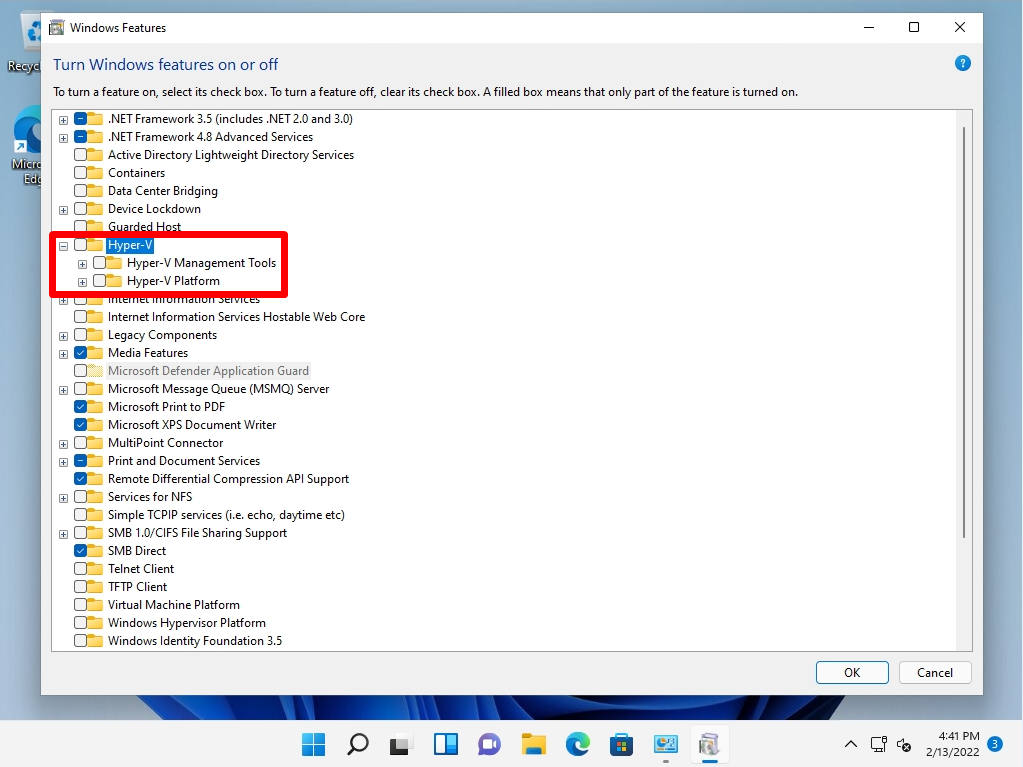
Step 5:
Windows Features screen : Enable the “Hyper-V” check box and select “OK”.
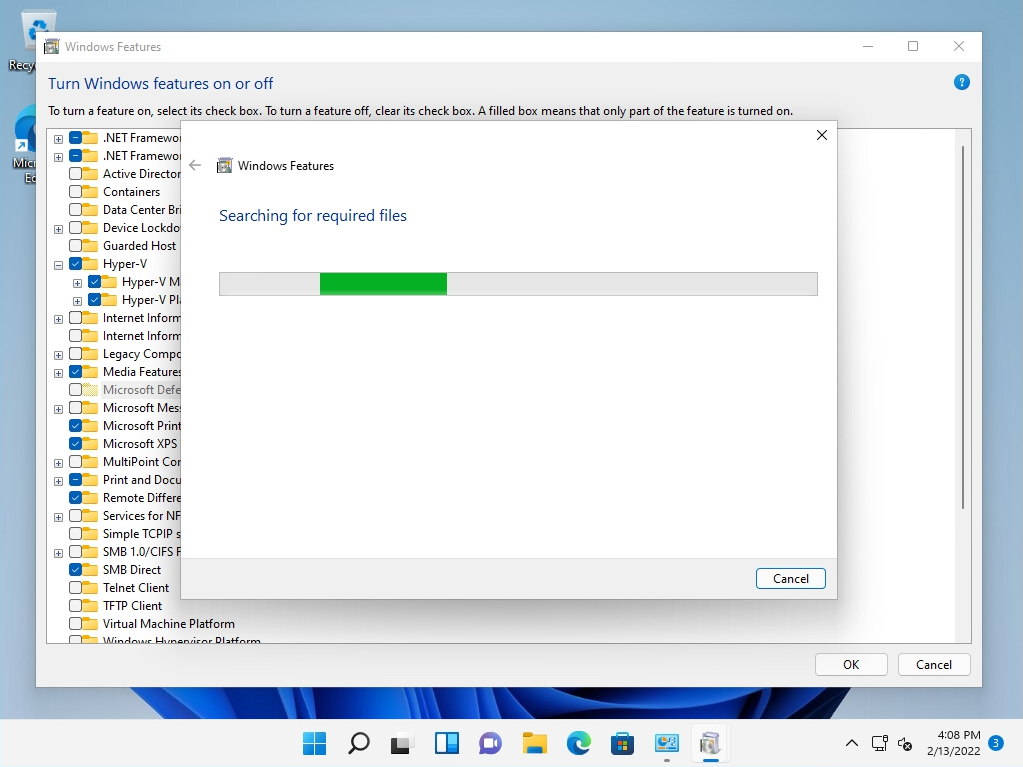
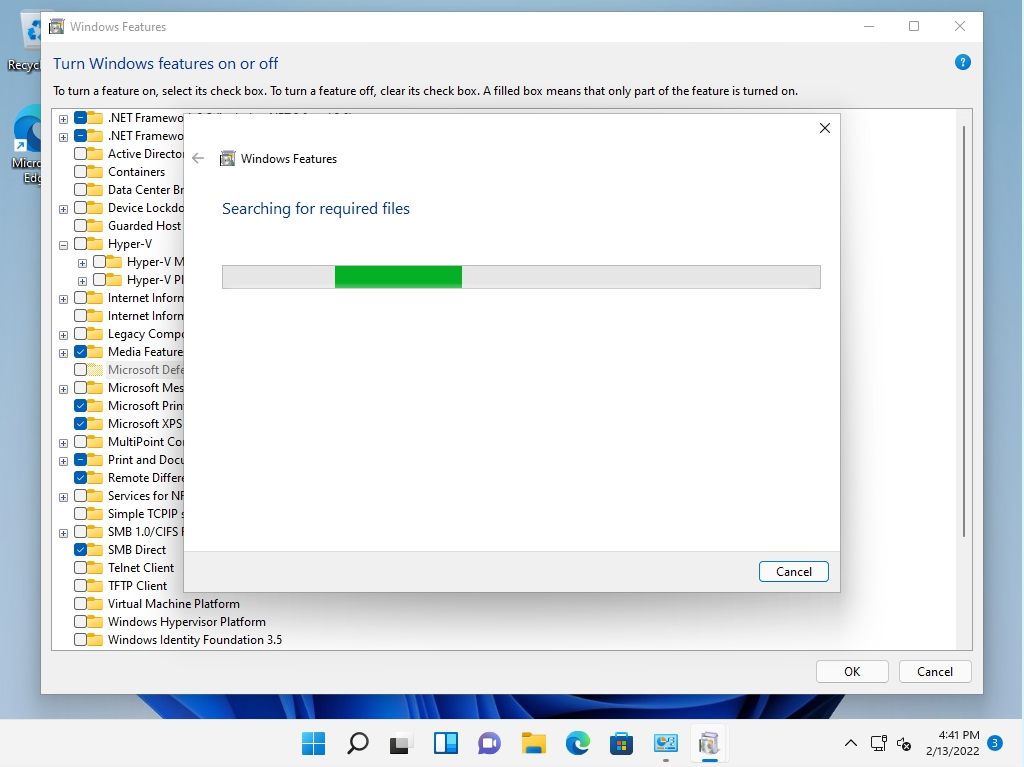
The Hyper-V activation process will start. Wait a moment for the process to finish.
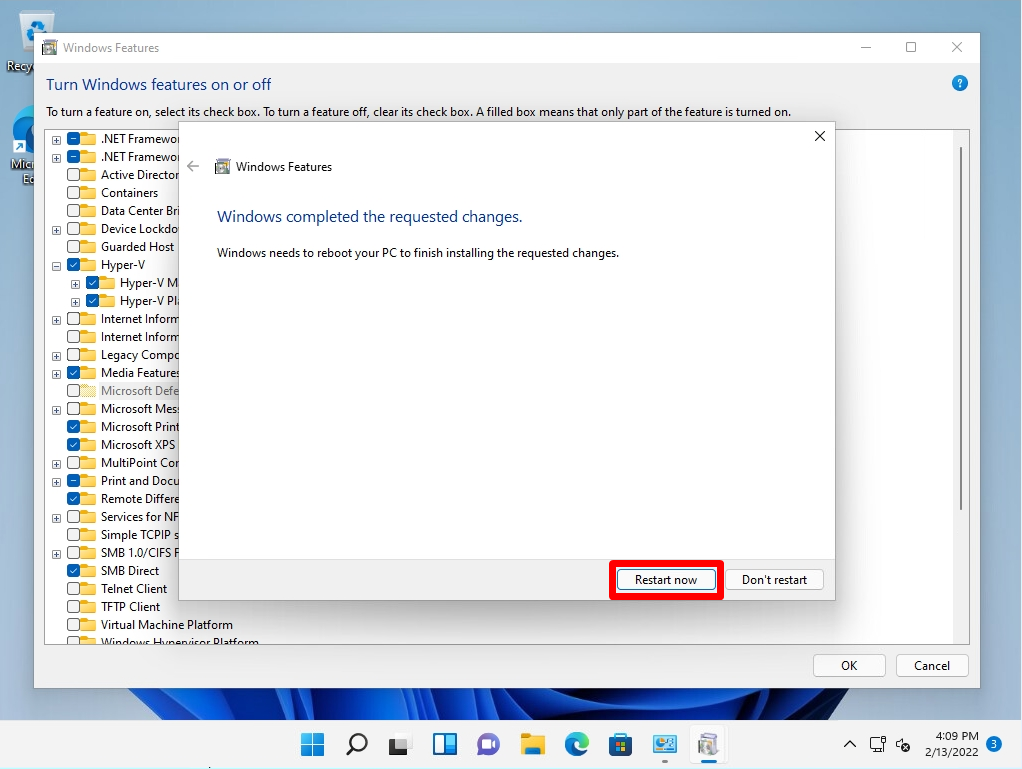
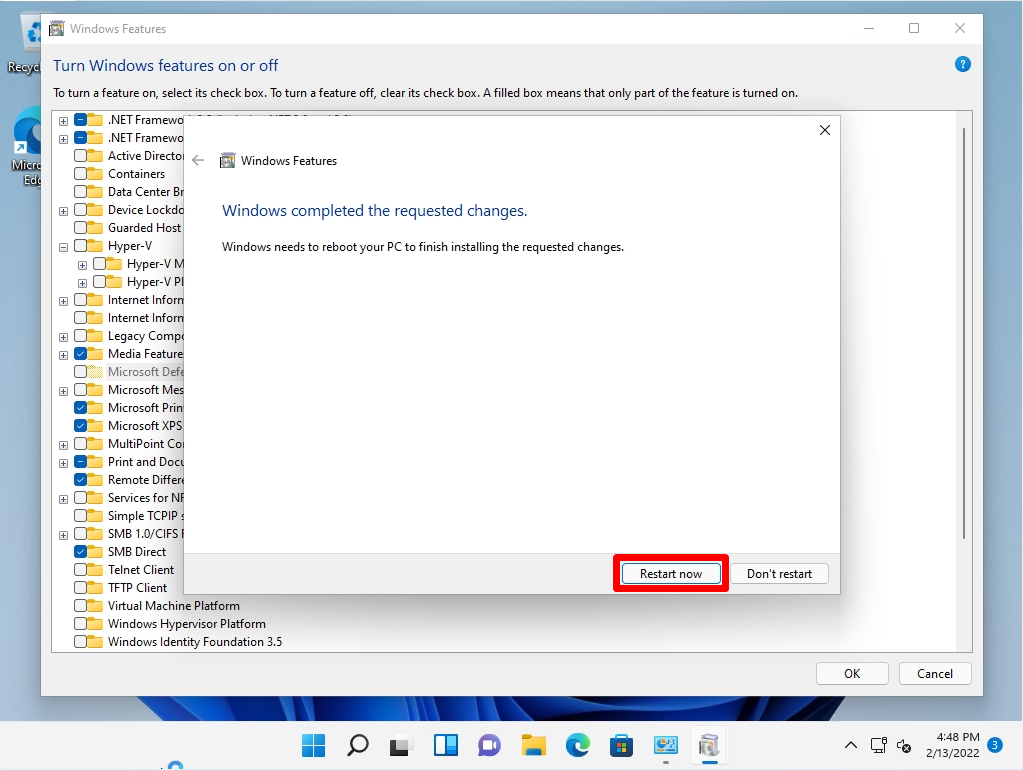
Step 6:
Select “Restart Now”.
Step 7:
After restarting your Windows 11 computer, make sure Hyper-V is installed.
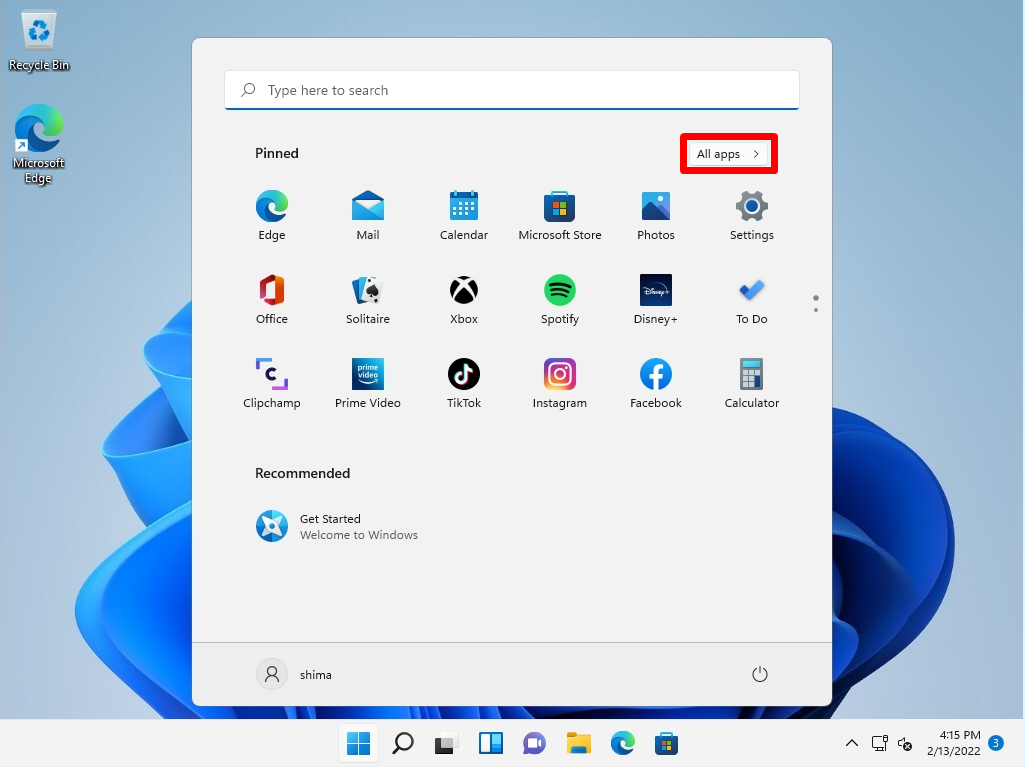
Select “Windows Marks”-> “All apps” on the taskbar.
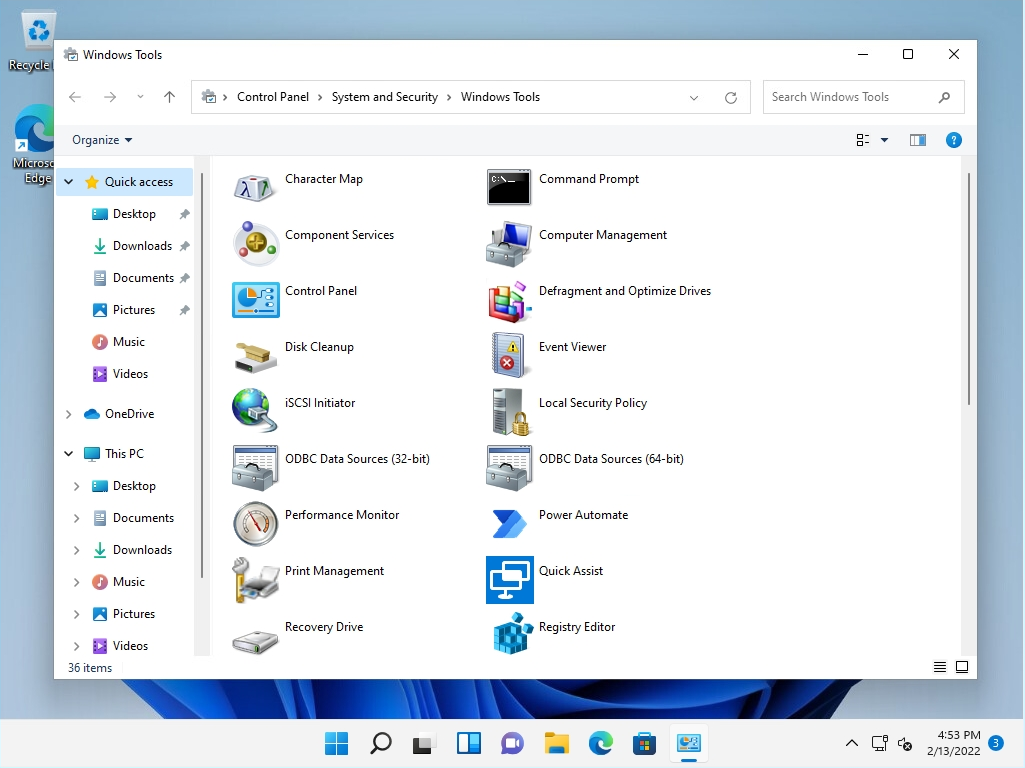
Step 8:
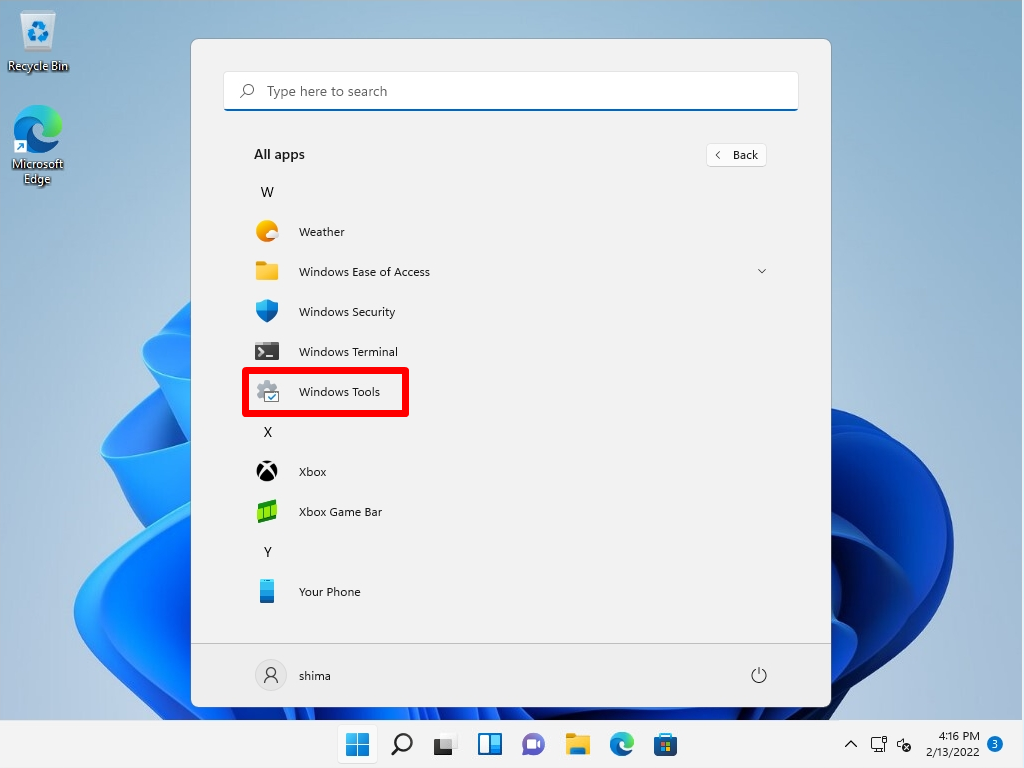
Select Windows Tools.
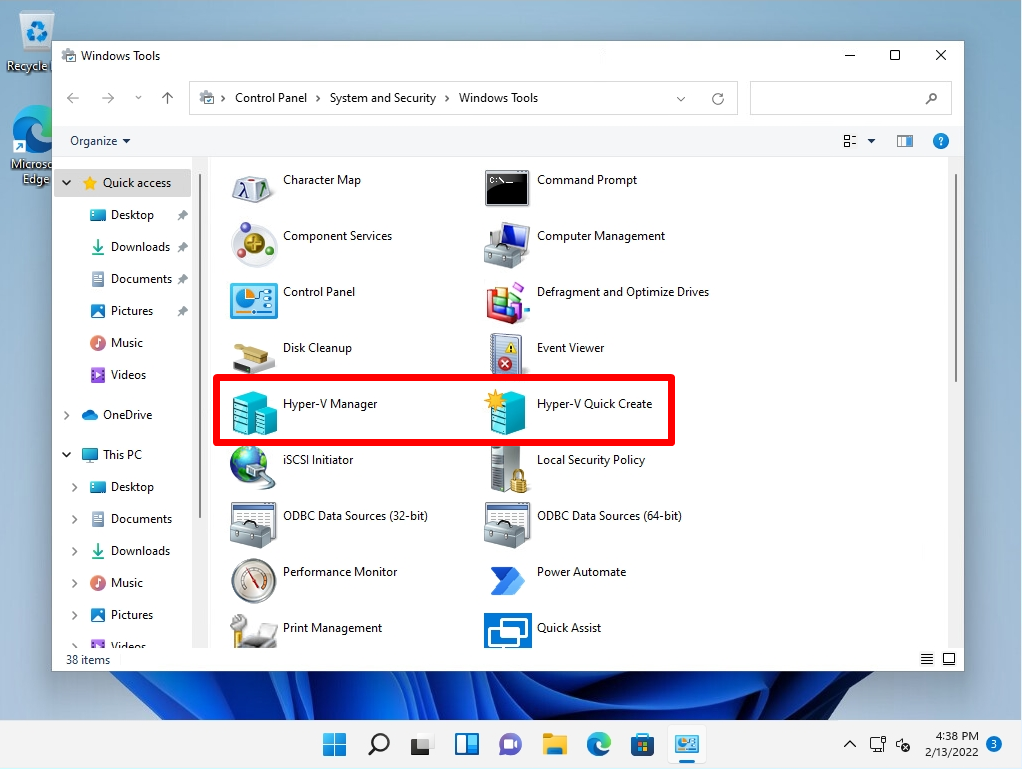
Step 9:
Confirm that “Hyper-V Manager” and “Hyper-V Quick Create” are installed.
Windows 11 PC: How to disable Hyper-V
Disabling Hyper-V on a Windows 11 computer is a prerequisite if Hyper-V is enabled. By default Hyper-V is disabled.
Step 1:
Select “Search Box” on the taskbar.

Step 2:
Enter “cont”-> Select “Control Panel”.
Step 3:
Control Panel screen: View by : Select Category -> Uninstall a program.

Step 4:
Programs and Features screen: Select “Turn Windows features on or off”.
Step 5:
Windows Features screen : Uncheck the “Hyper-V” check box and select “OK”.
Hyper-V invalidation processing starts. Wait a moment for the process to finish.
Step 6:
Select “Restart now”.
Step 7:
After restarting your Windows 11 computer, check that “Hyper-V Quick Create” and “Hyper-V Manager” are not displayed in Windows Tools.